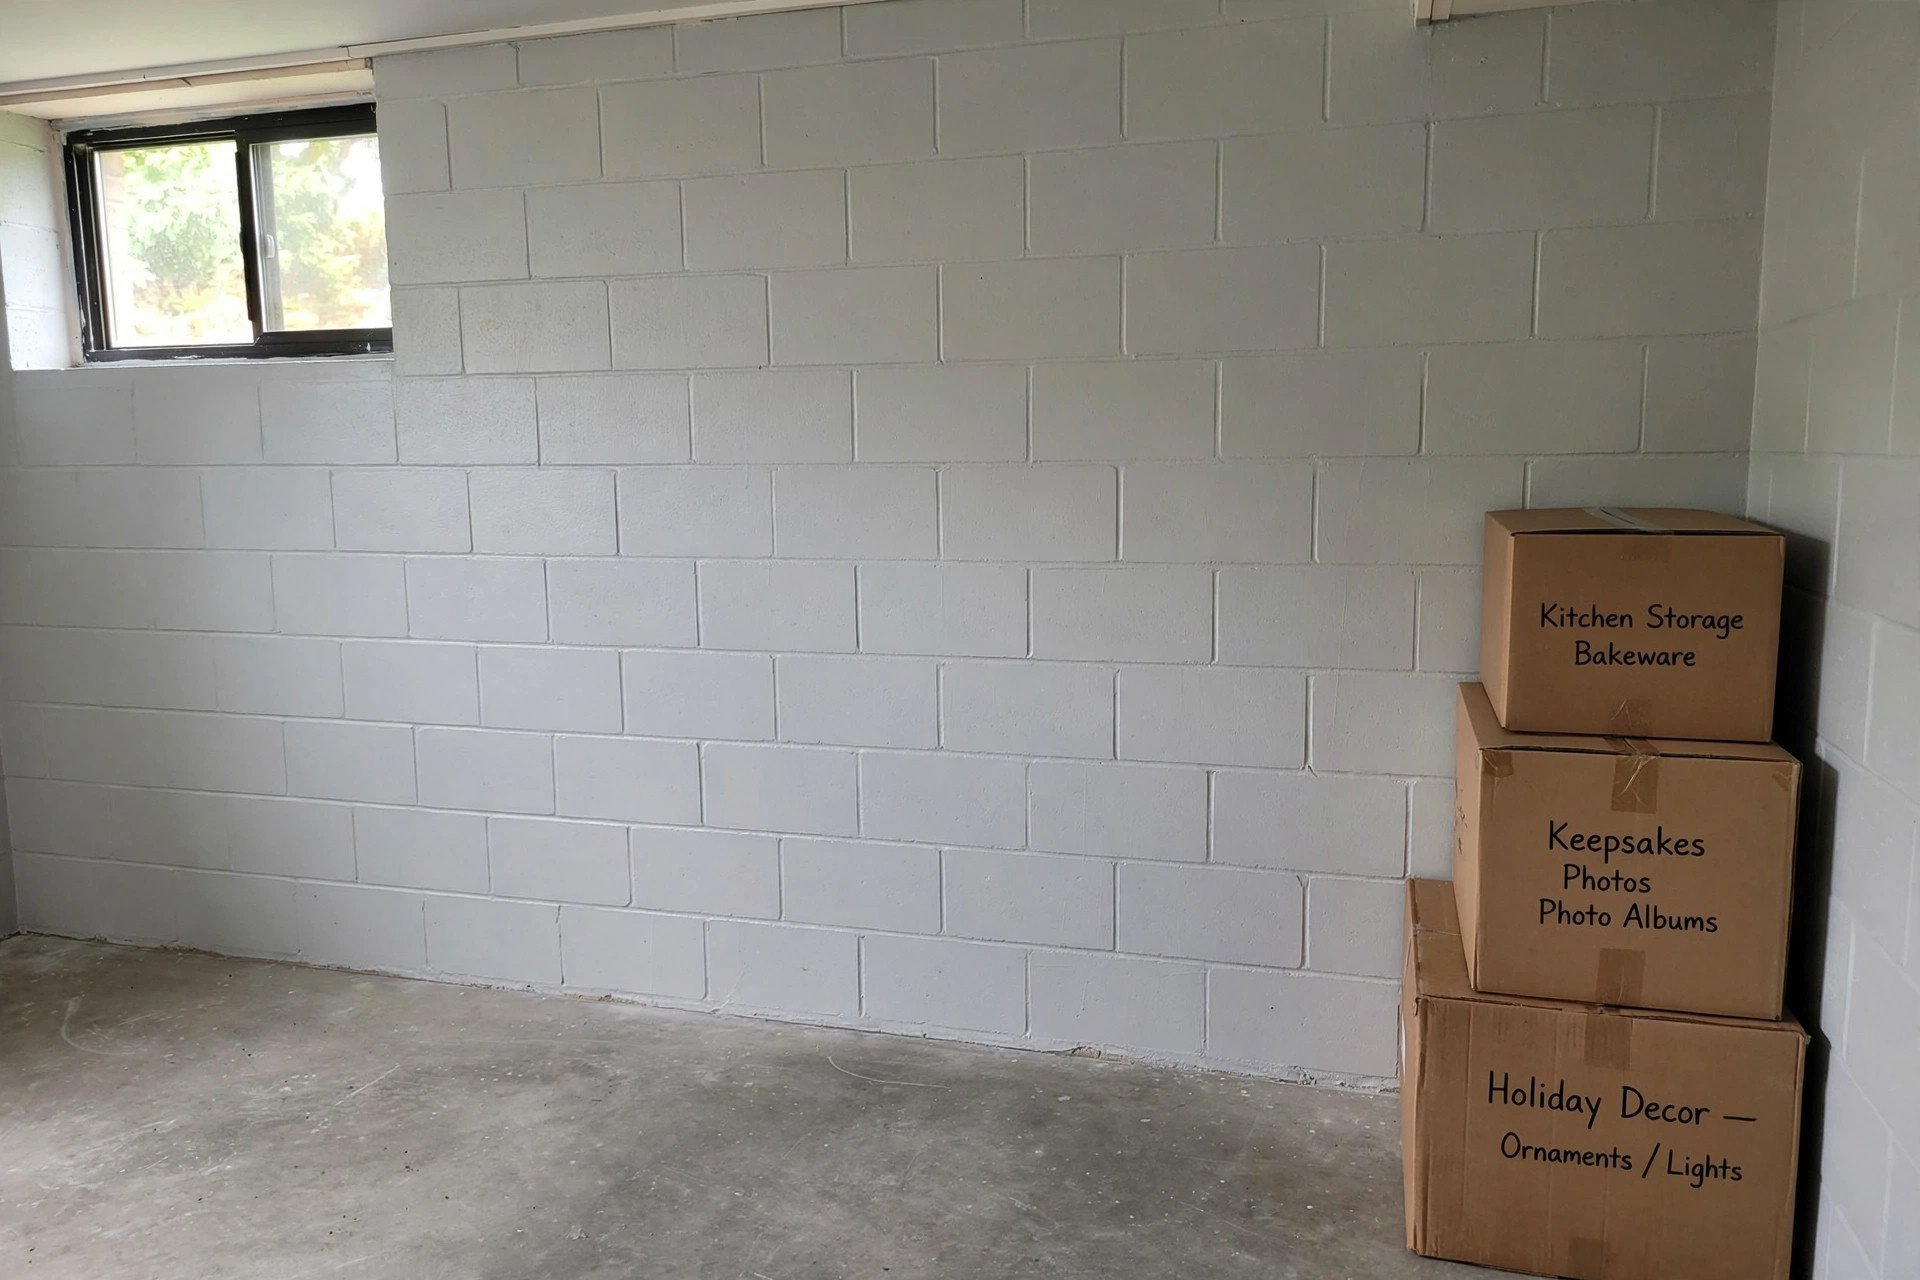

Basements sit below grade, so water is always trying to get in. If you want a dry, usable lower level, waterproof paint for basement walls interior is one of the most direct tools at your disposal. It is not ordinary wall paint. It is a thick coating made to block moisture that pushes through concrete and block walls from the soil outside. This guide explains what it is, when it helps, how to pick the right can, what it costs, and how to put it on so it lasts.
Why Waterproof Paint Matters for Interior Basement Walls
A basement wall made of poured concrete or concrete block is porous. Water in the soil travels through those tiny pores by capillary action. When the outside of the foundation is not sealed, dampness can appear on the inside face of the wall. You see it as dark patches, white powdery stains, flaking paint, or a musty smell that never quite goes away.
Waterproof coatings answer this problem at the surface. They form a tight film that keeps moisture from passing through the wall and into the room. That protects your finished walls, your stored goods, and the air you breathe. It is worth saying plainly what this paint cannot do. It cannot stop water that comes up through the floor, water that runs down from a broken gutter, or water that floods through a crack in the wall. It works on seepage, the slow movement of dampness through the wall itself. For bigger water problems, you still need grading, gutters, and drainage work. Paint is one layer of a full system, not the whole system.
How Waterproof Basement Paint Works: Waterproof Paint for Basement Walls Interior
Masonry and Latex Waterproof Coatings
Most interior waterproof paints for basement walls are thick latex or cement-based coatings. They contain more solids than standard paint, so they build a heavier film in one coat. When the film cures, it bridges hairline pores and small surface flaws in the concrete.
Epoxy and Acrylic Sealers
Heavier options include two-part epoxy coatings and penetrating acrylic sealers. Epoxies cure into a hard, dense skin that resists both water and abrasion. They suit floors and walls that take hard use. Penetrating sealers soak into the concrete and react inside it rather than forming a thick film on top. They leave the surface looking much the same while reducing water uptake. Each type has trade-offs in cost, smell during application, and ease of touch-up later. A practical overview of paint technology for masonry walls is available from Behr, and testing groups such as Consumer Reports publish independent ratings of coating performance.
How to Choose the Right Waterproof Paint
Start with the condition of your wall. If the wall is bare concrete or block, most waterproof paints bond directly after a good cleaning. If the wall is already painted, you must check whether the old paint is sound. Peel a strip of tape off the surface. If paint comes with it, the old coat is failing and must be removed before the new coating goes on. A coating is only as strong as the layer beneath it.
Read the label for hydrostatic pressure claims, the term manufacturers use for water pushing through the wall. For ordinary dampness with no standing water, a standard waterproof masonry paint is usually enough. For walls that stay wet for long periods, look for a heavier coating rated for that duty.
Consider the finish you want. Some products dry flat and look much like regular wall paint. Others dry with a slight sheen. A few cure so thick that they leave a texture on the wall. If you plan to hang drywall or paneling over the wall later, a penetrating sealer may be better than a heavy film, since films can trap moisture between the coating and the framed wall if the water keeps coming.
Early waterproof coatings came only in white or gray, but many now come in tints, though the color range is narrower than standard paint.
Types and Options on the Market
The shelf holds several kinds of interior basement waterproof coating. Cement-based waterproof coatings mix with water to form a thick slurry. They are among the oldest products of this type, stick well to bare masonry, and need a damp wall during application so the cement cures properly.
Latex waterproof masonry paint is the most common choice for homeowners. It applies with a brush and roller like regular paint, cleans up with water, and has a milder odor than solvent products. It is thick, so expect to move more slowly than with ordinary wall paint. Two coats are standard. Most brands recommend a minimum film thickness, and a cheap thin coat will not give the stated protection.
Two-part epoxy coatings are the heavy lifters. You mix a resin and a hardener, and the clock starts. Pot life is usually a few hours, so plan the job before you mix. The cured film is tough and highly water resistant. The trade-off is strong odor during curing and the need for good ventilation. Epoxies also make future repainting harder, because new paint must bond to a very slick surface.
If you are comparing related basement treatments, the concrete floor paint for basements reviews can help you sort floor coatings from wall coatings, since the two are not interchangeable. For a broader look at basement waterproofing paint reviews and cost, weigh film coatings against sealers and drainage work before you spend.
Cost and Price in the USA
Waterproof paint for interior basement walls costs more per gallon than ordinary wall paint, but less than most professional waterproofing work. As of 2026, expect to pay roughly 30 to 70 dollars per gallon for a quality latex waterproof masonry paint at a national retailer. Cement-based coatings run lower, often 20 to 45 dollars per bag or bucket, since you mix them yourself. Two-part epoxies sit at the top of the range, often 60 to 120 dollars per kit.
Coverage is where many homeowners misjudge the job. A gallon of standard paint covers about 350 square feet. A gallon of waterproof masonry paint often covers only 75 to 150 square feet per coat, because it goes on so thick. Measure your walls and read the coverage rate on the can. For a typical basement with 400 square feet of wall, you may need five to eight gallons for two coats. That puts material cost for a do-it-yourself job in the 150 to 450 dollar range for latex products.
Professional application adds labor. Contractors in most American markets charge 2 to 5 dollars per square foot of wall for surface prep and two coats of waterproof paint, not counting crack repair or drain work. Retailers like Lowe’s and brands like Sherwin-Williams and Benjamin Moore list current prices and coverage rates online, which helps you check a quote against the cost of materials.
How to Apply Waterproof Paint Step by Step
Preparation decides the outcome. A good product applied to a dirty, chalky wall will fail early. A fair product applied to a well-prepared wall often lasts for years. Follow the label on the can, but the general sequence below is standard.
Clean the walls. Scrub off dirt, dust, and any loose paint. Efflorescence, the white powdery deposit that forms on damp concrete, must be removed with a wire brush and a masonry cleaner. Grease spots need a degreaser. Rinse and let the wall dry to the state the label requires. Some products want a dry wall, some want a damp one.
Repair cracks and holes. Fill cracks with a masonry patching compound or hydraulic cement to give the coating a smooth, sound surface to seal.
Protect the area. Tape off the floor edge, windows, and anything you do not want coated. These coatings are thick and they do not wipe off trim easily.
Mix and stir. Stir the paint thoroughly. Cement-based coatings must be mixed to a smooth, lump-free slurry and used within the stated working time. Two-part epoxies must be mixed in the exact ratio the instructions give.
Apply the first coat. Use a stiff brush or a heavy-nap roller. Work the coating into the pores of the block or concrete rather than laying it on like ordinary paint. Block walls with deep mortar joints take more material. Keep a wet edge and do not stretch the product thin; coverage rate is the thickness the warranty assumes.
Let it cure, then apply the second coat. Recoat times range from four to twenty-four hours. Rushing the second coat traps solvent or water in the film and weakens it. Waiting too long can cause bonding problems between coats, so follow the window on the label.
Ventilate and cure fully. Full cure takes longer than dry to the touch. Plan on several days before you lean storage against the wall or hang anything on it. Keep air moving with fans and, where the product requires it, keep the basement ventilated until the odor clears.
Guides from This Old House and Bob Vila walk through surface preparation in detail, and The Spruce publishes step-by-step coating projects that show the pace of the work.
Care and Upkeep
A coated basement wall needs little attention. Inspect the walls once or twice a year, ideally after the wettest season. Look for new damp spots, blisters in the film, or white powder forming on top of the coating. Small blisters can be scraped back, cleaned, and touched up with the same product.
Keep the source of the water in mind. Paint resists seepage through the wall, but it cannot make up for gutters that dump water at the foundation or soil that slopes toward the house. Keep gutters clean, keep downspouts extended several feet from the foundation, and keep the soil graded away from the wall.
Control humidity in the basement. Even a sealed wall does not stop humid summer air from condensing on cool concrete. A dehumidifier set to hold relative humidity below 50 percent protects both the coating and anything stored in the room. In rooms where moisture is a constant guest, such as a basement laundry or bath, mildew resistant bathroom paint reviews usa may help you pick a finish formulated to resist mold on the paint film.
Safety Notes
Read the safety section of the product label before you open the can. Some waterproof coatings contain solvents that give off strong fumes. Work with windows open and a fan moving air out of the space. Keep pilot lights and open flames away from solvent-based products.
Wear the protection the label asks for: gloves, eye protection, and a respirator rated for the product you are using. Cement-based coatings are alkaline and can irritate skin and eyes. Two-part epoxies can sensitize skin with repeated contact, so keep gloves on for the whole job.
Children and pets should stay out of the work area until the coating has cured and the room is aired out. Store leftover coating in its sealed can, out of reach, and dispose of empty cans and rags according to local rules. Oil-soaked rags from any painting job deserve care, since they can self-heat in a pile. Spread them out to dry or store them in a metal can with a tight lid.
Frequently Asked Questions
Does waterproof paint stop basement leaks? It stops seepage, the slow passage of dampness through the pores of concrete and block. It does not stop active leaks through cracks, water coming up through the floor, or flooding. Think of the paint as the last layer of defense, not the first.
Can I put waterproof paint over old paint? Only if the old paint is firmly bonded. Test it with tape. If the old coat is chalky, peeling, or blistered, strip or scrape it down to sound material first. A waterproof coating applied over a failing layer will come off with that layer.
How long does waterproof basement paint last? A properly prepared and applied coating commonly lasts five to ten years on an interior basement wall. Walls under steady water pressure wear it out faster. Regular inspection and touch-up extend its life well beyond that range.
Is waterproof paint the same as a water sealer? Not quite. A penetrating sealer soaks into the concrete and reduces water uptake without building much of a film. Waterproof paint builds a visible film on the surface. Paint gives stronger protection against pressure but changes the look of the wall. Sealers leave the wall looking natural.
Can I finish the basement after waterproof painting? Yes, but with care. If water still reaches the wall regularly, trapping it behind framed walls and insulation can hide damage and grow mold out of sight. Fix the water source first, then finish. Leave a small inspection gap or use moisture-tolerant materials where the wall stays damp.
Do I need a primer first? Most waterproof masonry paints are self-priming on bare concrete and block. Some labels call for a specific primer on previously painted or patched surfaces. Follow the system the manufacturer recommends. Mixing brands between primer and topcoat can void the stated warranty.
A Final Word
Waterproof paint for basement walls interior is a practical, affordable step toward a dry basement. It will not fix every water problem, and it demands honest preparation and two full coats to do its job. Pick the right type for your wall, measure carefully so you buy enough, and pair the coating with good gutters, proper grading, and a dehumidifier. Do those things together and the lower level of your house can stay clean, dry, and useful for years. For project ideas and room design inspiration once the walls are sealed, HGTV offers finished-basement examples that show what a dry lower level can become.
References
Behr. (n.d.). Paints, primers, and stains. https://www.behr.com Benjamin Moore. (n.d.). Paints and stains. https://www.benjaminmoore.com Bob Vila. (n.d.). Home improvement advice. https://www.bobvila.com Consumer Reports. (n.d.). Product reviews and ratings. https://www.consumerreports.org HGTV. (n.d.). Home and garden ideas. https://www.hgtv.com Lowe’s. (n.d.). Home improvement products. https://www.lowes.com Sherwin-Williams. (n.d.). Paints and coatings. https://www.sherwin-williams.com The Spruce. (n.d.). Home and garden advice. https://www.thespruce.com This Old House. (n.d.). Home renovation guidance. https://www.thisoldhouse.com
Was this guide helpful?

About Lisa Anderson
The My Garden US editorial team writes practical, in-depth home and garden guides for American homeowners — tested advice, no fluff.
You May Also Like
Concrete Stain for Patio Reviews USA: A Plain Guide to Lasting Color
July 5, 2026 0 views
Best Welcome Mat for Painted Porch USA
September 23, 2026 0 views
Painting Brick in Cold Climates: Pros and Cons
August 4, 2026 0 views