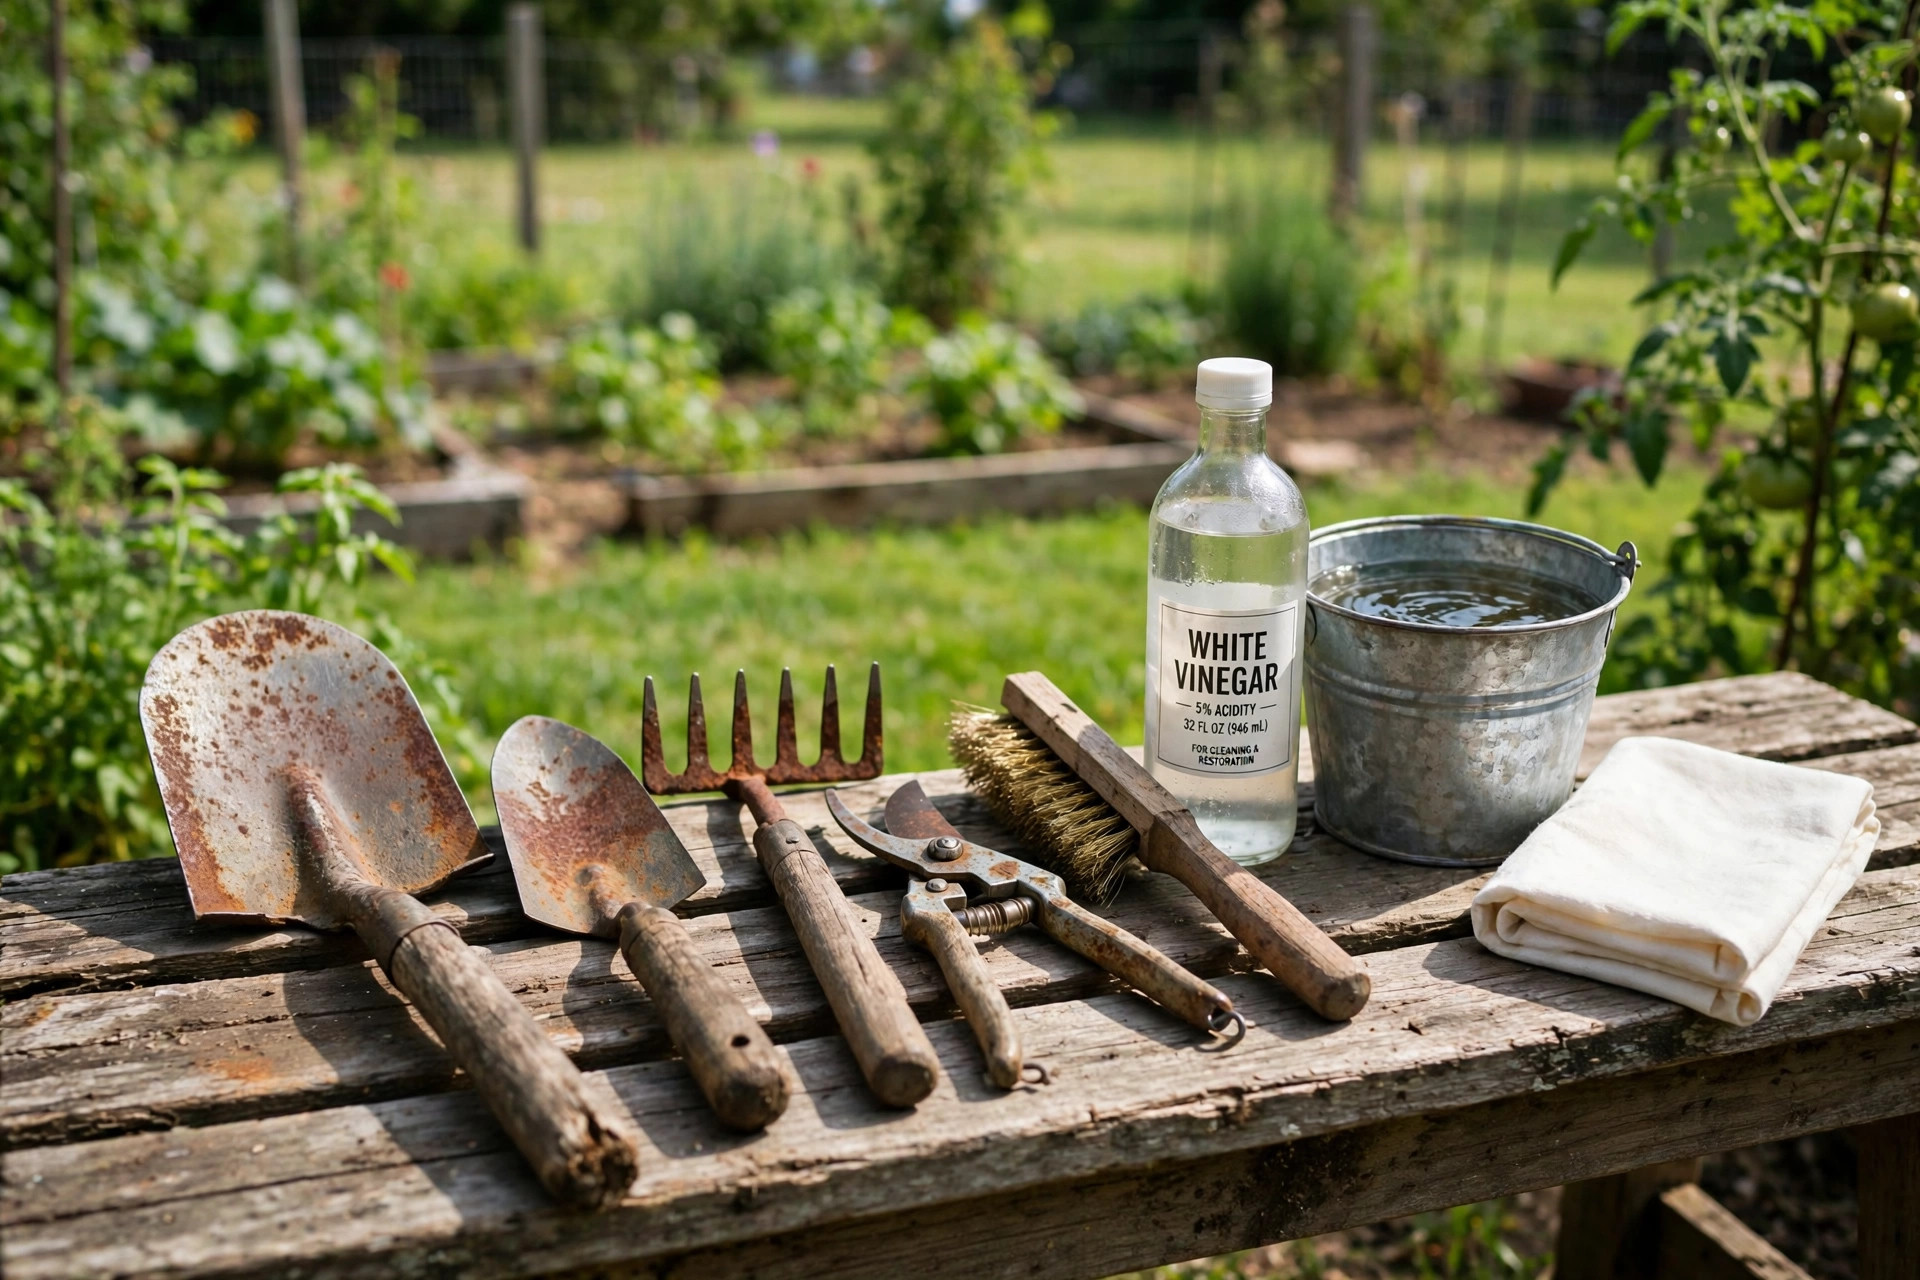

After a season or two, many tools show the same problem: rust. Blades turn orange and rough, and edges grow dull.
This guide on how to clean rusty garden tools will show you how to bring your tools back to life. The steps are simple and the supplies are cheap. Most of what you need may already be in your home. Whether you want to remove rust from garden tools that have sat in a shed for years, or you just want to clean one rusty trowel, these methods will help.
Why Cleaning Rust Off Garden Tools Matters
Rust is more than an ugly stain. It is a form of corrosion that eats into metal. When steel meets water and air, a chemical reaction begins. The iron in the steel changes into iron oxide. That is the orange crust we call rust.
A thin layer of rust is not the end of the world. But left alone, it grows deeper and pits the surface of the metal. A pitted shovel blade digs poorly. A rusty pair of pruning shears crushes stems instead of cutting them clean. Crushed stems invite disease into your plants.
A hoe with a rough, rusted edge also needs more force to cut through soil. A dull, corroded saw wears out your arm. Clean, sharp tools make garden work easier and safer.
There is also the matter of plant health. When you prune with dirty or rusted blades, you can carry disease from one plant to another. Cleaning rusty pruning shears and other cutting tools is a basic step in good garden care. Many gardeners who study how to test soil drainage at home or try seed starting in egg cartons soon learn the same lesson: good soil knowledge only helps if your tools are clean and sharp too.
Finally, cleaning rust is cheaper than buying new tools. A good spade or pair of loppers can cost thirty dollars or more. Restoring old garden tools costs only a few dollars in supplies and an afternoon of your time.
What You Need to Clean Rusty Garden Tools: How to Clean Rusty Garden Tools
Before you begin, gather your supplies. You do not need fancy products. Most rust removal methods use common household items.
Basic cleaning supplies:
– A stiff wire brush or steel wool pad – A bucket of warm water – Dish soap – Clean rags or old towels – Sandpaper in medium (80 to 120 grit) and fine (220 grit) grades – A stiff-bristled hand brush
For stubborn rust, you will also want one of these:
– White vinegar (plain distilled vinegar) – Baking soda – A commercial rust remover from a hardware store
For protection after cleaning:
– Boiled linseed oil or mineral oil – A small can of spray lubricant or household oil – Car wax or paste wax for long-term storage
Safety gear:
– Work gloves to protect your hands from sharp edges – Safety glasses, because rust flakes and wire bristles can fly – A dust mask if you will be sanding a lot of rust
How to Clean Rusty Garden Tools: The Main Methods
There are three main ways to clean rust from garden tools. Each works for a different level of rust. Start with the gentlest method and move to stronger ones only if you need them.
Method 1: Scrubbing with Soap and Water
This method works for light surface rust and for tools that are mostly dirty rather than deeply corroded.
1. Fill a bucket with warm water and add a squirt of dish soap. 2. Put the tool in the bucket and let it soak for ten to fifteen minutes. 3. Scrub the metal parts with a stiff wire brush or steel wool. Work along the blade in one direction. 4. Use a smaller brush or an old toothbrush to reach into corners and joints. 5. Rinse the tool with clean water. 6. Dry it at once with a clean rag. Do not let it air dry, or new rust will start.
This wash also makes a good first step before the stronger methods below.
Method 2: The Vinegar Soak
White vinegar is a mild acid. It dissolves rust without harsh chemicals. This is the most popular method for how to clean rusty garden tools at home, and it works very well on moderate rust.
1. Pour enough plain white vinegar into a bucket or deep tray to cover the rusted parts of the tool. 2. Place the tool in the vinegar. If only the blade is rusty, you can wrap the blade in vinegar-soaked rags instead of soaking the whole tool. This protects wooden handles from the acid. 3. Let the tool soak for one to twenty-four hours, depending on how bad the rust is. Light rust may clear in an hour. Heavy rust may need a full day. 4. Pull the tool out and scrub the loosened rust with a wire brush or steel wool. 5. Rinse the tool well with clean water. 6. Mix a tablespoon of baking soda in a cup of water and wipe the tool with it. This step neutralizes the acid so the vinegar does not keep eating into the metal. 7. Dry the tool completely with a clean towel.
Many gardeners prefer this method because vinegar is cheap and safe. The experts at Gardener’s Supply also suggest natural, non-toxic cleaners for tool care when possible.
Method 3: Sanding and Commercial Rust Removers
For deep rust and pitting, you may need sandpaper or a store-bought rust remover.
Sanding:
1. Start with medium sandpaper (80 to 120 grit). Rub the rusted areas firmly until the orange crust is gone and you see bright metal. 2. Switch to fine sandpaper (220 grit) to smooth the surface. 3. Wipe away all the dust with a damp rag, then dry the tool at once.
Commercial rust removers:
Products sold at hardware stores use stronger chemicals to dissolve rust. Read the label before you buy. Some products convert rust into a black coating that you can paint over. Others dissolve it completely and need a rinse.
1. Follow the product directions exactly. 2. Wear gloves and safety glasses, and work in a well-ventilated area. 3. Rinse and dry the tool as the label directs.
Advice on choosing the right rust remover and tool care supplies can be found in product guides at The Home Depot and Lowe’s, both of which carry a wide range of garden tool maintenance products.
Sharpening After Rust Removal
Once the rust is gone, most tools will benefit from sharpening. Rust removal can leave edges uneven. A sharp tool is safer and easier to use than a dull one.
For shovels, hoes, and spades:
Use a flat metal file. Hold the tool steady in a vise or clamp. Push the file across the edge at a slight angle, working in one direction. Follow the original bevel of the blade.
For pruning shears and loppers:
Use a small sharpening stone or a specialized shear sharpener. Sharpen only the beveled side of the blade. A few firm strokes are usually enough.
The tool makers at Fiskars publish clear sharpening guides for their pruners and axes, and the same basic rules apply to tools from any brand. The repair experts at Family Handyman also offer step-by-step sharpening advice for common garden tools.
Protecting Your Tools from Future Rust
Cleaning rusty garden tools is only half the job. The other half is keeping rust from coming back. These habits will add years to the life of your tools.
Dry tools after every use. This is the single most important habit. Wipe metal parts with a rag before you put tools away. A tool left damp in a shed will start rusting within days.
Oil the metal parts. After cleaning and drying, wipe a thin coat of oil on all metal surfaces. Boiled linseed oil, mineral oil, or even cooking oil will work. The oil forms a barrier between the steel and the air.
Treat wooden handles. Sand any rough spots on wooden handles with fine sandpaper. Rub in a coat of linseed oil. This keeps the wood from drying out and cracking, and it gives you a better grip.
Store tools off the ground. Hang tools on a wall rack or store them in a dry box. Tools that sit on a damp shed floor will rust fast. Many gardeners who keep their gear in a garden hose storage box also hang hand tools on hooks inside the lid to keep them dry.
Use paste wax for winter storage. Before you store tools for the winter, coat the metal with a layer of car wax or paste wax. The wax seals out moisture for months. The home improvement guides at Bob Vila recommend this method for long-term storage of metal tools.
Cost of Cleaning Rusty Garden Tools
Restoring old garden tools is cheap. Here is a rough breakdown of what the supplies cost in the United States.
– White vinegar (1 gallon): $3 to $5 – Wire brush set: $5 to $10 – Steel wool pads (pack): $4 to $7 – Sandpaper assortment: $5 to $8 – Boiled linseed oil (quart): $8 to $12 – Mineral oil (16 ounces): $5 to $8 – Spray lubricant: $4 to $6 – Commercial rust remover: $8 to $15 – Work gloves: $8 to $15 – Safety glasses: $5 to $10
Even if you buy everything on this list, the total is usually under fifty dollars. A new set of hand tools can easily cost one hundred dollars or more.
The price comparison reviews at Consumer Reports and The Spruce can help you decide whether a rusted tool is worth saving or whether a replacement makes more sense. As a rule, solid forged-steel tools are worth restoring. Thin, cheap tools that are deeply pitted are often better replaced.
Safety Tips for Cleaning Rusty Garden Tools
Rust removal is safe work, but a few precautions will keep you out of trouble.
Protect your eyes. Wire brushes throw off small bristles and rust flakes. Sanding creates fine dust. Wear safety glasses whenever you scrub or sand.
Wear gloves. Rusty edges are sharp. Vinegar and commercial rust removers can irritate the skin. Thick work gloves protect your hands from cuts and chemicals.
Work in fresh air. If you use a commercial rust remover, work outdoors or in an open garage. Read the product label for ventilation warnings.
Keep chemicals away from children and pets. Store vinegar, rust remover, and oils out of reach. Clean up spills at once.
Watch for tetanus risk. A deep cut from a rusty tool can lead to tetanus. Make sure your tetanus shot is up to date. The health guides at Burpee remind gardeners to treat tool safety as part of garden safety.
Frequently Asked Questions
How long does it take to clean rusty garden tools?
The time depends on the amount of rust. A quick scrub with soap and water takes about fifteen minutes per tool. A vinegar soak needs one to twenty-four hours of soaking time, but only about twenty minutes of actual work. Sanding a badly rusted shovel may take thirty to forty-five minutes. Most gardeners can restore a full set of hand tools in one afternoon.
Can I use WD-40 to clean rust off garden tools?
Yes. Spray lubricants like WD-40 can loosen light rust and protect metal from new rust. Spray the rusted area, let it sit for ten minutes, then scrub with a wire brush or steel wool. Wipe the tool clean and dry. For heavy rust, vinegar or sanding works better.
Will vinegar damage my garden tools?
Vinegar is safe for most steel tools if you use it correctly. The risk comes from leaving tools in vinegar too long. Extended soaking can etch the metal and weaken thin blades. Limit the soak to the time needed, neutralize with baking soda afterward, and rinse and dry well. Keep vinegar away from wooden handles, since the acid can dry out the wood.
How do I clean rusty pruning shears without ruining the spring?
Take the shears apart if you can. Most pruning shears have a center bolt you can unscrew. Clean the blades and the spring separately with a wire brush and vinegar. Dry every part completely. Put a drop of oil on the pivot bolt and the spring before you reassemble the shears. Test the action to make sure it opens and closes smoothly. The pruning tool guides at Corona Tools show how to take apart and maintain common shear designs.
Should I throw away badly rusted tools?
Not always. Surface rust is easy to fix. Even moderate pitting can be sanded out. Consider replacing a tool only if the metal is eaten through, the blade is cracked, or the rust has weakened a joint so the tool bends or wobbles. Solid forged tools are almost always worth saving. Cheap stamped-metal tools that are deeply corroded are usually better replaced.
How often should I clean my garden tools?
Give cutting tools a quick wipe and oil after every use during the growing season. Do a deep clean of all your tools twice a year: once in spring before planting and once in fall before winter storage. Tools that get used in wet soil or left outside need cleaning more often. A regular schedule keeps rust from ever getting a foothold.
A Final Word
Learning how to clean rusty garden tools is a skill every gardener should have. The process is simple: scrub, soak, sand, sharpen, and protect. With a few dollars in supplies and a free afternoon, you can restore old garden tools to working condition and keep them that way for years.
Clean tools dig better, cut cleaner, and last longer. Start with your most-used tool this weekend. Once it is clean, a little oil and dry storage will keep the rust from coming back.
References
Bob Vila. (n.d.). Home improvement advice. https://www.bobvila.com Burpee. (n.d.). Seeds, plants, and gardening supplies. https://www.burpee.com Consumer Reports. (n.d.). Product reviews and ratings. https://www.consumerreports.org Corona Tools. (n.d.). Garden and landscape tools. https://www.corona-tools.com Family Handyman. (n.d.). DIY home repair and maintenance. https://www.familyhandyman.com Fiskars. (n.d.). Garden and cutting tools. https://www.fiskars.com Gardener’s Supply Company. (n.d.). Gardening tools and supplies. https://www.gardeners.com Lowe’s. (n.d.). Home improvement products. https://www.lowes.com The Home Depot. (n.d.). Home improvement products. https://www.homedepot.com The Spruce. (n.d.). Home and garden advice. https://www.thespruce.com
Was this guide helpful?

About Sarah Mitchell
The My Garden US editorial team writes practical, in-depth home and garden guides for American homeowners — tested advice, no fluff.
You May Also Like

Seed Starting Mistakes to Avoid Guide
August 26, 2026 0 views
Raised Bed Corners for Easy Assembly: Build a Sturdy Garden Bed in an Afternoon
August 16, 2026 0 views
The Best Garden Wagon With Canopy Reviews: What to Buy and Why
June 25, 2026 0 views