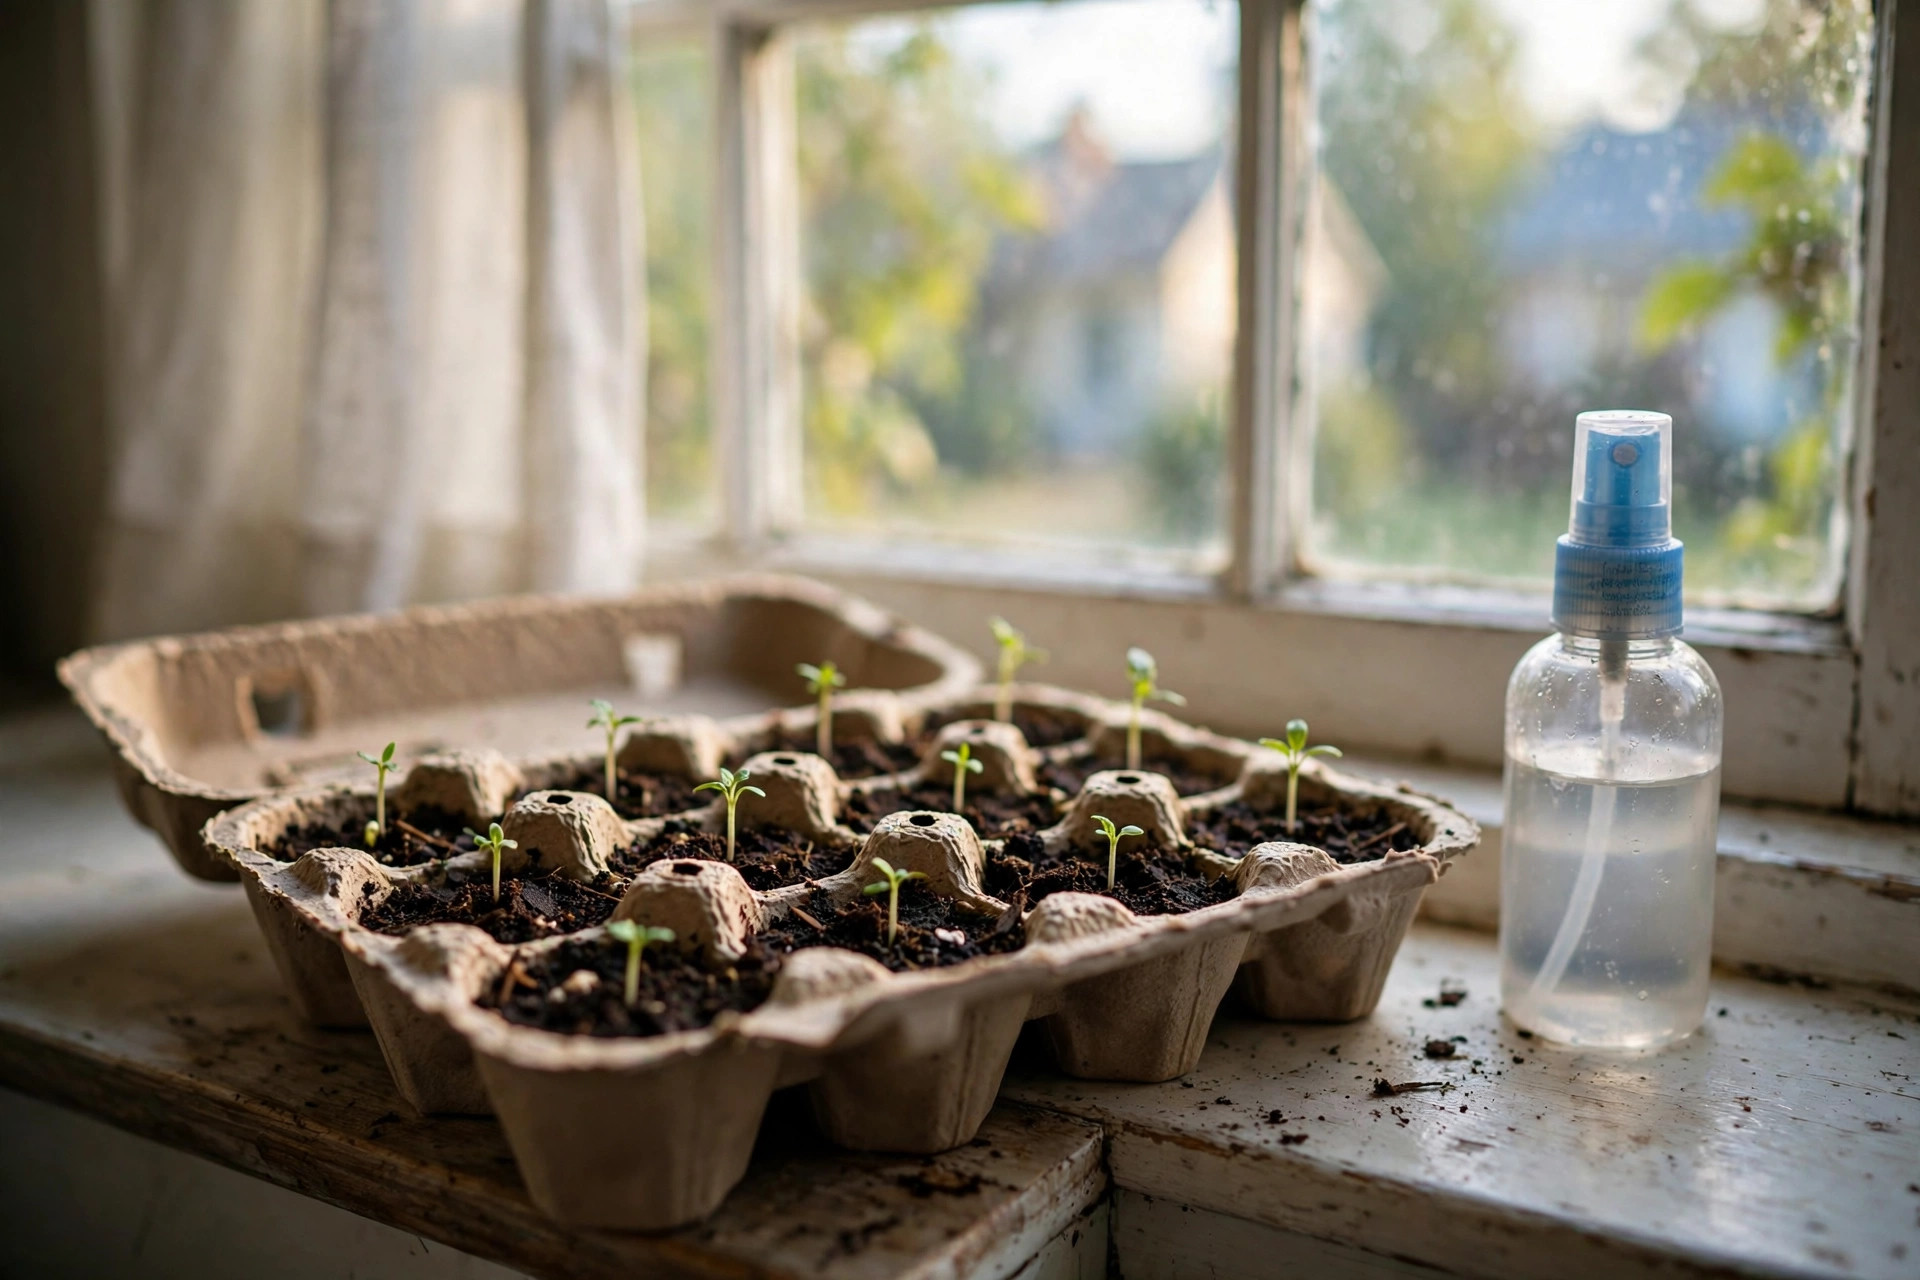

Many gardeners save egg cartons all winter. They stack them in the pantry. They wonder what to do with them. This seed starting in egg cartons guide gives them a good answer. An egg carton makes a fine seed tray. Each cup holds just enough soil for one young plant. The lid can act as a drip tray. The whole thing costs nothing at all.
Starting seeds indoors gives you a head start on the season. It also saves money. A packet of seeds costs far less than nursery plants. If you want the full picture, read our how to start seeds indoors guide. But if you want the simplest method of all, keep reading. You need only a carton, some soil, seeds, and light.
Why Egg Cartons Work for Seed Starting
An egg carton is the right size for a seed. Each cup is about one inch deep and two inches wide. That is enough room for the first two weeks of life. After that, the seedlings move to larger pots.
Cardboard cartons are the best kind. They breathe. Water passes through them. When it is time to plant outside, you can tear the cups apart and set the whole cup in the ground. The cardboard breaks down in the soil. The roots grow through it. Foam cartons work too, but they do not break down. You must take the seedling out of a foam cup.
Egg cartons also give you control. You can start one kind of seed in each carton. You can label the carton with a marker. You can move the whole carton to the sunniest window in the house. Twelve seedlings take up very little space.
What You Need to Begin: Seed Starting in Egg Cartons Guide
Gather these items before you start:
– A cardboard egg carton, clean and dry – Seed starting mix (not heavy garden soil) – Seeds of your choice – A spray bottle filled with water – A small tray or the carton lid to catch water – A pencil for making holes and labels – Clear plastic wrap or a plastic dome for humidity
The soil matters more than anything else. Learn the difference in our seed starting mix vs potting soil article. Regular potting soil can be too coarse and too rich for tiny seeds. Seed starting mix is fine and light. It lets water pass through. It holds moisture near the seed.
Preparing the Carton
Start with a clean carton. If it held raw eggs, wipe it with a damp cloth and let it dry. Tear off the lid and set it aside. You will use the lid under the carton as a water tray.
Poke a small hole in the bottom of each cup with a pencil. The hole should be about the size of a pea. This lets extra water drain out. Roots rot in standing water, so drainage is essential.
Set the carton on its lid. The lid catches water that runs through. Now you are ready to fill.
Filling and Planting
Fill each cup with seed starting mix. Pack it down gently. Leave about a quarter inch of space at the top. Water the mix until it is damp all the way through. Let it sit for five minutes. Then check it again.
Plant one or two seeds in each cup. Check the seed packet for depth. Most seeds go about twice as deep as they are wide. Small seeds, like lettuce, need only a light cover. Larger seeds, like beans, go deeper. A good rule is one quarter inch for most garden seeds.
Cover the seeds with a thin layer of mix. Mist them with the spray bottle. Do not pour water. Pouring moves the seeds around and washes them out.
Covering for Warmth and Moisture
Seeds need warmth and moisture to wake up. Stretch a piece of clear plastic wrap over the top of the carton. This holds in moisture like a small greenhouse. For a bigger project, a greenhouse for backyard beginners gives more room, but plastic wrap is enough for a carton.
Check under the wrap every day. If the soil looks dry, mist it. If water pools on the wrap, lift it for an hour to let air in. Most seeds sprout in seven to fourteen days. Tomatoes and peppers often take longer.
Once the seedlings come up, take the wrap off at once. Seedlings need moving air. Air makes their stems strong.
Light: The Most Important Factor
Light decides whether your seedlings live or die. A windowsill may be enough in spring. A south-facing window gives the most sun. Turn the carton one quarter turn each day. This keeps the stems from leaning to one side.
Weak, pale seedlings mean weak light. Tall, thin stems that fall over mean weak light too. If your windows are dark, buy a simple shop light or a grow light. Hang it two to four inches above the seedlings. Raise it as they grow. Run the light fourteen to sixteen hours a day. A cheap timer turns it on and off for you.
Strong light makes short, sturdy stems. That is what you want. A stocky seedling will grow into a strong garden plant.
Watering Young Seedlings
Water from the bottom when you can. Pour water into the lid tray under the carton. The cups will soak it up through the holes. Wait twenty minutes. Pour off any water that is left. This method keeps the stems dry and avoids rot.
If you must water from the top, use the spray bottle. Mist gently. The goal is damp soil, not wet soil. Let the top layer dry slightly between waterings. Roots grow deeper when they have to reach for water.
Egg cartons dry out faster than plastic trays. Cardboard pulls water out of the soil. Check the cups twice a day in warm rooms. If a cup feels light, it needs water.
Feeding and Thinning
Seed starting mix has almost no food in it. When the first true leaves appear, the plant needs food. True leaves are the second set of leaves. They look like the leaves of the adult plant. The first pair of leaves, the seed leaves, are plain and round.
At this point, feed with half-strength liquid fertilizer once a week. A fish emulsion or a mild vegetable fertilizer works well. Gardeners who shop at Burpee often find seed supplies and gentle fertilizers side by side. Full strength can burn young roots, so keep it weak.
Thin to one seedling per cup. If two seeds sprouted, cut the weaker one at soil level with small scissors. Do not pull it out. Pulling disturbs the roots of the plant that stays.
When to Move Seedlings On
Egg carton cups are small. After two to four weeks, most seedlings outgrow them. The roots fill the cup. You may see roots coming through the drainage hole. That is the sign to move up.
Move seedlings into three-inch pots with regular potting soil. Tear the cups apart at the seams. Plant each cup whole into its new pot if it is cardboard. Water well. Give them bright light and keep growing them inside until the weather is warm enough outside.
Hardening Off Before the Garden
Seedlings raised indoors are soft. Outdoor sun and wind can shock them. Hardening off builds their strength over seven to ten days.
Start by setting the pots in a shaded, calm spot for one hour. Bring them back inside. Add one hour each day. Move them slowly into morning sun. After a week, they can stay out all day. Then they are ready for the garden.
Plant on a cloudy day if you can. Water the hole before you set the plant in. Cardboard cups go straight into the ground. Push the whole cup in so no cardboard sticks up above the soil. Cardboard above the soil pulls water away from the roots.
What Seeds Work Best in Egg Cartons
Small and medium seeds do best. Tomatoes, peppers, eggplant, lettuce, herbs, and flowers all start well in egg cartons. These plants have small seeds and slow early growth.
Fast-growing, large seeds do less well. Beans, squash, and cucumbers grow too fast. Their roots fill the cup in days. They also dislike root disturbance. Start these seeds directly in the garden, or in large pots that go straight into the ground.
Flowers like marigolds, zinnias, and cosmos are good first choices. They sprout fast and forgive mistakes. A child can start marigolds in an egg carton and have flowers by summer.
Cost and Savings
The beauty of this method is the price. The carton is free. A bag of seed starting mix costs a few dollars and fills many cartons. A packet of seeds costs two to four dollars and may hold one hundred seeds. That can mean one hundred plants for less than five dollars.
Compare that to nursery plants. A six-pack of tomato plants can cost five to eight dollars. Twelve egg carton tomatoes cost under two dollars in seed and soil. The savings grow with every carton you start.
The tools you already own do most of the work. Guides from The Spruce and Bob Vila often show how simple setups beat costly ones. A kitchen window replaces a greenhouse. A spray bottle replaces a misting system. A marker replaces printed labels.
Care Through the Season
Keep your cartons clean between plantings. Old soil can carry disease. Dump it in the garden or the compost bin. Rinse foam cartons with soapy water. Cardboard cartons wear out after one or two uses. Recycle the soft ones and start fresh.
Store unused cartons dry. A damp stack of cartons will mold. Keep them in a pantry or a dry corner of the garage until spring.
Watch for common problems. Mold on the soil surface means too much water and too little air. Scrape it off and let the soil dry. Leggy seedlings need more light. Yellow leaves may mean overwatering or a need for food. Most problems in egg cartons trace back to water or light.
Safety Notes
Keep seed starting supplies away from small children and pets. Seed starting mix is not food. Some seeds are treated with fungicide that is harmful if swallowed. Buy untreated or organic seed when children will help.
Wash your hands after handling soil. Bagged mixes can carry dust and bacteria. A simple hand wash removes the risk. If you use liquid fertilizer, store it out of reach of children. Read the label and follow the amounts.
When moving trays in and out of the house, watch your step. Water on tile floors makes a slippery spot. Mop up spills at once.
Garden centers such as Home Depot and Lowe’s label treated seed clearly. Look for the warning on the packet. When in doubt, choose untreated seed for any garden where children play.
Frequently Asked Questions
Can I use foam egg cartons instead of cardboard?
Yes, but they behave differently. Foam cups hold water longer and do not break down in the soil. You must remove the seedling from the cup at planting time. Gently squeeze the cup and slide the root ball out. Cardboard is simpler because the whole cup goes into the ground.
How deep should I plant the seeds?
A good rule is twice as deep as the seed is wide. Tiny seeds go just under the surface. Medium seeds go one quarter inch deep. Large seeds go one half inch deep. The seed packet gives the exact depth for that variety. Follow it when you can.
How long can seedlings stay in an egg carton?
Two to four weeks is normal. Watch the roots. When roots circle the cup or push through the drainage hole, it is time to move up. Staying too long in a small cup stunts growth. A plant that is pot-bound takes longer to recover after transplanting.
Do I need a heat mat under the carton?
A heat mat helps with warm-season seeds like peppers, tomatoes, and eggplant. These seeds sprout best at seventy to eighty degrees. If your house is cool, a mat speeds things up. Cool-season seeds like lettuce and broccoli sprout fine at room temperature. A mat is helpful but not required.
Why are my seedlings falling over?
Falling over has two common causes. The first is weak light, which makes tall, thin stems. Move the carton to brighter light or add a grow light. The second is damping off, a disease that rots stems at the soil line. Prevent it by watering from the bottom, giving air flow, and not overwatering. Fan air across the seedlings for a few hours each day with a small fan on low.
Can I plant the whole cardboard cup in the garden?
Yes. That is the main advantage of cardboard cartons. Tear the cups apart first. Plant each cup so the top sits level with or just below the soil surface. Water well after planting. The cardboard softens and breaks down within weeks. Roots pass through it with ease.
Final Word
Starting seeds in egg cartons is one of the simplest garden skills you can learn. It asks little of you and gives back much. A saved carton, a handful of soil, and a packet of seeds can become a row of healthy plants. Try one carton this spring. Watch the seeds wake up on your windowsill. When they are strong enough for the garden, you will know the joy that keeps gardeners planting year after year. Simple guides at Family Handyman and Gardener’s Supply remind beginners that the best garden tool is often the one you already own.
See Fiskars for more detail.
References
Bob Vila. (n.d.). Home improvement advice. https://www.bobvila.com Burpee. (n.d.). Seeds, plants, and gardening supplies. https://www.burpee.com Family Handyman. (n.d.). DIY home repair and maintenance. https://www.familyhandyman.com Fiskars. (n.d.). Garden and cutting tools. https://www.fiskars.com Gardener’s Supply Company. (n.d.). Gardening tools and supplies. https://www.gardeners.com Lowe’s. (n.d.). Home improvement products. https://www.lowes.com The Home Depot. (n.d.). Home improvement products. https://www.homedepot.com The Spruce. (n.d.). Home and garden advice. https://www.thespruce.com
Was this guide helpful?

About Michael Thompson
The My Garden US editorial team writes practical, in-depth home and garden guides for American homeowners — tested advice, no fluff.
You May Also Like

How to Choose the Best Garden Hose for RV Use
May 20, 2026 0 views
Drip Irrigation for Fruit Trees Guide: How to Water Your Orchard the Right Way
July 25, 2026 0 views
Best Garden Knife for Harvesting Reviews: What Buyers Say and What Matters
July 27, 2026 0 views