
Learning how to build compost bin cheap is one of the smartest first steps for any home gardener. A compost bin turns kitchen scraps and yard waste into rich, dark soil food. Store-bought bins can cost fifty dollars or more. A homemade bin can cost almost nothing. All it takes is a few free pallets, some old lumber, or a roll of wire fencing. This guide shows how to pick a design, build it in an afternoon, and keep it working all year.
Why a Cheap Compost Bin Is Worth the Effort
Every kitchen makes waste. Vegetable peels, coffee grounds, and eggshells pile up fast. Most of that waste goes to the trash. In a landfill it rots without air and gives off methane gas. A compost bin gives that waste a better job. With air and water, the same scraps break down into humus. Humus is the dark, crumbly part of healthy soil. It feeds plants and holds water in the ground.
A cheap bin does the same work as an expensive one. Air flow is what matters most. So is the mix of green and brown material. The bin itself is only a container. Garden writers have said this for decades: the process does the work, not the box. That is good news for anyone watching costs. Bagged compost costs money every spring. A home bin makes it free. One cubic yard of homemade compost can replace several bags of store-bought soil amendment. Over a few seasons the savings add up. The garden also gets better. Homemade compost carries the microbes from your own yard. It suits your own soil better than anything from a bag.
What to Look for Before You Build: How to Build Compost Bin Cheap
A good plan saves time and lumber. Think through three things before you lift a hammer: the spot, the size, and the material.
The Right Spot
Place the bin on bare earth, not on concrete. Worms and microbes live in the soil. They move up into the pile from below. Bare ground lets water drain out of the pile. Concrete blocks both.
Pick a level spot with some shade. Full sun dries the pile out too fast. A spot under a tree or on the north side of a fence works well. Keep the bin within easy reach of the kitchen door. If the walk is long, scraps end up in the trash instead. Keep it a few feet from fences and sheds so air can move around it.### The Right Size
A pile needs enough mass to heat up. Most guides agree on one rule: the pile should be at least three feet wide, three feet deep, and three feet tall. That is one cubic yard. Smaller piles still rot, but they work slower.
A bin holds the pile in that rough shape. Build it about three to four feet on each side. Bigger than that is hard to turn. Smaller than that is too small to heat well. If you have a big yard, plan for two or three bins side by side. One holds fresh scraps. One cooks. One holds finished compost.
The Right Materials
Free material is the point. Old pallets are the classic choice. Stores give them away. Ask at garden centers, hardware stores, and warehouses. Wood shipping crates work too. Scrap fence boards, old fence posts, and leftover deck lumber all serve. Avoid wood that is painted or stained. Avoid pressure-treated lumber made before the modern standards, since old treatments can carry chemicals into the compost.
If wood is hard to find, wire fencing is cheap and simple. A roll of welded wire from a home improvement store makes a fine round bin. Cinder blocks cost little and last for years. You can even stack them dry, with no mortar.
Types of Cheap Compost Bins You Can Build
Four designs cost almost nothing. Each takes less than an afternoon. Pick the one that fits the materials you can get.
The Free Pallet Bin
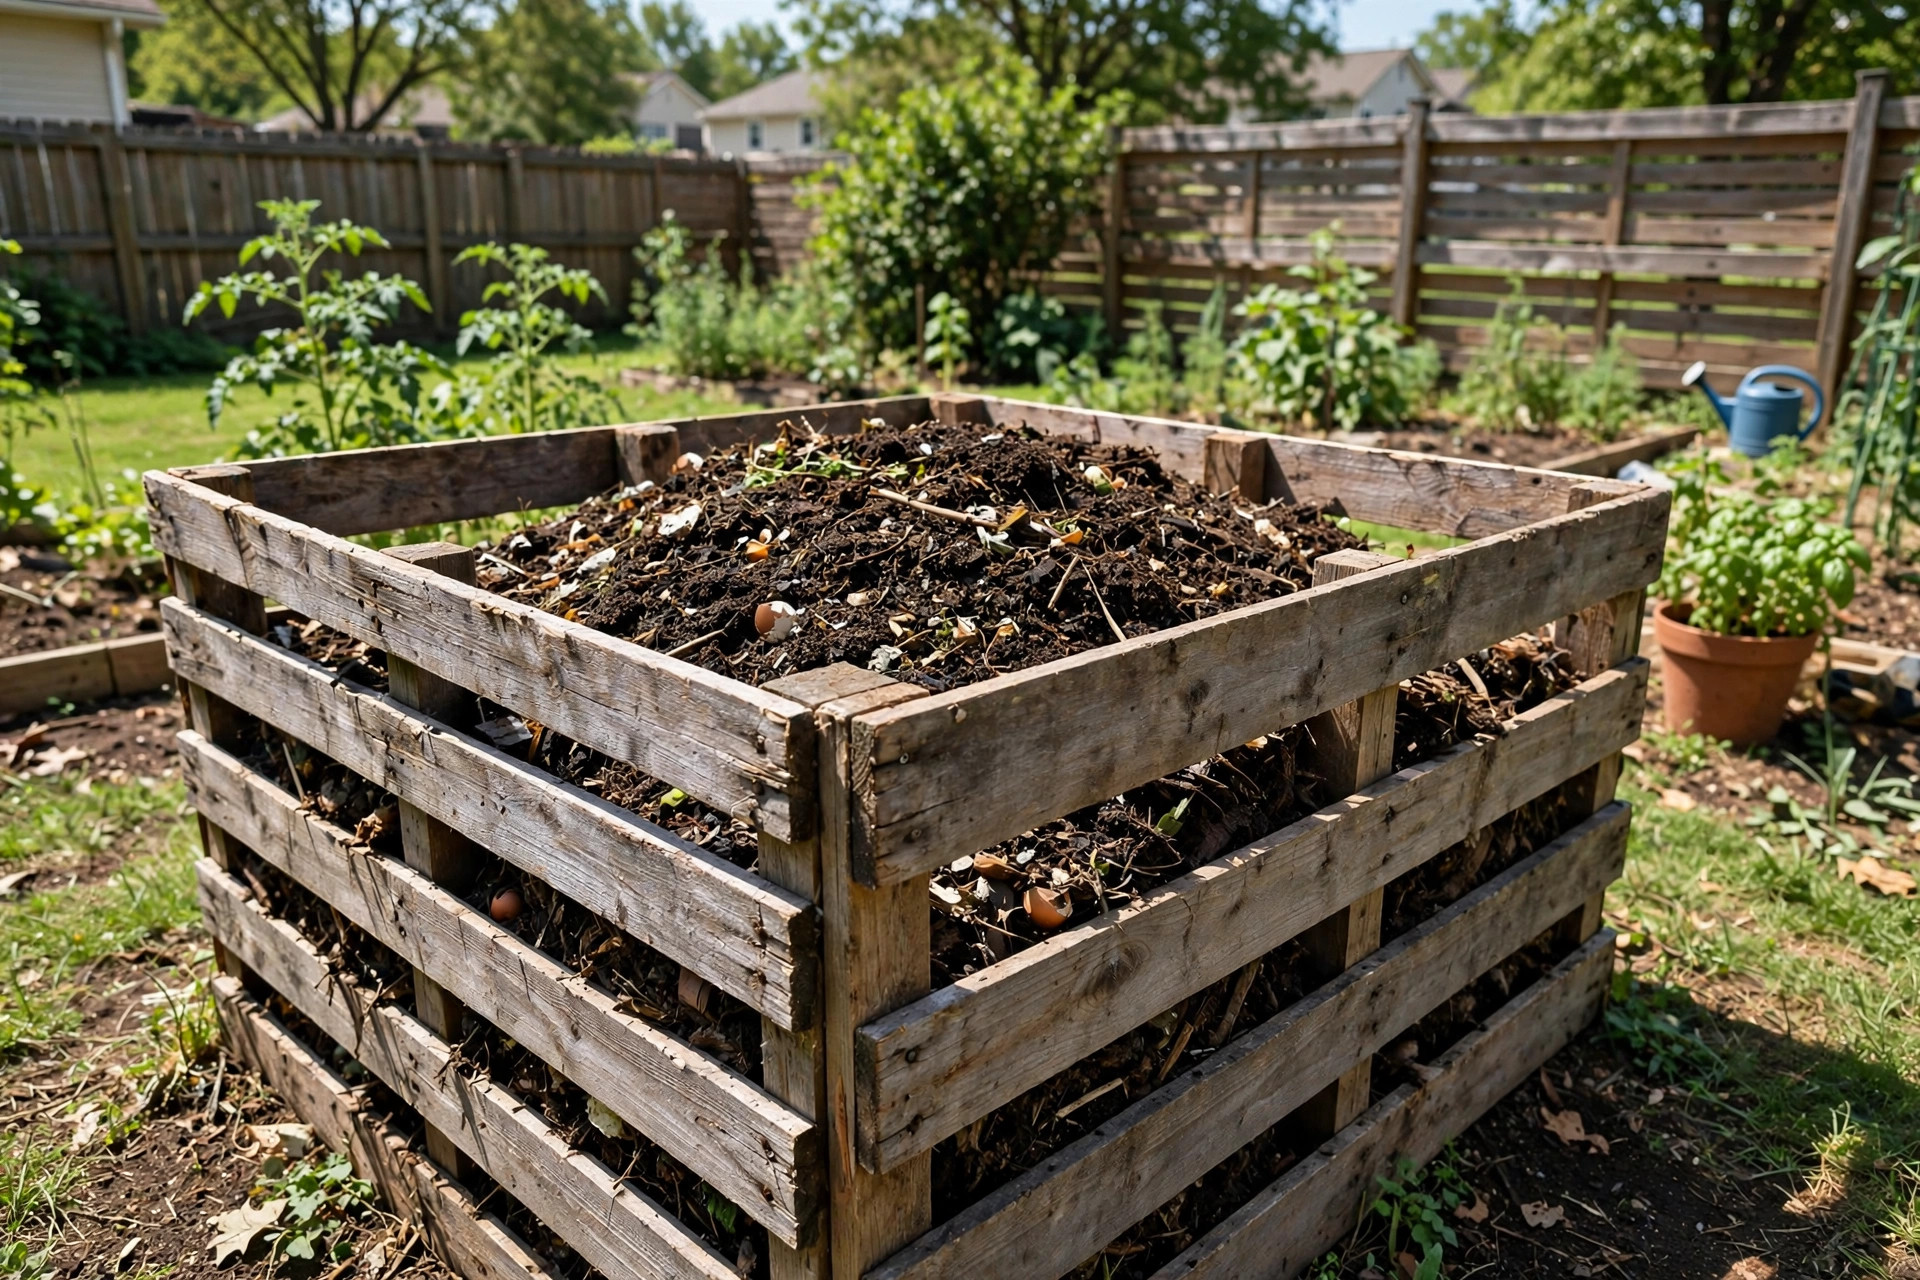
This is the most common homemade bin in America. You need four or five pallets. Stand three pallets on edge to form a U shape. Stand one pallet across the open front as a gate. Wire the corners together with baling wire or screw them to two-by-two posts. Leave the slats in place. The gaps let air in.
The front pallet can be wired with only two ties so it swings open. That makes turning the pile easy. Two bins side by side share one center wall. That saves one pallet. This design costs nothing if the pallets are free. It lasts three to five years before the wood breaks down. That is fine. Old pallet wood can go into the next pile.
The Wire Fence Bin
You need a roll of welded wire fencing, about ten to twelve feet long. Form it into a circle about three feet wide. Clip or twist the ends together. Stake the circle to the ground in four places. That is the whole build.
The wire bin breathes very well. That is its strong point. Its weak point is that it dries out fast in wind. Wrap the outside with burlap or cardboard in dry months. When the pile is done, lift the wire off and set it down in a new spot. This design works well for leaves and grass clippings. It pairs nicely with other low-cost methods such as the tips in how to make leaf mold compost.
The Scrap Wood Box
If you have leftover fence boards or framing lumber, build a simple square box. Four corner posts hold the walls. Nail the boards across with small gaps between them. The gaps give air. Leave the top open. Leave the bottom open to the soil.
Screw the boards instead of nailing if you can. Screws make the bin easy to take apart later. One side can be left shorter so you can reach in with a fork.
The Cinder Block Bin
Stack cinder blocks in a square, three blocks high. Leave no mortar. Turn some blocks sideways so the holes face out. Those holes let air in. Cinder blocks are heavy, so this bin stays put in wind. It lasts far longer than wood.
The cost is low if you find used blocks. Check classified ads and demolition sites. Even new blocks are cheap, a few dollars each. A single square bin needs about thirty blocks. Three bins side by side share walls and need fewer per bin.
What It Costs: How to Build Compost Bin Cheap
The honest answer is that it can cost nothing. Here is a rough breakdown of each design:
– Pallet bin: zero to ten dollars. Pallets are often free. You may buy a few screws or a short roll of wire. – Wire fence bin: fifteen to thirty dollars. The wire roll is the main cost. Stakes add a few dollars. – Scrap wood box: zero to twenty dollars. It depends on what scrap you have. Screws are the only purchase for most builders. – Cinder block bin: twenty to sixty dollars. Used blocks cut this to near zero.
The tools are simple. A hammer, a saw, and a drill cover most builds. A pair of work gloves and safety glasses are wise. Many gardeners already own these tools. If not, borrow them. There is no need to buy a power tool for a one-afternoon project.
Compare that to a store-bought plastic bin at fifty to one hundred fifty dollars. The homemade bin holds more, breathes better, and costs a tenth as much. The savings go straight into the garden.
How to Build It, Step by Step
Here is the pallet bin, the most popular cheap build, from start to finish. The whole job takes about two hours.
Step 1: Get five pallets. Check that they are heat-treated, not chemical-treated. A stamp reading “HT” means heat-treated. Ask local stores for spares. Bring them home and knock off loose nails.
Step 2: Pick the spot. Use the rules from above. Bare earth, some shade, close to the kitchen. Lay the pallets out on the ground to mark the square.
Step 3: Stand the back and side walls. Stand three pallets on edge in a U shape. Drive a short fence post at each corner for strength. Screw or wire the pallets to the posts.
Step 4: Add the front gate. Wire the last pallet across the open front with two loose ties at the top. It should swing or lift off easily.
Step 5: Start the pile. Lay down six inches of coarse brown material first. Dry leaves, straw, or small twigs work. This base layer lets air flow up from below.
Step 6: Add greens and browns in layers. Kitchen scraps and fresh grass are greens. Dry leaves, shredded paper, and straw are browns. Aim for roughly three parts brown to one part green by volume. Water each layer lightly as you build.
That is all there is to the build. The pile does the rest. Good project walk-throughs with photos can be found at Bob Vila and The Spruce, which both cover pallet bins among other gardening tools and supplies projects.
Care and Upkeep
A bin needs only a little care. Turn the pile every one to two weeks with a garden fork. Turning adds air and mixes the layers. A pile that gets turned stays sweet and earthy.
Keep the pile damp like a wrung-out sponge. In dry spells, water it. In rainy spells, cover the top with a tarp or an old piece of plywood. Soggy piles rot slowly and smell. Damp piles rot fast.
Shred big pieces before they go in. Whole branches take years. Chop corn stalks and sunflower stems into short pieces. A sharp pair of loppers makes this quick.
Feed the bin a steady mix. The classic ratio is about twenty-five to thirty parts carbon to one part nitrogen. In plain terms, that means much more brown than green. If the pile smells like ammonia, add browns. If nothing seems to happen, add greens and water.
Harvest the finished compost from the bottom. It looks dark and crumbly and smells like forest soil. You cannot see the original scraps in it. Sift it through a simple screen made of hardware cloth over a wood frame. Toss the chunky bits back into the active pile. A steady supply of finished compost cuts the need for store-bought fertilizer, and a compost bin for kitchen scraps keeps the kitchen side of the habit simple too.
In winter the pile slows down but does not die. Keep adding scraps. The center stays warm. In spring, turn the pile well and it wakes up fast.
Safety
Compost is safe, but a few rules keep it that way. Never add meat, fish, dairy, fats, or oils. They draw rats and raccoons. They also smell. Keep pet waste out. Dog and cat droppings can carry germs that survive home composting.
Wear gloves when you turn the pile. Wash your hands after. Dust from dry compost can bother lungs, so dampen the pile before you turn it on a dry day. Keep the bin away from wooden house siding. Damp compost against wood can invite termites. A gap of a few feet is enough.
Hot piles can reach one hundred forty degrees or more inside. That heat kills weed seeds and germs. It is a good sign. Do not let children dig deep into a hot pile. The heat can surprise them. The federal Environmental Protection Agency offers plain guidance on home composting safety for households that want the official word.
Frequently Asked Questions
How long does cheap compost take to finish? A well-kept pile finishes in two to four months in warm weather. A pile that is never turned can take a year. Turning, water, and the right mix speed things up. Cold winters slow everything down.
Can I build a compost bin with no tools at all? Yes. The wire fence bin needs only wire cutters or strong pliers. The cinder block bin needs no tools at all. Stack the blocks by hand.
Will a cheap bin attract rats? A well-kept bin does not. Rats come for meat, dairy, and easy food. Keep those out. Bury fresh kitchen scraps under a layer of browns. Keep the pile damp and turn it often. A tight wire bin with small mesh keeps rodents out of the sides.
Do I need to buy a compost starter or activator? No. Soil, finished compost, or fresh grass clippings start a pile fine. The microbes are already in your yard. Save your money. Spend it on a good fork instead. Reviews of tools and gear at Consumer Reports can help you pick one that lasts.
Where can I get free pallets safely? Ask at garden centers, nurseries, and small hardware stores. Many set unwanted pallets by the dumpster. Look for the “HT” heat-treatment stamp. Skip pallets marked “MB,” which means chemical fumigation. Skip pallets that carried chemicals or look stained. Gardener’s Supply and Burpee also carry ready-made bins if you later decide to buy one.
Can I compost in a small yard or a rental? Yes. A single wire bin fits in a corner and costs little. It lifts away clean when you move. That makes it ideal for renters. For small spaces, also look at a rain barrel for garden watering to pair water savings with your free compost.
A Final Word
Knowing how to build compost bin cheap puts good soil within reach of every gardener. The materials are free or nearly free. The work takes an afternoon. The payoff lasts for years. Start with one pallet bin. Feed it your scraps. Turn it now and then. By next planting season you will have dark, rich compost that no store can match. Your garden will show the difference, and your wallet will feel it too.
References
Bob Vila. (n.d.). Home improvement advice. https://www.bobvila.com Burpee. (n.d.). Seeds, plants, and gardening supplies. https://www.burpee.com Consumer Reports. (n.d.). Product reviews and ratings. https://www.consumerreports.org Gardener’s Supply Company. (n.d.). Gardening tools and supplies. https://www.gardeners.com Lowe’s. (n.d.). Home improvement products. https://www.lowes.com The Home Depot. (n.d.). Home improvement products. https://www.homedepot.com The Spruce. (n.d.). Home and garden advice. https://www.thespruce.com U.S. Environmental Protection Agency. (n.d.). Protecting human health and the environment. https://www.epa.gov
Was this guide helpful?

About Lisa Anderson
The My Garden US editorial team writes practical, in-depth home and garden guides for American homeowners — tested advice, no fluff.
You May Also Like
The Best Garden Scissors for Harvesting Herbs
May 24, 2026 0 views
Seed Starting in Egg Cartons Guide: A Simple Way to Begin Your Garden
June 27, 2026 0 views
How to Store Garden Seeds Long Term: A Simple Guide for Home Gardeners
September 30, 2026 0 views