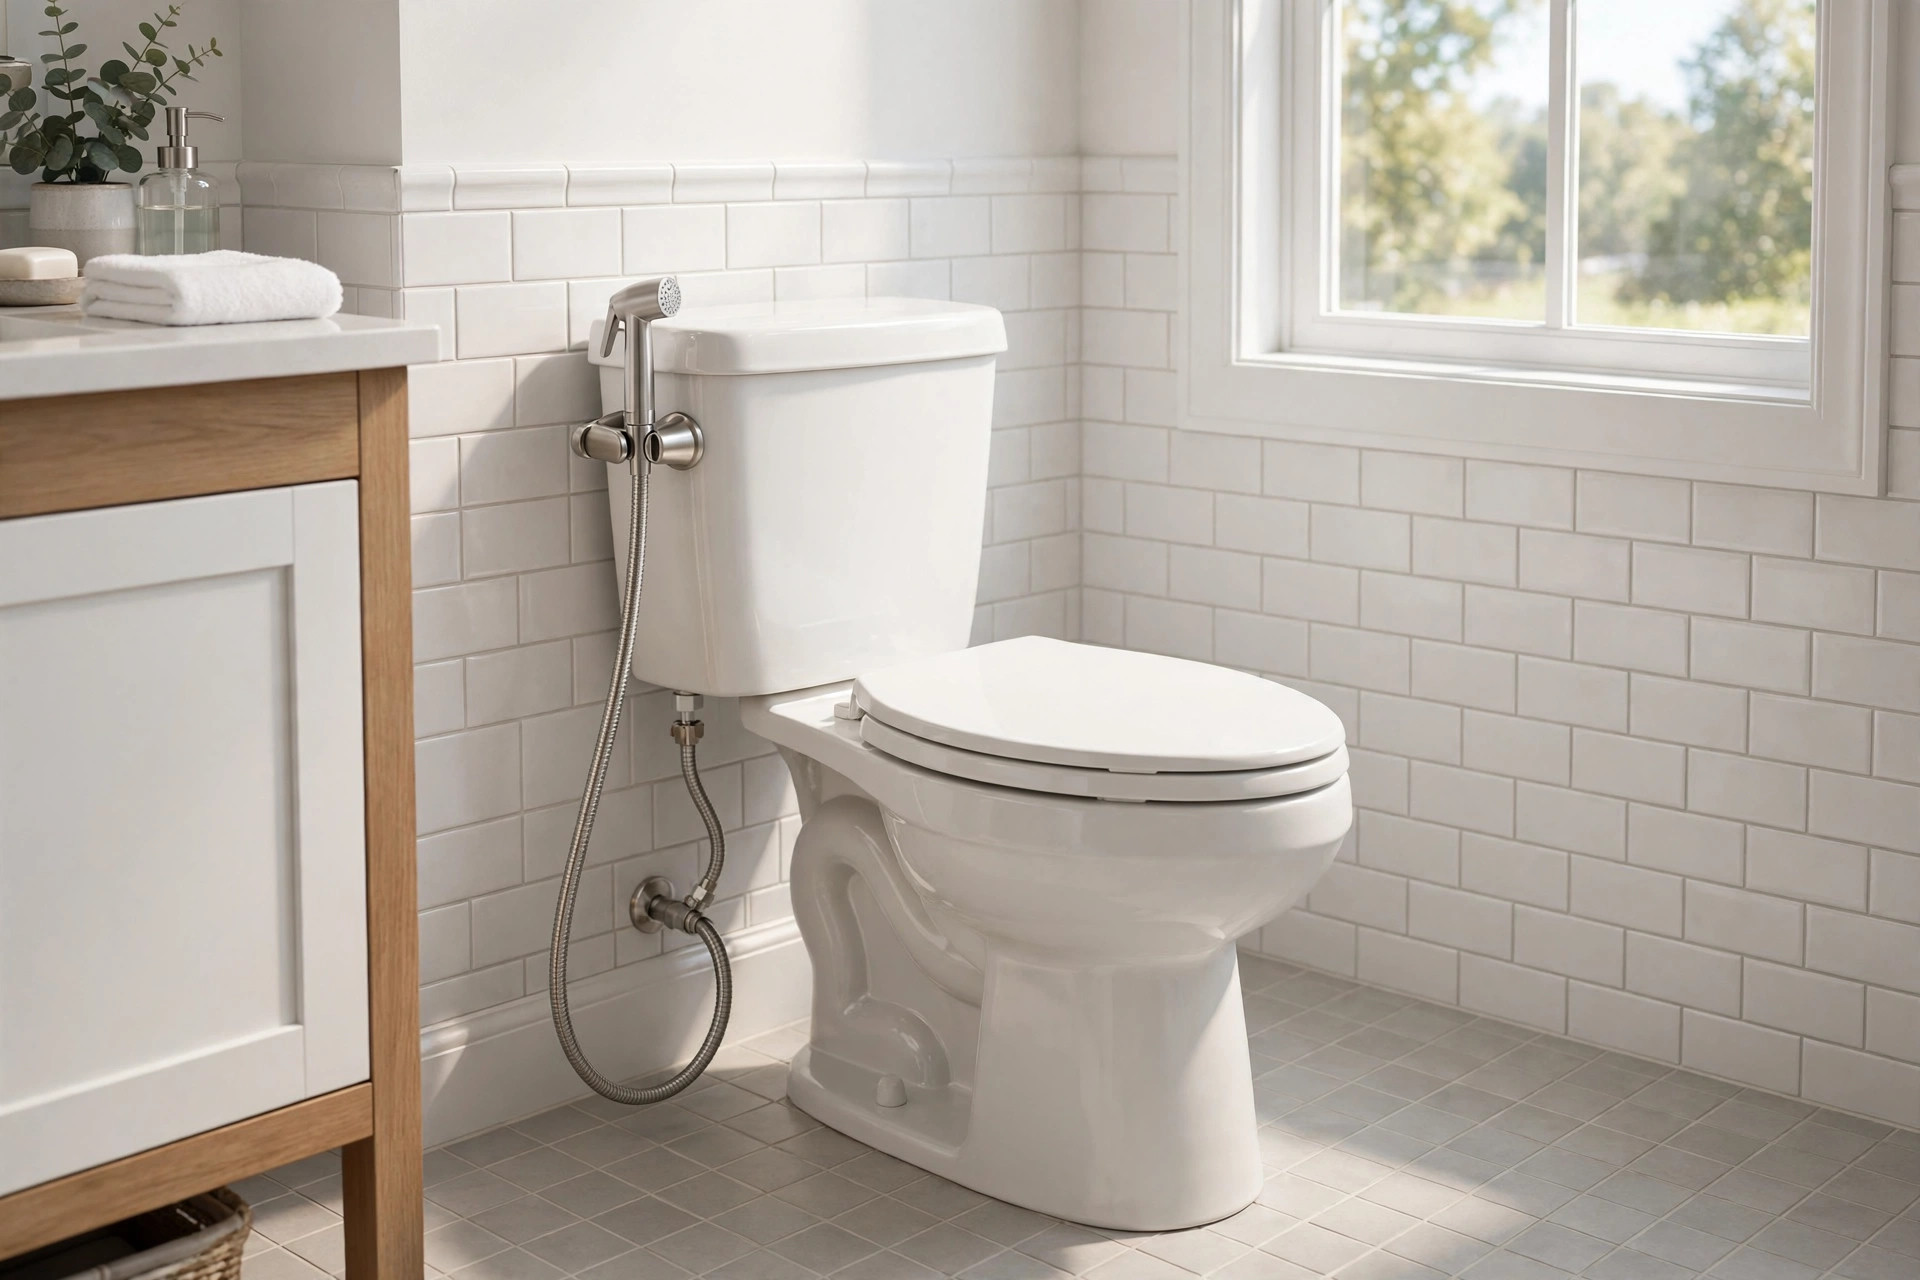

This handheld bidet sprayer installation guide usa homeowners can follow will walk you through every step of the job. A handheld bidet sprayer, sometimes called a diaper sprayer or a shattaf, is a small water sprayer that attaches to your toilet. It gives you a gentle, controlled stream of water for cleaning. Many families use it for personal hygiene, cloth diapers, and pet cleanup. The job takes most people under one hour. You do not need to be a plumber. You need only basic tools and a free weekend afternoon.
Why Install a Handheld Bidet Sprayer
A handheld bidet sprayer adds real value to any bathroom. First, it improves hygiene. Water cleans the skin more fully than dry paper alone. Second, it cuts down on toilet paper use. Many households report using far less paper after the switch. Third, it is kind to people with limited movement. Seniors and parents with small children often find it easier than twisting and reaching. Fourth, it saves money over time. Fewer paper products and fewer plumbing clogs mean lower bills.
The sprayer also helps beyond personal use. It works well for rinsing cloth diapers before they go into the wash. It cleans the inside of the toilet bowl fast. Pet owners use it to wash muddy paws in the tub. Because the spray is controlled by a simple lever, you can adjust the pressure for each task.
The device travels well, too. The whole kit weighs about a pound, so renters can take it from one apartment to the next. Installation leaves no holes in the wall when you use a tank-mounted holder. Landlords rarely object to it because nothing permanent changes. Some families even keep a spare kit for a second bathroom or for the RV. In older homes with limited bathroom space, the slim sprayer fits where a full bidet seat would not.
Tools and Parts You Need Before You Start: Handheld Bidet Sprayer Installation Guide Usa
Gather everything before you turn a single wrench. You will need the handheld bidet sprayer kit itself. A standard kit includes the sprayer head, a flexible hose, a T-adapter valve, a holder, and a small roll of plumber’s tape. Beyond the kit, you need an adjustable wrench and a towel or small bucket. A flashlight helps if the shutoff valve sits in a dark corner behind the tank.
Check your bathroom first. Look at the water supply line that feeds the toilet tank. Most American toilets use a 7/8-inch fill valve connection with a 3/8-inch or 1/2-inch supply line. Almost all sprayer kits fit these standard sizes. If your supply line is old, cracked, or very stiff, plan to replace it. The EPA’s WaterSense program offers guidance on efficient bathroom fixtures and water use that is worth reading before you buy.
How to Choose the Right Sprayer
Sprayers come in two main types. The most common type uses a T-adapter that splits water from the toilet supply line. This type is easy to install and needs no changes to the wall. The second type replaces the toilet’s fill valve with a built-in sprayer valve. It costs more but looks cleaner.
Material matters. Stainless steel sprayers last longer and resist rust. Plastic sprayers cost less but may crack after a few years. The hose should be braided stainless steel rather than plain plastic. Braided hoses handle pressure changes better and last longer. Look for a sprayer head with a lever that has a smooth, firm feel. A good lever lets you control the water pressure with one finger.
Also check the holder. Some holders clamp to the toilet tank. Others mount on the wall with screws. Tank-mounted holders are easier. Wall-mounted holders look tidier but need a drill and wall anchors. Retailers such as Home Depot and Lowe’s stock a wide range of kits, so you can compare models and read buyer reviews.
Step-by-Step Handheld Bidet Sprayer Installation
Follow these steps in order. The whole job usually takes 30 to 60 minutes.
Step 1: Turn Off the Water Supply
Find the shutoff valve on the wall behind the toilet. Turn it clockwise until it stops. Flush the toilet once to empty the tank. The tank will not refill because the water is off. Hold the flush handle down for a few extra seconds to let the bowl drain a little too.
Step 2: Remove the Old Supply Line
Place a towel and a small bucket under the tank. Use the adjustable wrench to loosen the nut that connects the supply line to the bottom of the toilet tank. Water left in the line will drip out. Let it drain into the towel. Then unscrew the supply line from the shutoff valve on the wall.
Step 3: Install the T-Adapter
Wrap plumber’s tape around the threads of the toilet fill valve, going clockwise two or three times. Screw the T-adapter onto the fill valve by hand, then give it one final snug turn with the wrench. Do not overtighten. Overtightening can crack the plastic fill valve and cause a leak.
Step 4: Reconnect the Supply Line
Attach the old supply line (or a new one) to the bottom outlet of the T-adapter. Tighten it by hand, then snug it lightly with the wrench. Make sure the line is not twisted or kinked. A kink can restrict water flow to the tank.
Step 5: Connect the Sprayer Hose
Wrap plumber’s tape around the side outlet of the T-adapter. Screw the sprayer hose onto that outlet. Hand-tighten first, then one light turn with the wrench. Attach the other end of the hose to the sprayer head in the same way.
Step 6: Mount the Holder
If your kit uses a tank-mounted holder, slide it over the edge of the toilet tank. The tank lid holds it in place. If your kit uses a wall-mounted holder, hold it against the wall, mark the screw holes, drill small pilot holes, push in the anchors, and screw the holder on. Place the holder within easy reach of the toilet but away from where elbows may bump it.
Step 7: Turn the Water Back On and Test
Turn the shutoff valve counterclockwise slowly. Watch every connection for drips. Flush the toilet and let the tank refill. Then pick up the sprayer and aim it into the bowl. Squeeze the lever gently. The spray should start soft and grow stronger as you press harder. Check all connections once more while the sprayer runs. Tighten anything that weeps.
Detailed fixture installation guides from makers such as Moen, Delta Faucet, and Kohler follow the same careful approach to valves and seals. If your kit brand publishes its own guide, read it alongside these steps.
Cost and Price
A handheld bidet sprayer kit costs between 25 and 80 dollars in most US stores. Basic plastic kits sit at the low end. Stainless steel kits with braided hoses sit at the high end. Premium models with built-in valves can reach 100 dollars or more.
If you hire a plumber, add 75 to 150 dollars for labor. Most plumbers charge a minimum visit fee even for a small job. Doing it yourself costs only the kit and maybe a new supply line, which runs about 10 dollars. There are no permit fees for this work in most cities because it counts as a simple fixture change.
Care and Upkeep
A sprayer needs little care. Wipe the head and hose once a week with a soft cloth. Hard water can leave white mineral buildup on the sprayer holes. Soak the head in a bowl of white vinegar for 30 minutes to dissolve the buildup. Rinse it well afterward.
Check the hose and connections every few months. Look for rust spots, fraying, or slow drips. Replace a braided hose every five to seven years as a safety measure, even if it still looks fine. Always turn off the small valve on the T-adapter when you travel or leave the house for several days. A burst hose is rare, but an open supply line under constant pressure adds risk.
Homes with hard water face more buildup. If your area has very hard water, a whole house water filter system may help. For now, replacing the best faucet water filter reviews 2026 usa guidance also applies to bathroom water quality. Also, if your toilet struggles to refill the tank after you flush, read about the best toilet for low water pressure usa to see whether your plumbing needs attention. Leak prevention matters too: a best water leak detector for water heater usa near the bathroom can alert you to a dripping supply line before damage spreads.
How often should I replace the sprayer?
The sprayer head itself can last 10 years or more with basic care. Replace the rubber washer inside the hose ends if you ever notice a drip at a connection point. Washers cost only a few cents and stop most small leaks. If the lever spring weakens and water keeps trickling after you release it, replace the head. A weak spring can let water run unnoticed and raise your bill.
Safety Tips
Safety is simple but worth stressing. Never leave the sprayer lever stuck in the on position. Let it go so the spring closes the valve. Always close the T-adapter shutoff valve after each use if your kit has one. Many kits include a small shutoff for this exact purpose.
Do not aim the sprayer at electrical outlets or switches. Keep the hose away from hot pipes and sharp edges. If you smell a sour odor from the hose, run the sprayer for a full minute to flush out standing water. Water that sits in a hose for days can grow bacteria.
If your bathroom floor stays wet after use, mop it up. A wet tile floor is a slip hazard. Teach children to ask an adult before using the sprayer. The water pressure can surprise a small child.
Frequently Asked Questions
How long does a handheld bidet sprayer installation take?
Most first-time installers finish in 30 to 60 minutes. The hardest part is reaching the shutoff valve behind the toilet. If your supply line is corroded and hard to remove, allow extra time.
Do I need a plumber to install a handheld bidet sprayer?
No. A standard kit is designed for homeowners. You need only an adjustable wrench and plumber’s tape. Call a plumber only if your shutoff valve is broken or your supply line is too old to reuse.
Will a bidet sprayer damage my toilet or plumbing?
No, when installed correctly. The T-adapter divides water flow without changing pressure to the tank. Follow the kit instructions, use plumber’s tape on the threads, and do not overtighten the connections.
Can I install a sprayer in a rental apartment?
Usually yes, since the kit installs on the existing supply line and can be removed later. But check your lease first. Some landlords restrict plumbing changes. Keep the original parts so you can restore the toilet when you move out.
How much water does a handheld bidet sprayer use?
Very little. A typical spray lasts 10 to 20 seconds and uses about half a gallon. Because you use far less toilet paper, most homes come out even or ahead on total water use.
Which sprayer pressure setting should I use?
Start low. Squeeze the lever gently and increase slowly until the spray feels comfortable. High pressure is useful for cleaning the bowl but not for personal use. A filtered water line, such as one discussed in Aquasana’s home water guides, can also make the spray gentler on skin.
A Final Word
A handheld bidet sprayer is one of the simplest bathroom upgrades you can make. The parts are cheap, the tools are basic, and the steps are clear. Take your time with each connection, test for leaks before you finish, and enjoy the comfort and savings. Weekend project guides from This Old House and Family Handyman cover hundreds of similar small upgrades, and this one ranks among the easiest.
References
Aquasana. (n.d.). Water filtration systems. https://www.aquasana.com Delta Faucet. (n.d.). Kitchen and bathroom faucets. https://www.deltafaucet.com Family Handyman. (n.d.). DIY home repair and maintenance. https://www.familyhandyman.com Kohler. (n.d.). Bathroom and kitchen fixtures. https://www.kohler.com Lowe’s. (n.d.). Home improvement products. https://www.lowes.com Moen. (n.d.). Faucets and plumbing fixtures. https://www.moen.com The Home Depot. (n.d.). Home improvement products. https://www.homedepot.com This Old House. (n.d.). Home renovation guidance. https://www.thisoldhouse.com U.S. Environmental Protection Agency. (n.d.). Protecting human health and the environment. https://www.epa.gov
Was this guide helpful?

About Robert Taylor
The My Garden US editorial team writes practical, in-depth home and garden guides for American homeowners — tested advice, no fluff.
You May Also Like
Best Carbon Filter for Chlorine Removal USA: A Complete Home Guide
September 30, 2026 0 views
Permeate Pump for RO System Reviews USA: A Clear Buyer Guide
June 11, 2026 0 views
Sulfur Smell in Well Water Filter Solution: A Complete Guide
March 14, 2026 0 views