
A drip irrigation system is one of the best tools a gardener can own. It puts water right at the roots, saves water, and keeps leaves dry. But it does not take care of itself. Without a steady drip irrigation maintenance checklist for garden owners to follow, small problems grow into dead plants and wasted water. This guide gives you a full checklist, season by season and step by step, so your system keeps working for years.
Why It Matters
Drip systems fail quietly. A hose line gets buried under mulch. An emitter clogs with dirt or hard water. A fitting pops loose after a freeze. Each problem is small on its own. Together they starve plants of water while the timer keeps running. You pay for water that never reaches the roots.
A regular drip irrigation maintenance checklist for garden beds catches these problems early. Ten minutes with a checklist saves hours of repair work later. It also saves money. A drip system that runs clean uses far less water than sprinklers or hand watering. The United States EPA notes that drip and other low-volume methods cut outdoor water waste sharply. Keeping yours in good shape protects that saving.
Know the Parts of Your System: Drip Irrigation Maintenance Checklist for Garden
Before you start the checklist, know what you are looking at. Most home drip systems have the same basic parts.
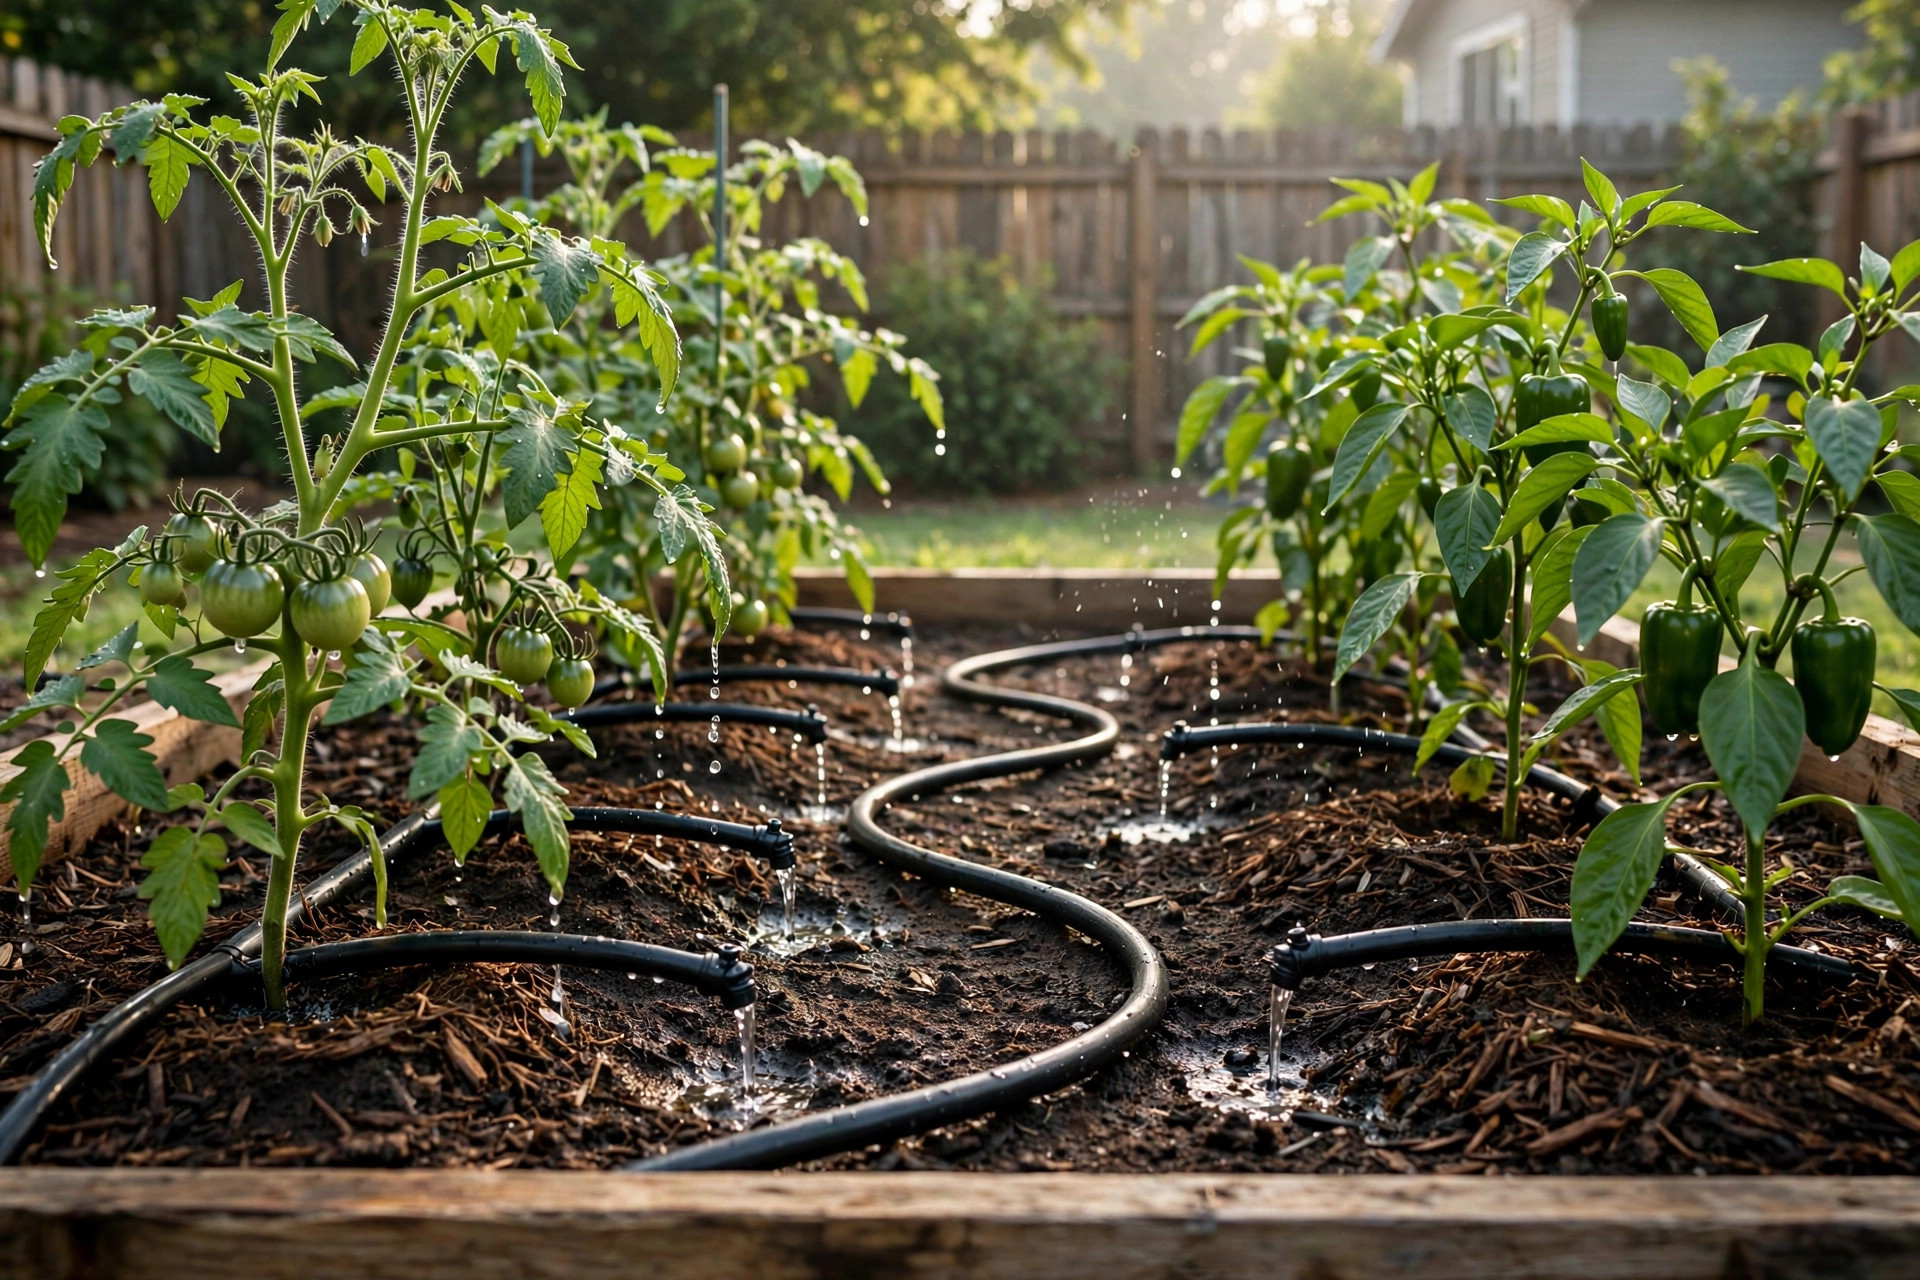
– Backflow preventer. Stops garden water from flowing back into the house line. – Filter. Catches sand, grit, and scale before they reach the emitters. – Pressure regulator. Keeps line pressure steady, usually around 25 pounds per square inch. – Main tubing. The half-inch pipe that carries water around the bed. – Emitters or drip line. Small outlets that let water out drop by drop. – Stakes, elbows, tees, and end caps. Holders and connectors that keep the layout in place.
When you built your setup from a drip irrigation kit for raised beds, you may already know these parts. If a landscaper installed it, walk the line once with this list and find each piece. You cannot check what you cannot find.
The Spring Start-Up Checklist
Spring is the most important season for drip care. The system has sat idle all winter. Pipes may have shifted. Rodents may have chewed a line. Run through this list before the first big watering.
1. Open the main valve slowly. Turn it on partway and let pressure build up over a minute. Fast pressure can blow fittings apart. 2. Walk every line. Look for cracks, chewed spots, and crushed tubing where tools or feet pressed it down. 3. Flush the lines. Open the end caps and let water run for one or two minutes. You will see dirt, silt, and insect bits wash out. Close the caps when the water runs clear. Guides from The Spruce suggest flushing at least once a year, and spring is the time to do it. 4. Clean the filter. Take out the filter screen and rinse it under a strong stream. If it is torn or warped, replace it. A clean filter is the cheapest insurance in the whole system. 5. Check the pressure regulator. Feel the line. If it is drum-tight and fittings strain, the regulator may have failed. A cheap pressure gauge on a hose bib tells you the truth. 6. Test every emitter. Run the zone for ten minutes. Watch each plant. You should see wet circles of soil around every emitter. Dry spots mean a clog or a cut line. 7. Adjust stakes and positions. Emitters should sit at the base of each plant, not a foot away. New growth since last fall may need a stake moved.
This spring routine is the heart of any drip irrigation maintenance checklist for garden use. It takes half an hour on a small garden. It finds nearly every problem.
The Mid-Season Checklist
Once the system runs daily, check it monthly during the growing season. These checks are shorter.
– Look for dry plants. Walk the beds while the system runs. A plant that wilts while its neighbors thrive points to a blocked emitter. – Unclog emitters. Pull a blocked emitter and soak it in vinegar for an hour, or replace it. New emitters cost little. Advice from Bob Vila and other home guides favors replacement over long fights with hard-water scale. – Watch for pooling. Water that puddles on the surface means an emitter flows too fast or a line broke. Fix the break or swap in a lower-flow emitter. – Check timers and batteries. If your valve runs on batteries, change them each spring and check the display monthly. A dead battery can leave a zone stuck open. – Trim around lines. Grass and weeds creep over tubing and hide it. Clear a hand-width strip so you can see what the system is doing. – Rinse the filter again. In dusty or sandy soil, the filter loads up fast. A quick rinse takes one minute and keeps flow strong.
This is also the time to rethink spacing if plants changed. If you added new beds, read up on drip emitter spacing for vegetable garden rows before you stretch the old line too far.
The Fall Shutdown Checklist
In cold climates, water left in the lines freezes and splits tubing. A fall shutdown belongs on every drip irrigation maintenance checklist for garden owners who see hard frost.
1. Shut off the water supply to the drip zones. 2. Drain the lines. Open the end caps and the lowest fittings. Let gravity do the work. Tip up low spots by hand. 3. Remove the timer and pressure regulator if you can, and store them indoors. Freezing kills seals and valves. 4. Cap open ends so insects and mice do not move in over winter. 5. Note repairs for spring. Keep a small card in your tool box. Write down every broken part you found. Buy the replacements over winter when prices are calm.
In warm climates with no hard freeze, skip the full drain. Run the monthly check through the year instead. Filters still need cleaning, and emitters still clog.
What to Look For When You Buy Replacement Parts
Drip parts are not all the same. Keep these points in mind when you shop for spares, whether at The Home Depot or Lowe’s.
– Match the tubing size. Half-inch main line parts do not fit three-quarter-inch parts. Bring a cut piece to the store. – Match the flow rate. Emitters come in half, one, and two gallons per hour. Match new emitters to the old ones so the bed waters evenly. – Buy pressure-compensating emitters for slopes. They give the same flow at the top and bottom of a hill. – Choose UV-rated tubing. Cheap pipe turns brittle in the sun within a season. Good tubing lasts years. – Keep a repair kit. A few extra emitters, couplings, end caps, stakes, and a short coil of tubing will fix most problems on the spot. Family Handyman lists this kind of spare kit among the first things a drip owner should keep on hand.
Brand names matter less than fit and quality. Many makers follow the same sizes, but not all do. Test-fit new parts at the store if you can.
Cost and Price
Maintenance costs very little. A filter screen costs a few dollars. Emitters cost pennies to a dollar each. A coil of half-inch tubing and a bag of fittings cover a whole season of repairs for less than the price of one bag of fertilizer. Compare that with the cost of replacing a dead shrub or a row of stunted tomatoes. The checklist pays for itself the first time it catches a clog before a heat wave.
If your system is old and brittle all over, a full rebuild of one bed may run from thirty to eighty dollars in parts, depending on size. That is still less than one season of hand-watering labor in time alone. Stores like Gardener’s Supply Company sell complete drip irrigation kit for raised beds sets that include new filters and regulators, which makes a rebuild simple.
Care and Upkeep Through the Year
Good habits do half the maintenance work for you.
– Mulch over the lines. Three inches of mulch shades tubing, slows sun damage, and keeps emitters at a steady temperature. – Keep a map. Sketch each bed with line routes and emitter spots. When something goes wrong next year, the map shows you where to dig. – Do not till over drip lines. Mark buried lines with small flags before you turn soil in spring. – Watch water quality. Well water with iron or calcium clogs faster than city water. If your water is hard, check emitters twice a month instead of once. – Flush after fertilizer. If you inject fertilizer through the system, flush the lines with clean water right after. Fertilizer salts crust inside emitters.
Quality hand tools make the work easier. A sharp pair of Fiskars pruners keeps plant growth away from lines, and Corona Tools cutters trim tubing cleanly for tight repairs.
Safety
Drip systems are low risk, but a few rules keep them that way.
– Shut off water before you cut or open a line. Pressurized tubing can snap and sting. – Use a backflow preventer. It keeps garden chemicals out of the drinking water. This is not optional. Many local codes require it. – Bury or cover supply lines where people walk. Trips cause most drip-system injuries. – Keep chemicals away from open ends. Never leave an open line lying in a puddle of fertilizer or pesticide. – Read your timer manual. A valve stuck open overnight can flood a bed and wash out soil. Know how to shut it by hand.
The safe habits above take no extra time. They belong on the list right beside the filter check.
FAQ
How often should I clean the filter? At least once in spring and once mid-season. If you use well water or live in a dusty area, clean it every month while the system runs.
How long do drip emitters last? Good emitters last three to five years. Cheap ones may last one season. Hard water shortens life. When more than a few clog at once, replace them all.
Can I leave the system running while I am on vacation? Yes, that is what timers are for. But run the full mid-season checklist before you leave. Change timer batteries, flush the lines, and ask a neighbor to glance at the beds once.
Why is one end of my line drier than the other? Pressure drops along a long run. Keep runs under about two hundred feet for half-inch tubing, or split the zone into two runs. Pressure-compensating emitters help on slopes and long lines.
Should I bury drip tubing? A light covering of mulch is fine. Deep burial makes checks and repairs hard and invites roots to grow into emitters. Keep lines where you can see and reach them.
Do I need to winterize in a mild climate? If your ground never freezes hard, no. Keep the monthly checks going. Drain and store the timer only if frosts below freezing reach it.
A Final Word
A drip irrigation maintenance checklist for garden beds is not fancy. It is a walk, a rinse, a look, and a note. Spring start-up, monthly mid-season checks, and a fall shutdown cover the whole year. Pair this routine with solid how to install raised bed irrigation know-how and the right drip emitter spacing for vegetable garden layout, and your system will water well for many seasons. Seeds and plants from a trusted supplier like Burpee deserve steady water. Give them that, and the garden will pay you back at harvest.
References
Bob Vila. (n.d.). Home improvement advice. https://www.bobvila.com Burpee. (n.d.). Seeds, plants, and gardening supplies. https://www.burpee.com Corona Tools. (n.d.). Garden and landscape tools. https://www.corona-tools.com Family Handyman. (n.d.). DIY home repair and maintenance. https://www.familyhandyman.com Fiskars. (n.d.). Garden and cutting tools. https://www.fiskars.com Gardener’s Supply Company. (n.d.). Gardening tools and supplies. https://www.gardeners.com Lowe’s. (n.d.). Home improvement products. https://www.lowes.com The Home Depot. (n.d.). Home improvement products. https://www.homedepot.com The Spruce. (n.d.). Home and garden advice. https://www.thespruce.com U.S. Environmental Protection Agency. (n.d.). Protecting human health and the environment. https://www.epa.gov
Was this guide helpful?

About Lisa Anderson
The My Garden US editorial team writes practical, in-depth home and garden guides for American homeowners — tested advice, no fluff.
You May Also Like
How to Divide Perennials in Fall
January 24, 2026 0 views
Best Garden Kneeler With Handles Reviews: A Complete Buying Guide
January 15, 2026 0 views
Finding the Best Garden Hose Reel for RV Life
June 3, 2026 0 views