
Introduction
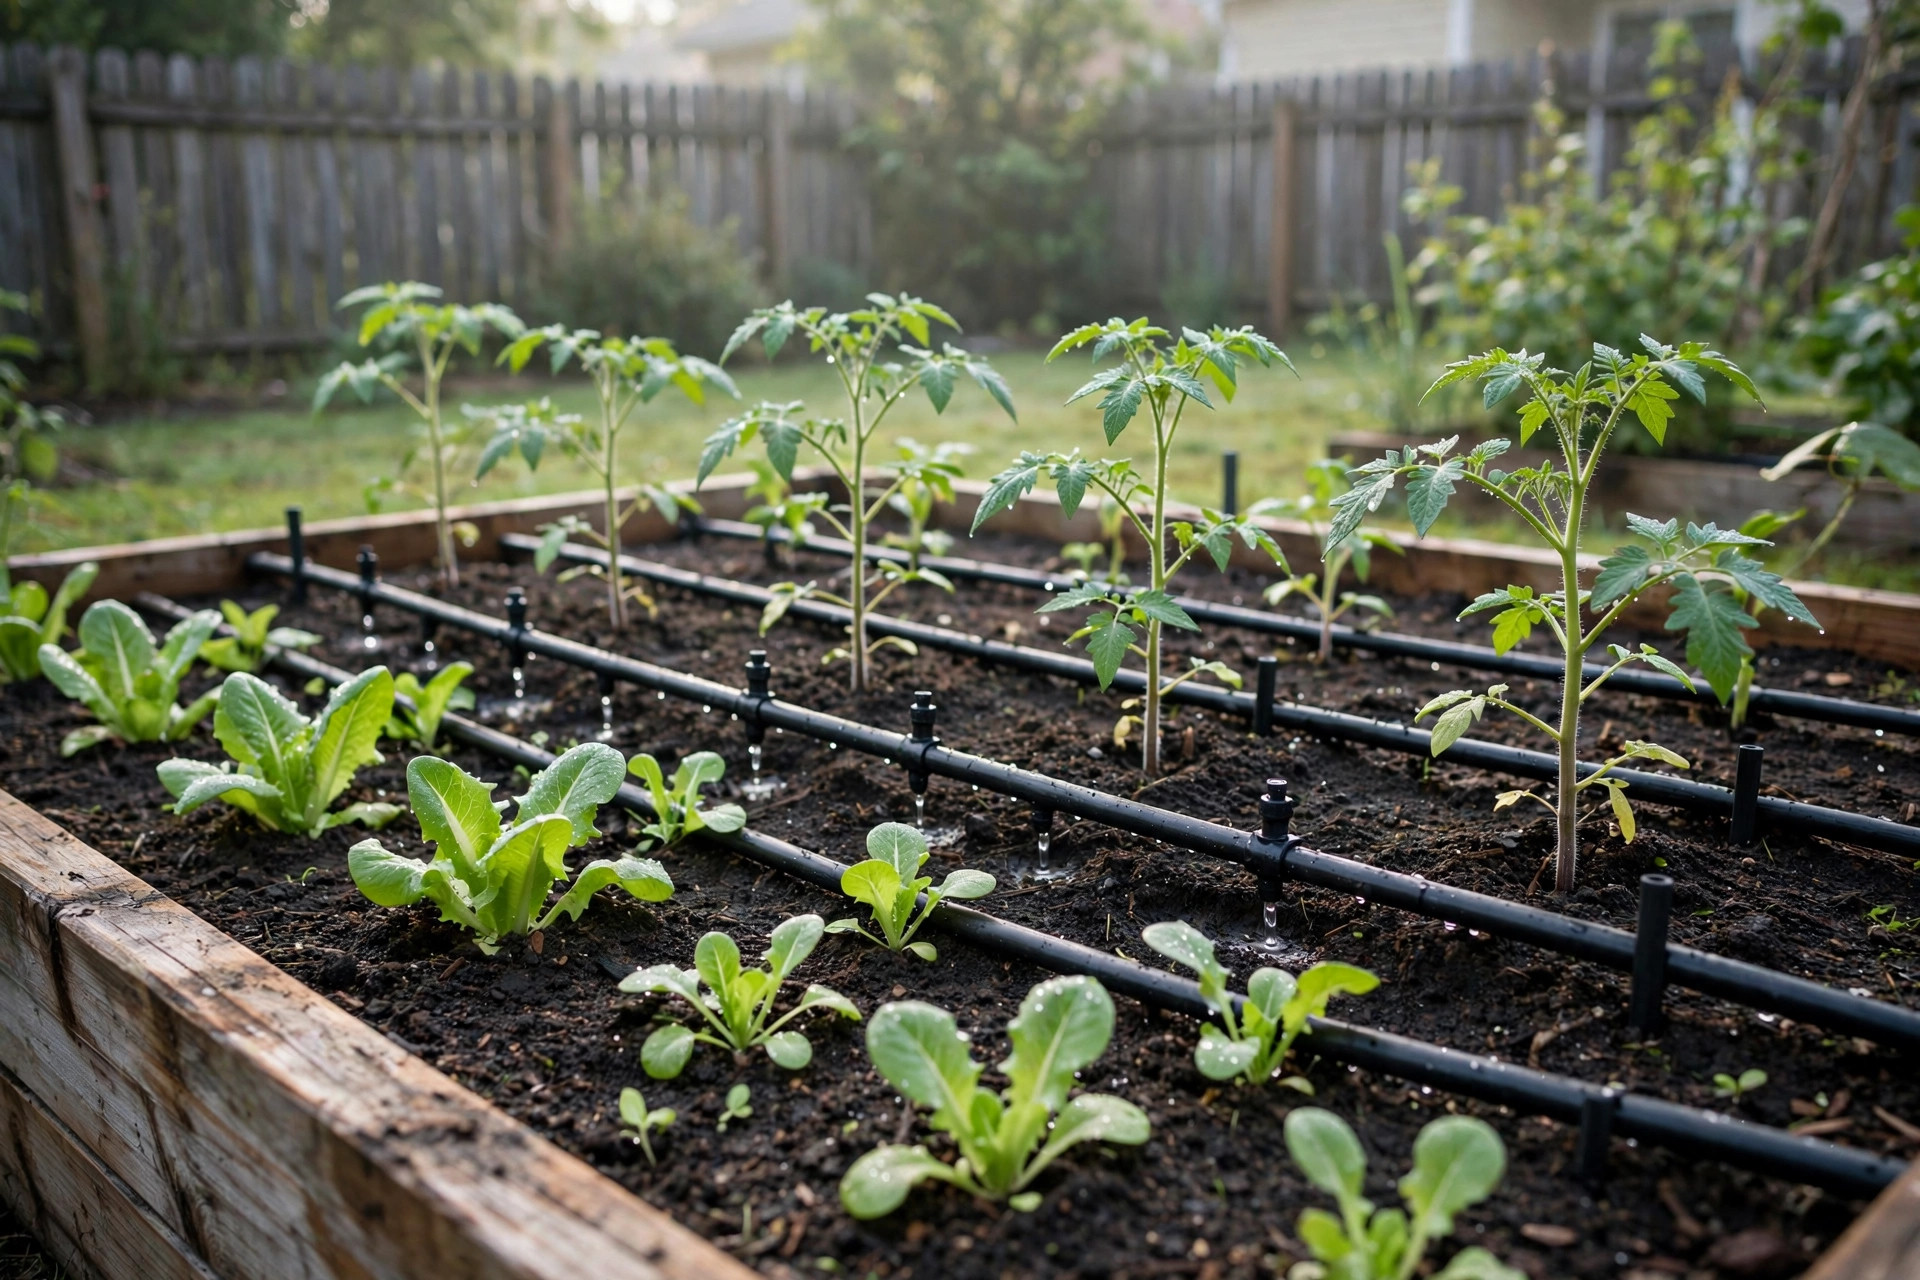
Getting the drip emitter spacing for vegetable garden beds right is one of the simplest ways to grow healthier plants. A drip system places water at the roots, drop by drop. But if the emitters sit too far apart, dry spots form between them. If they sit too close, water pools and roots suffer. The right spacing gives every plant a steady drink without waste.
Many gardeners set up a drip system and then guess at the spacing. They lay the line, open the valve, and hope for the best. A little planning works better. This guide explains how far apart to place emitters for common vegetables. It covers soil types, flow rates, and line layouts. It also covers cost, care, and safety. By the end, you will know exactly how to space your emitters for a full season of strong growth.
Why Emitter Spacing Matters: Drip Emitter Spacing for Vegetable Garden
Water does not travel far sideways in soil. It moves mostly downward. Each emitter forms a small wet zone under the soil surface, shaped like a ball or bulb. The space between two emitters must let their wet zones overlap. When they overlap, the whole row stays evenly moist. When they do not, dry gaps appear. Plants in those gaps grow slow and weak.
Correct spacing saves water too. Water that runs past the roots is lost. Water that never reaches the roots is also lost, because the gardener runs the system longer to compensate. A well-spaced line puts most of the water where roots feed. That means lower water bills and fewer visits to the faucet.
Good spacing also cuts disease. Wet leaves invite blight, mildew, and rot. Drip lines keep leaves dry. But poor spacing can still cause trouble. Emitters placed too close to the stem can soak the crown and rot it. Even spacing keeps moisture in the root zone, not on the plant.
The Basic Spacing Rules
General Rules of Thumb
Three common spacings cover most vegetable gardens: 6 inches, 9 inches, and 12 inches. These numbers describe the distance between emitters along the line, not between rows. For closely planted crops like lettuce and carrots, use 6-inch spacing. For average beds with peppers, beans, and herbs, use 9-inch spacing. For large plants like tomatoes, squash, and cucumbers, use 12-inch spacing.
These are starting points, not laws. Your soil may ask you to change them. Test your soil after a watering cycle. Dig a small hole 4 inches from the line and look for moisture. If it is dry, move emitters closer or run the water longer.
Match Spacing to Your Soil
Soil type changes how water spreads. Sandy soil drains fast. Water drops straight down and spreads only a few inches sideways. In sand, space emitters 6 inches apart so the wet bulbs join. Loam is the middle ground. Water spreads evenly down and out. Nine inches works well in most loams. Clay holds water and spreads it wide. A single emitter can wet a zone a foot across. Twelve-inch spacing often suits clay.
If you are unsure of your soil type, do a squeeze test. Take a handful of moist soil and squeeze it. If it falls apart, it is sandy. If it holds a loose ball that crumbles when poked, it is loam. If it holds a firm ball, it is clay. Adjust your emitter spacing to match the result.
How to Choose Your Emitters
Flow Rates Explained
Emitters are rated in gallons per hour, written as GPH. The three most common rates are 0.5, 1, and 2 GPH. A 0.5 GPH emitter drips slowly and suits clay or shade. A 1 GPH emitter is the all-round choice for vegetable beds. A 2 GPH emitter suits sandy soil or large plants that drink fast.
Flow rate and spacing work together. A slow emitter in sand may never wet the gap between emitters, even at 6-inch spacing. A fast emitter in clay may flood a wide zone at 12-inch spacing. Pair a slow rate with closer spacing, or a fast rate with wider spacing. When in doubt, use 1 GPH emitters at 9-inch spacing in loam. This combination suits most home gardens.
Many gardeners start with garden watering guides to learn the basics of drip irrigation before they buy parts.
Emitter Types
There are three main types. Inline drip line has emitters built into the tubing at fixed intervals. It is sold on rolls with spacing marked on the package. This is the simplest choice for long straight rows. Just roll it out and plant beside it.
Individual button emitters punch into blank tubing. You place each one exactly where you want it. This suits beds where plants sit at odd distances. Pot or spike emitters are a small form of button emitter pushed into the soil near each plant.
Flag emitters twist apart for cleaning. They cost a little more, but they last longer in hard water. If your water leaves white scale on fixtures, flag emitters may save you time.
Quality irrigation supplies and drip irrigation kits are widely available at home improvement stores, which makes starting easy.
Laying Out the Lines
Rows and Loops
For single rows, run one line down the center of the row. Space emitters along it by the rules above. For wide beds, run two or three lines, each 12 to 18 inches apart. The wet zones from parallel lines should overlap just like the zones along one line.
Tomatoes and other large plants do well with a loop. Circle the tubing around each plant about 8 inches from the stem. Place three or four emitters on the loop. This waters all sides of the root ball evenly.
Always place emitters a few inches from the stem, not right against it. Water touching the crown of the plant can cause rot. Six to eight inches out is a safe distance for most vegetables.
Raised Beds vs. In-Ground Rows
Raised beds warm early and drain fast. The loose soil mix acts like loam or sand. Use 6- or 9-inch spacing in raised beds. Many gardeners run two lines per 4-foot-wide bed, one down each side of the plant rows. Hand tools for preparing these beds are covered in many gardening tools references.
In-ground rows in native soil vary more. Test your soil first with the squeeze test. Clay gardens can use wider spacing, but they need slower flow so water does not run off. Sandy gardens need close spacing no matter what you grow.
If you are also watering by hose in parts of the garden, see our guide on the best garden hose for large yards for hand-watering options.
Spacing Chart for Common Vegetables
The chart below gives starting spacing for popular crops. All assume 1 GPH emitters in average loam soil. Move one step closer in sand and one step wider in clay.
– Tomatoes: 12 inches apart, one line per row – Peppers: 9 inches apart, one line per row – Cucumbers: 12 inches apart, one line per row – Squash and zucchini: 12 inches apart, one line per row – Beans: 9 inches apart, one line per row – Lettuce and greens: 6 inches apart, two lines per wide bed – Carrots and radishes: 6 inches apart, two lines per wide bed – Onions: 6 inches apart, two lines per wide bed – Herbs (basil, parsley): 9 inches apart, one line per row – Potatoes: 9 inches apart, one line per row – Corn: 12 inches apart, one line per row – Melons: 12 inches apart, one line per row with loops
After planting, run the system for 30 minutes. Then dig between two emitters and check. Moist soil from line to line means the spacing is right. Dry soil means you need closer spacing or a longer run time.
Cost and Price
A drip system is one of the cheapest garden upgrades. Inline drip line costs about 10 to 30 cents per foot. A 100-foot roll with 9-inch emitter spacing covers a large bed for under 20 dollars. Button emitters cost 30 cents to a dollar each. A small raised bed may need only 20 to 40 emitters.
You will also need a filter, a pressure regulator, and a timer. A simple filter and regulator set costs 15 to 30 dollars. A battery timer costs 25 to 50 dollars. Stakes and fittings add another 10 to 20 dollars. A full starter kit for one or two beds often totals 60 to 120 dollars.
Compare that with hand watering. A season of daily watering can take 10 to 15 minutes a day. Drip pays for itself in saved time alone. It also uses 30 to 50 percent less water than sprinklers, according to independent product testing and many home improvement advice sources. That shows up on the water bill.
Care and Upkeep
Flush the Lines
At the start of each season, open the end caps and flush the lines. Let water run for two minutes. This pushes out dirt, algae, and mineral flakes that settled over winter. Then close the caps and check each emitter. Replace any that drip weakly or not at all.
Use a Filter
A 120- or 150-mesh filter keeps sand and rust out of the emitters. Clean the filter screen once a month during the growing season. A clogged filter starves the whole system. This one habit prevents most drip problems.
Check for Damage
Walk the lines every few weeks. Look for chewed spots, kinked tubing, and popped emitters. Rodents and lawn tools are the two great enemies of drip line. Patch holes with a repair coupling. Replace chewed sections rather than taping them.
Winter Storage
In cold climates, drain the system before the first hard freeze. Open end caps, remove the timer, and let lines drain downhill. Store the timer and filter indoors. Frozen water splits tubing and cracks emitters. DIY project guides often include a winterizing checklist for outdoor water systems.
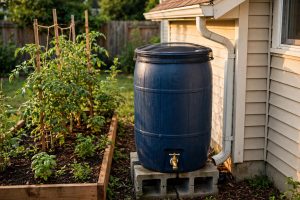
Many growers also keep a rain barrel for garden watering as a backup supply, though barrels need a pump or enough height to drive drip emitters.
Safety
Drip systems are safe, but a few cautions apply. Install a backflow preventer if your system connects to the house water line. This stops dirty garden water from flowing back into the drinking water. Many local codes require one. They cost little and screw on at the faucet.
Do not run fertilizer or chemicals through a drip system shared with drinking water lines without a proper backflow device. If you use a fertilizer injector, keep it on a separate line or use a strong air-gap backflow preventer. Wash your hands after handling fertilizer.
Keep emitters and tubing away from small children and pets. Some animals chew tubing. Bury lines an inch under mulch to hide them. Mulch also slows evaporation and keeps the soil cool.
Water quality matters for food safety. If you water with well water or pond water, have it tested. Water that is fine for flowers may carry germs that are not safe for leafy greens. City tap water is treated and safe for drip watering. Advice on garden supplies and hand tools for the garden can help you choose safe watering gear.
Frequently Asked Questions
How far apart should drip emitters be in a vegetable garden? Six to twelve inches apart along the line covers most cases. Use 6 inches for small crops in sandy soil, 9 inches for average beds in loam, and 12 inches for large plants in clay.
How many emitters does one tomato plant need? Two to four emitters per plant works well. Space them 12 inches apart around the plant in a loop, or run one line with 12-inch spacing down the row.
Can I use drip emitters with a soaker hose system? They are different systems, but they serve the same goal. If you are deciding between them, read /how-to-use-soaker-hose-effectively/ to compare watering methods before you buy.
How long should I run drip irrigation each day? Most vegetable beds need 30 to 60 minutes, two or three times a week, depending on heat and soil. Sandy soil needs shorter, more frequent runs. Clay needs longer, less frequent runs. Check the soil with your finger. Water when the top 2 inches are dry.
What GPH emitter is best for vegetables? One gallon per hour is the standard choice. Use 0.5 GPH in heavy clay and 2 GPH in very sandy soil or for large thirsty plants like squash.
Why are some of my emitters not dripping? The cause is usually a clog. Remove the emitter and rinse it. Check the filter. Flush the line. If your water is hard, soak clogged emitters in vinegar for an hour. Flag emitters can be twisted open and cleaned by hand.
A Short Final Word
Drip emitter spacing is not hard once you know the rules. Match the spacing to your plants and your soil. Test the wet zone with a trowel. Adjust as the season goes on. A few minutes of planning at setup time gives you months of even watering. Your plants will show the difference in strong stems, full leaves, and heavy harvests. For planting plans to go with your new watering layout, vegetable seeds and plants from trusted seed houses help you choose varieties that suit drip irrigation.
References
Bob Vila. (n.d.). Home improvement advice. https://www.bobvila.com Burpee. (n.d.). Seeds, plants, and gardening supplies. https://www.burpee.com Consumer Reports. (n.d.). Product reviews and ratings. https://www.consumerreports.org Corona Tools. (n.d.). Garden and landscape tools. https://www.corona-tools.com Family Handyman. (n.d.). DIY home repair and maintenance. https://www.familyhandyman.com Fiskars. (n.d.). Garden and cutting tools. https://www.fiskars.com Gardener’s Supply Company. (n.d.). Gardening tools and supplies. https://www.gardeners.com Lowe’s. (n.d.). Home improvement products. https://www.lowes.com The Home Depot. (n.d.). Home improvement products. https://www.homedepot.com The Spruce. (n.d.). Home and garden advice. https://www.thespruce.com
Was this guide helpful?

About James Carter
The My Garden US editorial team writes practical, in-depth home and garden guides for American homeowners — tested advice, no fluff.
You May Also Like
Drip Irrigation Maintenance Checklist for Garden
June 4, 2026 0 views
Cold Frame for Winter Gardening Reviews: What to Buy and How to Use It
July 3, 2026 1 views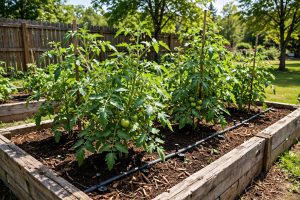
Best Garden Soil for Tomatoes Reviews: What Actually Grows the Best Crop
June 30, 2026 0 views