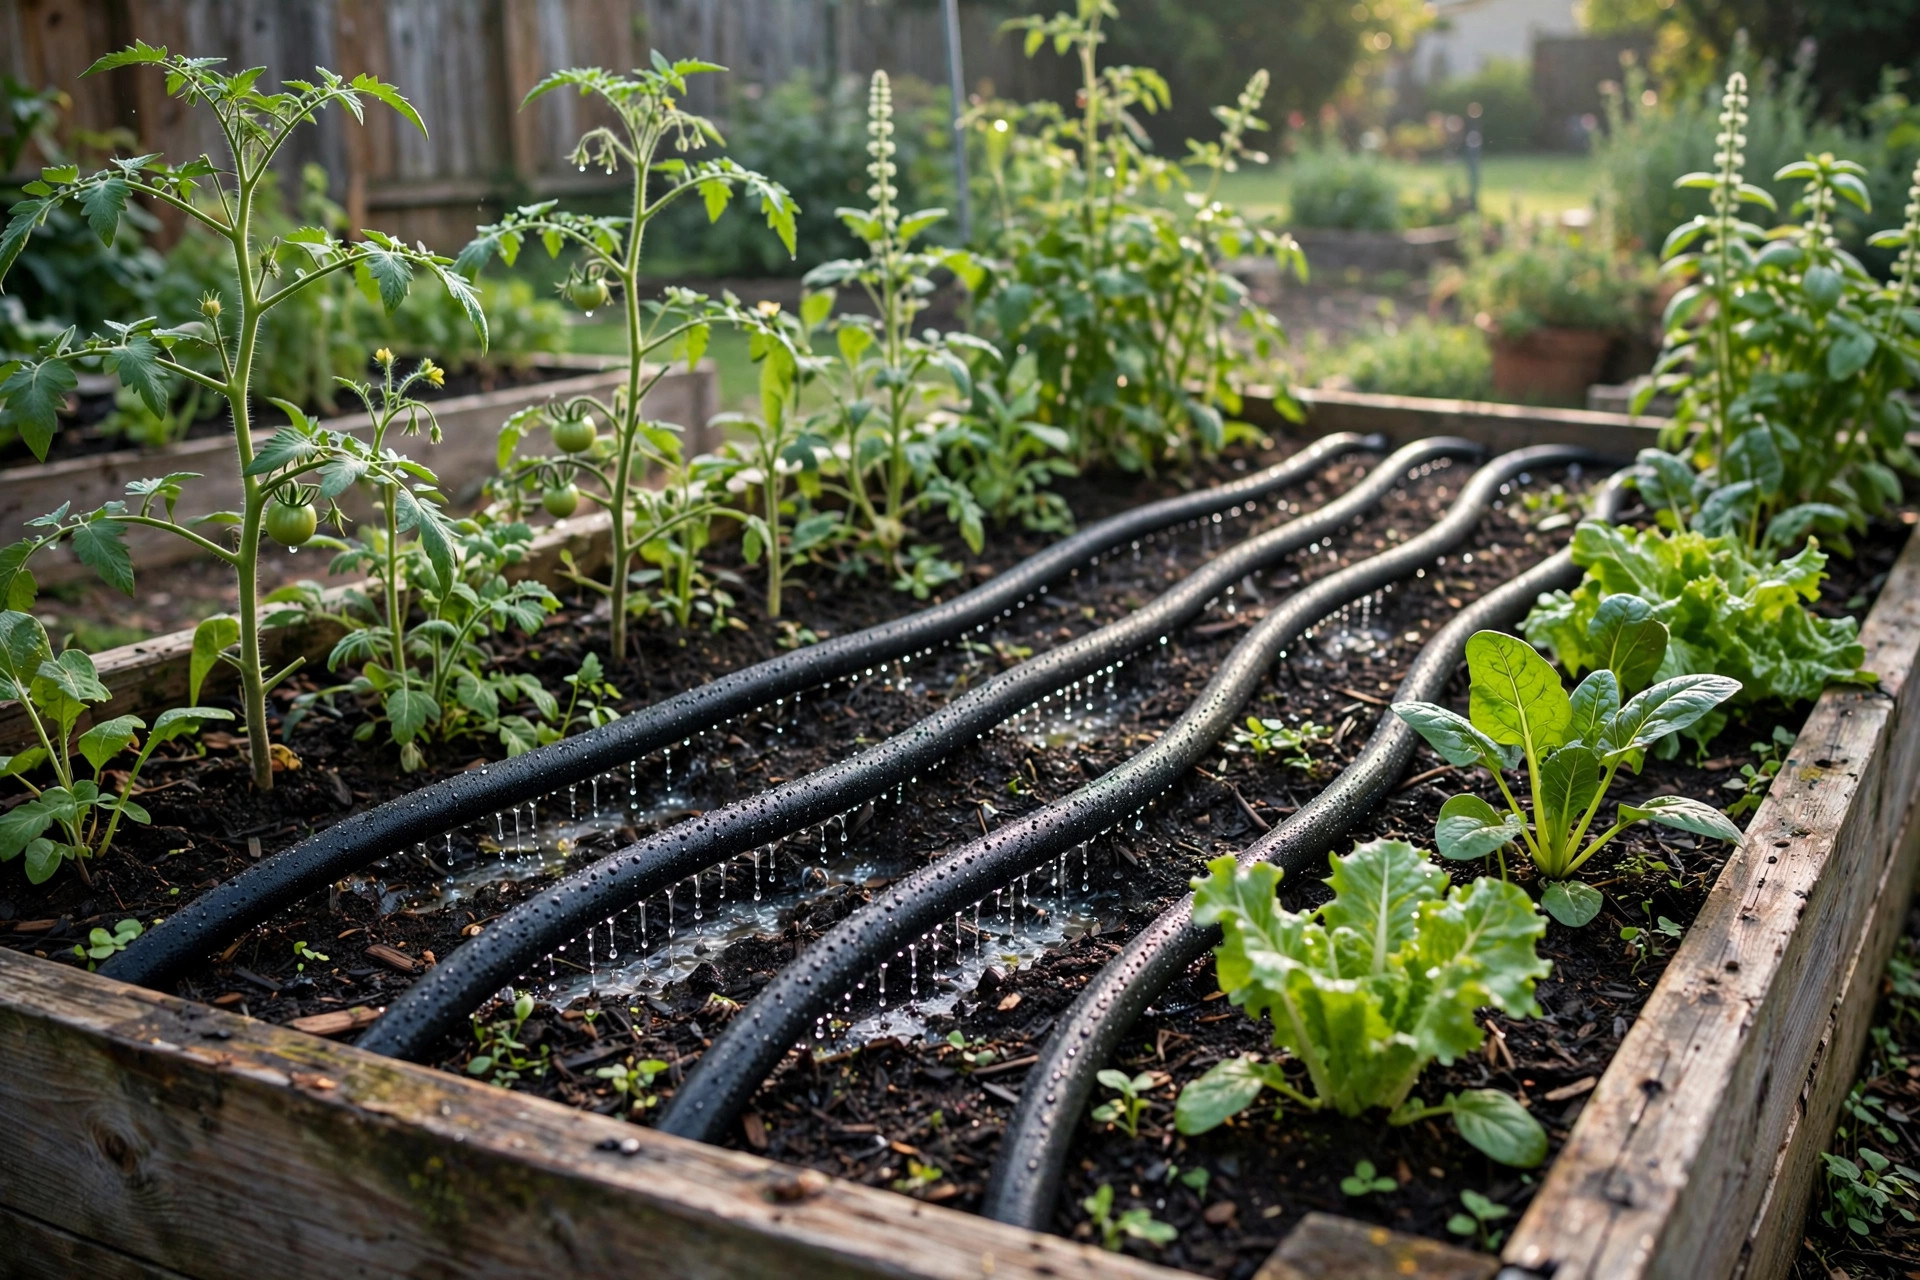

A soaker hose is one of the simplest tools a gardener can own. It is a flat or round hose with tiny holes along its length. Water seeps out of these holes at a slow, steady rate. When you learn how to use soaker hose effectively, you give your plants deep water with very little waste. No sprinklers spray the leaves. No puddles run off down the path. The water goes straight into the soil where the roots are. This guide explains the full method, from laying the hose to caring for it, so your garden gets the most from every gallon.
Why Soaker Hoses Matter
Water is the one resource every garden needs. Most home gardeners water with a handheld hose or a sprinkler. These methods wet everything at once. They soak the leaves, the paths, and the weeds. Much of the water evaporates in the sun before it ever reaches the roots. A soaker hose works the other way. It rests on the soil surface and lets water out slowly along its full length. The moisture moves down into the root zone instead of spreading across the surface.
There are several clear benefits to this approach. First, the leaves stay dry. Wet leaves invite disease. Many common garden problems, such as powdery mildew and blight, spread faster when foliage stays damp. A soaker hose keeps the water low, on the soil. Second, weeds get less help. When you water only the planted rows, the bare soil between rows stays drier, and fewer weed seeds sprout. Third, you save water. Studies of home irrigation often show that soaker hoses use far less water than sprinklers to give plants the same amount of moisture. That matters for your water bill and for local water supplies in dry months.
A soaker hose is also gentle. Young seedlings can be knocked flat by a strong spray from a nozzle. Tender transplants need steady moisture in their first weeks. The slow drip of a soaker hose will not disturb the soil or the plants. It suits vegetable beds, flower borders, hedges, and rows of berry bushes alike. If you are comparing watering tools, a soaker hose pairs well with a garden hose for large yards as the main supply line from the faucet to the beds.
What to Look for When Buying a Soaker Hose: How to Use Soaker Hose Effectively
Not all soaker hoses are the same. The basic choice is between two kinds of material. The most common is a porous recycled-rubber hose. Water weeps out through the entire wall of the hose. These are cheap and easy to find. The second kind is a flat fabric hose with small holes spaced along it. These lie flat on the ground and roll up neatly for storage.
Length matters. Soaker hoses come in 25, 50, 75, and 100 foot sizes. Water pressure falls as it travels along the hose. A hose that is too long may water the far end poorly. For most home beds, 50 feet is a good working length. If your garden is long, use two shorter hoses joined to a Y-splitter at the faucet rather than one very long hose.
Check the fittings. Good soaker hoses use standard garden hose threads so they connect to your faucet, a timer, or a rain barrel system without trouble. A washer inside the coupling stops leaks at the connection. Rubber washers wear out, so buy a small pack of replacements when you buy the hose.
Also look at the flow rate on the package. This tells you how many gallons per hour the hose gives off at a given pressure. Typical rates run from half a gallon to two gallons per foot per hour. You do not need an exact number, but it helps to know whether your hose is a fast or slow waterer when you set your timer.
How to Set Up a Soaker Hose the Right Way
Good results start with good placement. Follow these steps in order.
Start by watering the bed lightly with a regular hose. A dry bed soaks up the first water fast, and the soaker hose will not reach as far. Damp soil carries moisture sideways better.
Lay the hose on the soil surface in long rows, spaced 12 to 18 inches apart. For a wide bed, use two or three parallel runs joined with a connector. Keep the hose 2 to 4 inches away from the base of each plant. A light mulch layer over the hose is fine, but deep burial can block the pores.
Connect the hose to the faucet through a pressure regulator if you have one. Soaker hoses work best at low pressure, around 10 to 25 pounds per square inch. House faucets often give much more. High pressure makes the hose leak at the seams and shortens its life. A simple regulator costs little and protects the hose.
Turn on the water and walk the line. Look for spots that stay dry and spots that puddle. Move the hose a little until the wet line looks even. Let it run for an hour, then check with your finger how deep the water went. Push your finger into the soil next to the hose. You want moisture 6 to 8 inches deep for most vegetables and flowers. If the soil is only wet on top, run it longer. If you plan to automate, a review of battery operated hose timers can help you pick one that fits your faucet.
How Often and How Long to Water
This is where many gardeners go wrong. They run the hose too long and drown the roots, or too short and starve them. The right answer depends on your soil, your weather, and your plants.
In loam or clay soil, run the hose less often but longer. Clay holds water well. Two sessions per week of one to two hours each may be enough. In sandy soil, water drains fast, so run shorter sessions more often. Three or four short sessions per week work better there.
Watch the plants, not the clock. Stick your finger two inches into the soil the morning after watering. If it feels cool and damp, the timing is right. If it is soggy, cut back. If it is dry, add time. Most vegetable gardens need about one inch of water per week from all sources, rain included. Put an empty tuna can near the bed to see how much rain falls. Skip a watering after a good rain.
Morning is the best time to water. The soil takes up water before the heat of the day, and any splash on leaves dries fast. Evening watering is the second choice. Avoid midday watering when the sun is high and water evaporates quickly. If your water source is far from the beds, the right best garden hose for large yards as a supply line keeps pressure steady to the soaker line.
Types and Options Beyond the Basic Hose
Once the basic setup works, you can add options that make the system better.
Hose timers are the single best add-on. A simple mechanical or battery timer turns the water on and off by itself. You set the length and the start time, and the garden waters itself. This keeps the schedule steady even when you are busy or away. Good timers are sold wherever garden tools and supplies are sold.
Y-splitters let you run two zones at once. One side can feed the vegetable bed while the other feeds the flower border. A shut-off valve on each side lets you water one zone alone.
End caps with small drains help in cold weather. When winter comes, open the ends and let the water drain out. Water left inside can freeze and split the hose.
Some gardeners use drip tape instead of a soaker hose. Drip tape is thinner and cheaper for long rows of vegetables. It needs a filter and careful handling, though. For most home gardens, a standard soaker hose is easier to keep and reuse year after year.
Cost and Price: What You Can Expect to Pay
A soaker hose is one of the cheapest irrigation tools you can buy. A 25-foot hose often costs less than ten dollars. A 50-foot hose runs from ten to twenty dollars. Premium flat hoses with better fittings can cost a bit more. A pressure regulator costs about five to ten dollars. A basic hose timer costs fifteen to thirty dollars. Washers and connectors cost a few dollars for a pack.
The total cost for a small garden is often under forty dollars. Compare that with an installed sprinkler system, which can cost hundreds or thousands. The savings on your water bill add up too. Because a soaker hose wastes less water than a sprinkler, many gardeners see their summer water use drop, and the hose pays for itself in a single season.
Care and Upkeep Through the Season
A soaker hose needs little care, but a few habits will make it last longer.
Flush the hose once a month. Open the far end cap and run water through for a minute or two. This pushes out dirt and mineral bits that can clog the pores. If your water is hard, mineral buildup is the main reason hoses stop working well.
Cover the hose with two to three inches of mulch after setup. Mulch holds moisture in the soil and shields the hose from sun damage. Rubber hoses break down in strong sunlight over time. Mulch also hides the hose and keeps the bed looking neat.
In fall, drain and store the hose before the first hard freeze. Disconnect it from the faucet, open both ends, and let all the water out. Roll it in a loose coil, never a tight knot. Store it in a shed or garage where it stays dry.
Check the hose each spring before you lay it out. Look for cracks, split seams, and flat spots that will not round out. A small leak can be patched with a hose repair coupling. If the hose is brittle all along its length, replace it. A worn hose that leaks in the wrong spots wastes the water you are trying to save. Keep it in the shed with the rest of your gear, beside your garden gloves for thorn protection and hand tools.
Safety Tips for Garden Irrigation
Soaker hoses are safe tools, but a few cautions apply.
Never drink from a soaker hose. Rubber hoses can leach chemicals, and water sitting inside a warm hose can grow bacteria. Use the hose for the garden only.
If you use fertilizer through the hose, read the label first. Some liquid fertilizers work fine, but thick mixes can clog the pores. Flush the hose well after each feeding.
Watch your footing. A hose on the ground is a trip hazard, especially in low light. Cover it with mulch to mark its path. Turn off the faucet before you move the hose to a new bed, and never leave the water running when you leave the house without a timer.
In areas with water rules, check local limits. Some towns restrict outdoor watering to certain days or hours during dry spells. A timer makes it easy to follow the rules. Public health agencies such as the EPA publish guidance on safe home water use that is worth reading.
Frequently Asked Questions
Can I bury a soaker hose under the soil?
You can cover it with one to two inches of mulch, but do not bury it deep in the soil. Deep soil presses against the pores and blocks the water. Roots can also grow into the pores over time. A light mulch cover is the best balance.
How long should I run a soaker hose each time?
Start with one hour and check the soil depth with your finger. You want moisture six to eight inches deep. Clay soil may need two hours once a week. Sandy soil may need thirty minutes three times a week. Adjust from there. Product care guides on sites like Fiskars and The Spruce also discuss watering depth for common plants.
Can I connect two soaker hoses together?
Yes, but keep the total length under 100 feet. Beyond that, the far end gets too little pressure. For long gardens, use a Y-splitter at the faucet and run two separate lines. Each line then gets full pressure.
Do soaker hoses work on slopes?
They work on gentle slopes if you run the hose along the slope, not across it. Water will flow downhill inside the hose and pool at the low end. For steep slopes, split the run into short sections on level ground, or use drip emitters instead. Advice on sloped gardens is covered by writers at Corona Tools and Bob Vila.
Can I leave a soaker hose out all winter?
It is better to store it indoors. Water left inside can freeze and split the rubber. Even in mild climates, winter sun and frost wear the material. Drain it, coil it loosely, and hang it in the shed.
How do I know if my soaker hose is clogged?
Lay it out and turn the water on. Walk the full length and look for dry sections. Mark them with a small stick. Flush the hose from the far end. If a section still stays dry, soak that part in a bucket of white vinegar and water for an hour to dissolve mineral buildup, then rinse and test again.
A Short Final Word
Learning how to use soaker hose effectively takes one afternoon of setup and a few weeks of watching your plants. After that, the system almost runs itself. You will water less, weed less, and see healthier plants with deeper roots. For the price of a few bags of mulch, it is one of the best upgrades a home garden can get. Set it up well, keep a steady schedule, store it right in winter, and your soaker hose will serve you for many seasons.
References
Bob Vila. (n.d.). Home improvement advice. https://www.bobvila.com Burpee. (n.d.). Seeds, plants, and gardening supplies. https://www.burpee.com Corona Tools. (n.d.). Garden and landscape tools. https://www.corona-tools.com Family Handyman. (n.d.). DIY home repair and maintenance. https://www.familyhandyman.com Fiskars. (n.d.). Garden and cutting tools. https://www.fiskars.com Gardener’s Supply Company. (n.d.). Gardening tools and supplies. https://www.gardeners.com The Home Depot. (n.d.). Home improvement products. https://www.homedepot.com The Spruce. (n.d.). Home and garden advice. https://www.thespruce.com U.S. Environmental Protection Agency. (n.d.). Protecting human health and the environment. https://www.epa.gov
Was this guide helpful?

About Robert Taylor
The My Garden US editorial team writes practical, in-depth home and garden guides for American homeowners — tested advice, no fluff.
You May Also Like
Best Garden Trowel for Planting Reviews: How to Choose a Tool That Lasts
June 13, 2026 0 views
Best Garden Tool Storage Rack Reviews: What Buyers Say
March 10, 2026 0 views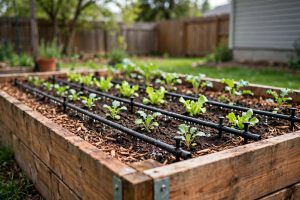
How to Install Raised Bed Irrigation: A Step-by-Step Guide
March 22, 2026 0 views