
A Quiet Revolution in the Backyard Garden
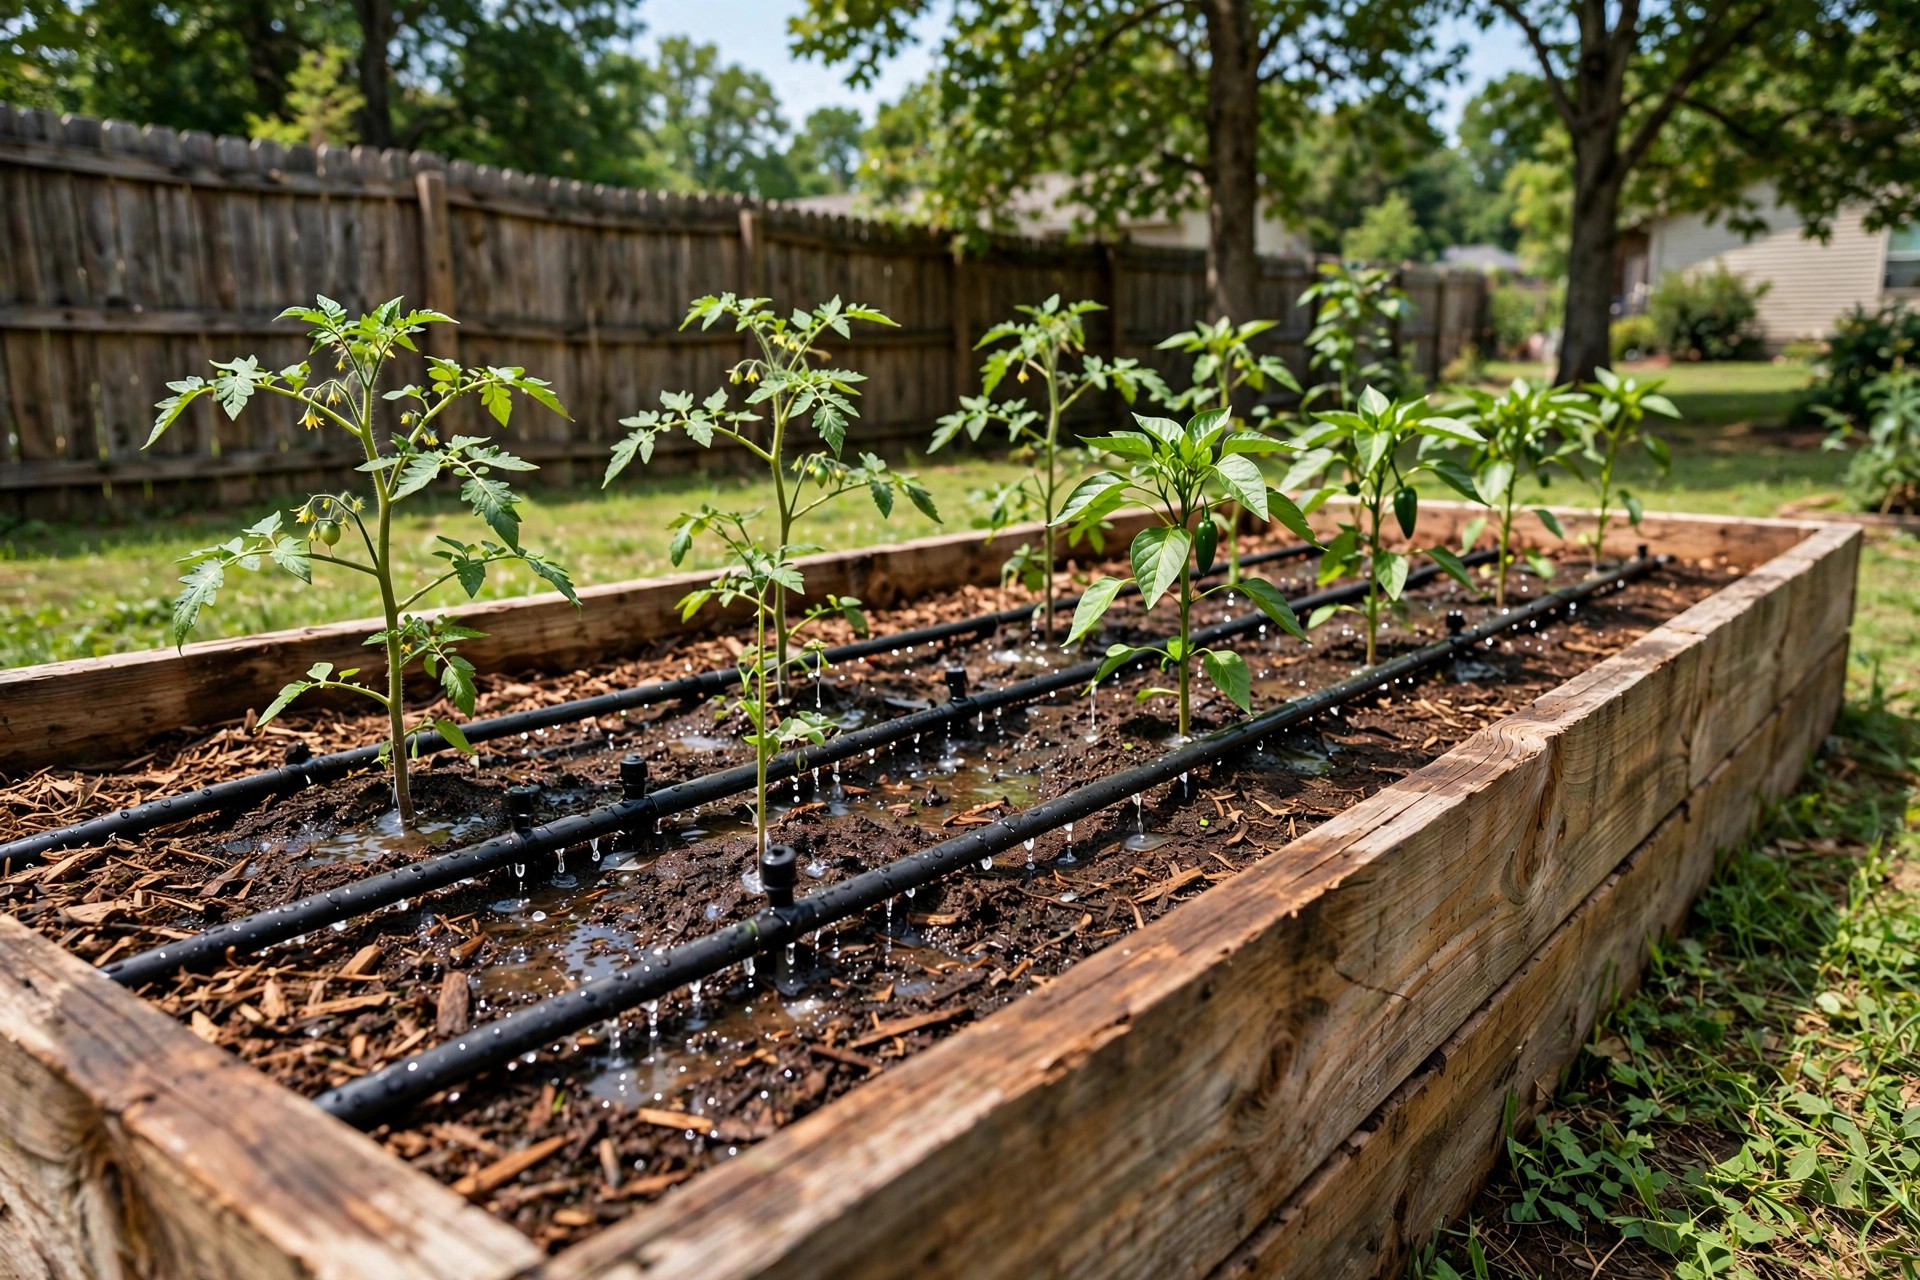
The raised bed garden has become one of the most loved sights in the American yard. It stands neat and square above the soil, full of tomatoes, peppers, herbs, and flowers. Yet the people who tend these beds face one old problem every summer: watering. A hose is hard to aim. A sprinkler wastes water on the paths. A drip irrigation kit for raised beds answers this problem in a simple way. It carries water through small tubes and lets it drip out drop by drop at the base of each plant. Nothing is wasted. The leaves stay dry. The roots drink deep.
This guide explains the whole subject in plain terms. It tells why these kits matter, what to look for when buying one, what types exist, what they cost, how to keep them working, and how to use them safely. Whether you keep one bed of herbs or a row of vegetable boxes, the pages below will help you make a sound choice.
Why a Drip Irrigation Kit Matters for Raised Beds: Drip Irrigation Kit for Raised Beds
Water is the first need of any garden. Raised beds lose water faster than ground soil because their sides are open to the air and the sun warms the whole box. Hand watering often fails to keep up. A gardener waters in the morning, and by the afternoon the top of the soil looks dry again. Deep watering by hand takes time and patience.
A drip system solves this by giving plants water slowly and steadily. The emitters release small amounts over hours, so the water sinks deep instead of running off the surface. Studies of drip watering have shown that it can cut water use by a large share compared with sprinklers, because almost no water is lost to wind or to wetting the leaves. For raised beds, where every inch of soil is paid for with bagged mix, that saving matters.
Healthier plants are the second reason. When leaves stay dry, many common plant diseases find it harder to spread. Fungi that attack tomato and squash leaves love a wet plant. Drip lines keep the water low, at the roots, where the plant needs it. The result is often stronger growth and a better harvest.
The third reason is simple comfort. A kit with a timer can water the bed while you are at work or away for the weekend. You set it once, and it keeps to its schedule. The garden is cared for even when you cannot be there.
What to Look for When You Choose a Kit
Not all kits are the same. A little study before you buy will save trouble later. These are the points that matter most.
Fit for Your Bed Size
Kits are sold for beds of certain sizes. A common small kit covers one or two four-by-four-foot beds. Larger kits cover four beds or more. Measure your beds before you shop. It is better to buy a kit that covers a little more than you need than one that falls short. A system that is stretched too far gives weak flow at the far end.
Emitter Flow Rate
Emitters are the small parts that let the water out. They are rated by how much water they release per hour, often half a gallon, one gallon, or two gallons. Sandy soil drinks fast, so it does well with higher flow. Clay-like soil drinks slowly, so it needs lower flow over a longer time. Most raised bed mixes drain well, and a half-gallon-per-hour emitter suits them. Adjustable emitters exist and let you turn the flow up or down for each plant.
Tubing and Connectors
The main tube carries water from the hose bib to the beds. Half-inch tubing serves most home gardens. Quarter-inch tubing branches off to reach single plants. Look for tubing made of strong black plastic that stands up to sun. The connectors, tees, and elbows should fit tight and not leak. A good kit has a pressure regulator, because home water pressure is often too strong for drip lines and can blow the emitters out.
Timer and Filter
A filter keeps small dirt and rust bits from clogging the emitters. Most kits include one, and if yours does not, add one. A timer turns the water on and off by itself. Some are simple dials; others let you set days and hours. For a raised bed, one or two short waterings a day in hot weather is a good starting point. You can learn more about garden watering tools from the wide range of supplies sold by Gardener’s Supply Company, which stocks drip parts and timers made for home beds.
Quality of Materials
Cheap kits exist, and some of them crack in the sun after one season. Read reviews and look for kits with warranties of a year or more. The best-known garden tool makers test their parts for long outdoor use. If you want to see how professional reviewers rate garden equipment, Consumer Reports publishes independent tests of outdoor products.
Types of Drip Kits and Options
Three main kinds of drip delivery suit raised beds. Each has its fans.
Emitter Tubing Kits
These are the most common. A tube runs along the bed, and built-in emitters drip at set gaps, often every six or twelve inches. They suit beds planted in rows, like carrots, onions, or lettuce. You simply lay the line down the row and stake it in place.
Adjustable Dripper Kits
These kits use single drip heads on short stakes, each placed at the base of a plant. You can set each head to drip faster or slower. They suit beds with mixed planting, where a tomato needs more water than a basil plant beside it. They take more time to set up, but they give the most control.
Soaker Hose Kits
Soaker hoses sweat water along their whole length through tiny pores. They are simple to lay and cheap to buy. They work well for dense plantings of flowers or herbs. They do not last as long as hard tubing, and they can clog, but for small beds they are a fine start.
Beyond these types, you can add parts to any system: a rain sensor that stops watering when it rains, a Y-splitter so one hose bib feeds two beds, or extra tubing to reach a new bed you build next year. Many home gardeners start small and grow the system as the garden grows. Step-by-step project guides from Family Handyman show how ordinary homeowners add drip lines to their beds.
Cost and Price: What You Should Expect
A basic drip irrigation kit for raised beds costs between twenty-five and sixty dollars. Small starter kits at the low end cover one bed. Kits near sixty dollars often cover two to four beds and include a timer and filter.
If you build a system from parts instead of a kit, the cost is about the same for one bed but rises for larger gardens. Expect to spend around one hundred dollars to outfit four raised beds with quality tubing, emitters, a filter, a regulator, and a timer. A good timer alone costs twenty to forty dollars. Prices are easy to compare at large home stores such as Lowe’s and The Home Depot, which both carry several brands of drip kits in store and online.
The money you save on water is worth counting. A sprinkler on a hose can pour out hundreds of gallons in an hour, much of it landing on paths and grass. A drip system may use a tenth of that for the same bed. Over a hot summer, the saving shows up on the water bill. Add the time you save by not hand watering, and most gardeners find the kit pays for itself in one season.
How to Install Your Kit: A Simple Plan
You do not need special skill to set up a drip kit. Most people finish in an hour or two. Here is a plain plan.
1. Lay out the bed. Set the main half-inch line along the center or the edge of the bed. 2. Attach the filter and pressure regulator to the hose bib, then connect the main line. 3. Run quarter-inch branch lines to each row or plant, and push in the emitters. 4. Stake the lines down so they do not move in the wind. 5. Cover the lines with a thin layer of mulch. Mulch hides the tubing, keeps the sun off it, and slows evaporation. 6. Turn the water on. Walk the bed and check every emitter. A dry spot means a clogged or pinched line. 7. Set the timer. Start with thirty minutes each morning and adjust after a week. Push a finger into the soil; it should be moist a few inches down.
Keep a few spare emitters and connectors on hand. They are cheap, and you will thank yourself when one needs a quick swap. For gardeners who want to plan the whole bed before planting, seed and plant advice from Burpee pairs well with a watering plan, since both start with knowing what will grow where.
Care and Upkeep Through the Seasons
A drip system asks little, but it asks regularly. Give it a short check once a week in the growing season. Look for puddles, which mean a leak or a broken emitter. Look for dry plants, which mean a clogged emitter. Clear any clogs by pulling the emitter and flushing the line.
Clean the filter at the start of the season and once more in midsummer. A dirty filter starves the whole system. If your water is hard, mineral crust can build up inside the lines; running the system without emitters for a few minutes each month helps flush it out.
When cold weather comes, the system must be drained. Water left in the lines can freeze and crack them. Unhook the kit from the hose bib, open the ends of the lines, and let them drain. In mild climates you can leave the tubing in place under the mulch. In cold climates, roll it up and store it in the shed. Spring setup takes only minutes when the parts were stored clean and dry. Durable cutting and pruning tools for garden maintenance, like those from Fiskars, help keep the beds tidy around the lines, and Corona Tools offers sturdy hand tools that many gardeners trust for bed work.
Safety Around Your Drip System
Drip systems are safe, but a few rules keep them that way. Always use a backflow preventer on the hose bib. This small device stops garden water from flowing back into your home water supply. It is required by many local codes, and it protects your drinking water.
Keep electrical timers dry. Mount battery timers under a small cover or in a sheltered spot. If you use a plug-in timer, the outlet must be rated for outdoor use and covered from rain.
Bury or cover tubing where people walk. A loose line is a trip hazard. In a raised bed this is rarely a problem, but where the line crosses a path, stake it flat or run it under a board. Teach children not to pull on the emitters. Good safety guidance for yard products also appears in home project articles from Bob Vila and The Spruce, both of which cover outdoor equipment with care.
Frequently Asked Questions
How long should I run a drip system each day?
It depends on the soil, the weather, and the plants. A good start is thirty to forty-five minutes each morning for a raised bed in summer. In cool spring weather, every other day may be enough. Check the soil with your finger. Moist soil three to four inches down means you are watering enough. Wilting plants or bone-dry soil mean you should add time.
Can one kit water several raised beds?
Yes, if the kit is sized for it. Many kits are made to cover two to four beds. You run a main line from the hose bib to each bed and branch off with smaller lines. If the water flow grows weak at the far bed, you may need a larger main line or a second zone with its own timer.
Will drip lines clog?
They can, especially with hard water or dirty water. A filter at the hose bib stops most trouble. Flushing the lines now and then clears the rest. Check emitters each week during the season. A clogged emitter is easy to spot: the plant beside it looks thirsty while its neighbors look fine.
Is drip irrigation worth it for a small herb bed?
For a very small bed, hand watering may be enough. But even a small bed benefits from steady water while you are away. Small kits are cheap, and a timer removes the daily chore. Many herb growers find their basil and parsley do better with even moisture than with the flood-and-dry cycle of hand watering.
Can I use a drip kit with a rain barrel?
Yes, but with care. Rain barrels give low pressure, and many standard emitters need more pressure to work well. Look for low-pressure drip kits made for gravity feed, or raise the barrel higher to gain pressure. A filter is even more important with barrel water, which can carry bits of leaf and grit.
What plants grow best in raised beds with drip watering?
Almost all common garden plants do well. Tomatoes, peppers, cucumbers, beans, lettuce, and herbs all thrive with steady root moisture. Root crops like carrots and beets do well with emitter tubing along the row. If you are also learning how to grow garlic at home, drip lines laid down the row give the steady moisture garlic likes in spring. And if you keep seeds from your harvest, our guide on how to save seeds from vegetables pairs naturally with a well-watered bed. For indoor growers, see how to grow chives indoors pots for a different kind of small-space garden.
A Final Word
A drip irrigation kit for raised beds is one of the quiet tools of the garden. It does not shine or sing. It simply puts water where it belongs, drop by drop, day after day. The plants grow stronger, the water bill grows smaller, and the gardener gains back the hours once spent with a hose. Choose a kit that fits your beds, install it with care, and check it now and then. Your garden will repay the effort all season long.
References
Bob Vila. (n.d.). Home improvement advice. https://www.bobvila.com Burpee. (n.d.). Seeds, plants, and gardening supplies. https://www.burpee.com Consumer Reports. (n.d.). Product reviews and ratings. https://www.consumerreports.org Corona Tools. (n.d.). Garden and landscape tools. https://www.corona-tools.com Family Handyman. (n.d.). DIY home repair and maintenance. https://www.familyhandyman.com Fiskars. (n.d.). Garden and cutting tools. https://www.fiskars.com Gardener’s Supply Company. (n.d.). Gardening tools and supplies. https://www.gardeners.com Lowe’s. (n.d.). Home improvement products. https://www.lowes.com The Home Depot. (n.d.). Home improvement products. https://www.homedepot.com The Spruce. (n.d.). Home and garden advice. https://www.thespruce.com
Was this guide helpful?

About David Wilson
The My Garden US editorial team writes practical, in-depth home and garden guides for American homeowners — tested advice, no fluff.
You May Also Like
Best Garden Soil Test Kit Reviews: What Your Garden Soil Is Telling You
April 12, 2026 1 views
Best Garden Hose for Large Yards: A Buyer’s Guide
August 21, 2026 0 views
Best Garden Cart for Heavy Loads: How to Choose the Right One
August 27, 2026 0 views