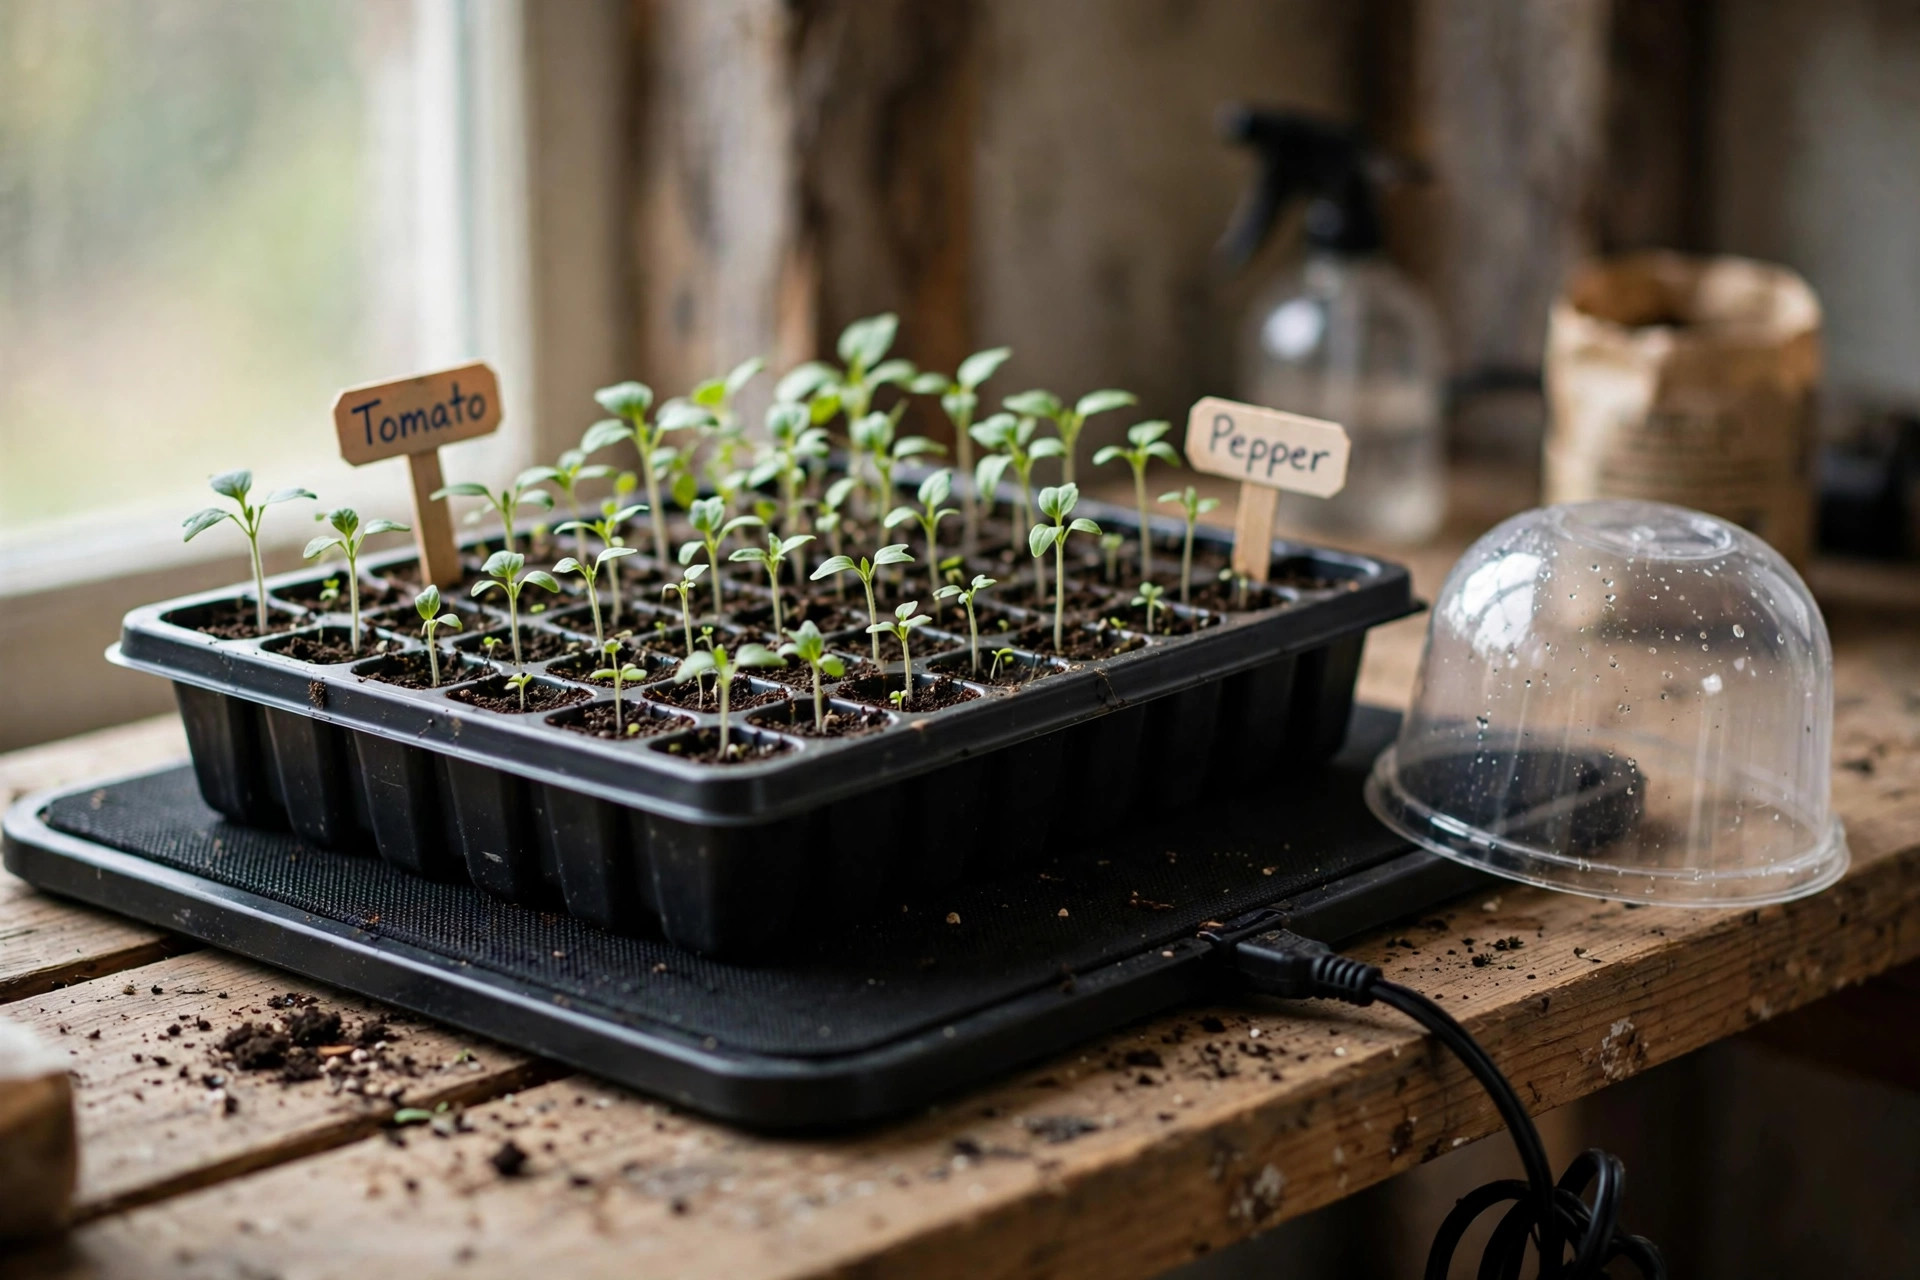

Many gardeners search for seedling heat mat for germination reviews before they start their first flat of seeds indoors. The reason is simple. Most vegetable and flower seeds sprout best when the soil is warm, often much warmer than a cool spring windowsill can provide. A heat mat placed under the tray raises the soil temperature by ten to twenty degrees, and that gentle warmth can cut sprouting time in half. Tomatoes, peppers, and eggplants in particular respond well to bottom heat. This guide reviews what these mats do, how to choose one, which types are on the market, what they cost, and how to use them safely for strong, even seedlings.
Why Bottom Heat Matters for Seed Germination
A seed is a living thing at rest. When it receives water and the right temperature, its inner processes wake up and the root pushes out. If the soil is too cold, this process slows or stops. Most vegetable and flower seeds want soil between 70 and 85 degrees. In a cool room in late winter, a tray on a table may sit at 62 degrees, and at that temperature pepper seeds may rot in the damp soil before they ever push through.
A seedling heat mat changes this picture. The mat sits flat on a shelf or table, and the tray sits on top of it. Heat rises through the bottom of the tray and warms the seed-starting mix from below. Roots grow toward warmth, so seedlings started on a mat often develop stronger root systems. The result is faster, more even sprouting across the tray and less loss to damping off, the fungal disease that kills young seedlings at the soil line.
Bottom heat matters most for warm-season crops. Tomatoes, peppers, eggplants, cucumbers, melons, basil, and many annual flowers all germinate faster with soil above 75 degrees. Cool-season crops like lettuce and spinach prefer cooler soil and may sprout poorly on a mat. Seed supplier Burpee publishes germination charts that list the ideal soil temperature for dozens of varieties.
What to Look for When You Read Reviews: Seedling Heat Mat for Germination Reviews
When you compare a seedling heat mat for germination reviews, look past the star ratings and check the details that matter in real use.
Size. Standard mats measure about 10 by 20 inches, which fits one standard nursery flat. Larger mats cover two flats, and smaller mats suit a single tray. Measure your trays before you buy. A mat that is too small leaves the edges of the tray cold, and the seedlings on the edges lag behind.
Wattage. Most standard mats draw between 17 and 20 watts, roughly the same as a night light, so they cost very little to run. Do not assume that more watts are better. Too much heat can cook the seeds.
Thermostat. Many basic mats have no thermostat. They simply warm the soil about ten to twenty degrees above the room temperature. This works fine in a stable room. Mats with a built-in or separate thermostat let you set a target soil temperature, often between 68 and 108 degrees. A thermostat is worth the extra cost if your growing room swings between cold nights and warm days. Gardeners who keep their mats in a garage or basement will find the control essential.
Water resistance. Seed starting is wet work. Water spills, trays drip, and humidity domes condense. The mat should have a sealed, water-resistant surface. Check reviews for any mention of the mat failing after a spill. A good mat survives years of damp use.
Durability and cord length. A heat mat should last for many seasons. Reviewers often report mats that run for five or more years without trouble. Check the length of the power cord as well. A short cord forces you to run an extension cord across the room, which is both ugly and unsafe.
Ease of cleaning. At the end of the season, the mat will have soil and algae on its surface. A smooth surface wipes clean in seconds, while a textured one is harder to clean and may harbor mold.
Home improvement guides at Bob Vila remind readers to weigh these practical details before trusting any single review, since growing conditions differ from home to home.
Types of Seedling Heat Mats
Not every heat mat is built the same. The main types differ in size, control, and intended use.
Standard Hobby Mats
These are the flat, flexible pads sold at garden centers and hardware stores. They measure about 10 by 20 inches and warm one nursery flat. Most have no thermostat and draw about 20 watts. They are the right choice for a home gardener starting a few trays of tomatoes and peppers: plug them in and place the tray on top.
Mats with Thermostat Controllers
These mats pair a heating pad with a temperature probe and a control box. You push the probe into the soil, set the target temperature, and the controller turns the mat on and off to hold it. They cost more but give exact control, and they are the best choice for slow or costly seeds. The Home Depot and Lowe’s both carry thermostat-controlled kits in their seed-starting sections.
Commercial and Propagation Mats
Large mats, often two feet by four feet, serve market gardeners and home growers with full seed-starting shelves. They warm several flats at once and cost more up front but less per tray.
Waterproof and Heavy-Duty Pads
Some mats are built for greenhouse use, with thick, sealed rubber bodies and grounded plugs. If your seed-starting area is a damp basement or an unheated greenhouse, a heavy-duty mat is safer than a thin hobby pad.
Cost and Price: What You Should Expect to Pay
A basic seedling heat mat costs between fifteen and thirty dollars. This price buys a standard 10-by-20-inch pad with no thermostat. It is the best value for most home gardeners, and a single mat serves for years.
A mat with a thermostat controller costs between thirty and sixty dollars. The extra money buys exact temperature control and peace of mind. If you start seeds in a cold garage, this upgrade pays for itself in one season by saving trays that would otherwise fail.
Commercial mats run from sixty to one hundred and fifty dollars, depending on size. They suit gardeners who fill a four-tier shelf with flats each spring.
Running costs are low. A 20-watt mat used for eight hours a day for two months adds only a few dollars to the electric bill, and thermostat models use even less since they cycle on and off. When you read a seedling heat mat for germination reviews, remember that the purchase price is nearly the whole cost. Consumer Reports notes that small heating devices like these are among the cheapest tools in the garden to operate.
How to Use a Heat Mat for Best Results
Buying the mat is only the first step. Using it well makes the difference between a tray of strong seedlings and a tray of leggy, weak ones.
Start by placing the mat on a flat, hard surface. A shelf, a table, or the floor all work. Do not place the mat on carpet or on a soft surface that traps heat. Set the seed tray directly on the mat. If you use a humidity dome, place the dome over the tray as usual. The mat warms the soil, and the dome holds in the moisture.
Check the soil temperature with a simple soil thermometer. Aim for the range your seed packet recommends. Most warm-season vegetables want 75 to 85 degrees. If the soil runs hotter than 90 degrees, raise the tray slightly or move the setup to a cooler room.
Water the trays from the bottom when you can. Warm soil dries from the top faster than cold soil, and bottom watering keeps the surface from crusting. Check moisture daily. A heat mat can dry a tray in a day or two if the room air is dry.
Turn off the mat when the seeds sprout. This is the step many beginners miss. Once the seedlings emerge, they no longer need bottom heat, and the warmth encourages weak, stretched growth. Move the seedlings under grow lights or to a bright window, and let the soil cool to room temperature. The mat has done its job.
Pair your mat with other seed-starting basics. A good guide on how to start seeds indoors covers lights, timing, and transplanting, while a comparison of seed starting mix versus potting soil helps you choose the right medium. If you plan to start many flats, a greenhouse for backyard beginners gives you room for several mats at once.
Care and Upkeep Through the Seasons
A seedling heat mat asks for very little care, but a few habits extend its life.
Unplug the mat before you clean it. Wipe the surface with a damp cloth and mild soap. Do not soak the mat or spray water on the power cord or plug. Let it dry fully before you store it.
Store the mat flat or loosely rolled. Do not fold it sharply, since a hard crease can break the heating wires inside. Keep it in a dry place over the summer.
Inspect the mat each spring before the season starts. Look for cracks, exposed wires, or a damaged plug. Plug it in and feel for even warmth across the pad after ten minutes. If one corner stays cold, replace the mat. Do not repair a heat mat yourself.
Rotate the trays on the mat every few days. Even a good mat warms the center a little more than the edges. A quarter turn of the tray evens out the warmth and gives every seedling the same start.
Tool care guides from Fiskars and Corona Tools stress the same point for all garden equipment: clean and inspect at the end of each season, and small tools last far longer than their price suggests.
Safety: Use Heat with Care
A heat mat is an electrical device used around water and soil. Treat it with respect.
Always plug the mat directly into a grounded outlet. Avoid extension cords when you can. If you must use one, choose a heavy-duty cord rated for the load, and keep it away from water.
Use a ground-fault circuit interrupter (GFCI) outlet in damp areas. A GFCI outlet cuts the power in a fraction of a second if electricity leaks where it should not. Most bathrooms, kitchens, and garages already have these outlets. They are a sensible precaution for any seed-starting area.
Keep the mat away from flammable materials. Do not place it under paper, cloth, or dry leaves. The surface stays warm, not hot, but heat builds up when airflow is blocked.
Never leave a damaged mat plugged in. If the cord is frayed, the surface is cracked, or the plug is loose, replace the mat. Watch for any burning smell during the first use of the season, and unplug the mat at once if you notice one.
Keep mats out of reach of small children and pets. Set up your seed-starting station where it will not be bumped or knocked over. Family Handyman offers practical advice on safe wiring for home growing setups, including how to manage cords and timers.
Frequently Asked Questions
Do I really need a heat mat to start seeds? You do not need one for every seed. Lettuce, spinach, peas, and many herbs sprout well at room temperature. You will see the biggest benefit with heat-loving crops like peppers, eggplants, and tomatoes, especially if your home is cool in late winter. Many gardeners buy one mat and use it only for the trays that need it.
How long should I leave the mat on each day? Leave it on around the clock until the seeds sprout. The goal is steady soil warmth, not a day-night cycle. Once most of the seedlings have emerged, turn the mat off and move the tray to strong light.
Can a heat mat get too hot and kill seeds? Yes, it can, though it is rare with standard mats. Soil above 95 degrees can damage or kill germinating seeds. Use a soil thermometer to check, and raise the tray or add a thermostat if the temperature runs high.
Can I use a heating pad for people instead of a seedling mat? This is not a good idea. Human heating pads reach higher temperatures, shut off on timers, and are not built for wet, dirty use. A seedling heat mat is designed for constant low heat and damp conditions. The right tool is safer and works better.
How many trays can one mat warm? A standard 10-by-20-inch mat warms one standard flat. Trays larger than the mat will have cold edges. For two flats, buy a larger mat or a second standard mat.
Where can I learn more about seed-starting gear? Gardener’s Supply maintains detailed guides on indoor seed starting, and The Spruce reviews common setups each season.
A Short Final Word
A seedling heat mat is one of the simplest tools a gardener can buy. It has no moving parts, costs little to run, and lasts for years. For heat-loving seeds started in a cool home, it often makes the difference between a tray full of strong seedlings and a tray of slow, patchy sprouts. Read the reviews, choose a mat that fits your trays, check the soil temperature, and turn the mat off once the seeds are up. Do these small things, and your spring garden will start the season ahead.
References
Bob Vila. (n.d.). Home improvement advice. https://www.bobvila.com Burpee. (n.d.). Seeds, plants, and gardening supplies. https://www.burpee.com Consumer Reports. (n.d.). Product reviews and ratings. https://www.consumerreports.org Corona Tools. (n.d.). Garden and landscape tools. https://www.corona-tools.com Family Handyman. (n.d.). DIY home repair and maintenance. https://www.familyhandyman.com Fiskars. (n.d.). Garden and cutting tools. https://www.fiskars.com Gardener’s Supply Company. (n.d.). Gardening tools and supplies. https://www.gardeners.com Lowe’s. (n.d.). Home improvement products. https://www.lowes.com The Home Depot. (n.d.). Home improvement products. https://www.homedepot.com The Spruce. (n.d.). Home and garden advice. https://www.thespruce.com
Was this guide helpful?

About James Carter
The My Garden US editorial team writes practical, in-depth home and garden guides for American homeowners — tested advice, no fluff.
You May Also Like
How to Pick a Garden Hose Nozzle with Multiple Settings
April 20, 2026 0 views
The Best Garden Trowel Set for Beginners: How to Choose Well
March 24, 2026 0 views
How to Grow Mint Without Spreading: A Complete Guide
September 16, 2026 0 views