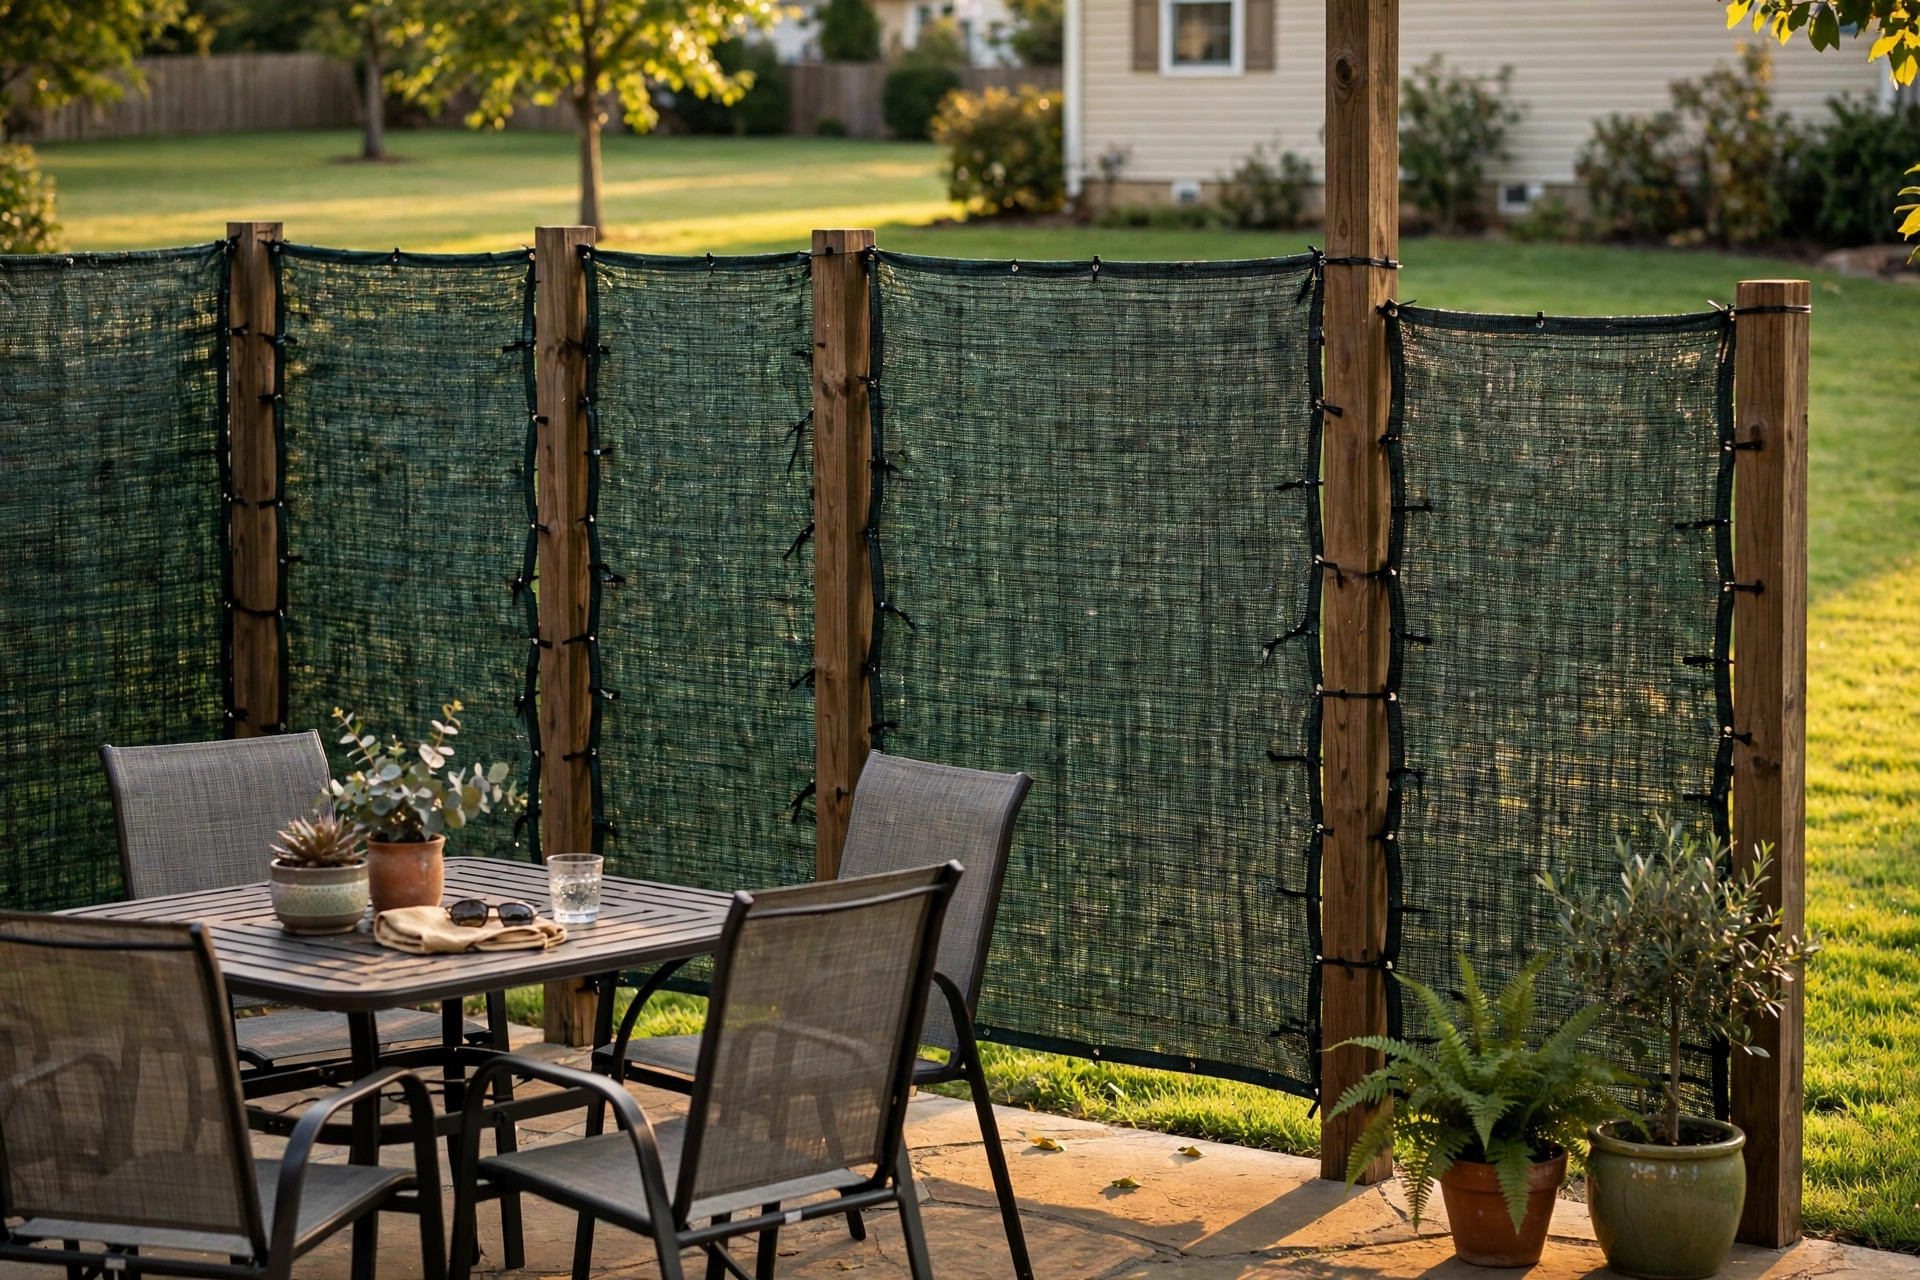

When you want to enjoy your yard without the eyes of neighbors or passersby, learning how to install a patio privacy screen is one of the most useful small projects a homeowner can take on. A privacy screen does more than block the view. It cuts wind, softens street noise, and makes a patio feel like a true outdoor room. Most screens are simple to put up, and a single weekend afternoon is often enough to finish the job.
Why a Privacy Screen Matters for Your Patio
A patio without any screen is open to the world. Neighbors can watch from a second-floor window. People on the street can see straight through a fence. That lack of privacy keeps many families from using their patios as much as they would like. A screen changes the feeling of the space at once.
Privacy is the main reason people add screens, but it is not the only one. A fabric mesh screen blocks a large share of the wind that sweeps across a yard. It cuts glare from low afternoon sun. It can even reduce street dust that drifts over fences. Homeowners who want a calmer patio for morning coffee or evening meals find that a privacy screen makes the patio cooler and more comfortable in summer.
Plan Before You Buy: How to Install Patio Privacy Screen
A little planning saves money and trouble. Study your patio before you order anything.
Check Local Rules
Many towns and homeowner associations set limits on fence and screen height. A common limit is six feet for side and back yard screens, but some towns allow only four feet near the street. Call your city office or read your association rules before you buy. It is far better to learn the rule now than to take down a screen you just put up.
Also ask about permits. Most fabric screens that hang on an existing fence need no permit. Freestanding screens with new posts sometimes need one, especially if the posts sit in concrete near a property line.
Measure Your Space
Measure the run where the screen will hang. Note the length in feet and the height of your fence or posts. Write both numbers down. Then walk along the run and look for problems: low branches, garden beds that block access, or sprinkler heads that may wet the fabric. If you plan to attach the screen to an existing fence, check that the fence boards and posts are solid. A new screen is only as strong as what holds it.
Think about sun and wind too. A screen that faces the west sun will do double duty as shade. A run that takes the full force of the wind will need extra ties and perhaps a wind screen fabric rated for high air flow.
Types of Patio Privacy Screens
Shoppers today have many choices. Each type has its own cost, look, and level of work to install.
Woven Fabric Mesh Panels
Woven mesh fabric is the most common choice. It is a strong, light material with small holes that let air pass while blocking the view. It comes in rolls of many lengths, usually three to eight feet tall. Black, dark green, and tan are common colors. Home retailers such as IKEA stock ready-made fabric panels in these neutral tones. Mesh fabric is a top pick among patio privacy screen ideas because it is cheap, light, and easy to hang with simple zip ties. Air flow through the weave means less wind pressure than solid sheets, so posts take less strain.
Wood or Vinyl Slat Screens
Slat screens use narrow boards fixed to a frame with small gaps between them. Cedar and redwood look warm and natural. Vinyl boards need almost no care and hold their color for years. Slat screens cost more than fabric, but they look like real furniture and last a long time.
Retractable Side Screens
A retractable screen pulls out from a post like a window shade and hooks to a second post across a gap. It is ideal for renters and small patios, since it rolls away when not in use. Most retractable screens cover ten to thirteen feet in length. They cost more per foot than fabric rolls, but they take almost no space and look neat.
Trellis and Planter Screens
A trellis with climbing plants makes a living screen. Large planters with tall grasses or bamboo work the same way. Living screens take time to grow, but they soften the yard and attract birds. If you like a garden look, pair a low wooden screen with planters full of fast growers. For comfort in the finished space, many homeowners add soft touches such as waterproof outdoor throw pillows for patio seating once the screen is up.
How to Choose the Right Screen
Start with your main goal. If full privacy is the need, choose a screen with ninety percent or more blockage. If you want shade and wind cut but still want to see the sky, seventy percent blockage is enough.
Match the screen to your climate. In hot, sunny states, a UV-resistant fabric keeps its strength for years. In rainy states, choose a fabric that drains and dries fast, or pick vinyl slats that never rot. In windy places, woven mesh beats solid fabric because it lets air through.
Finally, check the color against your house and fence. A dark screen looks sharp against light siding. A tan screen blends with wood fences. Shoppers browsing outdoor living guides will find a range of neutral tones that suit most yards.
What You Will Need
Gather your tools and materials before the work begins. You will need:
– The privacy screen fabric or panels, sized to your run – Measuring tape and a pencil or marker – A level, four feet long if you can get one – A power drill with bits, plus a screwdriver – Outdoor-rated screws or bolts for wood or metal posts – Heavy-duty UV-resistant zip ties, or grommet kits for fabric panels – A post-hole digger and quick-set concrete, if you are setting new posts – Gravel for drainage under each post – A ladder or step stool for tall runs – Work gloves and safety glasses
Buy ten percent more fabric than your measurement. Panels rarely come in exact lengths, and a little extra lets you wrap post ends cleanly.
How to Install a Patio Privacy Screen
This section covers the standard method: hanging a woven fabric privacy screen on posts or an existing fence. The same ideas apply to slat screens, with small changes noted where needed.
Step 1: Mark and Measure
Mark the start and end of the screen run with chalk or tape. Stretch a string line between the two marks to check that the line is straight. If you are using an existing fence, mark each post along the run. Posts should be no more than eight feet apart for fabric screens. If the gaps are wider, add a post or a mid-span support, or the fabric will sag.
For a new freestanding screen, mark where each post will stand. A four-by-four wood post or a two-inch metal post works well. Plan the post height so the top sits a few inches above the screen fabric.
Step 2: Set Your Posts or Frame
If you are setting new posts, dig each hole at least two feet deep, or one third of the post height above ground, whichever is deeper. Put three inches of gravel in the bottom of each hole for drainage. Set the post, check it with the level on two sides, and pour quick-set concrete around it. Let the concrete cure for at least twenty-four hours before you hang anything.
If you are hanging the screen on an existing fence, skip this step. Just check that each fence post is solid and free of rot. Tighten any loose boards now, since the screen will add wind load.
Step 3: Attach the Screen Panels
Unroll the fabric along the ground in front of the run. Lay it flat and smooth out wrinkles. Start at one end post. For woven mesh with a reinforced edge, push heavy-duty zip ties through the edge holes or the weave itself and around the post. Pull each tie snug, but not so tight that it tears the fabric.
Work down the line one post at a time. Pull the fabric firm as you go, so it hangs straight without droops. On long runs, step back every few posts to sight along the top edge.
For slat screens, fix each slat to the horizontal rails with outdoor screws. Pre-drill the holes to stop the wood from splitting. Keep the gap between slats even with a small spacer block.
Step 4: Secure the Bottom and Finish
Tie the bottom edge of the fabric to the fence boards or to a bottom rail every two feet. This stops the screen from lifting in wind. Trim the zip tie ends with scissors for a neat look. If the fabric came with grommets, use them for the strongest hold and place a tie at each one.
For a privacy screen hung on a patio railing, learning how to attach privacy screen to patio railing safely follows the same idea: tie top and bottom to the rail posts at close spacing, and never lean your weight on the fabric.
Stand back and look at the whole run. Check the top edge for level. Trim any loose threads. Your screen is now installed.
Cost and Price Guide
Costs vary by type and length. A woven fabric mesh screen is the cheapest option, often a few dollars per linear foot, plus a small amount for zip ties and fasteners. A basic twenty-foot run can cost less than one hundred dollars in materials if your fence is already in place.
Slat screens cost more. Cedar slats and framing for the same twenty-foot run can reach several hundred dollars, and vinyl panels sit in the middle. Setting new posts adds cost for concrete and labor. Before you spend, check the buying guides at Consumer Reports to judge screen quality.
Care and Upkeep
A privacy screen needs little care, but a few habits will double its life. Once a year, wash fabric screens with a garden hose and a soft brush. Mild soap and water remove pollen and dirt. Rinse well so no soap stays in the weave.
Check the ties each spring. Sunlight makes zip ties brittle over time. Replace any that look cracked or faded before they snap in a storm. If you cover patio furniture for winter, plan to check the screen ties at the same time; many homeowners who use weatherproof patio furniture covers heavy duty make this a single seasonal habit.
Trim plants away from the screen so leaves do not hold moisture against the fabric. In winter, shake heavy snow off fabric screens with a soft broom so the weight does not stretch the weave.
Safety
Work safe at every step. Wear gloves when you unroll wire-edged fabric and safety glasses when you drill. Call your local utility line number before you dig any post hole, even a shallow one. Underground wires and pipes are common in yards, and a shovel can cut them.
Keep the work area clear of children and pets while posts are being set and while you are on a ladder. Never attach a screen to a gas line, a meter, or an electrical box.
For renters, check the lease before you drill into a fence or set posts. Freestanding planters and retractable screens avoid most lease problems.
Frequently Asked Questions
How tall should a patio privacy screen be?
Six feet is the standard height for back yard screens, since it blocks the view from standing adults and most ground-floor windows. Some towns limit height to six feet, so check your local rule first.
Can I install a privacy screen on a rented patio?
Yes. Use freestanding planter screens, a retractable side screen that clamps to a post, or fabric tied to a railing with zip ties that can be cut away later. These methods leave no holes and can be removed in an hour. If you love the space, you might also add a shade source such as the options in our best patio umbrella for wind reviews guide for extra comfort.
How do I stop the screen from sagging?
Sagging comes from ties spaced too far apart or posts set too far apart. Keep posts within eight feet of each other and tie the top and bottom edges every two feet. Pull the fabric firm, not loose, as you work along the run. For very long runs, add a mid-span post or a tension wire along the top.
Will a privacy screen block my view or my light?
It will block the direct view, which is the point, but it need not block light. Mesh fabric with seventy to eighty percent blockage still lets plenty of daylight through. Slat screens with gaps admit air and light while hiding the yard beyond. If you want a bright patio, choose a lighter color fabric.
How long does a fabric privacy screen last?
A good UV-resistant mesh screen lasts five to ten years in normal sun. Cheap fabric without UV treatment may fade and weaken in two to three years. Annual cleaning and tie replacement keep it going longer.
Can I hang a privacy screen on a chain-link fence?
Yes, and chain-link fences make a strong base. Weave zip ties through the mesh fabric and the chain links every foot or so. The chain link takes the wind load well, so this is one of the easiest installs you can do.
A Short Final Word
A patio privacy screen is a small project with a large payoff. One afternoon of measuring, setting posts, and tying fabric turns an open yard into a quiet retreat. Plan first, buy quality materials, tie everything firm, and check your ties each year. Do that, and your screen will serve you well for many summers.
References
IKEA. (n.d.). Outdoor furniture and patio ideas. https://www.ikea.com Wayfair. (n.d.). Patio privacy screens and outdoor living. https://www.wayfair.com Consumer Reports. (n.d.). Product reviews and buying guides. https://www.consumerreports.org
Was this guide helpful?

About Sarah Mitchell
The My Garden US editorial team writes practical, in-depth home and garden guides for American homeowners — tested advice, no fluff.
You May Also Like
How to Refinish Teak Outdoor Furniture: A Plain Guide for Every Owner
March 10, 2026 0 views
How to Clean Teak Furniture with Vinegar
January 6, 2026 0 views
How to Clean an Outdoor Rug on a Patio: A Plain Guide
February 19, 2026 0 views