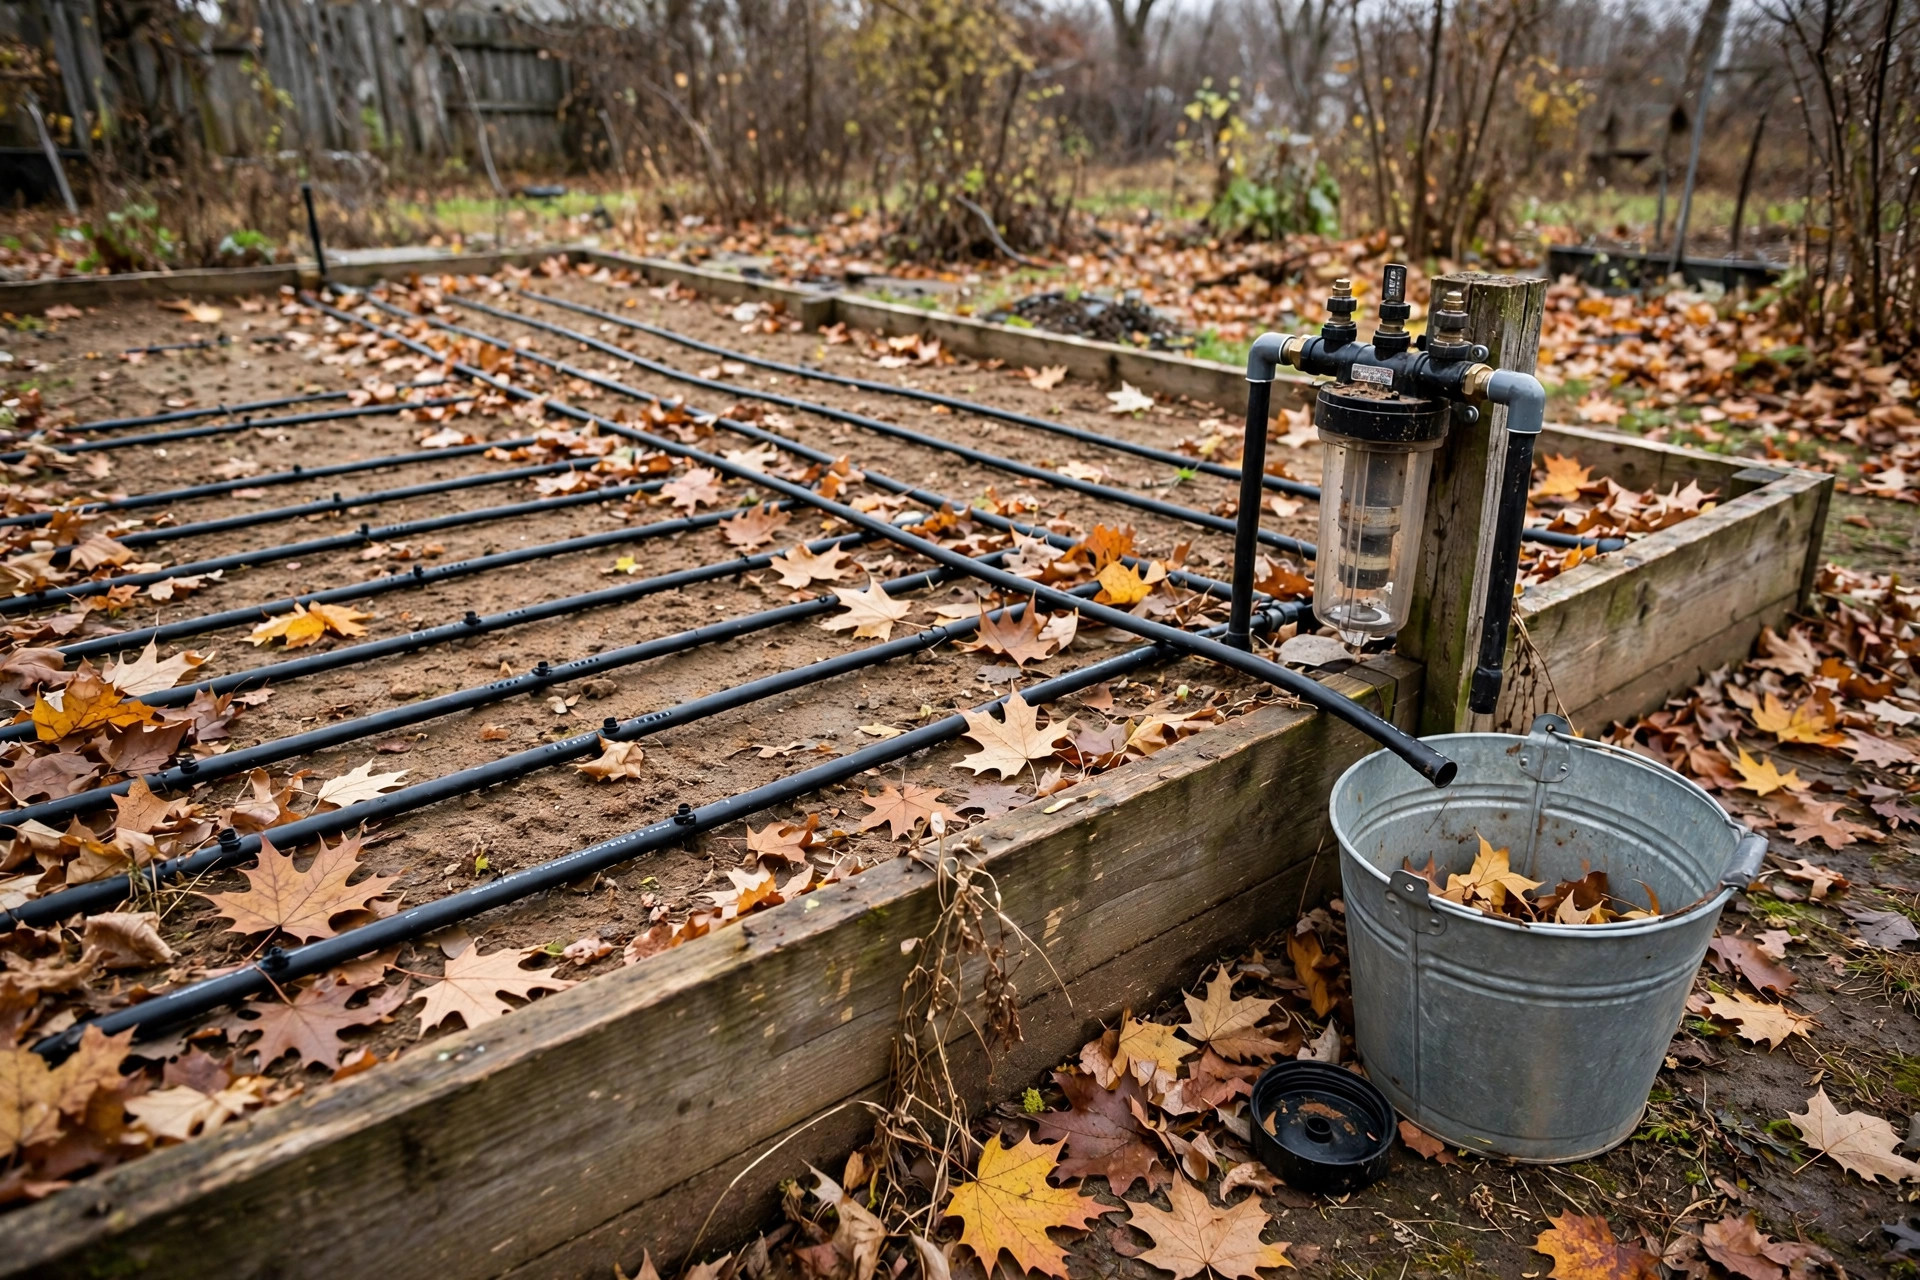

Water left inside a drip system in winter can cause great harm. It freezes. Ice takes more space than water. It can crack lines, split fittings, and break emitters. Spring repairs cost time and money. Good drip irrigation winterization steps for garden owners follow each fall can stop this damage. This guide walks through the job in plain steps. Most systems need one afternoon and a few basic tools.
Why Winterizing a Drip System Matters
A drip system is made of thin tubing, small emitters, filters, valves, and timers. Each of these parts holds water. When the first hard freeze arrives, trapped water turns to ice. The ice pushes outward. Thin-wall drip tape and drip line can split along their length. Push fittings can pop apart. Emitters can crack and stop working. Even the filter housing can break.
Many gardeners think warm states are safe. A single night below freezing can still damage a system that holds water. Draining the system is the safe move everywhere.
Winterizing also gives a chance to look the whole system over. You can mark leaks, clogs, and worn parts. A list made in fall turns into an easy shopping list for spring.
When to Winterize Your Drip System: Drip Irrigation Winterization Steps for Garden
Timing is the key to good winterizing. The goal is to drain the system before the first hard freeze, which is a night below 28 degrees Fahrenheit. Local weather services and garden calendars publish average first frost dates. Many gardeners rely on resources such as the Almanac frost date charts for their area. Plan to winterize two to three weeks before that average date. The weather can turn early. An extra cushion keeps you safe.
Do not shut the system down too soon. Plants still need water until they go dormant. When perennials die back and the soil starts to cool, the garden is telling you the season is over. That is the time to act.
If your area only sees a few light frosts, you still should drain the lines. A surprise cold snap can still catch you. Draining is cheap insurance.
Tools and Supplies You Will Need
Gather your tools before you start. Walking back to the shed in the middle of the job wastes time. Most gardeners already own most of these items.
– A compressor or air tank with a pressure regulator, or a garden hose for flushing – An adjustable wrench and pliers for fittings – Teflon tape for resealing threaded joints – A bucket for catching water from drains and filters – A soft brush or old toothbrush for cleaning emitters and screens – Zip ties, stakes, and flag tape for marking problems – A notepad for the repair list – A labeled storage box for the timer and small parts
The compressor is the one item some gardeners do not own. A portable air tank works for small systems. A rented compressor does the job for large ones. The key is a pressure regulator. Drip lines cannot take shop-level air pressure. Keep blowout pressure at 30 PSI or below. Guides from home improvement sources such as Lowe’s irrigation guides stress this limit in their winterizing advice.
Step 1: Shut Off the Water and the Timer
Start at the source. Turn off the main valve that feeds the drip system. Open a hose bib or drain valve to let pressure out of the supply line.
Next, turn off the timer or controller. Set it to off, or unplug the power adapter. If the timer runs on batteries, remove them for the winter. Batteries can leak inside a timer left in the cold. Store the timer indoors in a dry place. If your timer model is discussed in irrigation product reviews, check the manual for its winter storage rating.
Step 2: Open Valves and Drain Lines
Go to each zone valve in the system. Open manual valves by hand. If the valves are electric, open the bleed screw or the manual lever on the valve body. This lets water flow out of the low points.
Walk the lines and open every drain point. Many systems have flush caps or end caps at the ends of runs. Take these off. Tip up any low spots in the tubing and let the water run out. Drip line follows the shape of the bed, so water collects in dips. Lift and tilt each run until it stops dripping. Raise lines over bed corners and roll them gently toward the open ends.
Do not skip the filter. Open the filter housing and pour out the water. Take out the screen or disc element. Rinse it and let it dry. Store the clean element indoors for the winter. A filter left full of water can crack its housing. Practical how-to advice from Family Handyman covers this filter service step in detail.
Step 3: Blow Out the Lines with Air
Blowing out the lines removes water that gravity alone cannot reach. This is the most important of the drip irrigation winterization steps for garden systems in cold areas. Water hides in emitters, in low dips, and inside valves. Compressed air pushes it out.
Connect the compressor to the system downstream of the filter and pressure regulator. Never blow air through the pressure regulator or filter, since the air can damage them. Set the compressor regulator to 30 PSI or less. Work one zone at a time. Open the zone valve. Let the air run until the emitters give off a fine mist instead of water. Then move to the next zone.
Keep the run time short on each zone. Two to three minutes per zone is enough. If one emitter blows off its line, the pressure was too high or the barb was worn. Mark it for spring repair. When every zone runs dry, close the valves and disconnect the air line. Cap the open ends to keep insects and dirt out over winter.
Step 4: Remove and Store Sensitive Parts
Some parts last longer when they spend winter indoors. Backflow preventers should come off if they are the removable type. Drain them and store them in a shed or garage. Check valves and pressure regulators also do better indoors. Small drip tape, micro sprayers, and thin emitter tubing can be rolled up and stored under cover. This keeps sun and ice from wearing them down.
Flush caps and end plugs should be stored in a labeled bag so they do not get lost. Put the timer, its batteries, and any remote sensor in the same dry storage area. A labeled box marked “drip parts” makes spring setup fast. Keep a copy of the repair list in the box too. You will thank yourself in April.
Step 5: Protect Above-Ground Parts That Stay Outside
Not every part can come inside. Main lines buried or staked in place will stay out all winter. Give them some protection. Make sure all above-ground PVC and poly lines are drained. Cover exposed backflow devices that cannot be removed with an insulated pouch. These pouches are sold at garden centers and through retailers listed on garden supply sites.
Mulch over the beds also helps. A layer of leaves or straw keeps soil temperature steadier. This protects shallow lines and roots alike. Gardeners who compost leaves in bags each fall have a free source of winter mulch ready for this job. Do not bury emitters under heavy mulch, though. Mark their spots so you can find them in spring.
Step 6: Check Emitters, Fittings, and Stakes
With the lines empty, do a slow walk of the whole system. Look at each emitter. Mark any that are clogged, cracked, or missing with flag tape. Check push fittings and barbed connectors. Look for white stress marks on plastic, which signal that a fitting is near failure. Check stakes and hold-downs. Frost heave can push stakes up over winter, so reseat any loose ones now.
Clean what you can clean. Soak clogged emitters in white vinegar for an hour, then brush them out. Many clogs clear with this simple soak. Replace emitters that stay blocked. They are cheap, and a blocked emitter starves a plant all season. Corona hand tools, such as those shown by Corona Tools, make quick work of cutting out bad sections of line for replacement.
Write down every part you need. Note the size of the line, the type of emitter, and the count of each. This list is your spring shopping list. Buying parts in winter, when demand is low, can save money and avoid the spring rush.
Drip Irrigation Winterization Steps for Garden Types
The steps above fit all layouts, but a few types need extra care.
Raised beds use short runs that drain fast. The main risk is the timer and filter at the bed edge. Bring both inside.
In-ground row gardens use long runs of thin drip tape. Tape tears easily in ice. If the tape is more than two seasons old, many growers pull it up and replace it in spring.
Container gardens use micro tubing and small emitters that are hard to drain fully. Many gardeners coil the whole small system and store it in a garage. New tubing each spring costs little and works better.
Sloped yards pool water at the low end of each run. Open the lowest drain first. Blow air from the high end toward the low end.
Common Mistakes to Avoid
The most common mistake is skipping the blowout. Gravity draining feels complete, but water stays in emitters and valve bodies. The first hard freeze finds that water. Take the time to blow the lines out.
The second mistake is too much air pressure. Shop compressors can push 120 PSI or more. Drip parts are built for 20 to 30 PSI. Always use a regulator and test the first zone before you continue.
The third mistake is forgetting the timer. A timer left on will try to run its program all winter, and its battery will die in the cold. Turn it off and store it dry.
The fourth mistake is leaving the filter full. A filter bowl full of water can crack its housing. Empty it, rinse it, and store the element inside.
The fifth mistake is poor timing. Waiting until after the first hard freeze means the damage is already done. Mark the winterizing date on the calendar each year. Garden planning resources like The Spruce garden guides remind readers to treat fall shutdown as a fixed garden task.
Care and Upkeep Through Winter
Once the system is drained, winter care is simple. Keep the timer and stored parts dry. Walk the garden after heavy storms. Wind can uncover lines and shift mulch. Reseat any stakes that frost has lifted.
Do not run water through the system during a warm spell unless you plan to drain it again. If plants truly need water, water by hand. Keep the drip lines empty until spring.
Cost and Price of Winterizing
Winterizing a drip system costs little. Most gardeners spend nothing beyond their time. A rented compressor costs about twenty to forty dollars for a half day, and one rental can serve several neighbors if you share. Insulated pouches for backflow devices cost a few dollars each. Replacement emitters cost pennies apiece in packs.
Compare this with spring repair costs. A cracked filter housing can cost thirty dollars or more. A ruined timer can cost fifty to one hundred dollars. An afternoon in fall is cheaper than a weekend of repairs in spring. Product testers at Consumer Reports note that preventive care is the biggest factor in how long irrigation parts last.
Safety Notes
Compressed air can hurt. Wear safety glasses when blowing out lines. Keep hands and face away from open emitters during the blowout. Keep children and pets clear of the work area while the air is on.
Shut off electricity to outdoor outlets that feed the timer before you unplug it. Know where the main water shutoff is before you start. Rinse cleaned parts well before storing them.
Frequently Asked Questions
Do I need to winterize drip irrigation in a mild climate?
Yes, in most cases. Even one night below freezing can crack a line that holds water. Draining the system takes little time and removes the risk.
Can I use antifreeze in my drip lines?
No. Do not put antifreeze, alcohol, or any chemical in drip lines. These can harm soil, plants, and groundwater, and they can damage drip parts. Air and gravity are the safe ways to clear a system.
What pressure should I use to blow out drip lines?
Keep air pressure at 30 PSI or below. Most drip parts are rated for 20 to 30 PSI. Air hits harder than water, so staying low protects fittings and emitters. Always use a regulator on the compressor.
Should I remove the timer for winter?
Yes, if you can. Bring the timer indoors to a dry spot and remove its batteries. If the timer must stay mounted, turn it to off, unplug the power, and cover it.
How do I know all the water is out?
Work zone by zone. Blow air until emitters give off mist instead of water. Then open the lowest drain in the zone. When only air comes out, the zone is clear.
What should I do in spring to restart the system?
Reinstall the filter element, backflow device, and timer with fresh batteries. Close all drains and end caps. Turn the water on slowly and check for leaks. Flush each zone for two minutes. Replace any parts you marked with flag tape in the fall. Gardeners who also prune fruit trees for beginners in early spring often restart irrigation the same week.
A Final Word
Good drip irrigation winterization steps for garden systems are simple and cheap. Shut off the water. Drain the lines. Blow them out with low-pressure air. Store the small parts inside. Walk the system and mark repairs. Do this before the first hard freeze each fall. The habit takes one afternoon and saves a weekend of spring repairs. Many gardeners pair this fall task with planning next year’s beds, since a garden that attracts pollinators to the garden each summer starts with beds that were put to bed well the fall before.
References
Burpee. (n.d.). Seeds, plants, and gardening supplies. https://www.burpee.com Consumer Reports. (n.d.). Product reviews and ratings. https://www.consumerreports.org Corona Tools. (n.d.). Garden and landscape tools. https://www.corona-tools.com Family Handyman. (n.d.). DIY home repair and maintenance. https://www.familyhandyman.com Gardener’s Supply Company. (n.d.). Gardening tools and supplies. https://www.gardeners.com Lowe’s. (n.d.). Home improvement products. https://www.lowes.com The Home Depot. (n.d.). Home improvement products. https://www.homedepot.com The Spruce. (n.d.). Home and garden advice. https://www.thespruce.com
Was this guide helpful?

About Robert Taylor
The My Garden US editorial team writes practical, in-depth home and garden guides for American homeowners — tested advice, no fluff.
You May Also Like
How to Build a Cold Frame Cheap: A Gardener’s Budget Guide
March 29, 2026 0 views
How to Prune Fruit Trees for Beginners: A Plain and Patient Guide
March 1, 2026 0 views
The Best Garden Sprayer for Lawn Care: A Practical Buying Guide
June 25, 2026 0 views