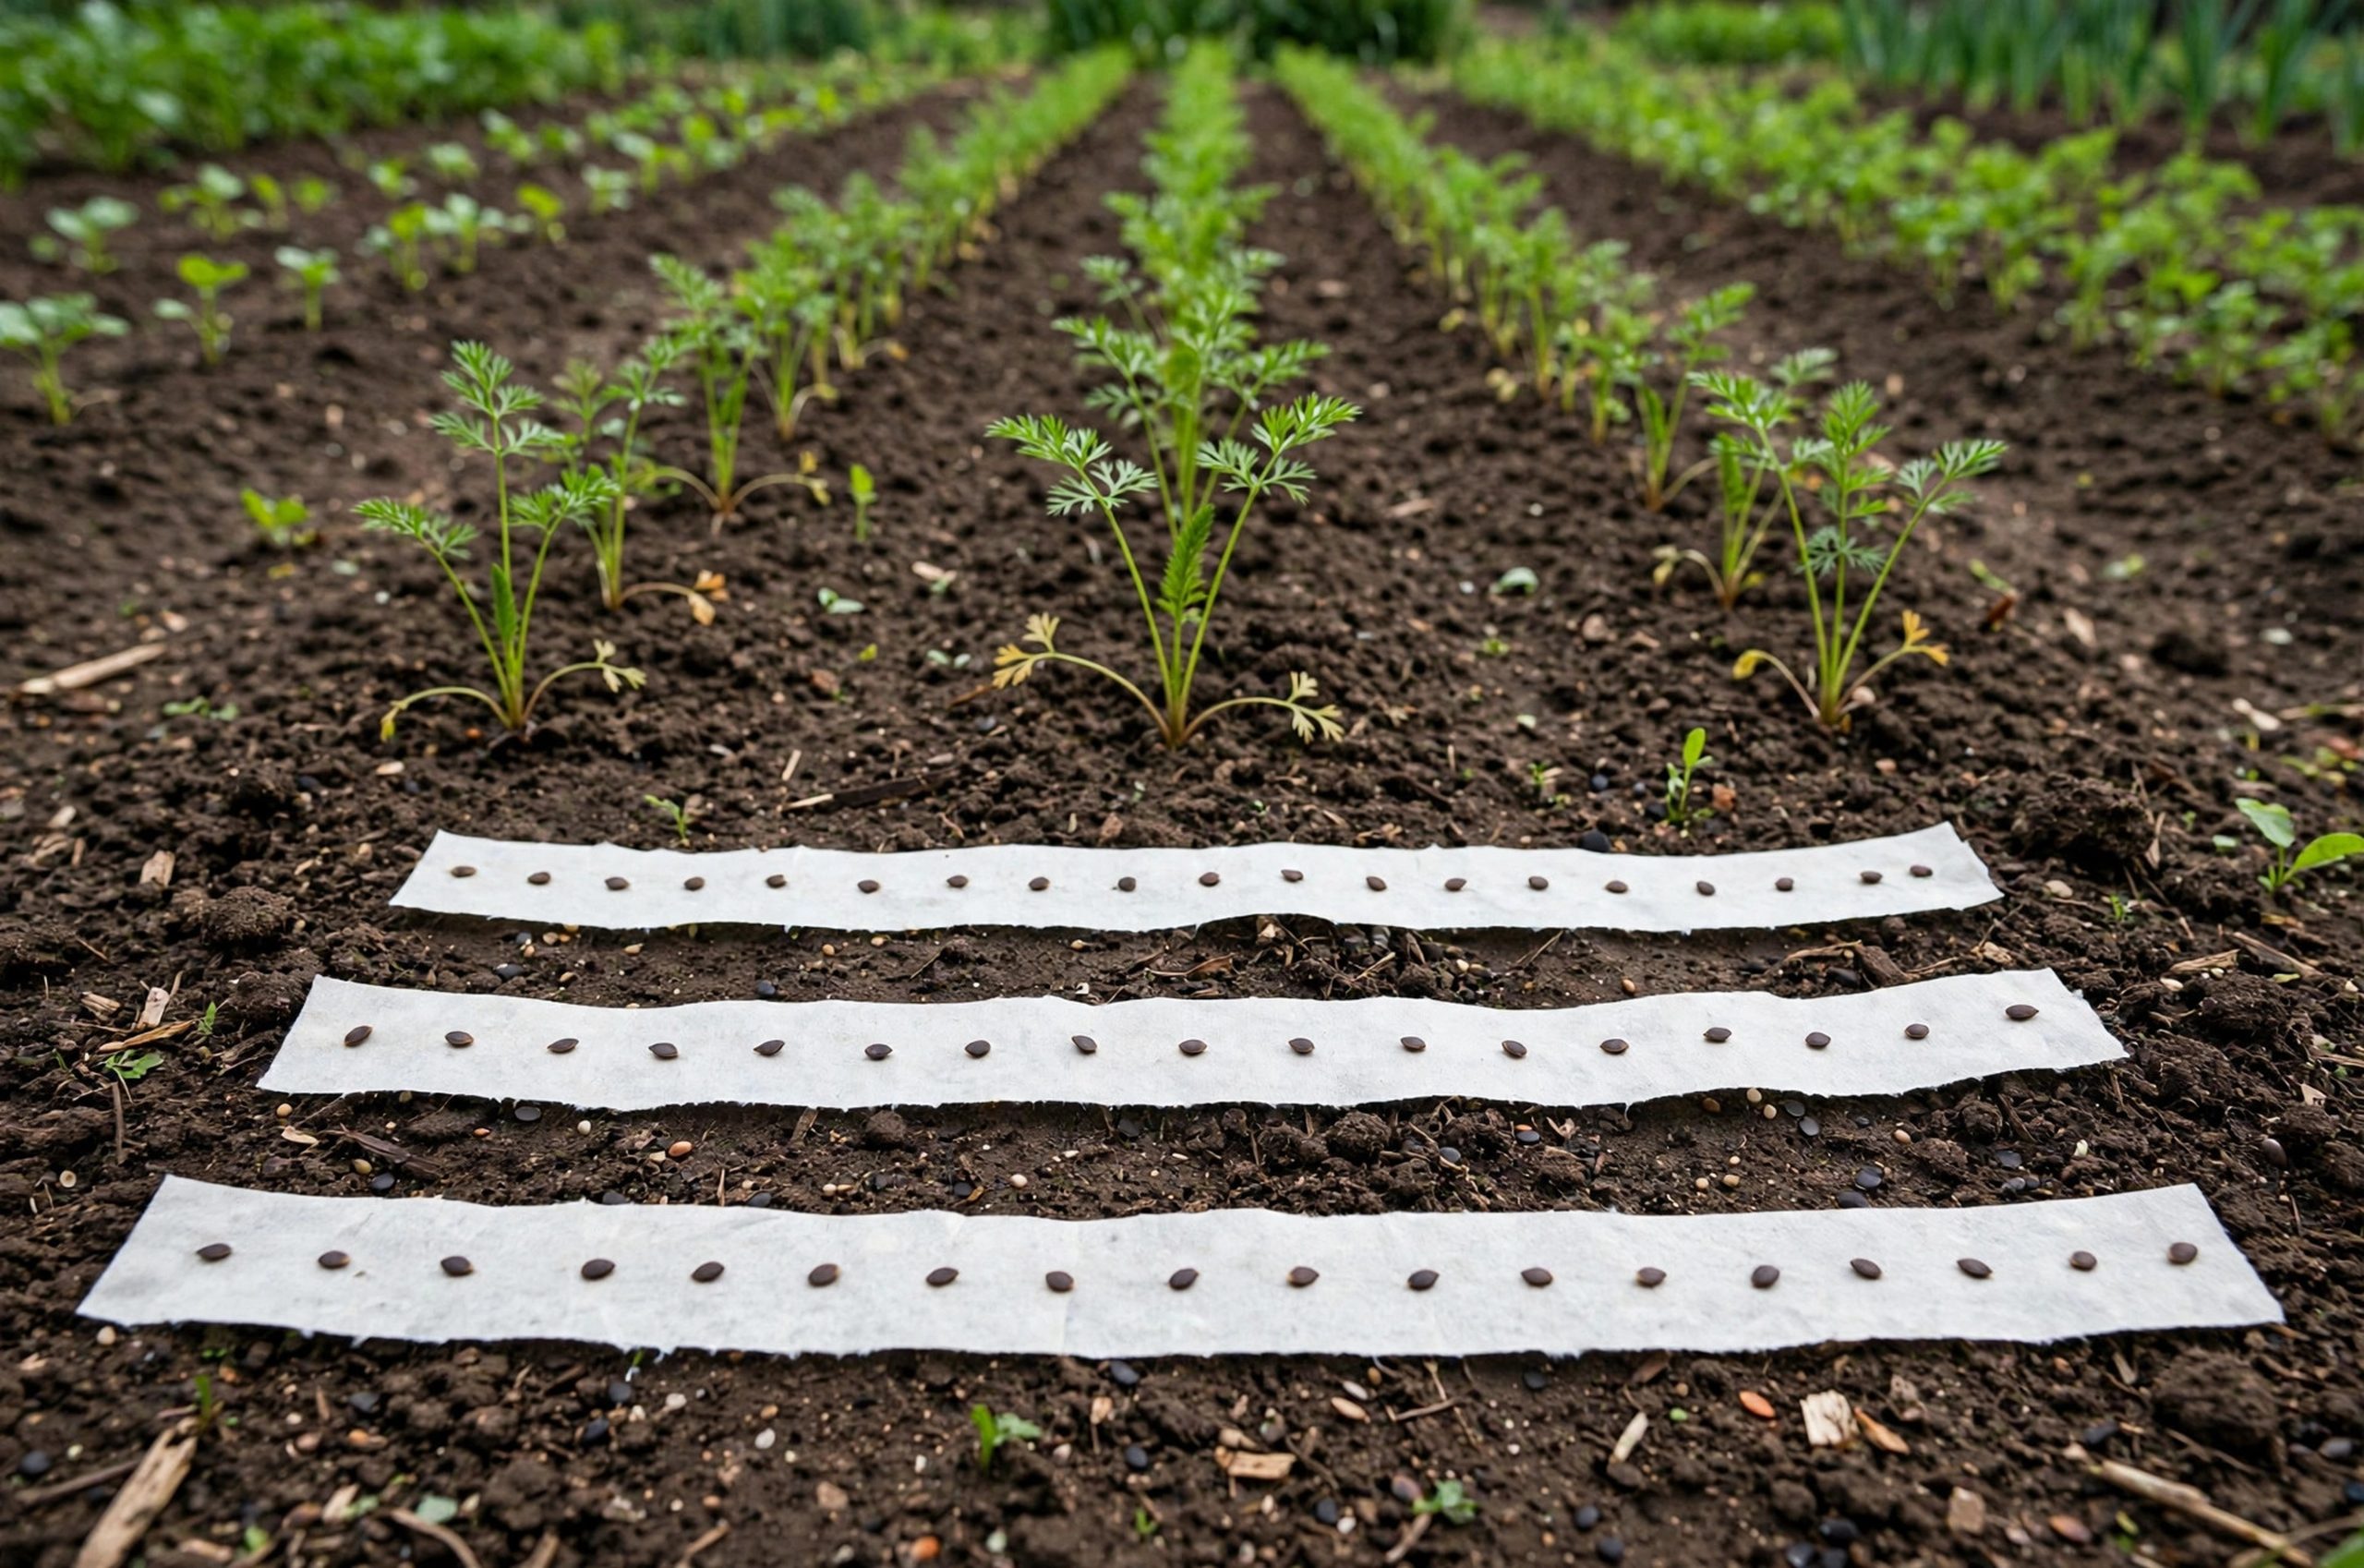
Carrot seeds are tiny, almost like dust. Sown by hand, they land in clumps, and the result is a crowded row that demands tedious thinning. Skip the thinning and the crowded seedlings grow into twisted, stunted roots. DIY seed tape solves the whole problem. You glue seeds onto strips of toilet paper at perfect spacing during a quiet evening indoors, then lay the strips into the garden like ribbons. Every seed lands exactly where it should. This guide shows how to make seed tape for carrots and other small seeds, step by step. If you are new to diy seed tape, start with the basics below.
Table of Contents
Table of Contents
- Diy Seed Tape: What Seed Tape Is
- Why Carrots Benefit Most
- What You Will Need
- Making the Flour Paste
- Making the Seed Tape: Step by Step
- 1. Cut Your Strips
- 2. Mark the Spacing
- 3. Dab on the Paste
- 4. Place the Seeds
- 5. Dry and Store
- Planting the Tape
- Soil Temperature and Timing
- Which Seeds Work Best on Tape
- Troubleshooting
- The Bottom Line
- References
Diy Seed Tape: What Seed Tape Is
When it comes to diy seed tape, getting the details right makes all the difference.
Many homeowners find that diy seed tape is easier than they expected once they know the basics.
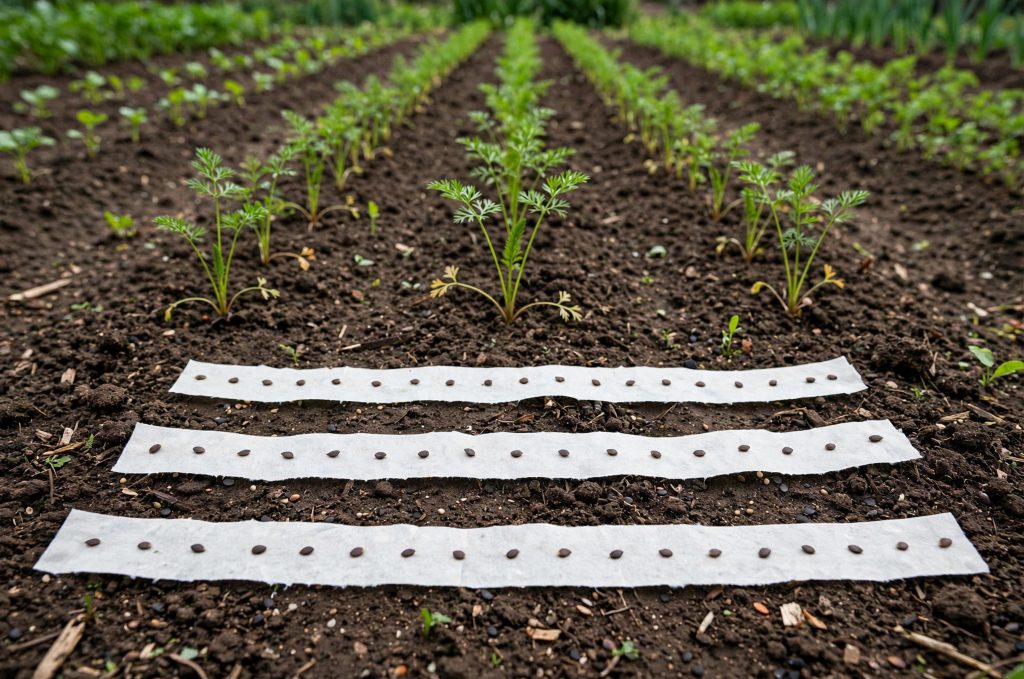
Seed tape is a strip of biodegradable paper with seeds stuck to it at even intervals. Commercial versions exist, but they cost more and limit you to whatever varieties the manufacturer chose. Homemade tape costs almost nothing, works with any seed you like, and lets you set the spacing yourself. In the soil, the paper softens and breaks down, the flour glue dissolves, and the seeds sprout right where you placed them (One Green Planet).
The method suits any small seed that is hard to space by hand: carrots, lettuce, radishes, spinach, onions, and many flower seeds. Kansas State University's healthy yards program demonstrates the technique as a family-friendly garden project, noting that carrots and radishes spaced on tape need no thinning later (Kansas State University).
Why Carrots Benefit Most
Many homeowners find that diy seed tape is easier than they expected once they know the basics.
The key to diy seed tape is choosing the right approach for your space and budget.
Carrots punish crowding more than almost any vegetable. When seedlings grow shoulder to shoulder, the roots tangle, fork, and stay skinny. The standard advice is to thin twice: first when seedlings are an inch or two tall, then again as they size up. Thinning works, but it wastes seed, disturbs the roots you keep, and the scent of pulled seedlings can draw carrot rust flies.
Seed tape ends the cycle. Seeds go down two to three inches apart from the start, each with room to form a straight root. You also use less seed, which matters with pricey pelleted or specialty varieties. For the full picture on growing the crop itself, see our carrot growing guide and the raised bed carrot guide.
What You Will Need
The key to diy seed tape is choosing the right approach for your space and budget.
With a little planning, diy seed tape can fit even a busy schedule.
- Plain, unscented single-ply toilet paper (or strips of newspaper printed without color ink)
- All-purpose flour and water
- A small bowl and a spoon or whisk
- Cotton swabs, toothpicks, or a small paintbrush
- A ruler or tape measure
- A pencil and scissors
- Carrot seeds (or any small seed)
- Tweezers (optional, but handy)
Use plain white toilet paper with no lotions or fragrances. The paper must break down cleanly in the soil, so skip anything quilted, dyed, or scented (Hillermann Nursery).
Making the Flour Paste
With a little planning, diy seed tape can fit even a busy schedule.
Before you start, it helps to understand how diy seed tape works in real homes.
The glue is just flour and water, and it needs to be thick. Mix about two tablespoons of flour with two tablespoons of water and stir until smooth. You want the consistency of white craft glue or thick syrup: heavy enough to sit on the end of a toothpick without dripping. If it runs, add a little more flour. If it clumps, add water a few drops at a time.
One caution from experienced makers: keep the paste thick and use small dabs. A watery glue can wake the seeds up too early, and a heavy hand makes a mess. A little goes a long way (Hillermann Nursery).
Making the Seed Tape: Step by Step
Before you start, it helps to understand how diy seed tape works in real homes.
1. Cut Your Strips
Unroll the toilet paper and cut it into strips the length of your garden rows. Toilet paper is wider than you need, so cut each length in half down the middle. If the paper is two-ply, you can separate the plies and get twice as many strips. Four-foot sections are easy to handle on a table; longer rows can be assembled from joined sections later.
2. Mark the Spacing
Lay a strip flat and, with the ruler and pencil, mark dots down the center where each seed will go. For carrots, mark every two to three inches. The Old Farmer's Almanac recommends final carrot spacing of two to three inches in rows a foot apart, so two and a half inches is a safe middle (Old Farmer's Almanac). For lettuce, use the spacing on the packet; for radishes, about two inches. University of Delaware Extension suggests three-inch spacing for carrots in intensive plantings (University of Delaware Extension).
3. Dab on the Paste
Dip the cotton swab or toothpick in the flour paste and place a small dab on each pencil mark. Work down a comfortable length, a ruler or two at a time, then switch to placing seeds before the paste skins over.
4. Place the Seeds
Set one seed on each dab of paste. If your germination rate is uncertain, place two seeds per spot for insurance; you can snip the weaker seedling later, though with good seed one is enough. Tweezers help with the tiniest seeds. Press each seed lightly so it sticks.
5. Dry and Store
Let the finished strips dry completely, which usually takes a few hours in open air. Once dry, roll them up loosely and store in a paper bag in a cool, dry place until planting time. Do not store them damp or sealed in plastic, or the seeds may sprout in storage (Hillermann Nursery).
Planting the Tape
A good plan for diy seed tape saves time, money, and frustration.
Prepare the bed first. Carrots need loose, stone-free soil worked deep, since rocks and clods fork the roots. The Old Farmer's Almanac advises tilling to about ten inches and removing every stone and clump, amending with compost and sandy topsoil if the ground is heavy (Old Farmer's Almanac).
Make a shallow trench about a quarter to a half inch deep, the depth the packet recommends for the seed. Lay the tape in the trench, cover it with fine soil, and firm gently. A covering of fine vermiculite or sifted compost instead of raw soil helps prevent the surface crust that blocks tiny seedlings (Old Farmer's Almanac). Water with a gentle spray so the tape is not washed out of place.
Keep the bed evenly moist until seedlings emerge. Carrots are slow, often taking two to three weeks, and the surface must never dry out and crust in that time. A board laid over the row holds moisture in; lift it daily to check, and remove it the moment seedlings appear.
Soil Temperature and Timing
For most people, diy seed tape comes down to a few smart choices.
Carrots germinate in soil from the mid forties upward, with the fastest, most even sprouting in the 45 to 85 degree range (Oregon State University Extension). The University of Wisconsin's planting guide lists 45 degrees as the minimum soil temperature to sow and 80 as the optimum (University of Wisconsin-Madison Extension). A simple soil thermometer takes the guesswork out of timing.
Which Seeds Work Best on Tape
If you are new to diy seed tape, start with the simplest option and build from there.
Beyond carrots, tape shines for lettuce, spinach, radishes, beets, scallions, and small flower seeds like alyssum and poppies. It is less useful for large seeds like beans, peas, and corn, which are easy to space by hand anyway. One roll of toilet paper and an evening at the kitchen table can produce tape for the whole spring garden.
Troubleshooting
When it comes to diy seed tape, getting the details right makes all the difference.
Seeds sprouted on the tape before planting. The paste was too wet or the strips were stored damp. Remake with thicker paste and dry the strips thoroughly.
Tape blew away or washed out. Plant on a calm day, cover promptly with soil, and water gently. A light mulch of straw over the row holds everything in place.
Patchy germination. Old seed is the usual suspect. Test germination on a damp paper towel before making a big batch of tape. Uneven moisture is the second suspect; the bed must stay consistently damp until emergence.
Seedlings still crowded. You placed two seeds per dab and both sprouted. Snip the weaker one at soil level rather than pulling, which disturbs its neighbor's roots.
For a lean, airy covering mix over the tape, a simple homemade blend of coconut coir and perlite works beautifully (Gardening Know How). And if your carrot bed is a raised bed, our raised bed soil guide covers the deep, loose mix carrots love.
The Bottom Line
DIY seed tape turns the fussiest sowing job in the vegetable garden into a calm indoor craft. An evening with toilet paper, flour paste, and a ruler buys you straight rows, even stands, and no thinning. Once you try it for carrots, you will find yourself making tape for everything small-seeded in the garden. A little care goes a long way with diy seed tape.
References
Gardening Know How. (n.d.). How to make the perfect DIY seed-starting mix: Easy recipes. https://www.gardeningknowhow.com/garden-how-to/seeds/diy-seed-starting-mix
Hillermann Nursery. (n.d.). Making seed tapes. https://www.hillermann.com/s/Making-Seed-Tapes.pdf
Kansas State University. (n.d.). Making your own seed tape. https://kansashealthyyards.org/all-videos/video/making-your-own-seed-tape
Old Farmer's Almanac. (n.d.). Carrots: Planting, growing, and harvesting carrots at home. https://www.almanac.com/plant/carrots?page=1
One Green Planet. (n.d.). What is seed tape, why people use it, and how to make your own. https://www.onegreenplanet.org/lifestyle/what-is-seed-tape-why-people-use-it-and-how-to-make-your-own/
Oregon State University Extension. (n.d.). Soil temperature conditions for vegetable seed germination. http://extension.oregonstate.edu/catalog/soil-temperature-conditions-vegetable-seed-germination
University of Delaware Extension. (n.d.). Carrots: Grow your own. https://www.udel.edu/content/dam/udelImages/canr/pdfs/extension/environmental-stewardship/lawn-and-garden/CARROTS_-_Grow_Your_Own.pdf
University of Wisconsin-Madison Extension. (n.d.). When is the right time to plant vegetable seeds? Check soil temperature. https://hort.extension.wisc.edu/articles/when-is-the-right-time-to-plant-vegetable-seeds-check-soil-temperature/
Was this guide helpful?

About My Garden US
The My Garden US editorial team writes practical, in-depth home and garden guides for American homeowners — tested advice, no fluff.
You May Also Like
Native Grass Seed for Sale USA: A Practical Guide for Homeowners
January 2, 2026 1 views
Snake Plants Indoor Deals Near Me: A Simple Buying Guide
May 23, 2026 0 views
Pothos Plants Bulk: Where to Buy USA for Homes, Offices, and Events
April 19, 2026 2 views