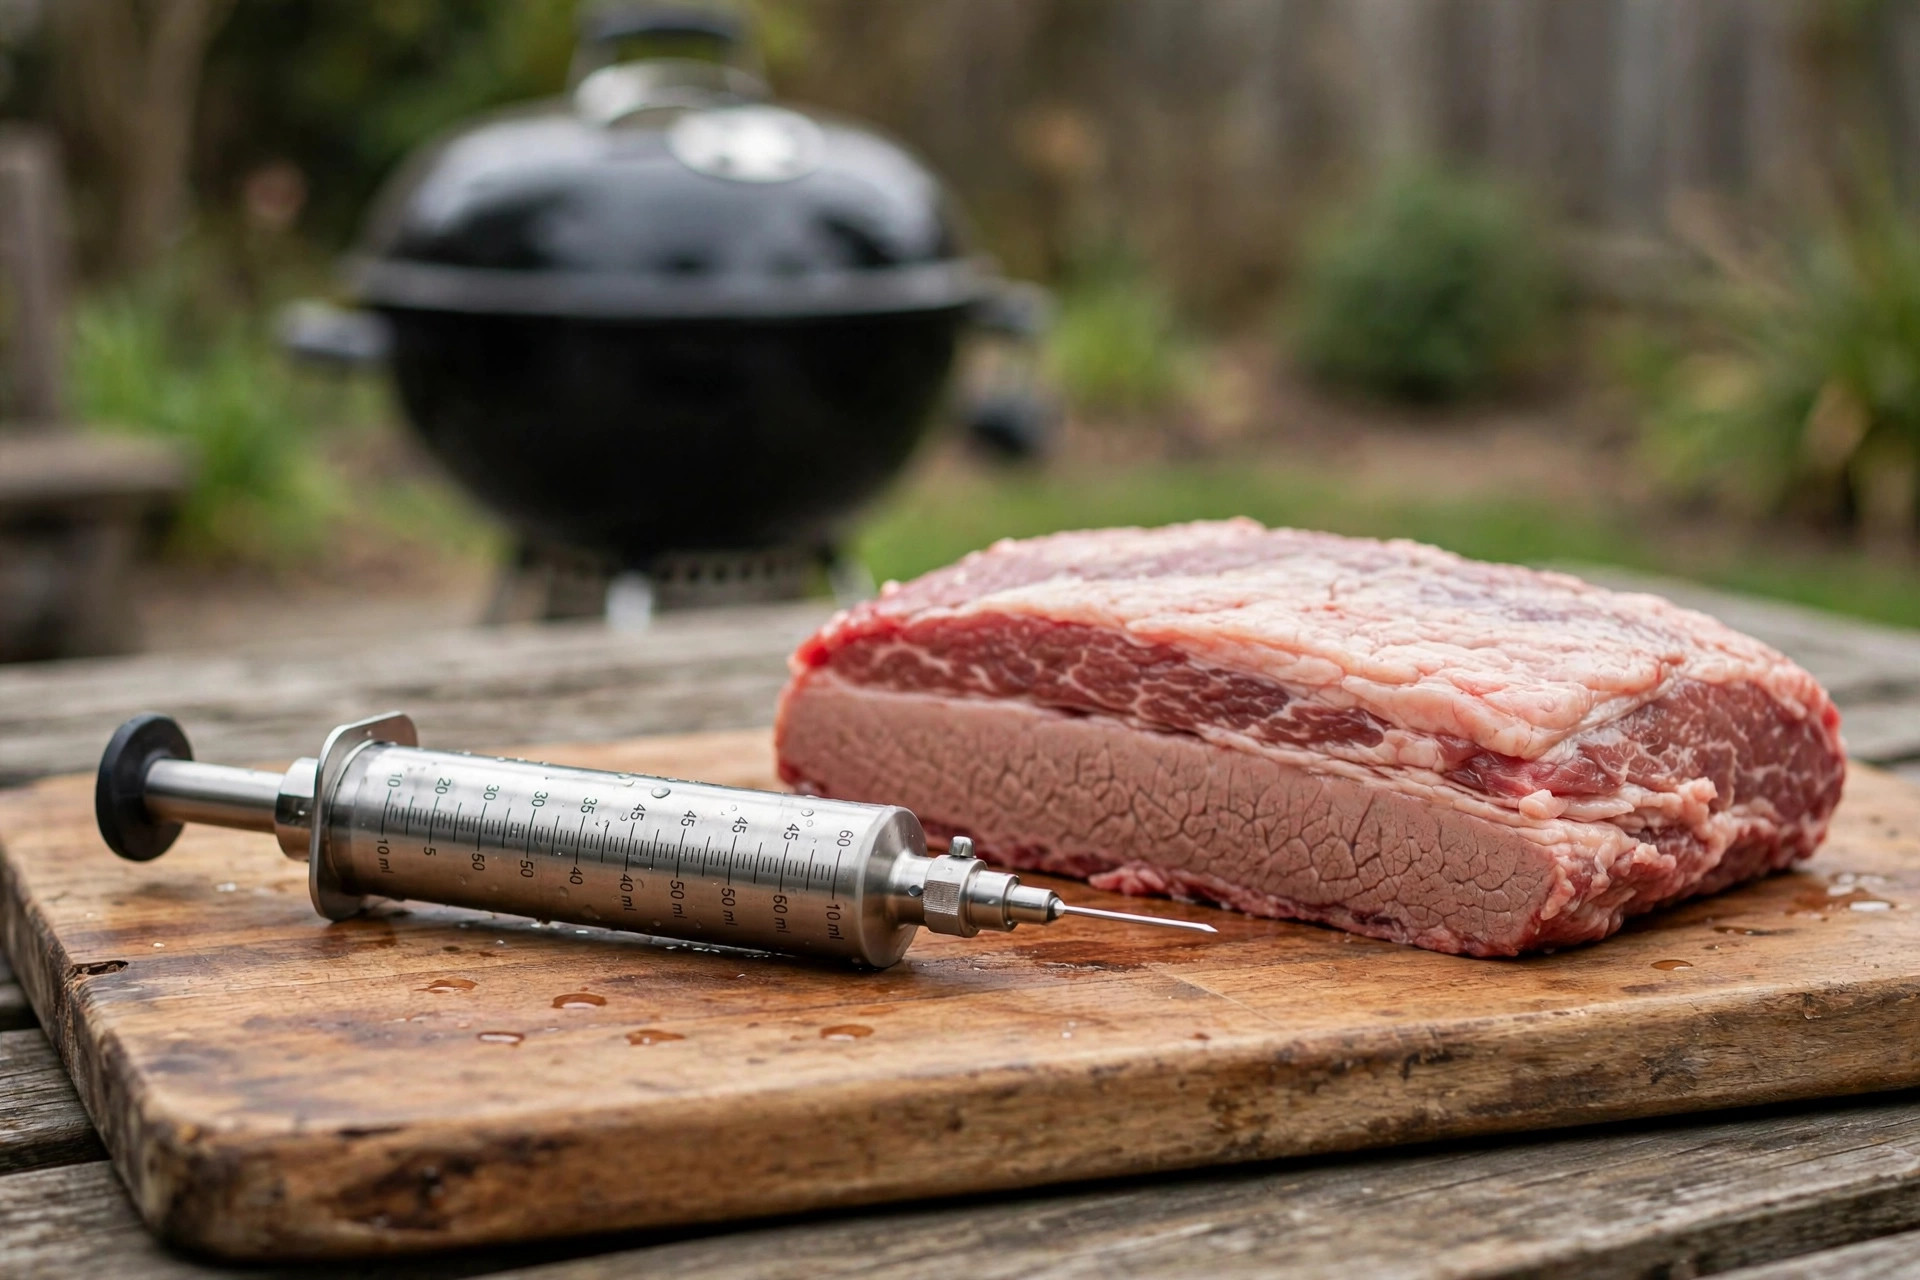
Anyone who has read the best BBQ injector for brisket reviews knows the central problem. A whole brisket is a big, tough piece of meat. It can spend twelve hours or more in the smoker. The outside takes on smoke and forms a dark crust. The inside can still turn out dry. Injection is the old trick pitmasters use to fight that dryness. A BBQ injector pushes broth, melted butter, or a seasoned marinade deep into the meat, where a surface rub can never reach.
This guide walks through what the reviews say, what features matter, and how to choose a meat injector for smoking brisket that will last for years of cooks.
Why Brisket Needs Help From the Inside
Brisket comes from the chest of the cow. It is full of tough connective tissue. Low heat and long time break that tissue down into soft gelatin. That is the basic science of barbecue. But the flat, the lean half of the brisket, has little fat to protect it. Hours of heat drive moisture out of it. No amount of mopping or wrapping can put moisture back inside the center of the meat.
Injection puts it there directly. A few ounces of beef broth or melted tallow, placed deep in the muscle, keep the flat juicy through a long cook. Competition teams have done this for decades. Backyard cooks now do it too, because a good injector costs less than a single ruined brisket.
The reviews agree on one point. An injector will not save bad meat or a bad fire. It raises the floor. It gives an average cook a better shot at a moist slice, and it gives a good cook a tool for real consistency.
What to Look For in a BBQ Injector: Best Bbq Injector for Brisket Reviews
The best BBQ injector for brisket reviews always come back to three parts: the needle, the barrel, and the build materials. Brisket is dense. It punishes weak tools.
The Needle
The needle does the hard work. It must pierce thick muscle without bending. Look for a needle at least six inches long, made of stainless steel, with holes along its sides as well as at the tip. Side holes spread the liquid in several directions as you inject. A needle with only a tip hole leaves pockets of marinade in one spot.
Thicker needles clog less. A wide bore handles broth, but it still struggles with marinade that holds garlic bits or ground pepper. Strain your injection liquid through a fine sieve before you load the syringe. Reviewers name clogged needles as the number one complaint.
Some kits ship with two or three needles. A fine needle suits thin liquids like stock. A wider needle with larger holes suits thicker mixtures. Extra needles are a real plus, not a gimmick.
The Barrel
Capacity matters. A one-ounce barrel means constant refilling on a fifteen-pound brisket. A two-ounce barrel is the common size and works well. Larger barrels exist, but they get heavy and hard to push. For brisket, two ounces is the sweet spot. You will refill it a few times, and each refill is quick.
Clear markings on the side help you dose each spot evenly. A good plunger seal keeps liquid from leaking back past the gasket. Many reviewers test this by filling the barrel with water and holding it needle-down. If it drips, the seal is poor.
The Build Materials
Stainless steel barrels and needles last. They do not stain, they do not hold odors, and they survive the dishwasher. Plastic barrels work, and they cost less, but they can crack under hard pressure and they stain from dark marinades over time.
Look for solid threads where the needle meets the barrel. A Luer-lock style fitting twists tight and will not shoot off under pressure. Cheap slip fittings can pop loose and spray broth across the kitchen. Reviewers mention this failure often, and it is worth paying more to avoid.
The Main Types of Injectors
Stainless Steel Syringe Injectors
This is the type the reviews rate highest. A heavy stainless barrel, a locking needle, and a firm plunger. It feels like a tool, not a toy. It costs more, often between twenty and forty dollars, but it lasts for years. For a cook who smokes brisket several times a year, this is the standard choice.
Simple Plastic Injectors
These sell for a few dollars at many stores. A plastic barrel, one needle, and a simple plunger. They work for a first try or a single cook. They clog more easily, and the plunger seal wears out fast. Reviewers call them fine for a beginner who wants to test injection before spending more.
Heavy Duty Kits With Spare Needles
The top-rated kits add a case, cleaning brushes, and two or three needles. They cost the most but solve the two biggest problems at once: clogging and cleaning. If you cook for crowds or enter local contests, a kit of this kind pays for itself in saved frustration.
How Injection Fits Into a Long Cook
Injection happens at the start, long before the meat meets the smoke. Trim the brisket, then load the injector with your warmed marinade. Work in a grid pattern across the flat, pressing the needle deep and releasing a small amount at each spot. Go with the grain of the meat. Pull the needle out slowly so the liquid stays inside instead of following the needle back out.
Plan on about one to two ounces of liquid per pound of meat. A twelve-pound brisket takes roughly a cup to a cup and a half. More is not better. Too much liquid pools under the meat and washes off your rub.
After injection, season the outside and let the brisket rest in the refrigerator for a few hours. Then cook as you normally would. If you are new to the long cook itself, a guide to how to smoke brisket on pellet grill covers temperatures and timing in plain terms.
During the cook, trust your tools. A best bbq thermometer wireless for grilling lets you watch the internal temperature without opening the lid and losing heat. Injection gives you a moisture buffer, but it does not change the target temperature. The brisket is done when it probes tender, usually near 200 to 205 degrees.
What Goes Into the Injector
The liquid matters as much as the tool. Plain beef broth is the classic choice. It adds beef flavor and salt without changing the character of the meat. Melted beef tallow is a favorite among competition cooks. It bastes the inside with pure beef fat.
Many cooks build a simple brisket injection marinade recipe at home: beef broth, a spoon of Worcestershire sauce, melted butter, and a little salt and garlic powder. Warm it, stir it smooth, and strain it. Keep the mixture warm while you work so the butter stays liquid. Cold liquid thickens and clogs the needle.
Avoid chunky ingredients. Onion pieces, cracked pepper, and herb stems will jam any needle. If you want those flavors, put them in the rub instead. A homemade best bbq rub for ribs homemade style rub works just as well on brisket, and it keeps the injector running clear.
What a Good Injector Costs
Prices fall into three bands. Simple plastic injectors cost five to ten dollars. They are disposable in spirit, though a careful cook can get a season out of one. Mid-range stainless steel injectors cost fifteen to twenty-five dollars. This is where most of the well-reviewed models sit. Heavy duty kits with spare needles and cases cost thirty to fifty dollars.
The reviews are clear about value. The jump from a plastic injector to a mid-range stainless model is worth the money. The jump from mid-range to a premium kit is worth it only if you inject often or hate cleaning clogs. For most backyard cooks, the middle band is the right buy.
Watch for sales at the big retailers. Grill gear goes on sale in spring and again in late summer. Buying off-season can cut the price of a good stainless injector by a third.
Using an Injector the Right Way
Good technique beats an expensive tool. Start with clean hands and a clean injector. Warm the liquid, strain it, and fill the barrel with the needle already attached. Point the needle up and push the plunger until a drop appears at the tip. This clears the air. Air pockets in the meat cause uneven cooking.
Inject the brisket on a rimmed sheet pan or in a roasting pan. Liquid will leak from the needle holes as you work. Press the needle in at a slight angle, push the plunger slowly, and withdraw the needle before moving to the next spot. Space your injections about an inch and a half apart across the flat. The point, the fatty half, needs less. It has its own fat to keep it moist.
Wipe the needle between refills. A quick rinse keeps dried bits from building up inside. If the plunger gets hard to push, stop and check for a clog. Forcing it can bend the needle or blow the fitting.
Cleaning and Care
Clean the injector right after use. Marinade dries fast and turns to glue inside the barrel. Take the needle off, push soapy water through it both ways, and scrub the barrel with a bottle brush. Most stainless models are dishwasher safe on the top rack, but a hand wash is faster and kinder to the seals.
Run a thin cleaning brush through the needle itself. Kits often include one. If the needle clogs with dried marinade, soak it in hot soapy water for twenty minutes, then brush it out. Never poke the clog through with a pin if you can avoid it. It can scratch the inside of the needle and make future clogs worse.
Store the injector taken apart, with the parts dry. A drop of food-safe mineral oil on the plunger gasket keeps the rubber soft. Check the gasket once a year. A worn gasket leaks and makes the plunger hard to push. Many makers sell replacement gaskets for a few dollars.
Safety
An injector needle is sharp. Treat it like a knife. Keep your free hand behind the needle path, never in front of it. Inject on a stable surface, not while holding the brisket in one hand.
Food safety matters too. Injection pushes surface bacteria deep into the meat. That is fine if you cook the brisket to a safe temperature all the way through, which a long smoke always does. Do not inject meat you plan to serve rare. Do not reuse leftover marinade that touched raw meat. Make a fresh batch, or boil the used liquid before serving it as a sauce.
Wash the injector between raw meat and any cooked food. Keep the parts out of reach of children. The needle looks harmless in a drawer, but it is not.
Frequently Asked Questions
Do I really need an injector for brisket?
No, but it helps. A well-cooked brisket without injection can be excellent. Injection is insurance. It is most useful on lean flats, on select-grade meat with little marbling, and on long cooks where the smoker runs a little hot. If you buy choice or prime briskets and cook steady, you may not miss it.
What is the best liquid to inject into brisket?
Beef broth is the safe classic. Melted beef tallow adds richness. A mix of broth, butter, and a little Worcestershire is a proven competition blend. Keep it simple. The meat should still taste like beef.
How far in advance should I inject?
A few hours before the cook is enough. Some cooks inject the night before. Overnight injection lets the salt in the marinade season deeper, but it can also make the texture a little hammy if the mix is very salty. Four to six hours in the refrigerator is a good middle ground.
Can I use a BBQ injector on other meats?
Yes. Pork butt, turkey breast, whole chickens, and pork loin all take injection well. Turkey is the other classic. A broth and butter injection keeps a smoked turkey breast moist in a way that brining alone sometimes misses. Clean the tool between different meats.
Why does my injector keep clogging?
The liquid is too thick or holds solid bits. Strain everything through a fine mesh sieve. Warm the liquid so fats stay melted. If you use a rub with coarse pepper in the mix, grind it finer or leave it out of the injection and put it on the outside instead.
Is a plastic injector good enough to start?
It is good enough to learn with. Fill it with plain broth, try it on one brisket, and see if you like the result. If you do, buy a stainless model. The plastic one will wear out, and you will already know the technique when the better tool arrives.
A Final Word
The best BBQ injector for brisket reviews point to the same conclusion. Buy a stainless steel injector with a locking needle, keep your liquid strained and warm, and inject with a steady hand. The tool is simple. The payoff is a brisket that slices juicy from edge to edge, the kind of result that brings people back to your table.
For more background, see Napoleon, Big Green Egg, and Broil King. For more background, see The Home Depot, The Spruce Eats, and AmazingRibs.com. Buying guides are also published by Consumer Reports and Weber.
References
AmazingRibs.com. (n.d.). Barbecue and grilling science. https://www.amazingribs.com Big Green Egg. (n.d.). Kamado grills and outdoor cooking. https://www.biggreenegg.com Broil King. (n.d.). Gas and charcoal grills. https://www.broilkingbbq.com Consumer Reports. (n.d.). Product reviews and ratings. https://www.consumerreports.org Napoleon. (n.d.). Fireplaces, grills, and heating products. https://www.napoleon.com The Home Depot. (n.d.). Home improvement products. https://www.homedepot.com The Spruce Eats. (n.d.). Recipes and cooking guides. https://www.thespruceeats.com Weber. (n.d.). Grills and outdoor cooking. https://www.weber.com
Was this guide helpful?

About Sarah Mitchell
The My Garden US editorial team writes practical, in-depth home and garden guides for American homeowners — tested advice, no fluff.