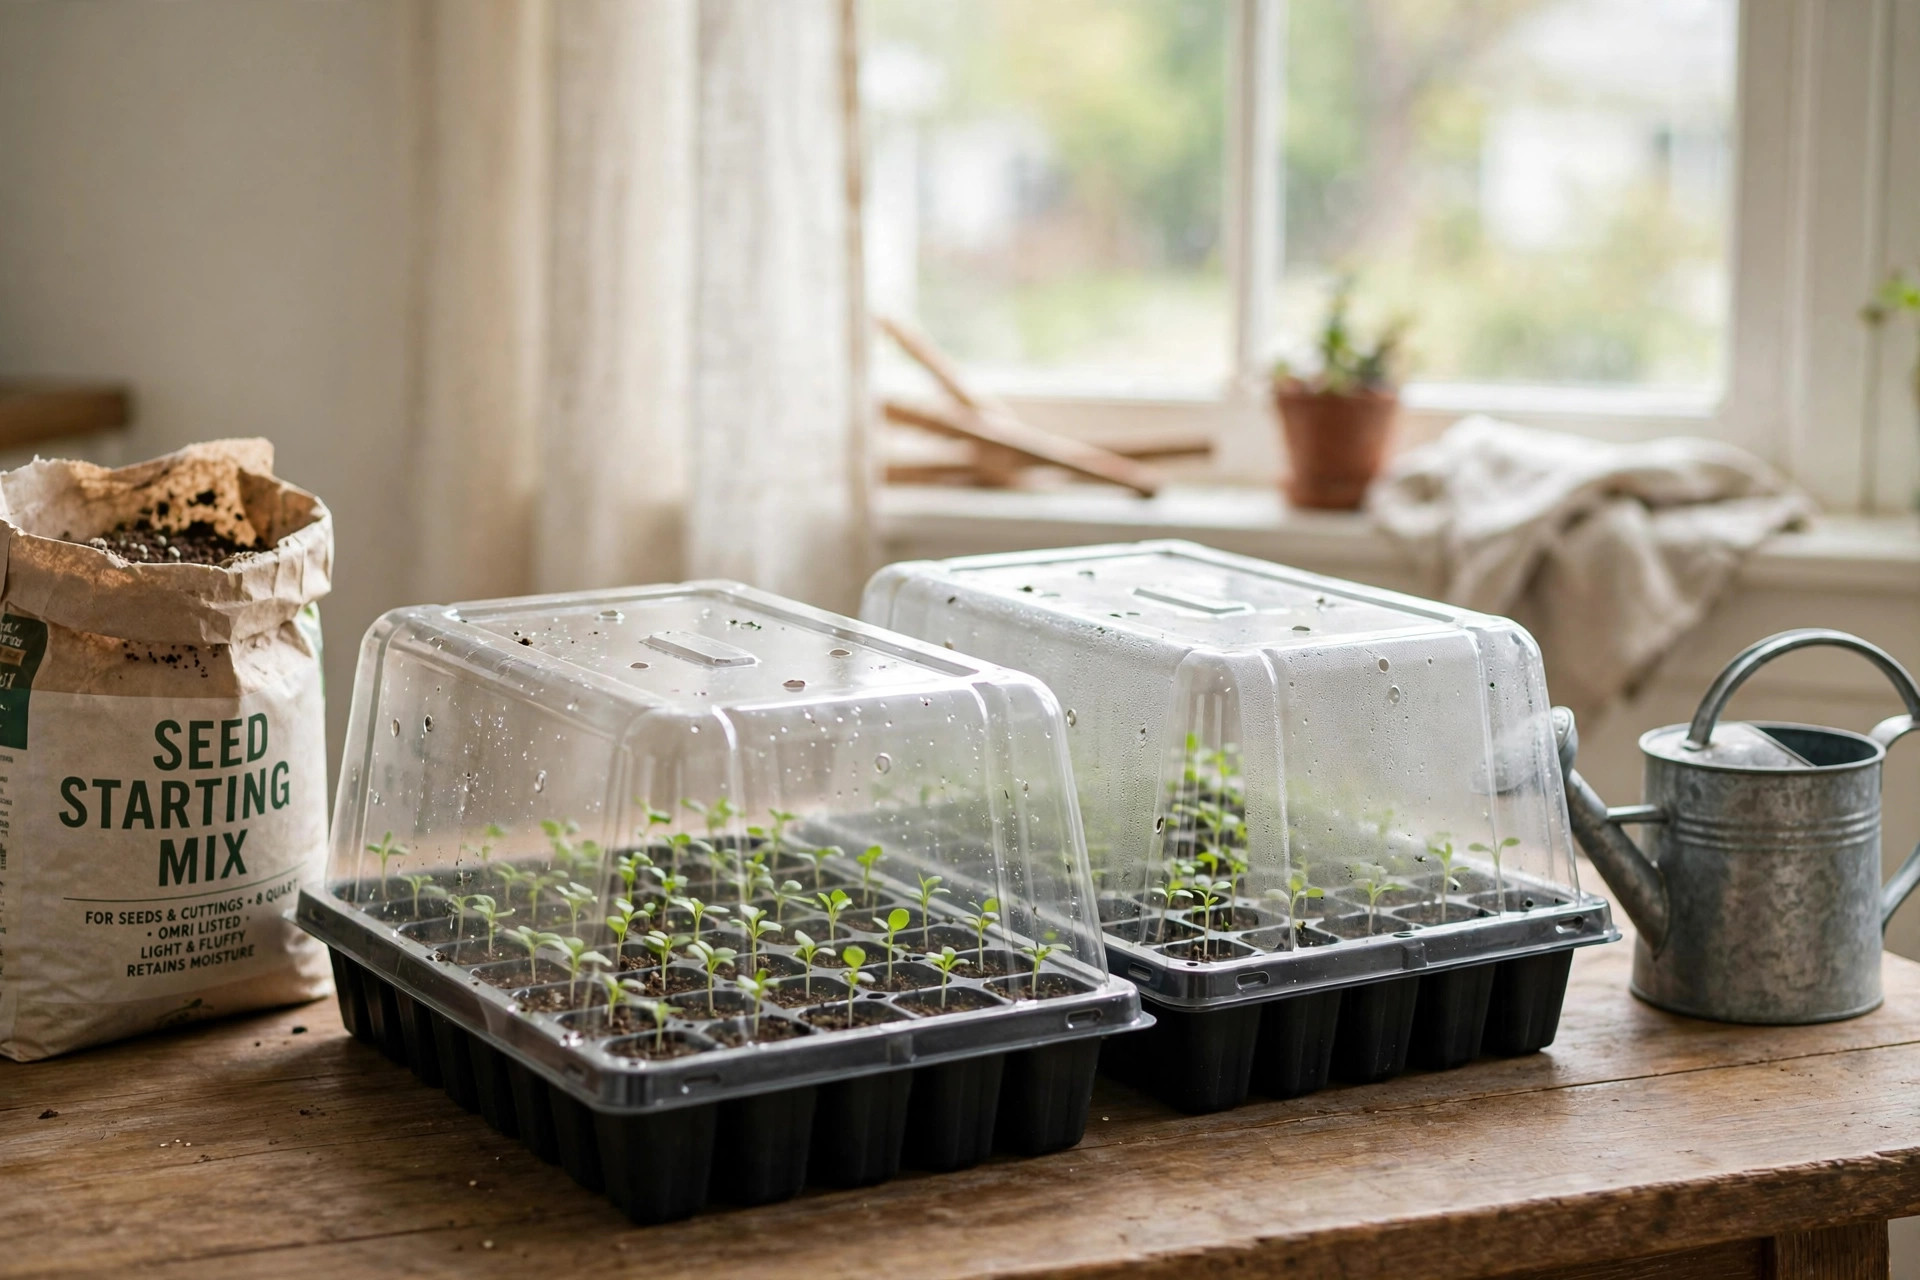

Seed starting trays with dome reviews matter more than most gardeners expect. These small kits hold soil, seeds, and moisture under a clear plastic cover. The cover acts like a tiny greenhouse. It keeps humidity high while seeds wake up and sprout. Reviews from real gardeners show that the best trays save time, water, and seed. Poor ones warp, crack, or grow mold. This guide walks through what seed starting trays with dome reviews tell us about picking a good kit, using it well, and keeping it clean for years of planting.
Why Seed Starting Trays with Domes Matter
Starting seeds indoors gives the garden a head start. A tomato seed planted inside in March becomes a strong plant ready for the soil in May. Direct sowing outside often fails because the weather is too cold or too dry. Trays with domes solve this problem in a simple way.
The dome traps warm, moist air around the seed cells. Most seeds need steady moisture to break open. They also need warmth. A clear dome holds both without extra work. When you look at seed starting trays with dome reviews, one theme comes up again and again: gardeners love that they can water once, cover the tray, and check back in a few days to find sprouts.
There is also the matter of space. One flat tray can hold 72 seed cells. That is 72 future plants in less space than a baking sheet. For small homes and apartments, this matters a great deal. A few trays on a windowsill can supply a whole season of vegetables, herbs, and flowers.
Reviews also show that domes reduce waste. Seeds are not cheap, and a failed batch means lost money and lost time. A tray with a good dome keeps the soil from drying out between waterings. This steady moisture raises the germination rate, which means fewer seeds go to waste. If you want to learn the basics of the whole process, read this how to start seeds indoors guide for step by step advice.
What to Look for When Reading Reviews: Seed Starting Trays with Dome Reviews
Not all seed starting trays are built the same. Reviews point to a few key features that separate good kits from bad ones.
Plastic thickness. Thin plastic trays crack after one season. Thicker, rigid plastic lasts for years. Many reviewers say they learned this the hard way after buying a cheap kit that fell apart during transplanting. Sites like Fiskars show how tool quality matters in garden work, and the same idea applies here.
Dome height and vents. The dome must be tall enough for seedlings to grow a few inches before it comes off. Domes with adjustable vents are best. The vents let you lower humidity as plants grow. Without vents, trapped moisture can cause damping off, a disease that kills young stems. Reviews often praise kits with two or three vent positions.
Cell size. Small cells dry out fast and cramp roots. Large cells use more soil but give roots room. For most vegetables, a 72-cell tray is the standard choice. For slow growers like peppers and herbs, a 50-cell tray with deeper cells works better. Gardeners writing seed starting trays with dome reviews often note which cell size they used and how it worked for each crop.
Drainage holes. Every cell must have a drainage hole. Water that sits in the soil breeds mold and rot. Good trays drain excess water into the base tray below. The base tray then catches the water and keeps the table dry.
Base tray strength. The bottom tray holds soil, water, and the whole cell insert. A flimsy base bows in the middle and spills. Reviews favor base trays with rolled edges and solid corners.
Size standard. The common 10 by 20 inch size fits standard heat mats and grow lights. Buying this size means you can add heat mats and grow lights later without trouble.
Types of Seed Starting Trays with Domes
Seed starting trays with dome reviews describe several types. Each type suits a different kind of gardener.
Standard Plastic Cell Kits
These are the most common. A cell insert sits inside a solid base tray, and a clear dome covers the top. They come in 50, 72, 98, and 128 cell counts. They are cheap, light, and easy to stack. Many gardeners buy a five-pack for one season. Heavier-duty versions cost more but last for many seasons.
Deep-Root Kits
Deep-root kits have cells four or five inches deep. They suit plants that hate root disturbance, like squash, cucumbers, and sunflowers. Reviews say these kits produce stronger transplants because the roots grow straight down instead of circling. They take more soil and more shelf space, but the results are worth it for large seedlings.
Soil Block and Peat Pot Kits
Some kits come with peat pots or compressed soil pellets instead of plastic cells. You plant the whole pot in the ground, so roots never get disturbed. Reviews are mixed. Peat pots can dry out at the edges, and they sometimes mold. Soil pellets expand with water and work well for small seeds. For a fuller look at growing media, see this comparison of seed starting mix vs potting soil.
Reusable and Recycled Kits
A few brands now sell trays made from recycled or sturdy reusable plastic. These cost more up front but save money over time. Reviewers who garden every year tend to prefer these. They report five or more seasons of use without cracks.
Heated Kits
Some kits include a heat mat under the base tray. Bottom heat speeds germination for warm crops like peppers and eggplants. Reviews show these kits work well but cost more. Most gardeners buy the mat separately and pair it with any standard tray.
Cost and Price: What Reviews Say You Should Pay
Prices run from five dollars to fifty dollars or more. A basic 72-cell kit with dome often costs between eight and fifteen dollars. Five-packs bring the per-tray price down. Heavy-duty reusable kits cost twenty to forty dollars each. Kits with heat mats run thirty to sixty dollars.
Seed starting trays with dome reviews suggest a middle path for most gardeners. Cheap kits work for one season but must be replaced. Premium kits last for years and cost less over time. A gardener who starts seeds every spring should buy the heavier kit. A gardener trying seeds for the first time can start cheap and upgrade later.
Watch for hidden costs too. You still need seed starting mix, and many reviewers note that cheap soil causes more failures than cheap trays. Stores like Lowe’s and The Home Depot both carry seed starting mix next to the trays, which makes shopping simple. Quality advice on soil and gear also appears on The Spruce and Bob Vila.
Sales are common in late winter. Many gardeners report buying next year’s kits in March sales and storing them dry until spring.
Care and Upkeep for Long-Lasting Trays
Trays last longer when they are cleaned after each use. Soil left in cells breeds disease. Wash trays with warm soapy water and a stiff brush. Then soak them for ten minutes in a mix of one part bleach to nine parts water. Rinse well and let them dry in the sun. The sun also helps kill germs.
Domes need the same care. Algae grows on the inside of damp domes. A soft cloth and soapy water remove it. Never use harsh scrubbers on domes because scratches block light.
Store trays dry and out of the sun when the season ends. Long sun exposure makes plastic brittle. Stack base trays and cell inserts separately so they do not warp. Keep domes upright so they hold their shape. Reviewers who follow these steps report using the same trays for five seasons or more.
Label every tray with the seed name and date. Many gardeners use plastic markers or masking tape. This simple habit saves confusion when ten trays of green sprouts all look the same. Guides at Gardener’s Supply Company offer good marking ideas, and Burpee has useful sowing calendars to pair with your labels.
Between uses, check for cracks. A cracked cell leaks water and weakens the tray. Small cracks can be fixed with waterproof tape, but badly cracked trays belong in the recycling bin.
Safety Tips for Seed Starting Indoors
Seed starting is safe work, but a few habits keep it that way.
Keep bleach solution away from children and pets during cleaning. Rinse trays well after soaking so no bleach stays on the plastic.
Heat mats warm up over hours. Always place them on a flat, dry surface. Never fold a heat mat, and unplug it when seedlings are moved off. Product safety guidance from Consumer Reports reminds buyers to check cords and plugs on any electric garden gear.
Wash hands after handling soil and fertilizer. Some bagged soils carry dust that irritates lungs. Wear a dust mask when pouring dry mix.
Keep grow lights away from water. Spills happen around trays. Plug lights into a ground-fault outlet when you can.
Watch for mold. White fuzz on soil usually means too much water and too little air. Open the dome vents or remove the dome for part of the day. Advice from Corona Tools and Family Handyman also stresses good airflow in damp indoor setups.
Frequently Asked Questions
Do I really need the dome, or can I start seeds without one? You can start seeds without a dome, but it is harder. The dome holds moisture in the soil so you water less. Without a dome, the top of the soil dries fast and seeds may fail. Most reviewers call the dome the most useful part of the kit.
When should I take the dome off? Remove the dome when most seeds have sprouted and the seedlings touch the top. Leaving it on too long keeps the air too wet and can cause mold. Open the vents a little each day before removing the dome fully. This slow change hardens the plants.
Can I reuse seed starting trays from last year? Yes, if you clean them well. Old soil can carry disease into new seedlings. Wash, soak in a mild bleach mix, rinse, and dry in the sun. Check for cracks and thin spots before filling with soil.
What size tray should a beginner buy? A 72-cell tray with dome is the best starting point. It holds enough plants for a small garden, fits standard heat mats, and costs little. If you plan a big vegetable garden, buy two or three.
Why are my seedlings tall and weak? Tall, pale seedlings need more light. Move the tray closer to a bright window or add a grow light a few inches above the plants. The dome is not the cause. Weak light is. When the plants are strong, follow this guide to transplant seedlings outdoors safely.
Where can I find honest seed starting trays with dome reviews? Look for reviews with photos and details about which crops were grown. Retailer review sections, gardening forums, and testing sites all help. Compare several reviews before buying, and favor reviewers who used the tray for a full season.
A Short Final Word
Seed starting trays with dome reviews agree on one point: a simple kit, used well, turns a windowsill into a nursery. Pick a sturdy tray, keep it clean, mind the vents, and give seedlings light. The garden you dream of in March starts in these small cells. Buy the kit that fits your plans, start your seeds, and watch the first green shoots rise under the dome.
References
Bob Vila. (n.d.). Home improvement advice. https://www.bobvila.com Burpee. (n.d.). Seeds, plants, and gardening supplies. https://www.burpee.com Consumer Reports. (n.d.). Product reviews and ratings. https://www.consumerreports.org Corona Tools. (n.d.). Garden and landscape tools. https://www.corona-tools.com Family Handyman. (n.d.). DIY home repair and maintenance. https://www.familyhandyman.com Fiskars. (n.d.). Garden and cutting tools. https://www.fiskars.com Gardener’s Supply Company. (n.d.). Gardening tools and supplies. https://www.gardeners.com Lowe’s. (n.d.). Home improvement products. https://www.lowes.com The Home Depot. (n.d.). Home improvement products. https://www.homedepot.com The Spruce. (n.d.). Home and garden advice. https://www.thespruce.com
Was this guide helpful?

About Jennifer Lee
The My Garden US editorial team writes practical, in-depth home and garden guides for American homeowners — tested advice, no fluff.
You May Also Like
Seed Starting Light Setup for Beginners: A Plain Guide to Strong Seedlings Indoors
August 30, 2026 0 views
Raised Garden Bed on Legs Reviews: What Real Gardeners Say
January 20, 2026 0 views
Best Garden Cart for Heavy Loads: How to Choose the Right One
August 27, 2026 0 views