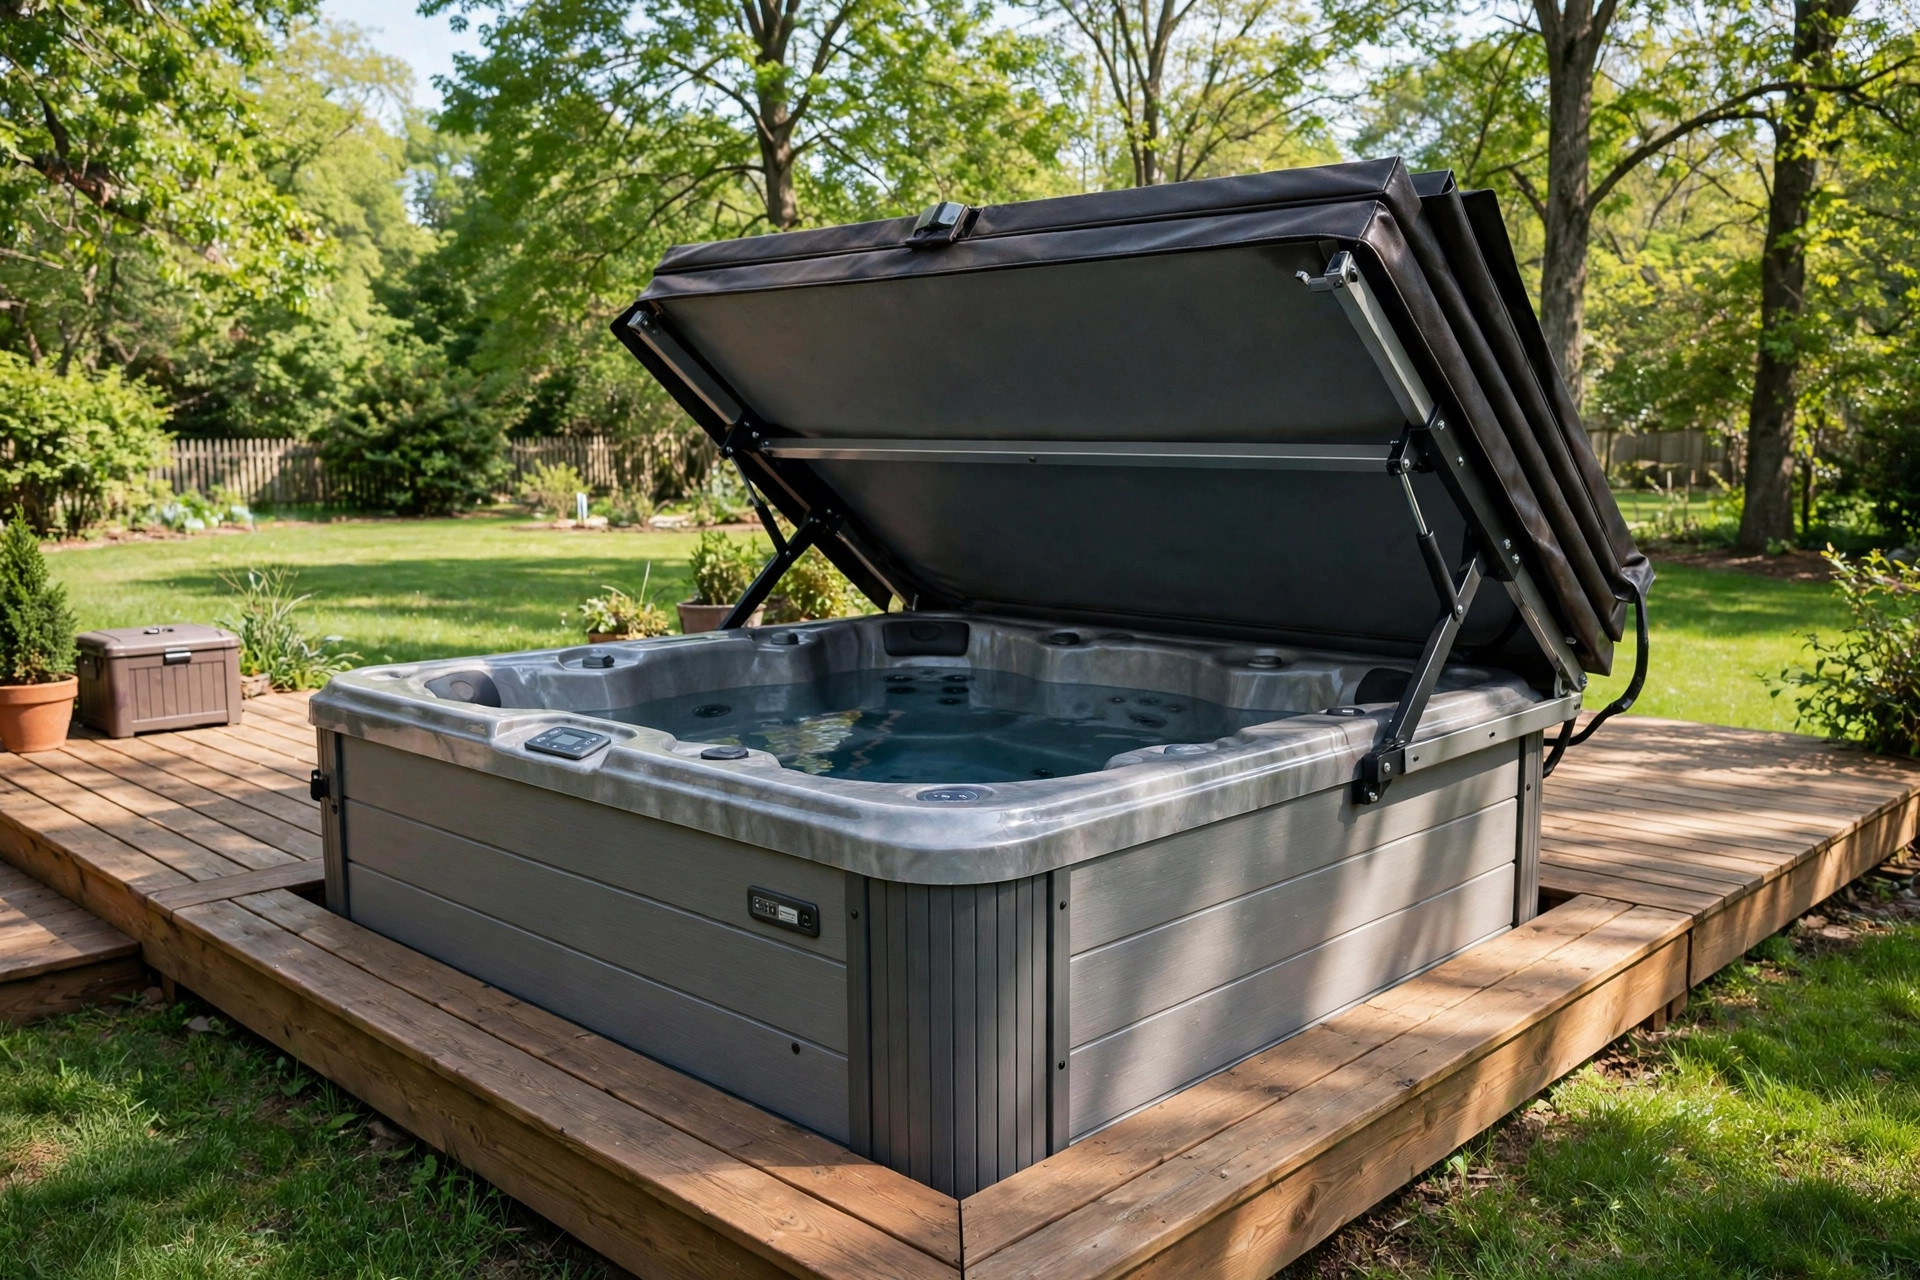

A hot tub cover can weigh a great deal. Foam cores soak up water over time. A cover that once felt light grows heavy. Many owners stop using their tub because the cover is too hard to move. This hot tub cover lifter installation guide solves that problem. A lifter is a simple frame with arms and pivots. It holds the cover while you slide it open. One person can open a heavy cover with little effort. The device also keeps the cover off the ground, which helps it last longer.
Most lifters fit common spa shapes. Round tubs, square tubs, and rectangular tubs all have matching models. Installation takes about an hour for most people. You need basic tools and a free afternoon. This guide explains each step in plain words. It also covers types, costs, upkeep, and safety. By the end, you will know exactly how to mount a lifter on your own spa.
Why a Cover Lifter Matters
A spa cover protects the water. It holds in heat. It keeps out leaves, dirt, and small animals. It also adds a layer of safety for children and pets. But a good cover is thick, and thick foam is heavy. When foam absorbs moisture, the weight can double. Lifting it alone can strain the back and shoulders.
A cover lifter changes this. The arms of the lifter carry the weight. You guide the cover back with a light push. The cover rests on the lifter frame behind the tub. It never touches the ground. This keeps the cover clean and dry on the underside. Dirt and damp ground wear out vinyl fast. A lifter can add years to the life of a cover.
Daily use matters most. People use their tubs more when the cover is easy to move. A lifter removes the main excuse for skipping a soak. For older owners, or anyone with a bad back, a lifter is not a luxury. It is a need. Many spa makers sell lifters as standard add-ons, and product guides from sites like Hot Spring and Bullfrog Spas list them among the first accessories to consider.
Types of Cover Lifters: Hot Tub Cover Lifter Installation Guide
Not all lifters work the same way. Four main designs cover almost every tub.
Top Mount Lifters
A top mount lifter screws into the wooden or synthetic skirt of the tub. The arms fold over the top of the spa. You push the cover back, and it drops behind the tub at a slight angle. These models are simple and low in cost. They work well when you have a few feet of clear space behind the spa.
Bottom Mount Lifters
A bottom mount lifter uses plates that slide under the base of the tub. The weight of the filled spa holds the plates in place. No screws go into the cabinet. The cover lifts straight up, then folds back over the rear edge. This design needs very little space behind the tub, often under two feet. It suits decks and tight patios.
Hydraulic Lifters
Hydraulic models add gas springs or pistons. The springs take most of the load. Opening the cover feels almost weightless. These lifters cost more. They suit very heavy covers or owners who want the easiest motion. Many owners of large swim spas choose this type.
Deck Mount Lifters
A deck mount lifter bolts to the deck boards or a concrete pad next to the tub. It does not touch the spa at all. The arms swing the cover to one side or straight back. This design is strong and stable. It works well for best hot tub for cold climates owners who need a lifter that stands firm in snow and wind.
Before you buy, check reviews of real models. Guides such as our best hot tub cover lifter reviews compare the common designs side by side. Retailers like Home Depot and Lowe’s also stock several brands, so you can read buyer feedback before you order.
What You Need Before You Start
Gather your tools before you open the box. You will need a power drill, a set of drill bits, a Phillips head screwdriver, a tape measure, a pencil, and a level. A second person helps, but most installs can be done alone. Read the manual that comes with your lifter first. Each brand has small differences in bracket size and bolt pattern.
Measure your tub. Note the width, the height of the cabinet, and the thickness of the cover. Check the space behind and beside the spa. Top mount and hydraulic models need room for the cover to swing. Bottom mount and side swing models need less. If your tub sits in a tight corner, measure twice.
Pick a dry day for the work. You will leave the cover off the tub for a while. Lay the cover on a clean tarp, not on bare grass or gravel. Keep screws and small parts in a cup so nothing rolls away.
How to Install a Cover Lifter, Step by Step
These steps fit most top mount and bottom mount lifters. Your manual may add brand details. Follow the manual where it differs.
Step 1: Unpack and Sort Parts
Open the box on a flat surface. Lay out the arms, brackets, pivot rods, screws, and caps. Match them to the parts list in the manual. Count the screws. If a part is missing, call the seller before you drill any holes.
Step 2: Position the Brackets
For a top mount lifter, hold a bracket against the side of the tub cabinet at the spot the manual shows. Most mount near the rear corners. Mark the screw holes with a pencil. Check that both brackets sit at the same height. Use your level. Uneven brackets make the cover fold crooked.
For a bottom mount lifter, slide the flat plates under the tub base. Center them left to right. The plates should extend a few inches out from each side. The weight of the water will lock them down later.
Step 3: Drill Pilot Holes
Drill small pilot holes where you marked. A pilot hole keeps the wood from splitting. Do not drill deeper than the screw length. On synthetic cabinets, drill slowly so the bit does not wander. Wipe away dust.
Step 4: Fasten the Brackets
Drive the screws by hand or on a low drill setting. Snug them down, but do not crush the cabinet. Check the level again after each bracket. Tighten any loose screw before you move on.
Step 5: Attach the Arms and Pivot Rods
Slide the arms onto the bracket pivots. Most arms lock with a pin or a bolt. Insert the long pivot rod that joins the two sides. This rod carries the cover across its full width. Make sure all pins have their clips. A missing clip lets a rod walk out over time.
Step 6: Mount the Cover
Set the cover on the open tub. Slip the lifter arms into the cover sleeves or strap brackets, as your model directs. Center the cover on the tub. Tighten the straps or bolts that hold the cover to the arms.
Step 7: Test the Motion
Push the cover back slowly. It should swing up and fold behind the tub with light pressure. Watch for binding or scraping. If one side lags, stop and check the bracket height. Adjust as needed. Bring the cover forward again. It should land flat on the tub with no gaps at the edges. A gap lets heat escape and lets rain in.
Step 8: Final Checks
Tighten every bolt once more. Cap exposed screw heads if your kit includes caps. They keep water out of the holes. Lock the cover straps. Walk around the tub and look for sharp edges or loose hardware.
Maintenance guides from Swim University and care tips from Leslie’s both stress the same point. Check your lifter hardware twice a year.
What to Look For When Buying
Match the lifter to your tub size. A lifter rated for a small two person spa will bend under a large seven foot cover. Check the weight rating and the maximum cover width. Round tubs need arms that follow the curve. Some brands sell adapter kits for round or odd shapes.
Look at the finish. Powder coated steel resists rust. Stainless hardware lasts longer near salt or ocean air. Plastic parts should feel thick, not thin and brittle. Sun breaks down cheap plastic in a few seasons.
Think about your space. If the tub backs against a fence, choose a low clearance model. If the deck is small, a side swing or deck mount design keeps walkways clear. Pair your choice with safe access steps, as covered in our best hot tub steps with storage guide, so entry and exit stay easy.
Price is a factor, but so is warranty. A lifter with a three year warranty from a known brand often beats a cheap no name model. Replacement parts should be easy to find. Pool Warehouse and big box stores list parts diagrams online, which helps years later. Independent test groups like Consumer Reports publish buying advice for outdoor products that can help you compare build quality.
Cost and Price
A basic top mount lifter costs about 60 to 120 dollars. Bottom mount models run about 100 to 180 dollars. Hydraulic lifters with gas springs cost 150 to 300 dollars. Deck mount models fall in the 120 to 250 dollar range. Prices shift with brand and season. Spring sales often bring the best deals.
Professional installation adds 75 to 150 dollars in most towns. The job is simple enough that most owners do it themselves. Your main cost is the lifter itself plus an hour of your time. Compare this to the price of a new cover. Covers cost 300 to 600 dollars. A lifter that adds two years to a cover pays for itself fast.
Shipping can add cost for heavy models. Check if the store offers free delivery. Local spa dealers sometimes include free installation with the purchase of a cover or a tub. Ask before you buy.
Care and Upkeep
A lifter needs little care. Rinse it with a garden hose when you clean the tub area. This washes off pool chemicals and salt. Dry the pivot points. Once a year, spray the moving joints with a silicone based lubricant. Do not use oil based sprays. Oil attracts dirt and gums up the pivots. Look at the powder coat for chips. Touch up bare metal with rust resistant paint. Replace worn pivot clips at once. A five dollar clip protects a two hundred dollar lifter.
Keep the cover itself in good shape. A lifter cannot save a cover whose foam is waterlogged and torn. Clean the vinyl twice a year with a mild soap made for spa covers. Condition it with a vinyl protectant. The Spruce offers clear outdoor care guides that cover vinyl and fabric upkeep in plain steps.
Safety
A cover lifter is a tool, not a safety device. Never let children play with the arms or the folded cover. A folded cover can trap small fingers. Keep the area behind the tub clear so the cover can swing without hitting a person.
Lock the cover when the tub is not in use. Most covers have locking straps. Use them every time. The U.S. Consumer Product Safety Commission publishes pool and spa safety guidance for homes with children. Their advice is worth reading in full.
Do not stand on a folded cover. It is not built to hold weight. Do not hang heavy items from the lifter arms. Extra weight bends the frame. In high wind, fold the cover down and lock it. A raised cover acts like a sail.
If anyone in the home has trouble with balance, add a sturdy handrail near the steps. Safe entry matters as much as safe covering.
Frequently Asked Questions
How long does installation take?
Most people finish in 45 to 90 minutes. The first bracket takes the longest because of measuring. After that, the work goes fast. Hydraulic models may take a bit longer due to extra parts.
Do I need to drill into my hot tub?
Top mount lifters need screws in the cabinet. Bottom mount and deck mount models do not. If you rent your home or want to keep the cabinet untouched, pick a no drill design.
Will a lifter fit a round hot tub?
Yes. Many brands make round tub kits or adjustable arms. Measure the diameter of your tub and the width of the cover fold. Buy a model rated for that size.
Can one person install a lifter alone?
Yes, in most cases. The parts are light. A helper makes step six easier, when you set the heavy cover onto the arms. If you work alone, rest the cover on the tub first, then attach the arms.
How much clearance do I need behind the tub?
Top mount models need about two to three feet. Low clearance bottom mount models need as little as 18 inches. Deck mount swing models need side room instead of rear room. Check the manual for your model.
What if my cover is already waterlogged and very heavy?
A hydraulic lifter can handle a heavy cover, but it is a short term fix. A waterlogged cover loses heat and grows mold inside. Plan to replace the cover soon. The lifter will fit the new cover too, so the money is not wasted.
A Final Word
A hot tub cover lifter is a small upgrade with a large payoff. It saves your back. It saves your cover. It makes the tub a pleasure instead of a chore. The work takes an hour and basic tools. Pick the right type for your space, measure with care, and follow the steps above. Soon the heavy cover will glide open with one hand, and your evening soak will be waiting.
References
Bullfrog Spas. (n.d.). Hot tubs and spas. https://www.bullfrogspas.com Consumer Reports. (n.d.). Product reviews and ratings. https://www.consumerreports.org Hot Spring Spas. (n.d.). Hot tubs and spas. https://www.hotspring.com Leslie’s Pool Supplies. (n.d.). Pool supplies and equipment. https://www.lesliespool.com Lowe’s. (n.d.). Home improvement products. https://www.lowes.com Pool Warehouse. (n.d.). Pool equipment and supplies. https://www.poolwarehouse.com Swim University. (n.d.). Pool and hot tub care guides. https://www.swimuniversity.com The Home Depot. (n.d.). Home improvement products. https://www.homedepot.com The Spruce. (n.d.). Home and garden advice. https://www.thespruce.com U.S. Consumer Product Safety Commission. (n.d.). Product safety information. https://www.cpsc.gov
Was this guide helpful?

About Sarah Mitchell
The My Garden US editorial team writes practical, in-depth home and garden guides for American homeowners — tested advice, no fluff.
You May Also Like

Best Pool Filter Sand vs Cartridge: Which System Is Right for Your Pool?
May 3, 2026 0 views
Best Pool Heater for Small Pools
October 5, 2026 0 views
The Best Hot Tub for Sore Muscles: How to Choose One
April 4, 2026 0 views