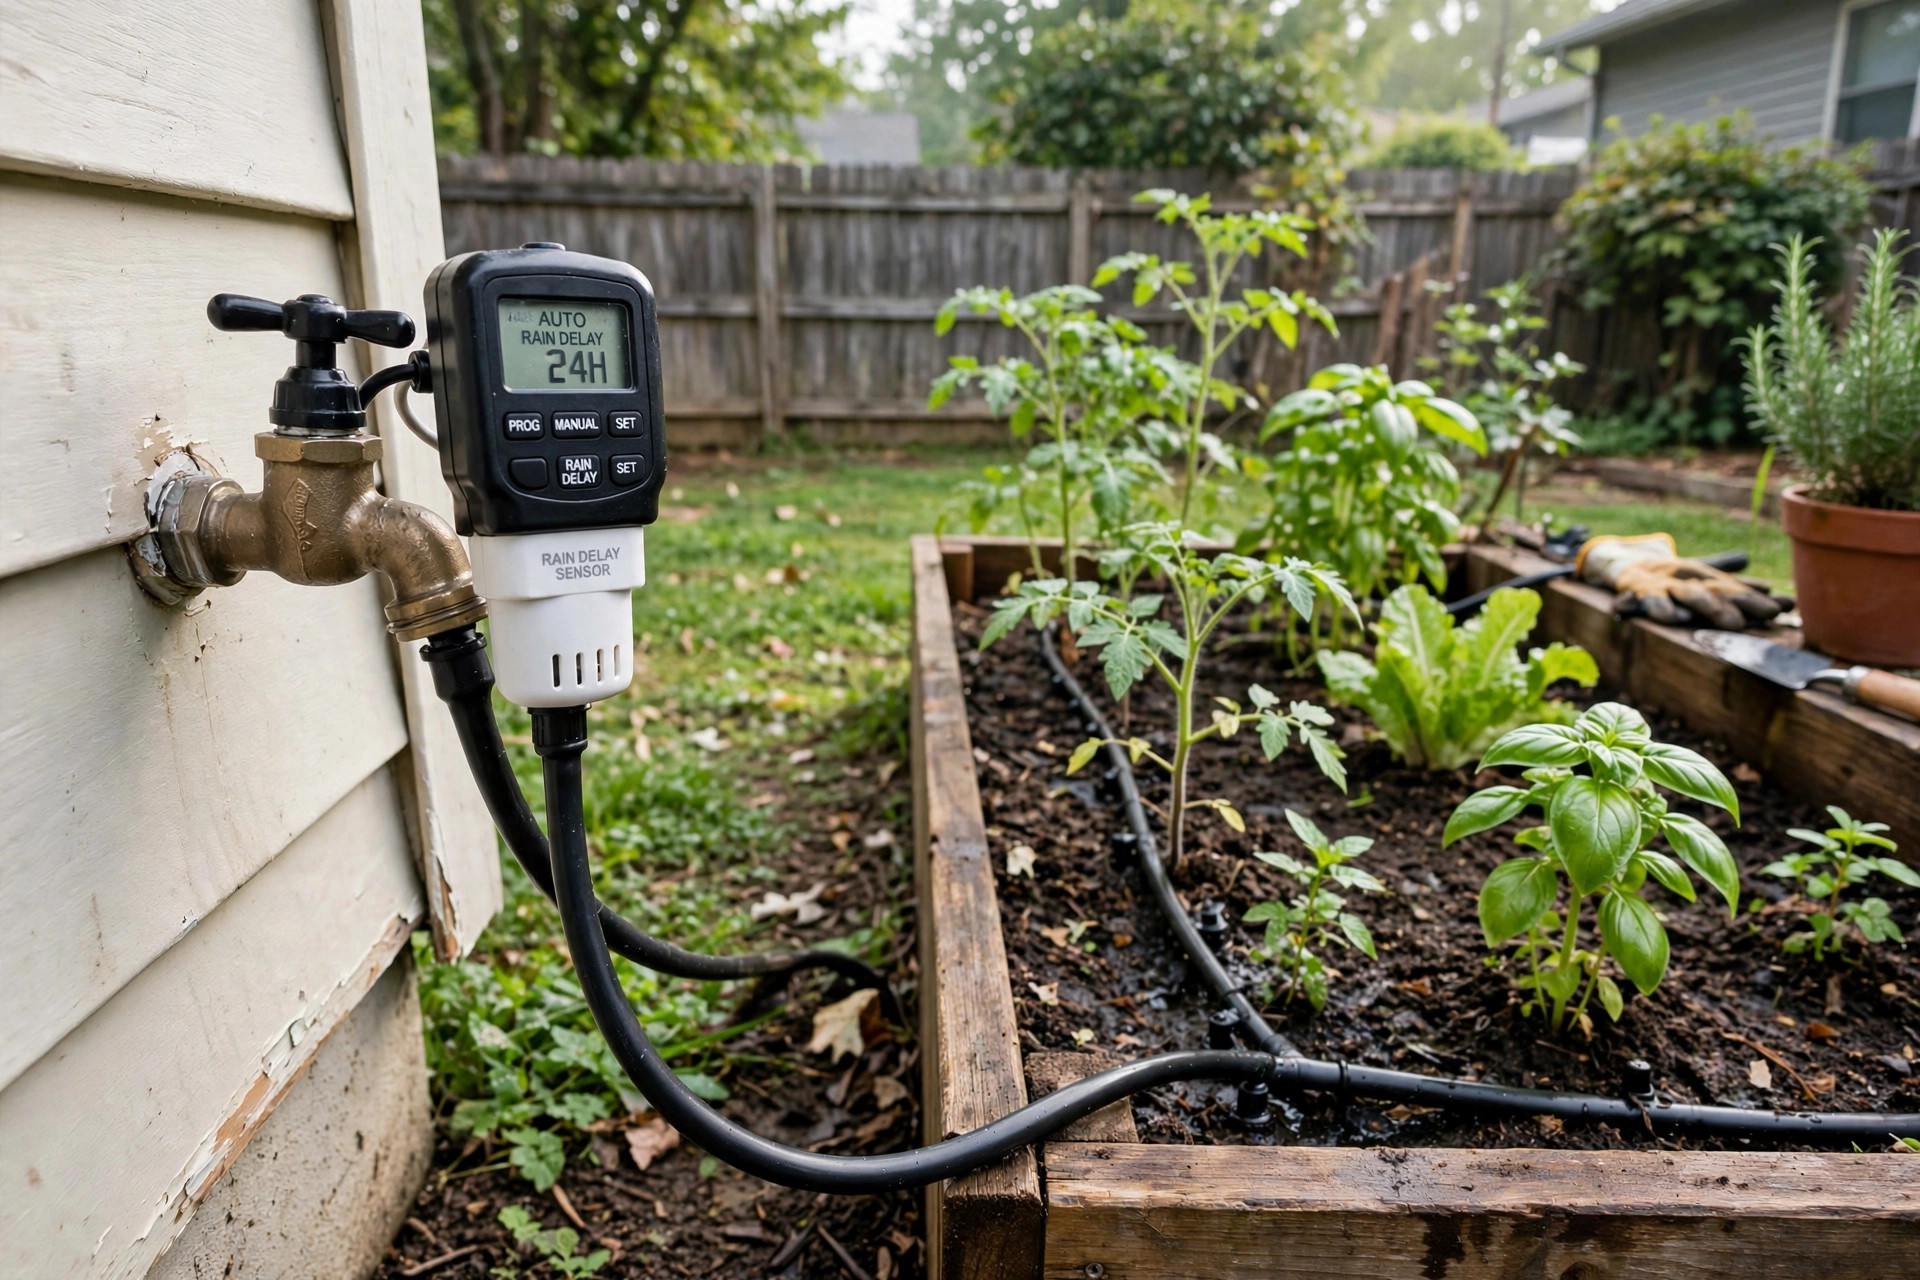

A drip irrigation timer with rain delay is a small device that turns your drip lines on and off by itself. It also holds back the watering when rain has already fallen. This means your plants get water on schedule, and you do not waste water after a storm.
Many home gardeners use a plain timer and then forget to turn it off when rain comes. The result is soggy soil and a high water bill. A timer with a rain delay fixes that mistake. You press one button, or the device senses the rain, and the next cycle is skipped. The plants keep the water the sky gave them, and nothing more.
Why It Matters
Water is the most valuable thing a gardener gives to plants. Too little water and plants wilt. Too much water and roots rot. A drip irrigation timer with rain delay helps you find the middle ground.
Drip irrigation already saves water. It puts drops right at the base of each plant. Almost nothing is lost to wind or runoff. When you add a timer, the watering starts and stops on its own, even when you are away from home. When you add the rain delay, the timer does not water after rain. Together, these features keep the soil at the right dampness.
There are other gains as well. A timer cuts the daily chore of turning taps by hand. It also helps when you go on a trip. Your tomatoes and peppers keep drinking while you are gone, and they do not drown if a storm passes through.
A drip irrigation timer with rain delay is also kind to the soil. Constant wet soil pushes air out and invites disease. When watering skips after rain, the soil gets time to breathe. Plant roots grow deeper and stronger when they are not soaked every day.
Many towns now ask homeowners to save water. Some water companies give discounts for smart watering gear. A rain-delay timer is an easy way to do your part.
How a Drip Irrigation Timer With Rain Delay Works
A basic hose timer screws onto an outdoor spigot. Drip tubing connects to the other side. Inside the timer is a valve and a small clock. You set the days and the minutes, and the valve opens and closes at those times. Most run on batteries, so no wire is needed.
The rain delay part comes in two forms. The simple form is a button. When you see rain in the forecast, or after a good rain, you press the button. The timer then skips the next cycle, or skips watering for 24, 48, or 72 hours. After the delay ends, the normal plan starts again.
The smarter form uses a rain sensor. A small cup or disc sits out in the open. When it fills with rain, it sends a signal to the timer. The timer shuts off or skips the next cycle on its own. When the sensor dries out, the schedule starts again. This form is best for people who do not check the weather each day.
Both forms work well. The button type costs less. The sensor type is more hands-free.
For a deeper look at basic timer models, see our review of the best garden watering timer reviews. If you are building the lines themselves, our guide to drip irrigation kit for raised beds shows how to lay out tubing and emitters.
What to Look For When You Buy
Shopping for a drip irrigation timer with rain delay is easier when you know the main features. Use the points below as a checklist.
Zones and Outlets
Some timers have one outlet. One outlet serves one set of drip lines. Larger gardens may need a timer with two or four zones, so beds and pots get different amounts of water. Count your beds before you shop.
Watering Times and Frequency
Check how often the timer can run. Most allow several start times per day. Some allow cycles every few hours. Seedlings may want short drinks twice a day, while grown bushes want one long drink every few days. A flexible timer handles both.
Rain Delay Length
Look at how long the delay lasts. Many models offer 24, 48, or 72 hours. A few let you pick any number of hours. Think about your weather. In a place with short afternoon storms, 24 hours may be enough. Where rain lasts for days, a longer delay is better.
Manual Watering Button
A manual button lets you run water at once without changing the plan. This is handy when you plant something new or wash down the patio. The timer goes back to its plan after the manual run ends.
Battery Life and Power
Most hose timers use one or two AA batteries. Good ones last a full season. Some models have a low-battery light that tells you when to change them. A few models use solar power. Read the label to learn how long the batteries should last.
Water Pressure and Flow
Drip lines need low pressure, often 25 to 30 psi. Check that the timer works at the pressure your spigot gives. A timer that only works at high pressure may crack cheap drip tubing. If your pressure is high, add a pressure reducer between the timer and the lines. Experts at Family Handyman often remind readers to match pressure to the whole system.
Build Quality
The timer will sit outside in sun and rain. Look for a sturdy case and good seals around the battery cover. Read user reviews to see which models last more than one season.
Types and Options
Drip irrigation timers with rain delay come in a few forms. Each suits a different gardener.
Single-Outlet Hose Timers
These screw straight onto the spigot. They are the simplest choice for one or two beds. They cost the least and take minutes to set up. Most include a basic rain delay button.
Multi-Zone Timers
Multi-zone timers have two, three, or four outlets. Each outlet can run a different plan. You might give the vegetable bed a long soak and the flower pots a light mist. These cost more but replace several single timers.
Smart Timers With Wi-Fi
Smart timers connect to your home Wi-Fi. You set the plan with a phone app. Many pull the local weather from the internet and skip watering when rain is near. These are the most hands-free, but they cost more and need a strong Wi-Fi signal at the spigot.
In-Line Drip Controllers
These sit inside the drip tubing instead of on the spigot. They suit gardens where the spigot must stay free for a hose. Setup takes more care, but the timer stays out of sight.
For plain hose watering without drip lines, many gardeners also use soaker hoses. Our article on how to use soaker hose effectively covers spacing and run times that pair well with a timer.
Cost and Price
Prices for a drip irrigation timer with rain delay vary by type and features. A basic single-outlet timer often costs between 30 and 60 dollars. It will have a rain delay button and simple dials or buttons for the plan.
A mid-range model with two zones, a rain sensor port, and a clear screen often costs between 60 and 100 dollars. These suit larger gardens.
Smart Wi-Fi timers usually cost between 80 and 150 dollars. A separate rain sensor may add 25 to 40 dollars if it is not in the box.
Batteries and a pressure reducer add a small extra cost. Many retailers, such as Home Depot and Lowe’s, carry the full range, so you can compare prices side by side. Review sites like Consumer Reports test timers for how long they last and how easy they are to use.
When you compare prices, think about the water you will save. In many areas, a timer pays for itself in one or two seasons through lower water bills.
Installation
Setting up a drip irrigation timer with rain delay takes less than half an hour. Follow these steps.
1. Turn off the spigot and remove any hose or nozzle. 2. Wrap plumber tape around the spigot threads. This helps stop leaks. 3. Screw the timer onto the spigot by hand. Do not use a wrench on plastic threads. 4. If you use a pressure reducer or filter, attach it to the timer outlet. 5. Connect the drip tubing or drip kit to the reducer or filter. 6. Put in fresh batteries and close the cover tight. 7. Turn the spigot on slowly and check for leaks. 8. Set the days, start times, and run minutes for each zone. 9. Turn on the rain delay or mount the rain sensor in an open spot.
Mount the rain sensor where it gets full rain, not under a roof edge. A spot on a fence post near the garden works well. Advice from Gardener’s Supply and The Spruce both stress that the sensor must sit in the open to read rain correctly.
Care and Upkeep
A drip irrigation timer with rain delay needs little care, but a few habits will make it last.
Check the batteries at the start of each season. Change them even if the old ones still work. Weak batteries are the top cause of missed watering.
Clean the filter screen where the timer meets the spigot. Bits of rust and sand can block the flow and make the valve stick. Rinse the screen under a tap twice a season.
Before winter, take the timer off the spigot. Drain the water out of it. Store it inside where it cannot freeze. Freezing water can crack the valve. If you live where winters are mild, you may leave it up, but draining is still wise.
Look at the drip lines once a month. Clogged emitters make the timer useless because water cannot reach the plants. Flush the lines at the start of the season. Corona Tools and Fiskars both publish simple guides for keeping drip systems clear.
At the end of the season, write down your watering plan. Note the days, times, and minutes that worked. Next spring, you can set the timer in minutes instead of guessing.
Safety
These timers are safe, but a few rules keep things that way.
Turn off the spigot before you attach or remove the timer. Water under pressure can spray and make parts jump.
Do not overtighten plastic fittings. A cracked thread can burst under pressure. Hand-tight plus a small turn is enough.
Keep batteries away from children. If the battery cover is broken, replace the timer or tape the cover shut.
If your rain sensor or smart timer uses wires, keep them out of paths where people walk. Bury low-voltage sensor wire just under the mulch.
Do not drink from the spigot when the timer is attached unless your area marks that spigot as safe for drinking water. Garden hoses and timers can leach chemicals. Bob Vila offers a good overview of garden water safety for families.
FAQ
How long should I water with a drip system?
Most gardens do well with 20 to 45 minutes per cycle, two or three times a week. Sandy soil drains fast and may need shorter, more frequent runs. Clay soil holds water and needs longer, less frequent runs. Watch your plants. If leaves wilt in the afternoon, add time. If the soil stays soggy, cut time.
Does the rain delay work with any rain sensor?
Most timers have a port or terminal for a wired rain sensor. Check the box or manual to see which sensors fit. Some brands only work with their own sensor. Smart timers often use internet weather instead of a sensor, so no extra part is needed.
Will the timer work with low water pressure from a well?
Most hose timers need some minimum pressure to open and close the valve. If your well pressure is very low, the timer may not shut off fully. Check the stated pressure range on the package. A plumber or the staff at Burpee can help you match a timer to a well system.
Can I use one timer for both drip lines and a sprinkler?
You can, but drip lines and sprinklers need different run times. Sprinklers often run 15 to 20 minutes. Drip lines often run 30 to 45 minutes. A two-zone timer lets each get its own plan. A one-zone timer forces both to share the same time, which waters one of them wrong.
What happens if the batteries die?
Most timers fail closed, which means the valve stays shut and watering stops. Your plants will not get watered until you change the batteries. Some models beep or flash a light when the battery is low. Change batteries at the start of every season to avoid surprises.
Is a rain delay enough, or do I need a soil moisture sensor?
A rain delay is enough for most home gardens. It skips watering after rain, which covers the main waste. A soil moisture sensor goes one step further. It measures dampness in the ground and waters only when the soil is dry. If you grow prized plants or pay high water rates, adding a moisture sensor is worth it.
A Short Final Word
A drip irrigation timer with rain delay is one of the simplest upgrades a gardener can make. It waters on time, skips watering after rain, and keeps working while you are away. Pick a model with enough zones, set the plan to match your soil and plants, and check it once a season. Your garden will get the water it needs, and not a drop more.
References
Bob Vila. (n.d.). Home improvement advice. https://www.bobvila.com Burpee. (n.d.). Seeds, plants, and gardening supplies. https://www.burpee.com Consumer Reports. (n.d.). Product reviews and ratings. https://www.consumerreports.org Corona Tools. (n.d.). Garden and landscape tools. https://www.corona-tools.com Family Handyman. (n.d.). DIY home repair and maintenance. https://www.familyhandyman.com Fiskars. (n.d.). Garden and cutting tools. https://www.fiskars.com Gardener’s Supply Company. (n.d.). Gardening tools and supplies. https://www.gardeners.com Lowe’s. (n.d.). Home improvement products. https://www.lowes.com The Home Depot. (n.d.). Home improvement products. https://www.homedepot.com The Spruce. (n.d.). Home and garden advice. https://www.thespruce.com
Was this guide helpful?

About Robert Taylor
The My Garden US editorial team writes practical, in-depth home and garden guides for American homeowners — tested advice, no fluff.
You May Also Like
Drip Irrigation Kit for Flower Beds: A Complete Buyer Guide
May 29, 2026 0 views
Garden Tool Storage Ideas for Shed: A Practical Guide
July 21, 2026 0 views
Best Garden Pruners for Small Hands: A Complete Buying Guide
August 3, 2026 0 views