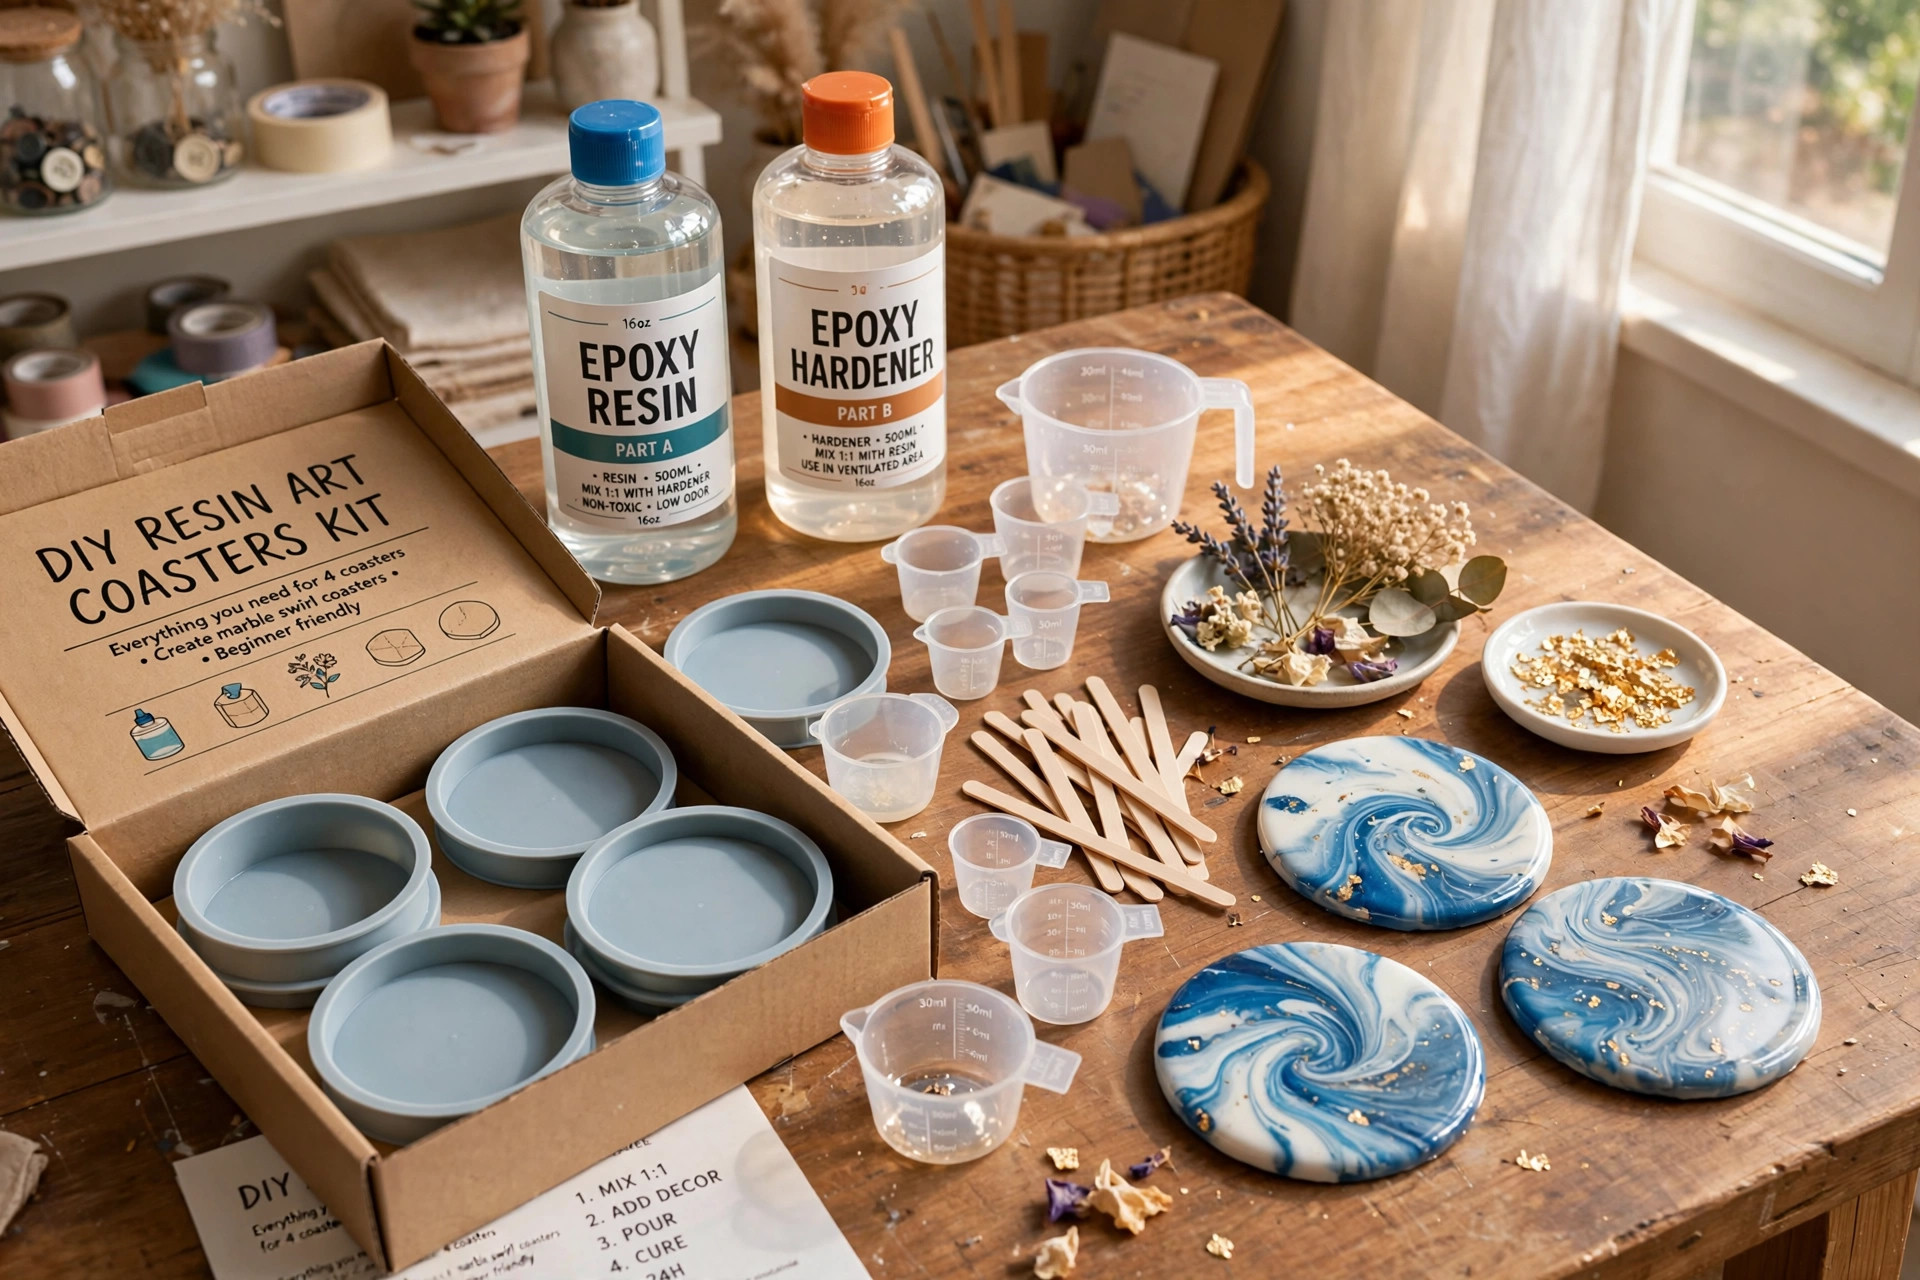

A diy coasters kit for resin art beginners is a box that holds almost everything a new crafter needs to make resin coasters at home. The box holds epoxy resin, silicone molds, mixing cups, stir sticks, and small extras such as gold flakes or dried flowers. You open the box, read the guide, and start. This makes the kit a good first step into resin art for people who have never worked with resin before.
Resin art has grown fast in the last few years. Many people learned it at home during long weekends. Coasters are the most common first project. They are small, cheap to make, and hard to spoil. Even a first try looks good on a coffee table. A beginner kit takes away the guesswork of buying each part alone.
Why a Beginner Kit Matters
The First Project Sets the Habit
The first craft project teaches you more than a skill. It teaches you whether you like the work. Resin has a learning curve. You mix two liquids. You wait. You watch for bubbles. A kit gives you measured parts and a short guide. That keeps the first hour calm instead of confusing.
Many beginners who buy resin alone pick the wrong amount. They buy a gallon when they need a cup. Or they buy deep-pour resin for a thin coaster. A kit built for coasters avoids these errors. The parts fit the project.
Resin Art Is Both Craft and Chemistry
Epoxy resin is a two-part chemical system. One part is the resin. The other part is the hardener. You mix them in a set ratio, often one to one or two to one. Then the mix cures hard over 24 hours. A beginner kit includes a resin with a forgiving mix ratio and a clear label. That matters more than brand fame.
A good kit also teaches safety early. Gloves, a mask, and a well-aired room are part of every pour. You can read more about home workshop safety in guides from Family Handyman and Bob Vila, which cover safe craft spaces for beginners.
What to Look for in a Beginner Coaster Kit: Diy Coasters Kit for Resin Art Beginners
Resin Type and Working Time
Start with a general casting resin made for crafts. Avoid deep-pour resin. Deep-pour resin is made for thick river tables. It cures slow and costs more. It also traps heat in a way that thin coasters do not need.
Working time is the minutes you have to mix, pour, and place extras before the resin thickens. For coasters, look for 30 to 45 minutes of working time. That gives a beginner room to fix mistakes. Cure time of 24 hours is standard. Plan to leave the molds alone overnight.
Silicone Mold Quality
The molds make the coaster shape. Good molds are made of thick, food-grade silicone. They hold their shape when you pour. They release the cured coaster with a gentle flex. Cheap thin molds warp. Warped molds give warped coasters.
Look for kits with four to six round molds. Round coasters are the classic shape. Some kits add square or geode shapes. Start round. It is easier to sand the edges if needed.
Mixing Cups, Sticks, and Measuring Tools
You need a clean cup for every mix. Kits should include graduated cups so you can read the ounces. Stir sticks should be flat and smooth. They let you fold the two parts together without whipping in air. Air means bubbles. Bubbles mean flaws.
Some kits add syringes for tiny pours. Syringes help with thin color lines. They are nice but not needed at first.
Colorants and Add-Ons
Pigments give your coasters color. Good beginner kits include a few mica powder jars or alcohol inks. Mica powder gives a soft shimmer. Alcohol ink gives bold swirls. Both are easy to learn.
Add-ons may include gold leaf flakes, dried flowers, or glitter. These turn a plain pour into a gift item. Make sure the kit lists every add-on on the box. Surprises are not helpful when you plan a color theme.
Safety Gear in the Box
A kit made for beginners should include gloves. Many include a dust mask. A few include a plastic table cover. If the kit lacks a mask, buy one before you start. Resin fumes need respect. Work near an open window or in a garage with the door up. This is standard advice in home project safety writing, including craft room guides at This Old House.
Types of Coaster Kits You Can Buy
Basic Starter Box
The basic box holds resin, molds, cups, sticks, gloves, and one or two color sets. It costs the least. It is enough for your first dozen coasters. It is also the best gift for someone who only wants to try resin once.
Deluxe Kit With Full Tools
The deluxe kit adds a heat gun or small torch, extra molds, more pigments, and a mixing drill bit. The heat gun pops surface bubbles fast. The drill bit mixes large batches with less effort. This kit costs more, but it saves you a second shopping trip.
Theme Kits
Theme kits center on a style. Ocean coasters use blue and white pigments with sand. Geode coasters use crystal shapes and gold edges. Pressed flower coasters use dried blooms. Theme kits are fun for gifts. They narrow your color choices, which helps a beginner pick a design fast.
Refill Packs
Once you learn, you will want more resin. Refill packs sell resin and hardener without new molds. Buying the same brand keeps your mix ratio and cure time steady. Stick with one brand until you are sure of your method.
Cost and Price Guide
What a Kit Costs
In the United States, a diy coasters kit for resin art beginners usually costs between 25 and 60 dollars. Basic boxes sit near 25 to 35 dollars. Deluxe kits run 45 to 65 dollars. Theme kits land in the middle. Prices shift with the amount of resin in the box. More resin means a higher price.
Per coaster, the math is kind. A 16-ounce resin set makes about 12 to 16 coasters. If the kit costs 40 dollars, each coaster costs under 3 dollars in materials. Handmade resin coasters sell for 8 to 15 dollars each at craft fairs. The kit can pay for itself fast.
What a Single Coaster Costs to Make
Break it down. Resin runs about 1.50 to 2.50 dollars per coaster. Pigments add a few cents. Molds are a one-time cost of about 8 to 15 dollars for a set of six. Add gloves and cups, and the first batch costs more. Later batches cost little. You can compare craft supply prices at large retailers such as Michaels, Joann, and Hobby Lobby, and art-focused shops like Blick.
Hidden Costs to Watch
Resin work uses paper towels, tape, and table covers. You will also want sandpaper for edge cleanup. A fine 400-grit paper smooths rough rims. None of this costs much. But plan for it so your first pour is not delayed by a missing roll of tape.
How to Use Your Kit Step by Step
Set Up the Space
Cover the table with a plastic sheet. Set the molds on a level tray. A tray lets you move the pour without tilting it. Put on gloves and a mask. Open a window. Keep pets out of the room until the resin cures.
Measure and Mix
Read the ratio on the bottle. Pour part A and part B into a clean cup. Stir slowly for three to five minutes. Scrape the sides and bottom. Poor mixing leaves soft spots that never cure. This is the step beginners rush. Do not rush it.
Add Color
Add mica powder or ink to the mixed resin. Stir again for one minute. Keep color loads small at first. Too much pigment can stop a full cure. A pea-sized pinch of mica per ounce is plenty to start.
Pour the Coasters
Pour a thin base layer into each mold. Add extras like flowers or flakes with tweezers. Pour the top layer to fill the mold. Use a toothpick to pop large bubbles. A quick pass with a heat gun clears the rest. Hold the gun six inches away and keep it moving.
Cure and Demold
Cover the tray with a box lid to keep dust off. Wait the full cure time, usually 24 hours. Flex the mold to pop each coaster out. Sand any sharp edge with 400-grit paper. Wipe the dust off with a damp cloth.
Seal If You Want
Most casting resin cures hard and needs no sealer. If you want a glossy top, brush a thin coat of resin over the cured coaster. Let it cure again. This second coat is called a flood coat. It hides small flaws and adds shine.
Care and Upkeep of Your Kit
Store Resin the Right Way
Keep resin bottles closed and upright. Store them at room temperature, away from sun. Cold resin turns cloudy. Warm it in a bowl of warm water before use. Never microwave resin. Heat the water, then set the closed bottle in it.
Clean Molds After Each Use
Wipe molds with a soft cloth while resin is still wet. Cured bits peel off silicone with a gentle pull. Do not use sharp tools on molds. Scratches in the mold show up on every future coaster. Good molds last for dozens of pours.
Keep Tools Ready
Wash mixing cups before resin cures in them. Toss cups that are too sticky to clean. Keep stir sticks in a jar. Keep pigments closed and dry. A small craft caddy holds the whole kit between projects.
Safety Notes Every Beginner Should Read
Resin is safe when used with care. It is not safe when used carelessly. Wear gloves on every pour. Wear a mask rated for organic vapors in small rooms. Never eat or drink at the pour table. Wash hands after each session.
Keep resin away from children and pets. Store the kit on a high shelf. Read the safety sheet that comes in the box. If skin contact happens, wash with soap and water. Do not use solvents on skin. These rules are standard across craft safety guides, including advice from Home Depot project resources and general home how-to writing at The Spruce.
Gift Ideas and Selling Your Work
Resin coasters make strong gifts. A set of four in a small box reads as handmade and thoughtful. Pair the set with a note about the colors. People keep these gifts on their tables for years.
Some beginners turn the hobby into a small shop. Start with friends and family. Price sets of four at 25 to 40 dollars. Track your costs in a notebook. If you plan to sell online, take photos in daylight on a plain table. Clear photos sell crafts faster than any ad line.
If you enjoy small DIY gift projects, you may also like a wooden spoon carving kit for beginners diy or a bead organizer box for jewelry making storage. For stitchers, a best embroidery hoop stand for lap stitching pairs well with a craft corner.
FAQ
How long does a resin coaster take to cure?
Most craft resin cures to the touch in 8 to 12 hours and fully hardens in 24 hours. Do not stack or use the coasters before the full cure. Cold rooms slow the cure. Warm rooms speed it up.
Why are there bubbles in my resin coasters?
Bubbles come from fast stirring or cold resin. Stir slowly and warm the bottles first. A heat gun pass after pouring clears most surface bubbles. A pressure pot clears all bubbles, but beginners rarely need one.
Is resin art safe for beginners?
Yes, with gloves, a mask, and fresh air. Read the safety sheet in your kit. Keep resin off skin and out of reach of kids and pets. Work in a room you can air out.
Can I use a hair dryer instead of a heat gun?
A hair dryer works but blows dust into the pour. It also cools the surface, which can add ripples. A small craft heat gun is cheap and gives better control. Hold it moving and keep it six inches away.
How many coasters can I make with one kit?
A kit with 16 ounces of resin makes about 12 to 16 coasters. Larger kits with 32 ounces make 25 to 30. Your pour thickness sets the final count. Thin pours stretch the resin further.
Do resin coasters hold up to hot drinks?
Yes. Cured epoxy handles hot mugs well. Most brands rate their resin to about 120 degrees Fahrenheit of heat resistance. Very hot pots fresh from the stove may mark the surface. Use a trivet for those.
A Short Final Word
A diy coasters kit for resin art beginners is one of the kindest ways to enter a new craft. The parts match the project. The guide holds your hand. The first pour teaches you mixing, color, and patience in a single afternoon. Pick a kit with good molds, a clear mix ratio, and safety gear in the box. Set up a covered table, open a window, and pour your first set. You will learn more in that one hour than in a week of watching videos. Then make a second set. That is how a hobby starts.
References
Blick Art Materials. (n.d.). Art and craft supplies. https://www.dickblick.com Bob Vila. (n.d.). Home improvement advice. https://www.bobvila.com Family Handyman. (n.d.). DIY home repair and maintenance. https://www.familyhandyman.com Hobby Lobby. (n.d.). Arts, crafts, and home decor. https://www.hobbylobby.com JOANN. (n.d.). Fabric and craft supplies. https://www.joann.com Michaels. (n.d.). Arts and crafts supplies. https://www.michaels.com The Home Depot. (n.d.). Home improvement products. https://www.homedepot.com The Spruce. (n.d.). Home and garden advice. https://www.thespruce.com This Old House. (n.d.). Home renovation guidance. https://www.thisoldhouse.com
Was this guide helpful?

About Lisa Anderson
The My Garden US editorial team writes practical, in-depth home and garden guides for American homeowners — tested advice, no fluff.
You May Also Like
How to Choose a Paint Palette for Acrylics Mixing at Home
July 27, 2026 0 views
Best Crochet Hook Set Ergonomic for Beginners: A Plain and Simple Guide
September 28, 2026 1 views
Best Chalk Markers for Windows and Signs
August 21, 2026 0 views