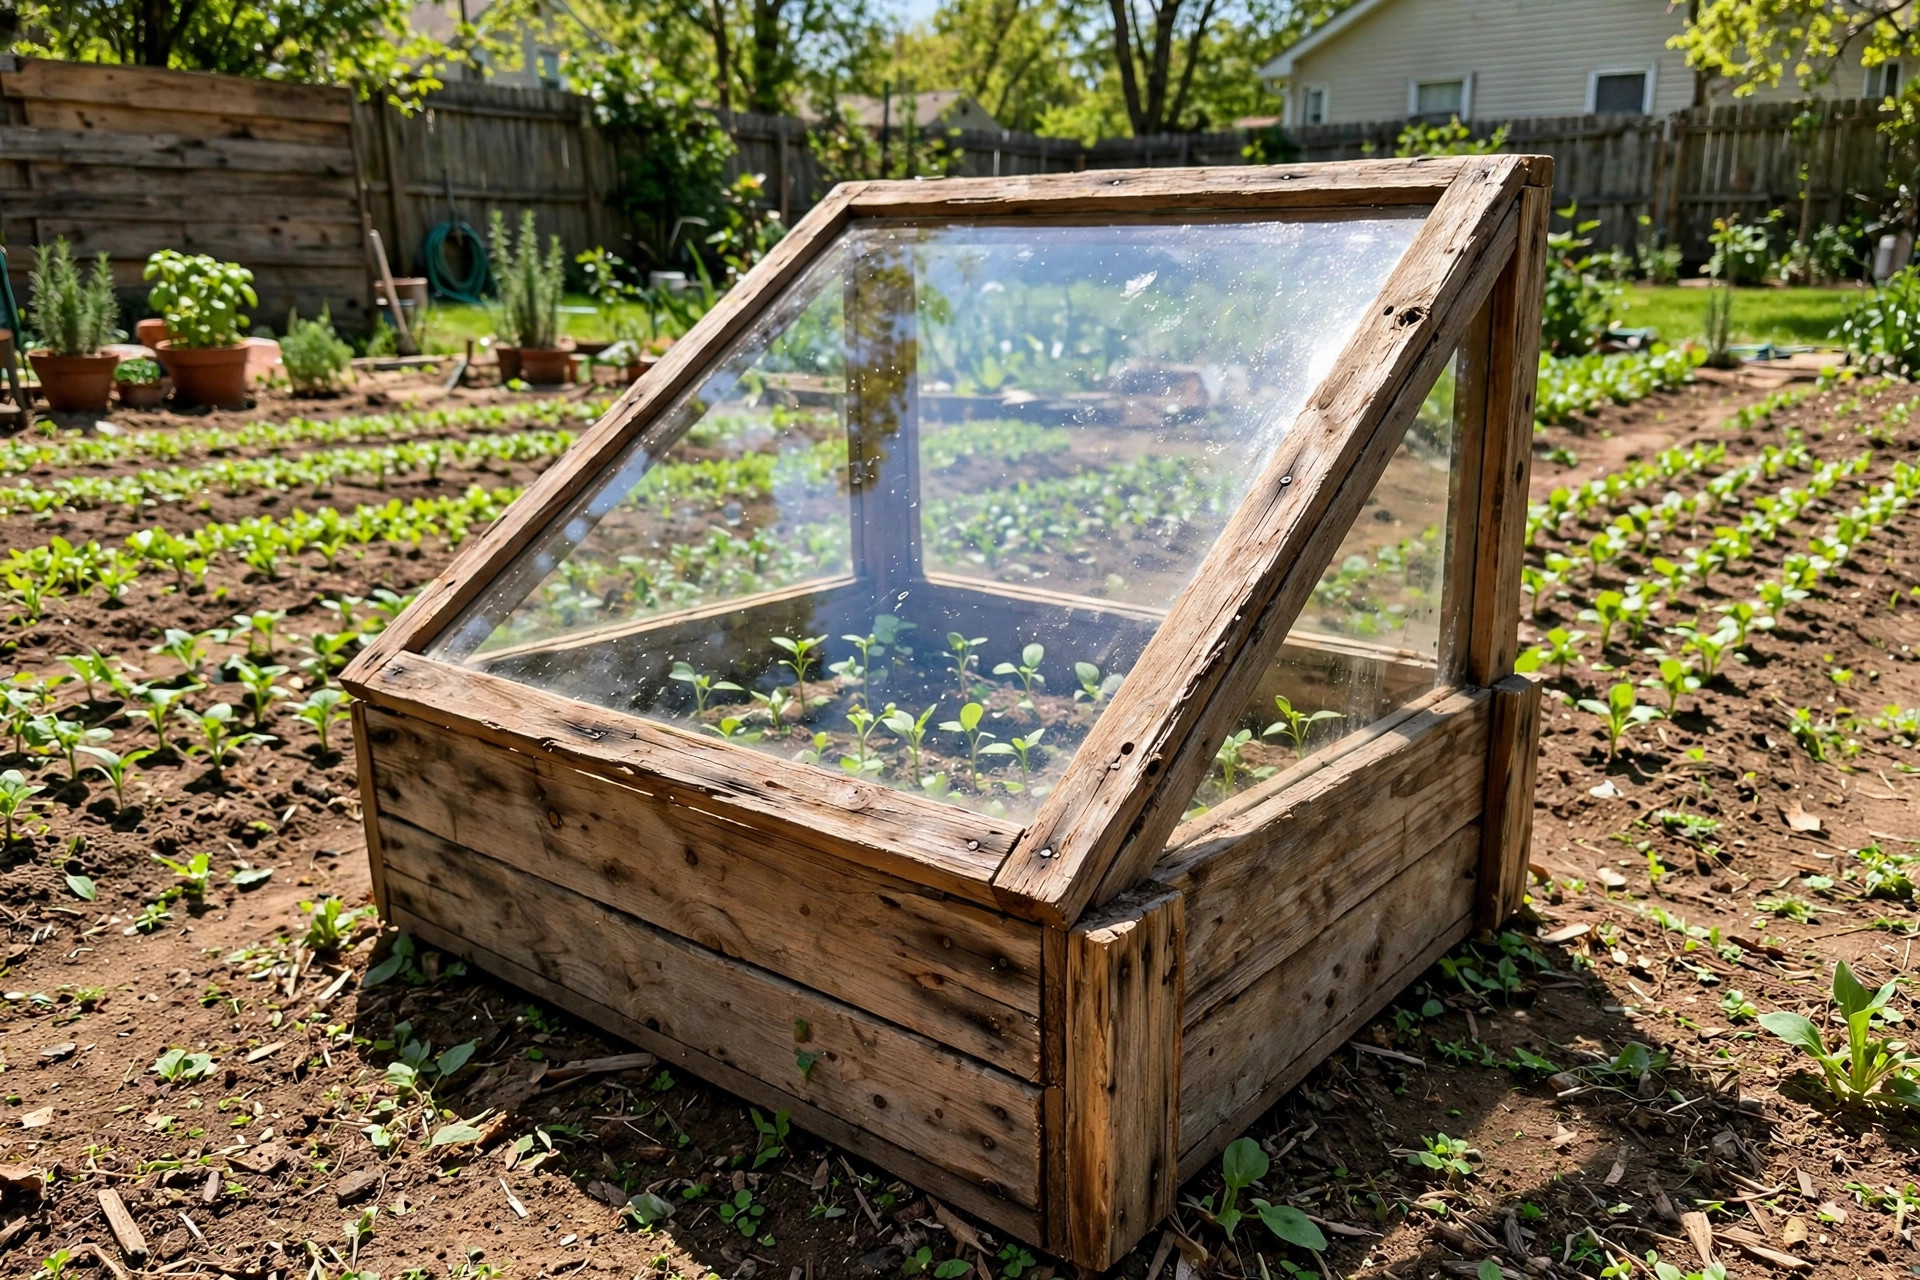
Cold frame plans for diy builders give gardeners a way to stretch the growing season without a greenhouse. A cold frame is a low box with a clear lid. It traps heat from the sun. It shields plants from wind, frost, and cold rain. Seeds start weeks early inside one. Small plants stay safe through cold snaps. This guide walks through the key steps of choosing, building, and keeping a cold frame. The language is plain. The steps are clear. A person with basic tools can finish a simple frame in one weekend.
Why Cold Frame Plans for DIY Builders Matter
A good plan saves money and time. Many builders start with scraps of wood and an old window. That can work. But a clear plan leads to a frame that lasts longer and works better. It shows the right size. It lists the materials. It explains where to place the frame in the yard.
A cold frame adds weeks to the season at both ends. In late winter, it warms soil for early seeds. In fall, it protects greens from early frost. Lettuce, spinach, and carrots grow in a frame when the open garden is done. Hardening off young plants is easier too. Seedlings that start indoors need slow steps before they face full sun and wind. A cold frame is the middle step. The lid opens a little each day. The plants adjust. They move to the open bed with less shock.
Plans also help builders avoid common errors. A frame that is too tall holds too much air and warms slowly. A lid that does not open on hinges makes care hard. Wood placed against wet soil rots fast. A sound plan from a trusted guide, such as the seasonal building projects at Family Handyman, covers these points before the first board is cut. Readers who want ready-made options can also look at cold frame reviews for winter gardening to compare bought frames with home-built ones.
What to Look for in Cold Frame Plans: Cold Frame Plans for Diy Builders
Not all plans suit every yard. A builder should check a few details before choosing one.
Size and Shape
Most plans show a box about three to four feet wide and four to six feet long. That size is easy to reach into from one side. The back wall stands a little taller than the front. The lid slopes down toward the south. This slope catches low winter sun. A low frame warms faster than a tall one. For most home gardens, a box no taller than eighteen inches at the back is best.
The spot matters as much as the plan. A frame should sit on level ground with good drainage. It should face south or southeast. A wall or fence to the north blocks cold wind. Some builders sink the frame six inches into the soil for extra warmth. Others set it on top of gravel for drainage. The plan should note the grade of the site. Guides from The Spruce often stress this point, since a frame in a low, wet spot rots and chills.
Materials
Wood is the most common choice. Cedar and redwood resist rot for many years. Pressure-treated lumber lasts long too, but some gardeners avoid it near food crops. They fear chemicals in the wood. Plans from Bob Vila’s project guides often list cedar as the best pick for this reason.
For the lid, old windows are cheap and heavy. New glazing panels of polycarbonate are light and safe. Glass lets in the most light. Polycarbonate twin-wall panels hold heat better at night. Each plan should state which glazing it uses. It should also show how the lid is held open. A simple prop stick works. A hinged lid with an automatic vent opener is better. These openers lift the lid when the air inside gets too warm. They need no power.
Ventilation and Drainage
Heat builds fast inside a closed frame on a sunny day. Air can reach over one hundred degrees by noon in early spring. Young plants cook at that heat. Every plan must show a way to vent the lid. A prop that holds the lid open one to six inches is the simple answer. The best plans include a daily venting routine. Open the lid in the morning. Close it in late afternoon before the sun drops.
Drainage keeps roots healthy. A layer of gravel under the soil helps. The plan should also warn against sitting the box in a puddle. Some gardeners add a thin base frame of stone. This lifts the wood off wet ground and adds years to its life.
Types of Cold Frame Designs
Cold frame plans for diy builders fall into a few common types. Each has its own strengths.
The Classic Box Frame
This is the most popular plan. Four wood sides form a rectangle. The back is higher than the front. A glazed lid hinges on the back rail. It is simple to build with a saw, a drill, and a tape measure. A first-time builder can finish one in a day. Lumber from a local building supply store like Lowe’s or Home Depot keeps the cost low. Old windows from a salvage yard make fine lids.
The Lean-To Frame
A lean-to frame uses a house wall or fence as its back. The plan calls for only three wood sides and one glazed front. The wall adds heat at night. It holds warmth from the day and gives it back slowly. This design suits small yards. It also needs fewer boards. Builders should pick a south-facing wall. They should keep the frame clear of roof drip lines.
The Hoop-Top Frame
This plan uses curved pipe or flexible rods to form hoops over a low base. Clear plastic sheeting covers the hoops. The frame is light and cheap. It warms well. It is less sturdy than wood in wind. Gardeners in windy places tie it down well or pick a wood design. Sheets and hoop house supplies from Burpee make this build easy to source.
The Straw-Bale Frame
For the lowest cost, some plans use straw bales as the walls. Two rows of bales form the sides. An old window or clear panel rests on top as the lid. The bales insulate well. They break down after one or two seasons. Then they become mulch or compost. This plan suits a builder who wants how to build a cold frame cheap and does not mind rebuilding each year.
Builders with big dreams sometimes move from cold frames to small greenhouses. A beginner’s guide to backyard greenhouses can help when the time comes. But a cold frame teaches the basics first: sun angles, heat gain, and venting.
Cost and Price
A cold frame is one of the cheapest garden structures to build. The price depends on the materials on hand.
A straw-bale frame can cost under thirty dollars if an old window is free. Bales cost only a few dollars each at feed stores in fall. A wood box frame with cedar boards and a polycarbonate lid may cost eighty to one hundred fifty dollars. Reclaimed lumber cuts that cost in half. A lean-to frame costs less than a full box since the wall does half the work.
Builders should budget for hardware too. Hinges, screws, and a handle add ten to twenty dollars. An automatic vent opener costs thirty to fifty dollars but saves the plants on hot days. It is a smart buy for people who work away from home. Price reports from Consumer Reports and store listings help builders compare material costs at major retailers before they shop.
Time is part of the cost as well. A simple box takes four to six hours for a beginner. A fancier plan with a stepped lid or divided sections may take a full weekend. The work pays off for years. A well-built cedar frame can last ten years or more with basic care.
Care and Upkeep
A cold frame needs regular care through the season. The routine is simple.
Each morning, check the air inside. A cheap soil thermometer on a stick shows the reading at a glance. Above seventy-five degrees, prop the lid open. Below forty at night, close it tight and add a blanket or burlap over the lid for extra warmth. Water plants in the morning so leaves dry before night. Wet leaves in a closed frame invite mold.
Wood care extends the life of the frame. Each fall, brush off dirt and check for soft spots. A coat of raw linseed oil protects cedar without chemicals that harm plants. Tighten loose hinges. Replace cracked glazing panels before winter. Quality hand tools from Fiskars make this upkeep easy, from trimming nearby weeds to cutting new boards.
At the end of the season, clean the frame well. Remove old soil from the top two inches. Sweep the glazing so light passes through. A dirty lid blocks up to twenty percent of the sun. Store straw bales for compost if the frame uses them. With this care, the frame is ready each spring without extra work.
Safety
Cold frame plans for diy builders must include safety from the first cut to the last screw.
Power tools demand care. Wear eye protection when sawing and drilling. Keep hands clear of blades. Clamp boards before cutting so they do not slip. Work gloves protect against splinters and sharp screw tips. A first aid kit should sit nearby.
The lid is the main risk in use. A heavy glass lid can slam shut on fingers. A strong hinge and a firm prop stick prevent this. Some builders add a chain that stops the lid from falling past a set point. Children should learn that the frame is not a seat or a step. A cracked glass lid must be replaced at once. Polycarbonate lids are safer where children play.
Soil and chemical safety matter too. Do not use old painted wood of unknown age for food beds. Old paint may hold lead. Keep treated lumber away from root crops if that is a concern. Wash hands after handling soil and compost. Store tools out of reach when the work is done.
FAQ
What is the best month to build a cold frame?
Late summer or early fall is the best time. The ground is dry and easy to work. The frame is ready before the first frost. A fall build also lets the gardener test it with winter greens. Spring builds work too, but the builder may miss the early season rush.
How deep should the soil be inside a cold frame?
Six to eight inches of good soil suits most plants. That depth holds moisture and lets roots spread. Some gardeners fill the frame with a mix of garden soil and compost. Others set pots and trays on a gravel base inside the frame. Both ways work.
Can a cold frame stay closed all winter?
No. Even in winter, a sunny day can push the inside air above eighty degrees. That heat harms cold-hardy greens. Open the lid a crack on bright days. Close it at night and during storms. A daily check takes only a minute and keeps plants safe.
What plants grow best in a cold frame?
Lettuce, spinach, kale, and arugula are top picks for fall and winter. Radishes and green onions grow fast in early spring. Herbs like parsley and cilantro do well too. Seed starting is another strong use. Trays of tomato and pepper starts can move out to the frame weeks before the last frost.
Do I need a permit to build a cold frame?
Almost never. A cold frame is small and sits on the ground without a foundation. Most towns treat it like a garden bed. Still, renters should ask the landlord first. Homeowners with strict housing rules should check the community guidelines.
How do I keep pests out of a cold frame?
A tight lid keeps out most pests. Mice may still find a way in during winter. A layer of hardware cloth under the frame blocks them. Slugs like the damp air. A ring of crushed eggshells or copper tape around the base helps. Check plants often and pick pests off by hand.
A Short Final Word
Cold frame plans for diy builders open the door to year-round growing. A simple box, a clear lid, and a sunny spot are all it takes. The build is short. The cost is low. The reward is fresh greens in months when the garden used to sleep. Pick a plan, gather the boards, and build. The first harvest from a home-built frame tastes like a small victory.
References
Bob Vila. (n.d.). Home improvement advice. https://www.bobvila.com Burpee. (n.d.). Seeds, plants, and gardening supplies. https://www.burpee.com Consumer Reports. (n.d.). Product reviews and ratings. https://www.consumerreports.org Family Handyman. (n.d.). DIY home repair and maintenance. https://www.familyhandyman.com Fiskars. (n.d.). Garden and cutting tools. https://www.fiskars.com Gardener’s Supply Company. (n.d.). Gardening tools and supplies. https://www.gardeners.com Lowe’s. (n.d.). Home improvement products. https://www.lowes.com The Home Depot. (n.d.). Home improvement products. https://www.homedepot.com The Spruce. (n.d.). Home and garden advice. https://www.thespruce.com
Was this guide helpful?

About Emily Rodriguez
The My Garden US editorial team writes practical, in-depth home and garden guides for American homeowners — tested advice, no fluff.