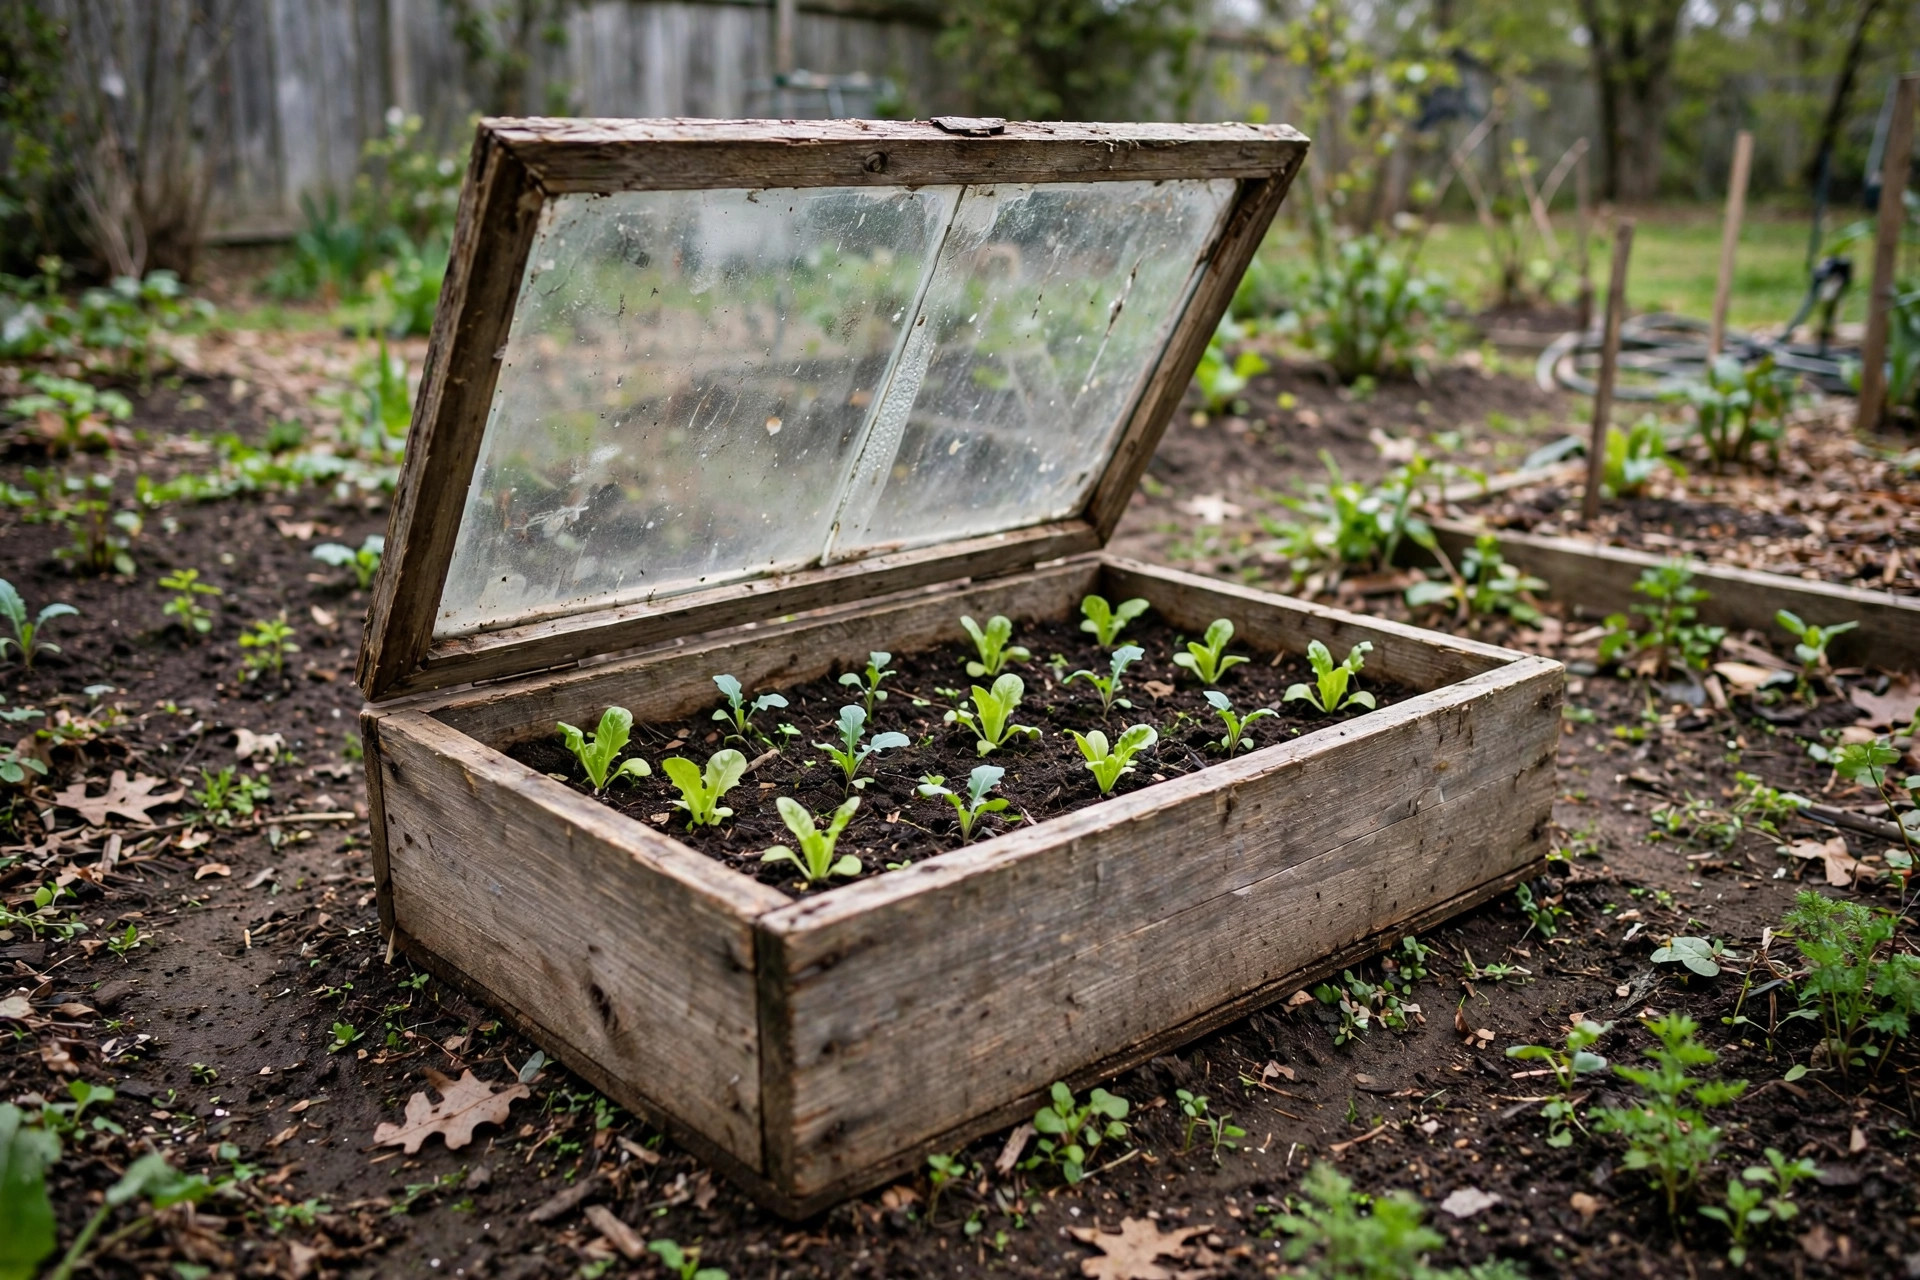
If you have ever wished for an earlier spring garden, a cold frame can give it to you. A cold frame is a simple box with a clear lid that traps the heat of the sun. It works like a small greenhouse. Plants inside stay warmer than the air outside. You can start seeds weeks before the last frost. You can also harden off young plants before they go into the open ground.
The good news is that you can learn how to build cold frame cheap. You do not need new lumber from a store. You do not need a kit. With scrap wood, an old window, and a free afternoon, you can build a cold frame that lasts for years. This guide shows you how to do it step by step, what it should cost, and how to keep it in good shape.
Why a Cheap Cold Frame Matters
A cold frame extends the growing season on both ends. In spring, the soil inside warms up long before the soil outside. Seeds sprout faster in warm soil. Young plants grow stronger when they are safe from cold wind. In fall, a cold frame protects late crops from the first light frosts. Greens like spinach, kale, and lettuce can keep growing for weeks after the outdoor garden has finished.
Buying a ready-made cold frame can cost more than a hundred dollars. Some models cost much more than that. But the box itself is a simple thing. It is four boards and a clear lid. There is no reason to pay for a brand name when scrap material works just as well. A cold frame built from used lumber and a window from a salvage pile does the same job as a store model. The sun does not care what the frame cost.
Gardeners in colder states have used cold frames for more than a hundred years. Old farm books describe boxes made from barn boards and storm windows. The idea has not changed. Only the price of kits has gone up. When you build your own, you also get a box that fits your exact space. You can size it to your window. You can size it to your raised bed. That freedom is part of the fun.
What to Look for in Cheap Materials: How to Build Cold Frame Cheap
Before you build, gather your materials. Almost everything can come from salvage. Here is what you need and where to find it.
The lid. The best lid is an old window sash. Check the curb on trash day. Ask at building sites when old windows are being replaced. Visit a salvage yard or a thrift store that takes building materials. A single-pane window works fine. So does a glass door from a cabinet. If you cannot find glass, clear plastic sheeting over a wood frame also works. Avoid foggy or cracked glass that blocks most of the light.
The box. Scrap lumber is easy to find. Old fence boards, pallet wood, and barn boards all work. Two-by-six or two-by-eight boards are a good size for the walls. Even one-inch boards work if you brace the corners. Make sure the wood is not rotten. Painted wood is fine as long as the paint is not peeling badly. Many gardeners use free pallet wood and get several years of use from it.
Hardware. You need hinges so the lid can open. Old door hinges from a salvage bin work well. You need a few screws or nails. You also need a stick or a chain to hold the lid open on warm days. A simple stick is free and works perfectly.
Extras. A thermometer is helpful but not required. Some gardeners paint the inside of the box white to bounce light around. White exterior paint from a half-used can is fine. Line the bottom with gravel or coarse sand for drainage if the frame sits on bare ground.
Keep a basic set of hand tools nearby. A saw, a hammer, a drill, and a tape measure are enough. For keeping your blades and edges in shape, see our guide on how to sharpen garden tools properly before you start cutting.
How to Build a Cold Frame Cheap: Step by Step
This plan builds a box sized to a standard old window, about three feet by three feet. Change the numbers to fit the lid you found. The steps are the same whatever the size.
Step 1: Pick a Spot
Choose a place with full sun. The frame should face south if you can manage it. A south-facing wall of the house or garage is ideal. The wall blocks north wind and bounces extra warmth into the box. The ground should be level. In late winter, clear snow from the spot so the box sits flat on soil.
Step 2: Build the Back Wall Higher Than the Front
Cut two boards for the front wall and two taller boards for the back wall. The back should be about four to six inches taller than the front. This slope lets rain run off the lid. It also angles the glass toward the low southern sun, which catches more light in spring.
Lay the boards on the ground in a rectangle. Fasten the corners with screws. Add a corner brace inside each corner if the wood is thin. Pallets and thin boards need these braces. Sturdy two-by boards may not.
Step 3: Attach the Lid with Hinges
Lay your window on top of the box. Mark where it sits. Screw two hinges to the back wall and to the lid frame. The hinges go on the high side, the back. Test the lid. It should open and close without sticking. If the window is heavier than the box can hold, add a short chain or a stick to prop it open safely.
Step 4: Seal the Gaps
Light leaks and cold drafts are the enemy. Fill small gaps between boards with caulk or with strips of scrap wood. You can also bank soil or mulch around the outside base of the box. This stops cold air from sneaking in under the walls. Do not seal the box so tight that air never moves. The lid itself will vent the box when you open it.
Step 5: Prepare the Soil Inside
Fork the soil at the bottom of the box. Mix in compost. The dark soil warms faster in the sun. If the frame sits on lawn, lay cardboard on the grass first, then add four to six inches of soil mix over it. The cardboard kills the grass and rots away in a few weeks. Water the soil and close the lid. Within a day or two on sunny weather, the box will feel warm inside.
That is the whole build. Most people finish in two to three hours. The box is ready for seeds or for hardening off young plants.
Types of Cold Frames and Budget Options
The basic box described above is the cheapest type. It costs almost nothing. But there are a few common variations worth knowing.
The pallet-wood frame. Made entirely from free pallet boards. Light and easy to move. Expect two to three years of life before the boards start to soften. Good for a first try.
The straw-bale frame. Stack straw bales in a rectangle and lay an old window across the top. No sawing at all. The bales rot into mulch after one season, which is part of the charm. Very cheap if you have a local farm source for bales.
The raised-bed lid. If you already have a raised bed, just build a hinged glass lid sized to fit it. This costs the least of all when you already own the bed. Many gardeners start here.
The double-layer frame. Two windows hinged together, or a layer of clear plastic under the glass lid. This holds more heat on bitter nights. It costs a little more in material but adds real protection in cold zones.
Any of these can be built for under twenty dollars when materials are salvaged. The straw-bale version is often free except for the lid. A useful roundup of project ideas appears at Family Handyman, and Bob Vila covers many simple garden builds.
Cost and Price Breakdown
Here is what a truly cheap build looks like. These are honest numbers for a gardener who salvages material.
– Lumber, salvaged: free to 10 dollars – Old window or glass lid, salvaged: free to 15 dollars – Hinges, salvaged or new: 0 to 8 dollars – Screws and nails: 0 to 5 dollars – Caulk or gap filler: 0 to 4 dollars – Paint, from a leftover can: 0 to 6 dollars
Total: free to about 48 dollars, with most builds landing under 20 dollars. Compare that with store-bought cold frames, which often run 80 to 250 dollars. Testing and price data from Consumer Reports show how much garden products vary in price, which is why salvaging makes such a big difference.
Where you spend matters more than how much. Spend on the lid if you must spend anything. A good clear lid is the heart of the frame. Spend nothing on fancy wood. Plain boards do the job. If you need new cutting tools for the project, Fiskars and Corona both make garden hand tools built to last many seasons. For seeds to start in your new frame, Burpee sells varieties suited to cool-season growing.
Care and Upkeep
A cheap cold frame still needs a little care. The main job is venting. On sunny days, the inside of a closed cold frame can reach 90 degrees even when the air outside is near freezing. Heat like that can cook seedlings in an hour. Open the lid a few inches whenever the sun is strong and the outside air is above freezing. Close it before sunset.
Water the soil inside when it dries out. The lid blocks rain, so you are the rain now. Check the soil with your finger. If the top inch is dry, water gently in the morning.
Once a year, look over the wood. Tighten loose screws. Re-caulk any gaps. Touch up paint if you painted the box. Scrap wood lasts longer when it can dry out between rains, so keep mulch from piling against the outside boards.
At season’s end, you can leave the frame in place or store it. Many gardeners leave it out all winter with the lid shut. Others tip it on its side under a porch roof. Either way works.
In summer, some gardeners remove the glass lid and use the box as a small raised bed. That is a fine way to get double duty from your work. Warm-season crops like the ones in our guide on how to prune tomato plants properly do well in the deep warm soil a cold frame leaves behind.
Safety
A cold frame is a safe project, but take normal care. Old windows can have broken edges. Wear gloves when you handle salvaged glass. Check old paint for lead if the window is very old, especially if children will garden nearby. Keep the lid propped firmly when it is open. A heavy window that slams shut can break fingers or shatter. A short chain fixed to the lid and the back wall stops it from swinging too far in wind. Tools with sharp edges deserve respect, so keep the saw and drill habits you use on any build. Lowe’s stocks basic safety gear like work gloves and glasses at fair prices.
Frequently Asked Questions
How early can I plant in a cold frame? In most zones, you can sow cool-season seeds four to six weeks before the last spring frost. Spinach, lettuce, radish, and peas handle the chill. Watch the inside temperature. Seeds want soil above 40 degrees to wake up.
Will a cold frame freeze at night? It can on very cold nights. The box holds daytime heat for hours, but a hard freeze will get through. On nights below 25 degrees, cover the lid with an old blanket or a tarp. Remove the cover in the morning so light gets in.
Do I need a south-facing spot? It helps a lot, but it is not required. East-facing works. Even a flat spot in the open works. What matters most is full sun for most of the day and shelter from hard wind.
Can I build one without an old window? Yes. A frame of scrap wood covered with clear plastic sheeting works. Stretch the plastic tight and staple it to the frame. It will not last as long as glass, but it costs almost nothing and you can replace it each year.
What grows best in a cold frame? Cool-season greens are the stars. Lettuce, spinach, arugula, kale, and Asian greens thrive. Herbs like parsley and cilantro do well. Root crops like radish and carrot work too. Once nights warm up, use the frame to harden off warm-season seedlings before transplant.
How big should my cold frame be? Size it to your lid. A three-by-three-foot box is easy to reach across from one side. Do not make it so wide that you cannot reach the back plants. If you want a bigger frame, make two lids side by side instead of one giant lid.
A Final Word
Learning how to build cold frame cheap is one of the best skills a gardener can pick up. The build takes an afternoon. The cost is pocket change. The reward is fresh greens weeks before the neighbors have any. Salvage yards, curbs, and old barns hold everything you need. When spring comes and your seedlings are already growing strong under glass, you will wonder why you waited so long.
For more ideas on what to grow around your new frame, read our piece on how to attract pollinators to garden. Plant care guides like The Spruce and Gardener’s Supply offer steady advice for beginners through every season.
References
Bob Vila. (n.d.). Home improvement advice. https://www.bobvila.com Burpee. (n.d.). Seeds, plants, and gardening supplies. https://www.burpee.com Consumer Reports. (n.d.). Product reviews and ratings. https://www.consumerreports.org Corona Tools. (n.d.). Garden and landscape tools. https://www.corona-tools.com Family Handyman. (n.d.). DIY home repair and maintenance. https://www.familyhandyman.com Fiskars. (n.d.). Garden and cutting tools. https://www.fiskars.com Gardener’s Supply Company. (n.d.). Gardening tools and supplies. https://www.gardeners.com Lowe’s. (n.d.). Home improvement products. https://www.lowes.com The Spruce. (n.d.). Home and garden advice. https://www.thespruce.com
Was this guide helpful?

About Lisa Anderson
The My Garden US editorial team writes practical, in-depth home and garden guides for American homeowners — tested advice, no fluff.