
Introduction
This chlorinating a well step by step guide usa homeowners rely on explains how to disinfect a private well with plain household bleach. Shock chlorination is the standard method. It kills bacteria in the well, the pipes, and the pressure tank. Many state health departments and county extension offices recommend it.
You should chlorinate a well when a water test shows coliform bacteria. Also do it after a flood, after a repair, or when the water turns cloudy or smells odd. New wells need it too. Drilling equipment can push dirt and germs into the water supply.
The process is simple. You mix unscented bleach with water. You pour it into the well. You circulate it through the pipes. You let it sit. Then you flush it out. The whole job takes one to two days, mostly waiting. This guide walks you through each step in plain language.
Why Chlorinate Your Well: Chlorinating a Well Step By Step Guide Usa
Wells draw water from underground. Soil filters much of it, but germs can still get in. Surface water runs down the casing after heavy rain. Floods bring waste and mud. A cracked cap or a loose seal lets insects and dirt inside. Even a perfect well can change. A drought lowers the water table and disturbs old sediment.
Bacteria are the main danger. Coliform bacteria live in soil and in animal waste. Most types do not make you sick. But they tell you that worse germs may be present. E. coli is a harmful type. It causes stomach pain, cramps, and diarrhea. Children and old people suffer the most. Regular testing is the only way to know. The United States Environmental Protection Agency publishes clear guidance on private well water and disinfection.
Chlorination fixes the problem at the source. A home filter only treats the water that passes through it. Chlorine reaches the well itself. It reaches the inside of the casing, the drop pipe, the pressure tank, and every faucet. After flushing, no bleach taste remains. The job is cheap. It needs no special skills.
Do not chlorinate just to fix a taste or a smell. Sulfur smells and iron stains need different treatment, such as a best well water filtration system reviews usa or a softener. Know what your problem is before you act.
Before You Start: What You Need
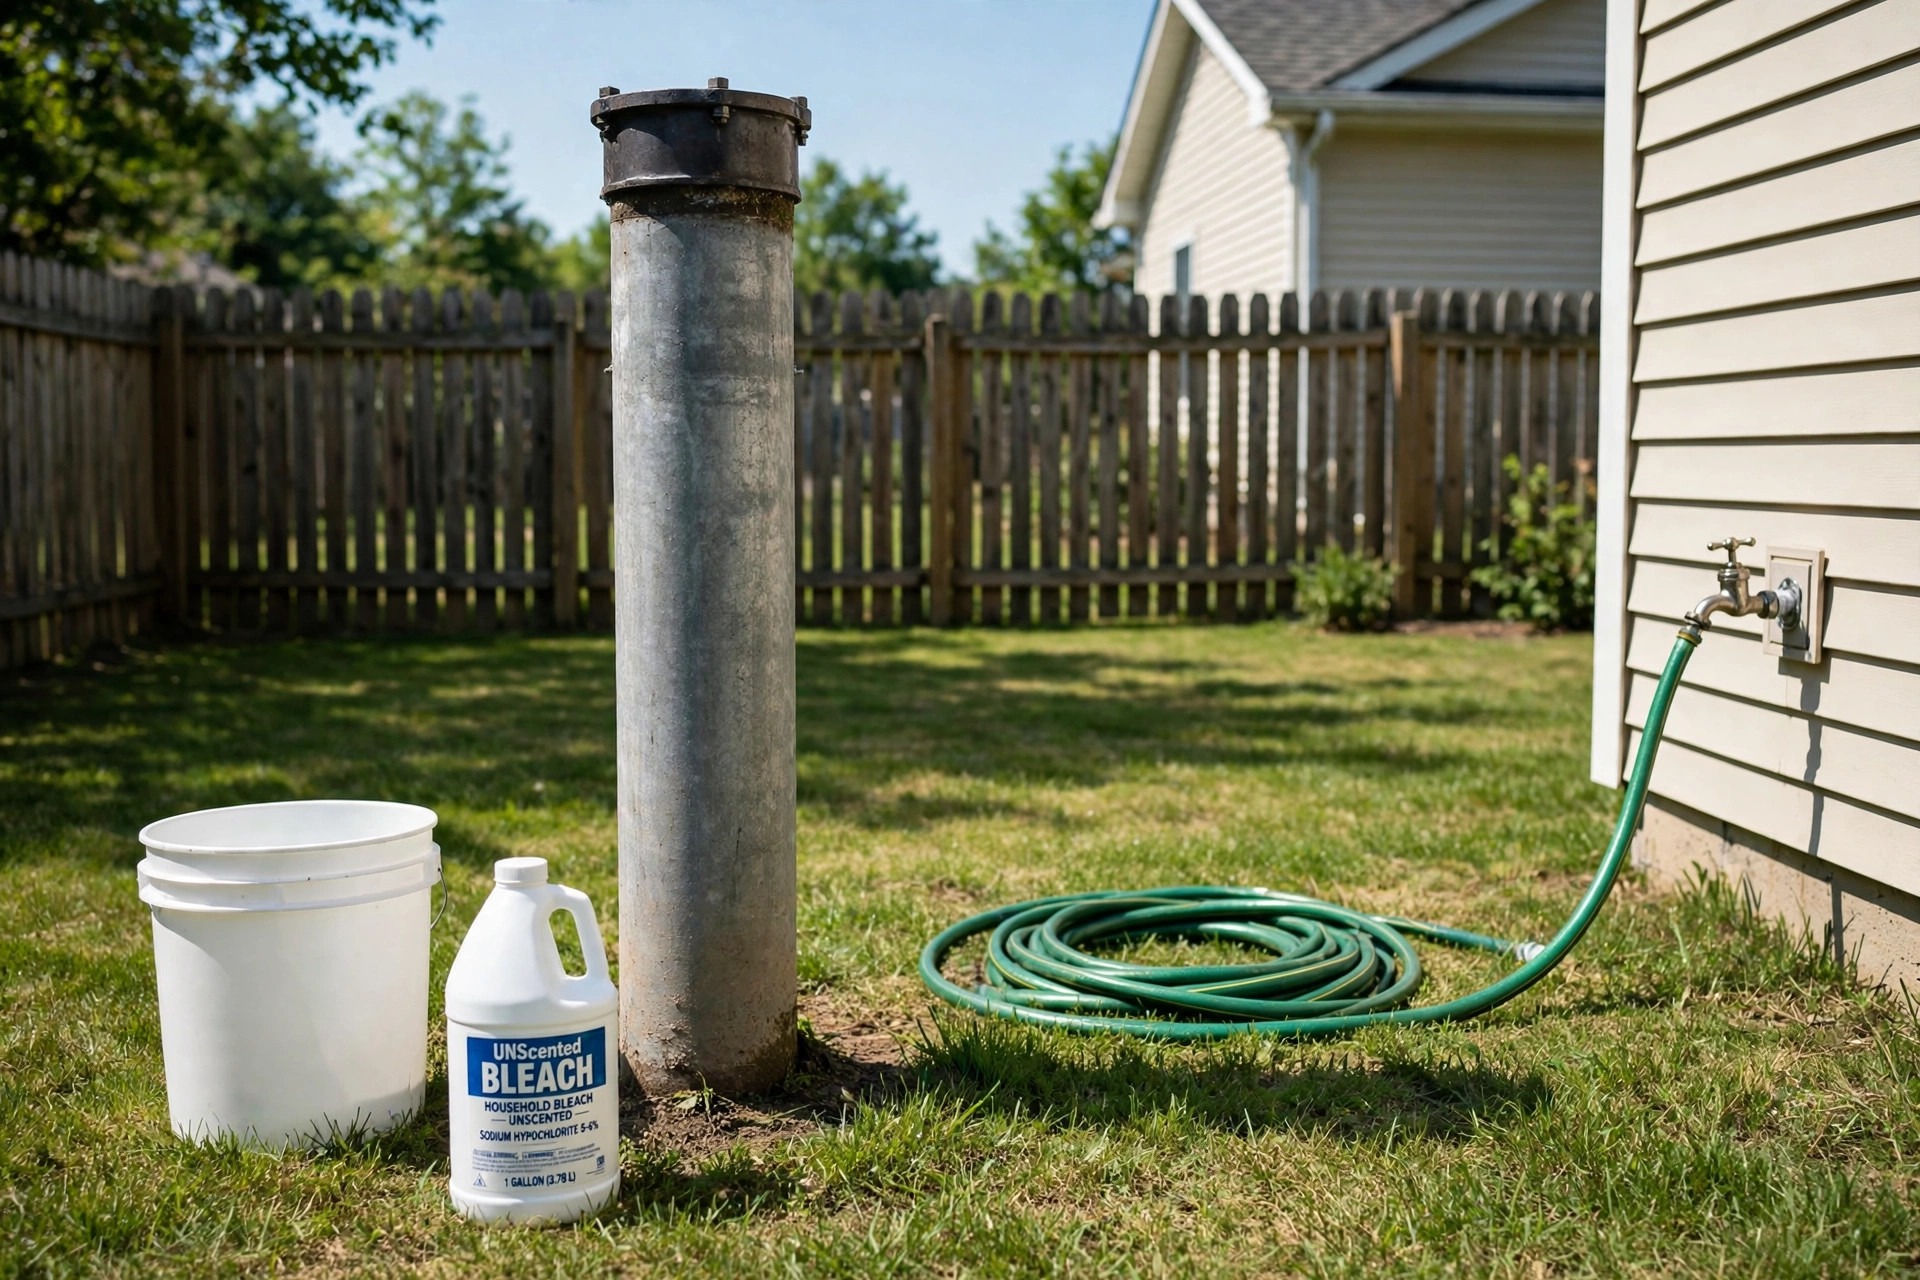
Gather your supplies the day before. You will need plain unscented household bleach with 5 to 6 percent sodium hypochlorite. Check the label. It must say regular bleach. Avoid bleach with scents, dyes, splash-less formulas, or cleaning additives. Those products are not safe for drinking water. You can also use pool shock made of calcium hypochlorite. It comes as granules. It works well, but plain bleach is easier to find.
You need a clean garden hose long enough to reach from a faucet back to the well head. You need a large clean bucket. You need a wrench to open the well cap. You need a funnel or a pipe section to pour through. You need rubber gloves and safety glasses. Chlorine burns skin and eyes. You can pick up a hose, a bucket, gloves, and glasses at Lowe’s in a single trip. Keep a water test kit for well water ready for after the job. Test kits are sold by Home Depot and many hardware stores.
Calculate the dose before you start. The rule is 3 pints of 5 to 6 percent bleach per 100 gallons of water standing in the well. Measure from the ground to the water surface with a weighted string. Mark where it splashes. Measure the inside diameter of the casing.
Each foot of a 6 inch casing holds about 1.5 gallons. Each foot of a 4 inch casing holds about 0.65 gallons. Multiply gallons of water by 0.03 pints of bleach per gallon. As an example, a 6 inch casing with 100 feet of water holds about 150 gallons and needs a little more than half a gallon of bleach. Round up slightly. A small excess does no harm. For detailed math help, Family Handyman offers a plain guide to well shock chlorination.
Plan your timing. Start early in the morning. You will not use the water for 12 to 24 hours. Fill bathtubs and jugs with clean water the night before. Tell the whole household. Do not run dishwashers or washing machines during the wait. Keep pets away from faucets. Flush to a drain ditch or a yard area if local rules allow it. Excess chlorine can hurt the bacteria in a septic tank.
Types of Wells and Chlorine Products
The United States has three common well types. A drilled well is a deep hole with a steel or plastic casing. A dug well is a wide shallow pit lined with stone or tile. A driven well is a pipe driven into sandy ground. Shock chlorination works for all three. Use the same 3 pints of bleach per 100 gallons. Put any filter or softener on bypass before you start.
Liquid household bleach is the most common choice. It mixes fast and pours easy. Use fresh bleach. Old bleach loses strength. Check the date on the bottle. Calcium hypochlorite granules, sold as pool shock, are stronger. Dissolve them fully in a bucket first. Never pour dry granules into the well. Chlorine pellets work too, but liquid bleach is simpler for most people.
Do not use swimming pool tablets with stabilizer. Do not use chlorinated cleaners from under the sink. Only pure chlorine products touch your drinking water.
Cost and Price
Shock chlorination is one of the cheapest home water jobs. A gallon of plain bleach costs only a few dollars. Most wells need half a gallon to one gallon. A water test kit costs between ten and thirty dollars. A county lab test may cost twenty to fifty dollars.
Your time is the main cost. The work takes about one hour of active labor. The waiting takes 12 to 24 hours. Flushing takes another hour. A well contractor charges 150 to 400 dollars. Most homeowners do it themselves and save the money.
Step by Step: How to Chlorinate Your Well
Follow these steps in order. Do not skip the waiting time. The chlorine needs hours to kill every germ.
Step 1: Prepare the Household
Fill clean containers with drinking water for the next day. A family of four needs about ten gallons. Fill the bathtub for toilet flushing. Turn off the water heater breaker or set it to pilot. Tell everyone in the house not to use the taps.
Step 2: Put Filtration on Bypass
Find your water softener, sediment filter, carbon filter, and any reverse osmosis system. Switch each one to bypass. Chlorine will damage carbon media and resin beads. Note your settings so you can restore them later.
Step 3: Mix the Chlorine Solution
Put on rubber gloves and safety glasses. Fill a five gallon bucket with clean water. Pour in the measured bleach. Stir with a clean stick. If you use pool shock granules, dissolve them fully. Never mix bleach with any other cleaner. Mixed chemicals can make poison gas. Work outside or in open air.
Step 4: Pour the Solution Into the Well
Open the well cap with your wrench. Pour the bleach solution down the casing. Use a funnel to avoid spills. Close the cap at once. Do not leave the well open. Open wells invite dirt, insects, and accidents.
Step 5: Circulate the Chlorinated Water
Attach the garden hose to an outside faucet. Run the other end back to the open well. Open the faucet and let water run back into the well for about 15 to 20 minutes. This mixes the chlorine through the whole column of water. Close the faucet. Remove the hose. Close the well cap tight.
Step 6: Run Each Faucet
Go inside. Open each cold water faucet one by one. Run it until you smell chlorine. Then close it. Do this for sinks, tubs, and outside spigots. Flush each toilet once. Open the hot water faucets too, so chlorine enters the water heater. Fixture makers such as Kohler advise checking and rinsing faucet aerators after any system shock.
Step 7: Wait 12 to 24 Hours
Let the chlorine sit overnight. Twelve hours is the minimum. Twenty four hours is better. Do not use the water during this time. Do not drink it. Do not cook with it. Do not bathe in it. The chlorine is far too strong. Post reminders at the kitchen sink.
Step 8: Flush the System
The next morning, attach the hose to an outside faucet. Run the water onto the yard, away from plants, ponds, and the septic drain field. Chlorine kills grass and fish. It also harms septic bacteria. Keep flushing until the strong chlorine smell fades. Then open indoor faucets and flush until the smell is gone there too.
Step 9: Restore Filters and Test
Put the softener and filters back in service. Reset the water heater. Clean each faucet aerator. Guides from Delta Faucet show how to remove and rinse them. Wait three to five days before testing. The system needs time to settle. Then test for coliform bacteria. Use your water test kit for well water or send a sample to a certified lab. Bob Vila recommends a lab test for the final check, since lab results hold up for records and real estate deals. If the test is still positive, repeat the whole process once.
Care and Upkeep After Chlorination
Chlorination is a treatment, not a permanent fix. Keep watching your water. Test for bacteria and nitrates once a year. Test after any flood, repair, or long outage. Keep a log of test dates and results.
Inspect the well head every few months. The cap should fit tight. The casing should stick up at least 12 inches above the ground. The ground should slope away from the well. Keep chemicals, fuel, and paint far from the well area. Keep animals and septic parts at least 50 feet away. This Old House offers clear guides on well cap and casing inspection. Check taps for loosened sediment as well. Care guides from Moen explain how to clean aerators after heavy chlorination.
Watch for warning signs. Cloudy water, new smells, or a metallic taste all deserve a test. Do not chlorinate on a hunch. Test first. Fix the true cause. Iron and sulfur are mineral problems. A best well water filtration system reviews usa handles them better than bleach. For ongoing daily protection after disinfection, a whole home water filter can treat water before it reaches the taps. Hard water is a mineral problem too. A water softener for well water fixes it without chlorine.
Protect your septic system from the flush water. Never flush heavy chlorine into the septic tank. The chlorine kills the good bacteria that digest waste. Route flush water to the yard or a ditch. After flushing, the tank bacteria recover on their own.
Safety Rules You Must Follow
Chlorine is safe in small doses but dangerous in strong form. Follow these rules every time.
Never mix bleach with vinegar, ammonia, or toilet cleaners. The fumes can kill. Use only plain bleach and water. Wear gloves and glasses. Rinse any splash with clean water at once. If bleach gets in your eyes, flush them for 15 minutes and call poison control.
Keep bleach bottles away from children and pets. Store them in a locked cabinet. Use fresh air when you mix. Do the pouring outside.
Do not drink the water during the waiting period. The chlorine level is hundreds of times higher than normal. Wait until the smell is gone and a test shows clean water. If anyone has a chlorine allergy or a health condition, talk to a doctor first. People on dialysis must avoid chlorinated water completely.
Respect your yard and neighbors. Do not flood a neighbor’s land with chlorinated water. Keep it off vegetable gardens, fish ponds, and streams. For general chemical safety rules in the home, the Consumer Product Safety Commission is a trusted source.
Frequently Asked Questions
How often should I chlorinate my well?
Test your water once a year. Chlorinate only when a bacteria test is positive, or after a flood, a repair, or a long period without use. Let the test decide.
Can I use scented or splash-less bleach?
No. Scented and splash-less bleaches contain soaps and perfumes. Those chemicals are not safe for drinking water. Use only plain unscented bleach with 5 to 6 percent sodium hypochlorite.
How long before the water is safe to drink?
Wait until the chlorine smell is fully gone and a bacteria test comes back clean. This usually takes three to five days after flushing. Do not rush. A lab test is the best proof. Home test kits work too, but labs are more exact.
Will chlorine hurt my water softener?
Yes, strong chlorine damages softener resin and carbon filters. Always put them on bypass before you start. Check the softener manual for exact bypass steps.
What if the water still tests positive after two rounds?
Call a well contractor. The problem may be a cracked casing, a bad seal, or a nearby pollution source. Two failed chlorinations mean the germs are coming back. A contractor can inspect the well and find the entry point. Do not keep adding bleach. Find the source.
Is shock chlorination safe for the septic tank?
The dose in the well does not hurt the septic system if you flush to the yard. The danger is flushing strong chlorine down indoor drains into the tank. Always route the first heavy flush to an outside area.
A Final Word
Chlorinating a well is plain work. It takes care, not skill. Follow the steps, respect the waiting time, and test at the end. Keep the cap tight. Keep the ground sloped. Test every year. The tools cost little. The knowledge lasts a lifetime.
Good water is the heart of a good home. A clean well protects your family and your property. It gives you peace of mind every time you turn the tap.
References
Aquasana. (n.d.). Water filtration systems. https://www.aquasana.com Bob Vila. (n.d.). Home improvement advice. https://www.bobvila.com Delta Faucet. (n.d.). Kitchen and bathroom faucets. https://www.deltafaucet.com Family Handyman. (n.d.). DIY home repair and maintenance. https://www.familyhandyman.com Kohler. (n.d.). Bathroom and kitchen fixtures. https://www.kohler.com Lowe’s. (n.d.). Home improvement products. https://www.lowes.com Moen. (n.d.). Faucets and plumbing fixtures. https://www.moen.com The Home Depot. (n.d.). Home improvement products. https://www.homedepot.com This Old House. (n.d.). Home renovation guidance. https://www.thisoldhouse.com U.S. Consumer Product Safety Commission. (n.d.). Product safety information. https://www.cpsc.gov U.S. Environmental Protection Agency. (n.d.). Protecting human health and the environment. https://www.epa.gov
Was this guide helpful?

About Lisa Anderson
The My Garden US editorial team writes practical, in-depth home and garden guides for American homeowners — tested advice, no fluff.
You May Also Like
Sewer Line Replacement Cost Per Foot USA: What Homeowners Pay in 2026
April 23, 2026 0 views
How to Size a Water Softener: A Guide for USA Homes
February 26, 2026 0 views
Garbage Disposal Installation Cost Near Me: A Plain Guide for Homeowners
May 3, 2026 0 views