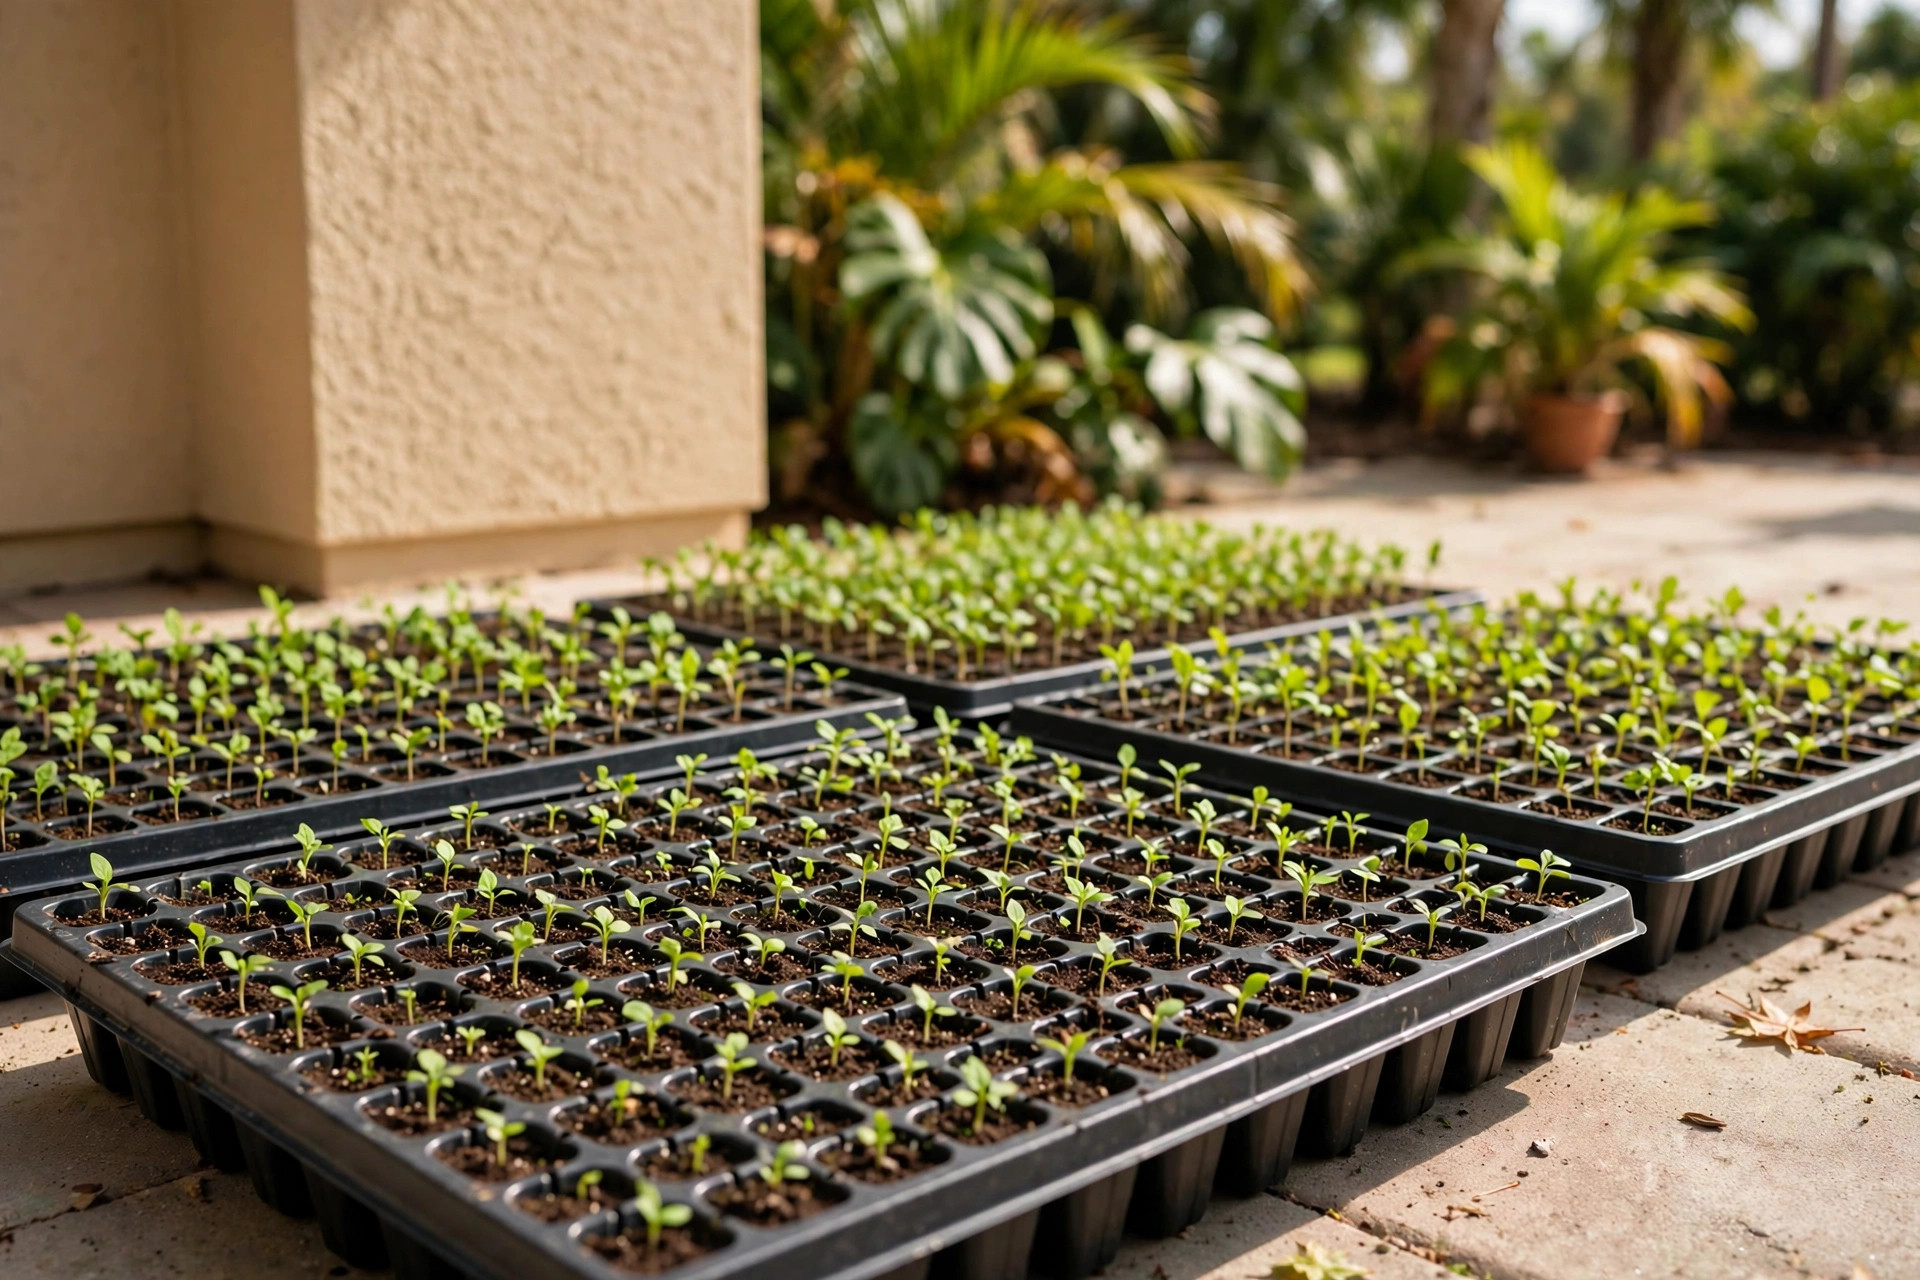

Florida is a land of long summers and short winters. In most parts of the state a gardener can grow food and flowers for much of the year. But the heat, the heavy rain, and the sandy soil make starting seeds a special skill. A good tray can make the work simple. A poor tray can make it hard. This guide looks at seed starting trays florida homes usa gardeners actually use, and shows how to pick, fill, and care for them so seedlings grow strong before they move outside.
Why Seed Starting Trays Matter in Florida
Seeds are small and full of promise. But a Florida yard is not a gentle place for them. Summer sun can dry a seed bed in one afternoon. A sudden storm can wash tiny seeds away. Sandy soil lets water run through too fast, and hungry birds and insects wait for anything green.
A seed starting tray gives seeds a safe home. Each cell holds just enough mix for one seedling. The tray keeps the mix moist, holds the roots in shape, and lets the gardener move many plants at once. Instead of sowing in the garden and hoping, the grower raises baby plants on a patio, a porch, or a kitchen table. When the seedlings are sturdy, they go into the ground.
Florida gardeners also face a short cool season. Tomatoes, peppers, and many flowers do best when they are set out as strong transplants, not as seed. A tray lets the gardener start seeds weeks before the right planting date. In North Florida this means spring transplants are ready when frost danger passes. In South Florida it means fall crops can start in the heat of late summer, safe under shade, while the garden bed is still too hot for seed. Guides like The Old Farmer’s Almanac publish planting calendars that help Florida growers pick these dates with care.
A tray also saves money. A packet of seed costs little. The same money spent on nursery transplants buys only a few plants. With seed starting trays for Florida homes, one packet can fill several trays, and the gardener chooses the exact kinds to grow.
How to Choose the Right Tray: Seed Starting Trays Florida Homes Usa
Cell Size and Depth
Trays come with many small cells or fewer large cells. Small cells, often 72 or 128 to a tray, suit seeds that move out soon, such as lettuce, basil, and flowers. Large cells, often 36 or 50 to a tray, suit plants that stay longer, such as tomatoes, peppers, and eggplant. Deep cells give roots more room and keep the mix from drying out as fast. In Florida heat, deeper cells are often the wiser choice.
Tray Material
Most trays are plastic. Thin plastic trays cost little but may crack after one season. Thick plastic trays last for years and can be washed and used again. Rigid trays hold their shape when lifted full of wet mix. Some growers like trays made from peat or coir. These break down in the soil, so the seedling can be planted pot and all. They suit gardeners who do not want to disturb roots.
A seed starting trays buying guide can show the common sizes and explain which crops suit which cell count. Reading one before buying saves time and money.
Humidity Domes and Bottom Trays
Many trays come with a clear plastic dome and a solid tray with no holes. The dome holds warm, moist air over the seeds and helps them sprout. The solid tray catches water from below. Bottom watering keeps the surface dry and cuts down on a common seedling sickness called damping off, which rots young stems at the soil line. Every cell must drain, so check that each one has holes in the bottom.
Types of Seed Starting Trays
Standard Plastic Cell Trays
These are the workhorses. They are cheap, light, and easy to stack. A 72-cell tray fits a standard flat and is simple to carry. Wash them with mild soap between uses to keep disease away. Many gardeners keep the same trays for five years or more.
Peat and Coir Pots
These small pots are pressed from peat moss or coconut fiber. The gardener sows one or two seeds in each pot, then plants the whole pot in the garden. Roots grow through the walls. This type suits crops that hate root disturbance, such as cucumbers, melons, and squash. A guide to peat pots for seedlings explains when these pots work best and how to keep them from drying out at the edges.
Soil Blocks and Self-Watering Trays
Some growers press planting mix into firm blocks with a special tool and use no tray at all. This takes practice but uses no plastic. Self-watering trays hold a water tank below and wicks that pull moisture up into the cells. In a Florida home where the air conditioner dries the air, they can save seedlings from a missed watering.
Seed Starting Mix: The Foundation
Do not use garden soil in trays. Florida soil is sandy, heavy with weed seeds, and full of fungi that kill seedlings. Use a bagged seed starting mix. These mixes are light and clean. They are made from peat moss or coir, vermiculite, and perlite. They hold water but still let air reach the roots.
Some mixes come with a small charge of fertilizer. Most do not. Seeds do not need food to sprout. They carry their own supply. Once the first true leaves appear, the seedling needs mild feeding. A half-strength liquid fertilizer once a week is enough. Too much food burns young roots.
Fill each cell to the top and press the mix down gently. Water the tray before sowing so the mix is damp through. Sow at the depth shown on the seed packet, and label every tray with the crop name and the date. Memory fails, but a plastic tag does not.
Timing: Florida Planting Calendars
Florida spans three growing zones, and timing shifts with place. In North Florida, spring frost can reach into March, so warm-season crops are started indoors six to eight weeks before the last frost. In Central Florida the frost is light and brief, and spring planting starts earlier. In South Florida winter is the prime garden season, so trays for fall crops are sown in late summer and kept in shade while the garden bed is still too hot.
The planting guides at Gardening Know How give zone-by-zone timing advice that Florida gardeners can follow with confidence.
Light, Heat, and Air
Light
Seedlings need strong light from the day they sprout. A sunny Florida windowsill often is not enough, since plants stretch toward the glass and grow tall and weak. A simple shop light hung two inches above the seedlings and raised as they grow gives far better results. Keep it on fourteen to sixteen hours a day with a cheap timer.
Most vegetable seeds sprout best when the mix is between 70 and 85 degrees. In an air-conditioned home the mix may be too cool for peppers and eggplant, so a heat mat under the tray helps. Remove it once seeds are up. A small fan blowing gently across the trays dries the leaf surface, which fights disease, and makes the stems sway, which grows them thick and strong.
Watering and Feeding
Water from below when the surface of the mix feels dry. Lift a corner of the tray to judge its weight. A light tray needs water. A heavy tray does not. In Florida’s dry indoor air, check trays once a day.
When the first true leaves open, begin feeding with a balanced liquid fertilizer at half the label rate, once a week. True leaves are the second set of leaves, shaped like the adult plant’s leaves. Pale or yellow leaves often mean hunger. Dark green leaves with steady growth mean the feeding is right.
Hardening Off Before Planting Out
A seedling raised indoors has lived a soft life. It must be trained for the real garden. This training is called hardening off, and it takes seven to ten days.
Set the trays outside in shade for two or three hours on the first day. Bring them in at night. Each day, add an hour or two of sun and wind. By the end of the week the plants can stay out all day. Skip this step and the Florida sun will scorch tender leaves in a single afternoon.
Plant out in the late afternoon or on a cloudy day. Water the seedlings well before and after planting. A little shade cloth over new transplants for the first few days helps them settle.
Cost and Price
A thin 72-cell tray often costs two to four dollars. A sturdy reusable tray costs eight to fifteen dollars. A full kit with tray, dome, and heat mat may run twenty to forty dollars. Seed starting mix sells for five to ten dollars a bag, enough for several trays.
Compare this with nursery transplants at three to six dollars each. One tray of tomato seedlings can replace fifty dollars of store plants. The savings grow each season as trays are reused. Even with lights and mats, a home seed starting setup pays for itself in the first year for a serious vegetable gardener. A gardener who starts flower bulbs and annuals from seed in trays can fill beds for a fraction of nursery prices, though fine plants from nurseries such as White Flower Farm have their place too.
Care and Upkeep of Trays
Clean trays between uses. Old mix can carry disease into the next crop. Shake out the loose mix, scrub with warm soapy water, and rinse well. A day drying in the full Florida sun kills many germs. Store trays dry and out of the sun when not in use, since sunlight makes thin plastic brittle. Check each season for cracks, and retire cracked trays to use as drip catchers under pots.
Safety
Seed starting is safe work, but a few cautions apply. Pour and mix seed starting mix outdoors or in a well-aired room, and wear a simple dust mask, since peat and perlite dust can irritate lungs. Keep fertilizers and any pest products locked away from children and pets, and use only products labeled for food crops on vegetable seedlings. Wash hands after handling mix, fertilizer, and trays. Keep heat mats and grow lights away from water, plug them into grounded outlets, and check cords for damage each season.
Home electrical safety guides published by the U.S. Consumer Product Safety Commission cover this in plain terms, and the National Institute of Food and Agriculture offers research-based guidance on safe home gardening practices.
Common Problems and Fixes
Damping off strikes when seedlings keel over at the base and die. Prevent it with clean trays, fresh mix, bottom watering, and moving air. Pull sick seedlings at once.
Leggy seedlings stretch tall and pale toward weak light. Move the light closer and add hours of light. Mold or algae on the mix surface comes from too much water and too little air. Let the surface dry between waterings, and sprinkle vermiculite on top after sowing. Slow sprouting often means the mix is too cool, so check it with a thermometer.
Frequently Asked Questions
When should I start seeds indoors in Florida?
It depends on your part of the state. In North Florida, start warm-season crops indoors six to eight weeks before the last spring frost. In Central and South Florida, the main season is fall through spring, so start trays in late summer for fall planting. Check a Florida planting calendar for your county each year.
Do I need grow lights for seedlings in Florida?
In most cases, yes. Florida sun is strong, but a windowsill gives light from one side only, and seedlings stretch and weaken. A simple fluorescent or LED shop light hung close above the trays grows stocky, healthy plants. Many gardeners find lights are the single best upgrade to their seed starting setup.
Can I reuse seed starting trays?
Yes. Sturdy plastic trays can be used for many years if they are washed between crops. Thin trays may last only one or two seasons. Clean trays with soap and water, dry them fully, and store them out of the sun.
What is the best mix for seed starting trays?
A bagged seed starting mix made for the purpose. It is light, holds moisture, and is free of weed seeds and disease. Do not use garden soil or heavy potting soil. Seedlings need air around their young roots as much as they need water.
Why do my seedlings fall over and die?
The most common cause is damping off, a fungal disease of wet, airless conditions. Use fresh mix, water from below, give the trays moving air from a small fan, and do not sow too thickly. Remove fallen seedlings at once so the sickness does not spread.
How many seeds go in each cell?
For most crops, two seeds per cell is wise. If both sprout, snip the weaker one at the base with small scissors. Do not pull it, as pulling can disturb the roots of the one that stays. For costly or large seeds, one per cell is enough.
A Short Final Word
Seed starting trays turn a Florida home into a small nursery. The work is simple, the cost is low, and the reward is a garden planted exactly when and how the grower wants. Start with one tray, one bag of mix, and one packet of seed. By the second season the trays will feel like old tools, and the garden will show it. For more ideas on seeds and young plants, the guides at Burpee, Park Seed, Gurney’s, Proven Winners, and The Spruce are worth a quiet evening of reading.
References
Burpee. (n.d.). Seeds, plants, and gardening supplies. https://www.burpee.com Gardening Know How. (n.d.). Gardening guides and plant care. https://www.gardeningknowhow.com Gurney’s Seed & Nursery Co. (n.d.). Seeds, plants, and garden supplies. https://www.gurneys.com National Institute of Food and Agriculture. (n.d.). Agricultural research and extension. https://www.nifa.usda.gov Park Seed. (n.d.). Seeds, plants, and gardening supplies. https://www.parkseed.com Proven Winners. (n.d.). Plants and gardening inspiration. https://www.provenwinners.com The Old Farmer’s Almanac. (n.d.). Gardening calendars and advice. https://www.almanac.com The Spruce. (n.d.). Home and garden advice. https://www.thespruce.com White Flower Farm. (n.d.). Plants, bulbs, and garden supplies. https://www.whiteflowerfarm.com
Was this guide helpful?

About Lisa Anderson
The My Garden US editorial team writes practical, in-depth home and garden guides for American homeowners — tested advice, no fluff.
You May Also Like
Onion Sets Planting For Sale USA: A Complete Guide for Home Gardeners
August 25, 2026 0 views
Onion Sets Planting USA Online Deals: A Simple Guide for Home Gardeners
June 2, 2026 0 views
Dahlia Bulbs Bulk USA Online Deals: How to Buy More Tubers for Less Money
February 3, 2026 0 views