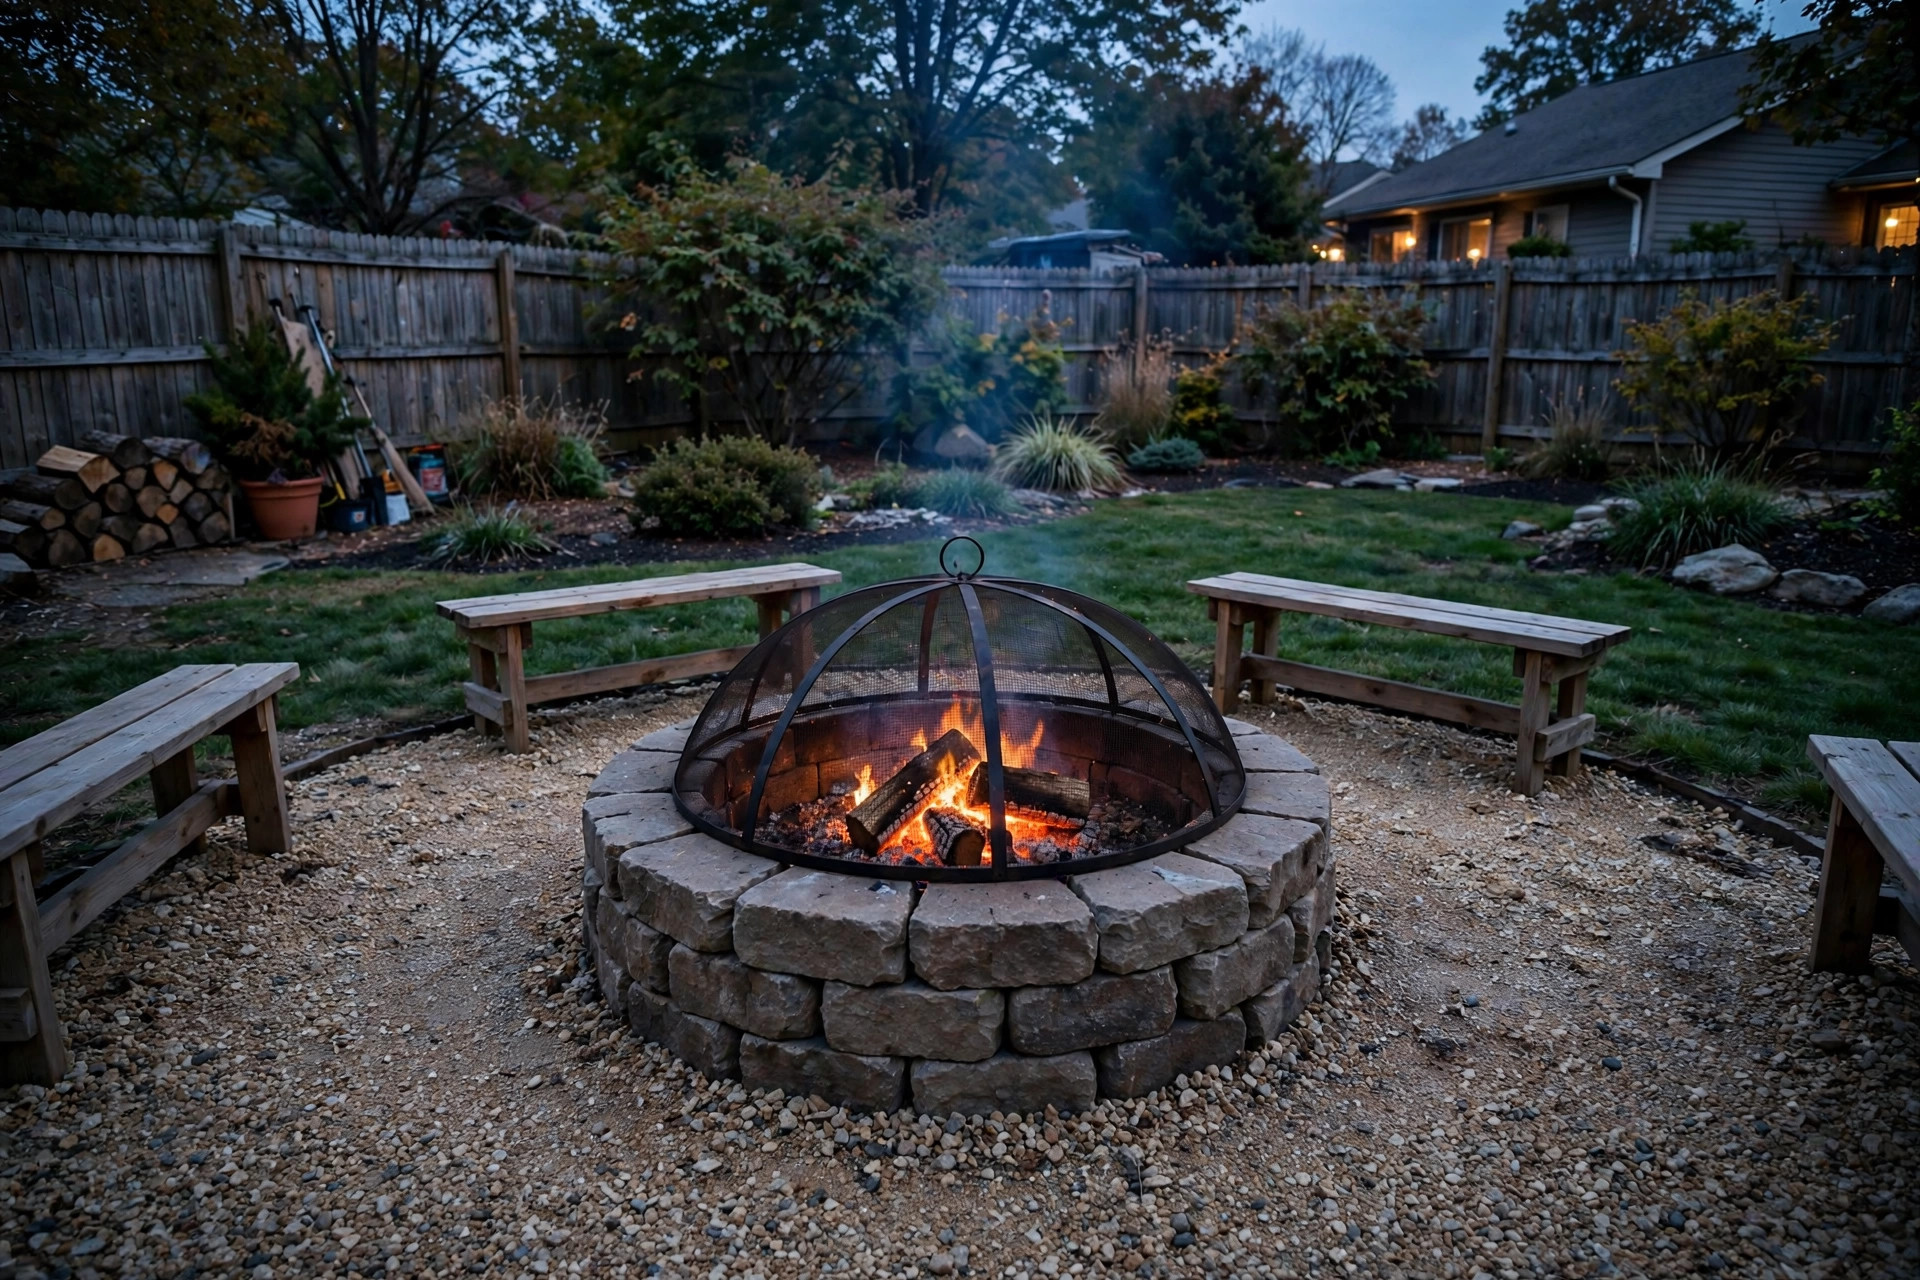

A backyard fire pit area gives a family a place to sit on cool evenings. It costs less than most patio projects. It can be built in a weekend by one or two people. This guide explains how to build a fire pit area that is safe, sturdy, and pleasant to use.
Why a Fire Pit Area Matters
A fire pit area turns an unused corner of the yard into a gathering place. People sit near fire by instinct. The light draws them in. Conversation comes easy around a small fire.
For the homeowner, the project also adds value. A finished yard with a clear use is worth more than bare grass. Real estate writers have long noted that outdoor living space ranks high with buyers. A fire pit area is one of the cheapest ways to add such space.
There is also the simple pleasure of the thing. A fall evening in America was made for a small fire. Children roast marshmallows. Neighbors stop by. The yard, so quiet all summer, has a center.
Before you start, check the local rules. Many towns allow small backyard fire pits. Some require a permit. Some ban open burning during dry months. A quick call to the town office or fire department answers the question in minutes. This step is part of how to build a fire pit area the right way, not the fast way.
Choosing the Spot: How to Build a Fire Pit Area
Distance From the House and Trees
Safety begins with placement. Set the fire pit at least ten feet from the house, the garage, and any shed. Low branches are a danger too. Keep the pit clear of trees by at least ten feet in every direction, and make sure no branch hangs over the spot.
Wind matters. Notice which way the wind usually blows across your yard in the evening. Do not place the pit where smoke will drift into an open bedroom window every night. A corner of the yard that sits downwind of the house works best.
Ground and Drainage
Choose ground that is level or nearly level. A slope makes seating hard and can let water run under the pit. Avoid low spots where rain gathers. If your yard holds water near the house, you may need to fix that problem first; a guide to french drain installation around the house explains one common fix.
Call the utility marking service before you dig. In most states, one call brings out locators who mark buried gas, electric, and water lines for free. Digging without this step risks a broken line and a large repair bill.
What You Will Need
Most fire pit areas use the same short list of materials. You can buy all of it at a local home and garden store.
– Concrete retaining wall blocks, tapered or straight, about 40 to 50 pieces for a pit three feet across and three blocks high – Fire-rated bricks or a steel fire ring insert for the inside of the pit – Crushed stone or pea gravel, about half a ton, for the base and the surrounding pad – Landscape fabric to lay under the gravel – A metal spark screen, sized to the pit – Long matches or a long lighter, a fire poker, and a bucket of sand for safety
For tools, you will want a shovel, a rake, a tamper or a heavy flat board for packing the gravel, a level, a tape measure, and work gloves. A wheelbarrow helps with the stone. If your mower is out of service during the project, lawn mower repair shops near you can get it running again.
When you shop for block, choose block rated for outdoor use. Standard retaining wall block from a yard supply works well. Do not use plain concrete blocks that are not rated for heat on the inside ring; heat can crack them. The inner lining of fire brick or a steel insert takes the direct heat and protects the outer wall.
Types of Fire Pit Areas
Above-Ground Stone Pit
The classic choice is a round pit of stacked block, set on a gravel pad. No mortar is needed. The blocks sit by gravity, three courses high. A steel fire ring or fire brick lines the inside. This is the simplest type to build and to repair later.
Sunken Fire Pit
A sunken pit sits one or two feet below grade, with the seating ring set around it. It feels more enclosed and blocks wind well. But it needs careful drainage. A sunken pit that fills with rain is useless. For most do-it-yourself builders, the above-ground pit is the better choice.
Patio-Style Fire Pit Area
Some homeowners build the pit as part of a larger paved patio. This looks handsome and gives more room for chairs. The cost is higher because of the paving. The steps for the pit itself are the same; only the ground under it changes.
Building the Fire Pit Area Step by Step
Step 1: Mark the Circle
Drive a stake where the center of the pit will be. Tie a string to it and mark a circle about ten feet across for the gravel pad. Then mark a smaller circle, about three to four feet across, for the pit itself. The pad gives you room for chairs around the fire.
Step 2: Prepare the Ground
Cut away the grass inside the ten-foot circle. Dig down about four inches. Lay landscape fabric over the bare soil. This keeps weeds from growing up through the gravel.
Step 3: Lay the Gravel Pad
Spread crushed stone four inches deep over the fabric. Rake it level. Pack it down with the tamper. A firm base keeps the pit wall from shifting over time. Add gravel around the marked pit circle to fill the whole pad.
Step 4: Set the First Course of Block
Lay the first ring of block on the gravel where the pit circle is marked. Set each block firmly and check with the level. This first course carries all the weight above it, so take your time. Adjust gravel under any block that rocks.
Step 5: Stack the Wall
Set the second course, staggering the joints like brickwork. Staggered joints make the wall strong. Add the third course the same way. Most pits stand about three courses high, which is roughly a foot above the gravel.
Step 6: Line the Inside
Place the steel fire ring insert inside the block wall, or stack fire brick against the inner face. The lining takes the heat of the fire. Leave a small air gap between the lining and the block if the maker of the insert advises it.
Step 7: Add the Spark Screen and Seating
Set the spark screen over the top of the pit. Arrange seating around the pad: benches, simple outdoor chairs, or stumps. Keep all seating at least three feet from the pit wall. Spread a final thin layer of gravel to dress the pad.
Cost and Price
A simple fire pit area costs between $150 and $600 in materials, depending on the stone you choose. Concrete block is the cheapest wall material. Natural stone costs more but looks better.
Breaking it down: block and fire brick often run $100 to $250. A half ton of crushed stone runs $40 to $80, plus delivery if you cannot haul it. A steel insert or spark screen adds $50 to $150. Tools, if you must buy them, add to the bill, but most of these tools serve the yard for years.
Hiring a landscaper to build the same project usually costs $800 to $2,000. The do-it-yourself route saves most of that. The work is honest labor: digging, lifting, leveling. Two people can finish in one long day or two easy weekends.
Care and Upkeep
A fire pit area needs little care, but small habits keep it safe and sound.
Remove ash after every few fires. Ash holds moisture, and wet ash can damage the lining over time. Scoop it into a metal bucket, never a plastic one. Let the ash cool a full day before you move it.
Check the block wall each spring. Frost can shift a course. Reset any block that has moved. Pull weeds from the gravel pad before they take hold. A guide to outdoor ant killer for lawns can help if ants move into the gravel.
Cover the pit when it is not in use. A simple metal cover keeps rain out of the fire chamber. This is the single best habit for a long-lived pit.
Safety Rules to Follow
Fire deserves respect. A few firm rules keep every evening safe.
Never leave a burning fire alone. Not for a minute. Assign one adult to watch the fire until it is fully out.
Keep water or sand close. A garden hose, a bucket of water, or a bucket of sand should stand within reach whenever the pit is lit.
Burn only clean, dry wood. Do not burn trash, painted boards, or pressure-treated lumber. These release harsh smoke and chemicals. Split hardwood burns best and makes the least smoke.
Watch the wind. If gusts carry sparks, let the fire burn down or put it out. The spark screen helps, but it is not a cure for bad weather.
Keep children and pets back. Mark a clear ring three feet from the pit and teach children to stay outside it. Store matches and lighters out of reach.
Let the fire burn down, then drown the coals. Stir the ashes and drown them again. Coals can stay hot for many hours. Touch nothing until you are sure it is cold.
For general outdoor safety standards, the Consumer Product Safety Commission publishes guidance on home fire safety at https://www.cpsc.gov. Outdoor power equipment makers such as Toro and Briggs & Stratton also publish yard safety tips worth reading before any project that changes the yard.
Frequently Asked Questions
How far should a fire pit be from the house? Ten feet is the common rule, and many fire departments ask for more. Measure from the pit wall to the nearest wall of the house. Include the garage and any wooden fence in your measuring.
Do I need a permit to build a fire pit area? It depends on your town. Many towns allow small recreational fires without a permit. Some require one. A few ban open burning outright. Call the local fire department before you buy materials.
Can I build a fire pit area on grass? You can, but a gravel pad is better. Grass under and around a pit dries out, turns brown, and can catch stray sparks. The gravel pad in this guide costs little and makes the area safer and neater.
What is the best size for a backyard fire pit? Three to four feet across on the inside works for most families. It holds a good fire without wasting wood. The seating pad around it should be eight to twelve feet across to give everyone room.
How deep should the gravel base be? Four inches of packed crushed stone is enough for a small block pit. The key is packing it firm and keeping it level. Soft or uneven gravel lets the wall shift.
Can I cook over my fire pit? Yes, with care. A simple grill grate set over the pit turns it into a cooker. Burn the wood down to coals first. Use long tools. Never cook over trash or treated wood.
A Final Word
Learning how to build a fire pit area is mostly a matter of planning the spot, setting a level base, and stacking block with care. The work is simple. The result lasts for years. On the first cool evening, when the fire is lit and the chairs are full, you will be glad you spent the weekend on it.
References
Briggs & Stratton. (n.d.). Outdoor power equipment and engines. https://www.briggsandstratton.com Toro. (n.d.). Lawn mowers and outdoor power equipment. https://www.toro.com U.S. Consumer Product Safety Commission. (n.d.). Home safety information. https://www.cpsc.gov
Was this guide helpful?

About Robert Taylor
The My Garden US editorial team writes practical, in-depth home and garden guides for American homeowners — tested advice, no fluff.
You May Also Like
Top Rated String Trimmer for Thick Weeds: A Practical Guide
January 17, 2026 2 views
The Best Push Lawn Sweeper for Leaves: A Plain Guide
January 1, 2026 1 views
Flagstone Walkway Ideas for Backyards
May 30, 2026 0 views