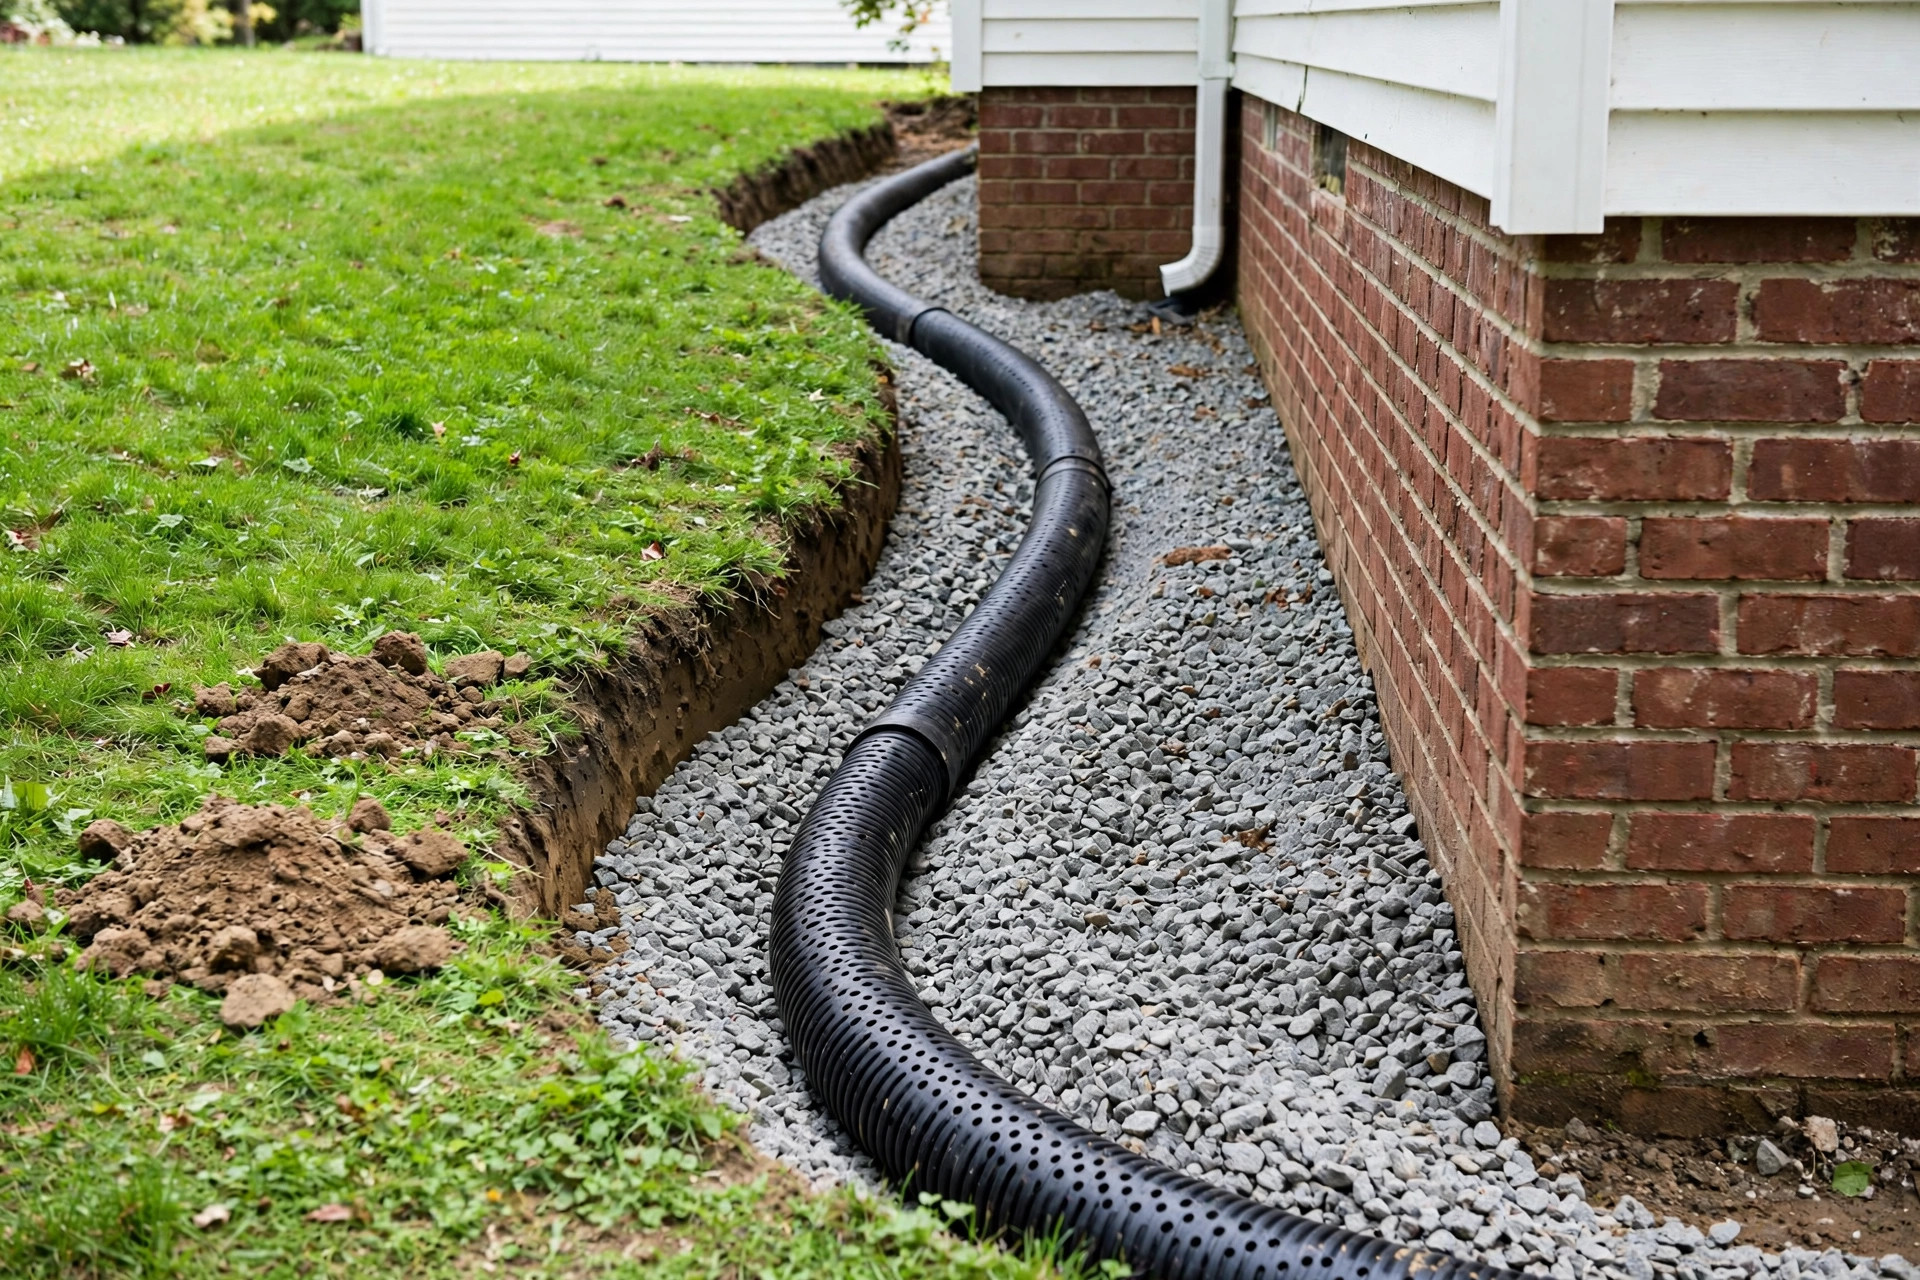

Water is patient. It finds the low spot in every yard, gathers by the foundation, and works its way in. A wet basement, a soggy strip of lawn, a crawl space that smells of damp earth: all of these point to one problem. The ground around the house does not drain well. Learning how to install french drain around house is the fix most homeowners reach for first, and with good reason. A french drain is simple, it is proven, and it lasts for decades when it is built right.
A french drain is a buried trench filled with gravel and a perforated pipe. Water flows into the gravel, slips through the holes in the pipe, and travels away from the house by gravity. Once it is buried, you would never know it was there.
This guide walks through the whole job in plain steps: why a french drain matters, what to check before you dig, the tools and materials you need, how to dig and lay the pipe, what it costs, how to keep it working, and how to stay safe while you work.
Why It Matters
Standing water near the foundation is more than a nuisance. Soil that stays wet against a basement wall pushes against it with real force. Over time this pressure cracks mortar joints, pushes seepage through small openings, and rots wooden framing where it meets damp concrete. In a crawl space, constant moisture feeds mold and wood rot. In a yard, it drowns grass roots and breeds mosquitoes.
Most homes that need a french drain show clear signs: puddles that linger near the foundation after rain, a basement wall with white powdery stains, water marks on the concrete block, or a musty smell in the lower level.
Before You Dig: How to Install French Drain Around House
A little planning saves a lot of backtracking. Start by watching your yard during or right after a heavy rain. Walk the perimeter of the house and note where water gathers. Look for the low spots and the downspouts that empty right at the foundation. The french drain trench should pass through these problem areas and run downhill to an exit.
Next, decide where the water will go. Every french drain needs a place to discharge: a dry well, a storm drain connection where allowed by local rules, or simply a low corner of the yard far from any house. The exit must be lower than the start of the trench so gravity can do the work. A drop of about one inch for every eight feet of pipe is the usual rule.
Now check two things that are not optional. First, call your local utility marking service before you put a shovel in the ground. In the United States, dialing 811 reaches the national call-before-you-dig service in most areas, and the utilities will mark their buried lines free of charge. Second, check your town or county rules. Some areas require a permit for drainage work, and some do not allow connecting a private drain to the public storm system.
Tools and Materials
You do not need special equipment for most of this job. Here is what to gather before you start:
– A flat-blade shovel and a trenching shovel – A wheelbarrow for moving soil and gravel – A four-foot level or a line level with string to check the slope – A tape measure and a utility knife – A hacksaw or PVC cutter for cutting the pipe – Four-inch perforated drain pipe, either rigid PVC or flexible corrugated – Landscape fabric, the kind that lets water pass through – Washed gravel, usually three-quarter inch, clean and angular – PVC fittings: elbows, a tee or wye, and a solid section of pipe for the exit run – A pop-up emitter or drain grate for the discharge end – Work gloves and safety glasses
If the trench will run more than about fifty feet, or if the soil is heavy clay, consider renting a small trencher for a day from an equipment dealer such as Toro or John Deere. It cuts a straight, even trench in a fraction of the time hand digging takes.
For materials, quality matters in two places: the pipe and the fabric. The landscape fabric must be the non-woven, water-permeable type made for drainage. Cheap plastic sheeting with no pores will block the water and ruin the drain. For more on yard water problems, read our guide on lawn drainage solutions for soggy yards.
How to Choose Your Design
Not every french drain is the same. The basic design has three choices to make.
First, decide the route. The most common route is a straight line or gentle curve along one or two sides of the house, about three to six feet from the foundation. Keep the trench away from the footing itself; digging too close to the foundation can disturb the soil that supports the house.
Second, decide the depth. A typical residential french drain trench is about eighteen to twenty-four inches deep and twelve inches wide. Go deeper if the frost line in your area demands it or if the wet zone sits lower.
Third, decide the pipe type. Rigid PVC with two rows of holes holds its slope better and resists crushing, which makes it the better choice where a car might drive over the trench. Flexible corrugated pipe with a fabric sleeve is cheaper and easier to curve, but it can sag between supports and hold low spots where silt gathers. Either one works if you bed it in clean gravel and keep the slope steady.
If your yard also has sprinkler lines, plan around them. Many homeowners combine projects; see our affordable lawn sprinkler installation cost estimate and our guide on how to install pop up sprinklers yourself if you are thinking of adding or fixing sprinklers at the same time.
Step-by-Step Installation
Set aside a full weekend for a typical job, or one long day with a rented trencher. Work in dry weather so the trench walls hold their shape.
Step 1: Mark the trench line
Drive small stakes along the planned route and run string between them. Use marking paint to draw the line on the grass. Keep the route at least three feet from the foundation wall and check that it runs downhill toward your chosen exit point. Mark any sprinkler lines or shallow cables you know about.
Step 2: Dig the trench
Cut the sod in strips if you want to relay it later, then dig. Aim for a trench about twelve inches wide and eighteen to twenty-four inches deep. Check the slope as you go with the level: one inch of fall for every eight feet. Pile the soil on one side of the trench and keep the sod separate.
Step 3: Line with fabric
Unroll landscape fabric into the trench so it lines the bottom and both walls, with extra fabric hanging over each side. You will fold this over the gravel at the end. Overlap sections by at least a foot where one roll ends and the next begins.
Step 4: Add the gravel bed
Shovel in about three inches of washed gravel and spread it level. This bed supports the pipe and keeps it at the right height. Check the slope once more before the pipe goes in; small fixes now are easy, and fixes later are not.
Step 5: Lay the pipe
Set the perforated pipe on the gravel bed with the holes facing down, since water rises into the pipe from below as the gravel fills. Connect sections with the proper fittings, and use elbows where the trench turns. At the exit end, switch to solid pipe for the last stretch.
Step 6: Cover with gravel
Fill the trench with gravel to within about four to six inches of the surface. Keep the pipe centered and do not walk on it while you work.
Step 7: Wrap and backfill
Fold the extra fabric over the top of the gravel, overlapping the edges. This fabric is the filter that keeps soil from washing into the gravel and clogging the drain. Then shovel the soil back over the fabric. Mound it slightly above the surrounding grade because the loose soil will settle. Lay the sod strips back on top or seed the bare strip and keep it watered until it takes hold.
Step 8: Finish the exit
At the discharge end, connect the solid pipe to a pop-up emitter or a drain grate set at ground level. A pop-up emitter stays closed until water pressure pushes it open, which keeps the pipe from filling with debris. Make sure the emitter sits in a spot where the water can spread out and soak in without flowing toward a neighbor’s house or back toward yours.
Cost and Price
The cost of a french drain depends on length, depth, soil, and whether you hire help. A do-it-yourself job for a fifty-foot trench typically runs between three hundred and eight hundred dollars in materials. Gravel is the biggest single cost, and delivery fees can add up if the stone yard is far away.
Hiring a contractor changes the picture. Professional installation usually costs between twenty and fifty dollars per linear foot in the United States, so a hundred-foot system can run two thousand to five thousand dollars. The price rises with rocky soil, deep trenches, and tricky exits like a dry well or a pump. Get two or three written estimates and ask each contractor the same questions: what pipe will they use, how deep will they dig, and where will the water discharge.
Renting a trencher, usually powered by engines from makers like Briggs and Stratton, costs between one hundred fifty and three hundred dollars per day. For long trenches in hard soil, the rental pays for itself in saved labor and a straighter trench.
Care and Upkeep
A french drain asks little of you, but it is not maintenance-free. Once a year, walk the trench line and look for settling or soggy spots. Soft spots can mean the pipe has shifted or the gravel has filled with silt. Check the exit emitter in spring and fall; leaves and mulch love to block it. Flush it with a garden hose if water seems slow to leave.
Keep heavy equipment off the trench line. A truck or a loaded trailer can crush flexible pipe and compact the gravel, which cuts the flow the drain was built to carry.
Do not plant trees with aggressive roots right over the line; roots seek the steady moisture in a drain and can work into the pipe joints over the years. Maples, willows, and poplars are the usual offenders. Keep them at least twenty feet away.
With these simple habits, a well-built french drain keeps working for thirty to fifty years. The gravel does not wear out and the pipe, kept clean and protected, lasts as long as the house it protects.
Safety
Digging looks harmless until it is not. Call 811 or your local utility marking service at least two or three days before you dig, and respect every marked line. Hand dig carefully within two feet of any mark. Never trench deeper than four feet without shoring; trench walls can collapse without warning.
Wear gloves, boots, and eye protection. Keep children and pets away from the open trench. If you smell gas while digging, stop at once, leave the area, and call the utility from a safe distance.
Work in daylight and in dry weather. Wet trench walls crumble and muddy slopes are slippery. If rain starts, cover the open trench with a tarp and come back when the soil firms up.
Frequently Asked Questions
How long does it take to install a french drain?
A fifty-foot trench by hand takes most homeowners one full weekend: a day to dig and a day to lay pipe, gravel, and backfill. With a rented trencher, the same job often fits into one long day.
How deep should a french drain be?
For most homes, eighteen to twenty-four inches deep is enough. In cold climates, check the frost depth; a drain that freezes solid stops working until spring.
Can I install a french drain myself?
Yes. This is one of the most do-it-yourself friendly drainage projects. The skills are basic digging, measuring slope, and cutting pipe. Call the utility marking service first, and rent a trencher for long runs or hard soil.
Where should the water go?
To a low spot well away from your house and your neighbor’s house, a dry well, or an approved storm drain connection. Never let the exit dump water against the foundation. Check local rules before connecting to any public system.
Will a french drain stop basement leaks?
It helps a great deal with leaks caused by surface water and poor grading, which are the most common kind. It will not fix cracks that run deep below the footing or a high water table that presses up through the floor. If water comes up through the basement floor during every storm, talk to a foundation specialist.
How long does a french drain last?
Thirty to fifty years is normal for a drain built with clean gravel, proper fabric, and a steady slope. Drains that fail early almost always fail for one reason: silt got in. The fabric wrap and clean gravel are what keep that from happening, so do not skip them.
A Short Final Word
Knowing how to install french drain around house puts one of the most useful yard skills in your hands. The job is straightforward, the materials are honest, and the result works quietly for decades. Plan the route, mind the slope, use clean gravel and good fabric, and give the water a clear way out.
References
Briggs & Stratton. (n.d.). Power equipment and outdoor products. https://www.briggsandstratton.com Deere. (n.d.). Agricultural and lawn equipment. https://www.deere.com Toro. (n.d.). Lawn care and landscape equipment. https://www.toro.com
Was this guide helpful?

About Jennifer Lee
The My Garden US editorial team writes practical, in-depth home and garden guides for American homeowners — tested advice, no fluff.
You May Also Like

Finding the Best Overseeding Machine Rental Near Me
February 3, 2026 0 views
Best Soil for Topdressing Lawn Reviews: A Plain Guide to What Really Works
March 8, 2026 0 views
Lawn Irrigation Winterization Service Near Me: What to Know Before the First Freeze
September 23, 2026 0 views