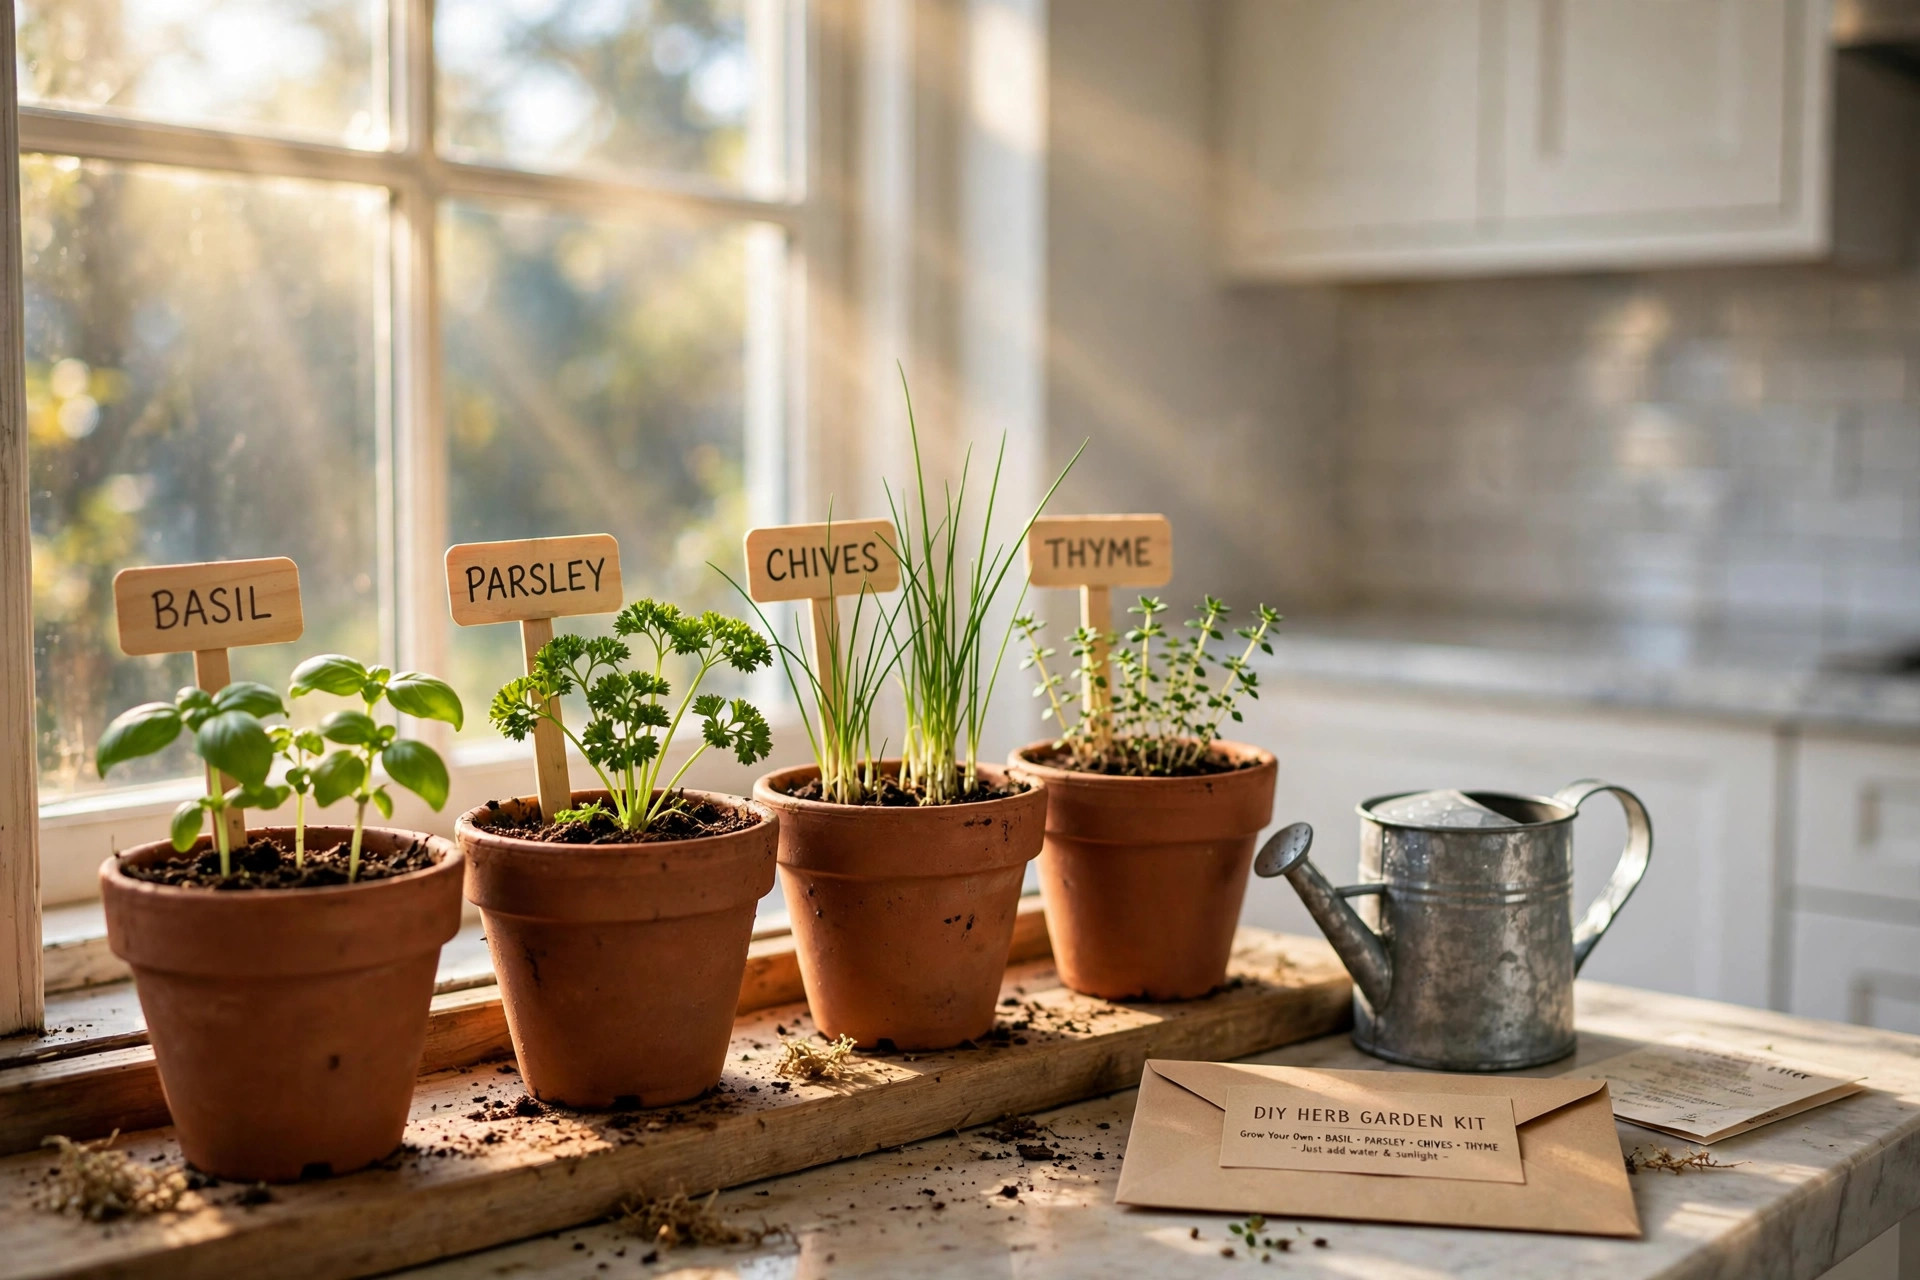

A diy herb garden kit for kitchen windowsill usa cooks and gardeners often choose is one of the simplest home projects a person can take on. It needs little space. It needs little money. It needs only a sunny window and a few minutes of care each week. Within a month, most kits give you fresh basil, parsley, chives, or thyme to cut right into your cooking. This guide explains what these kits are, how to pick one, what they cost, and how to keep the plants alive through the seasons.
Why a Kitchen Windowsill Herb Kit Matters
Fresh herbs change a meal. A pinch of basil lifts a tomato sauce. Fresh parsley brightens a salad. Chives add bite to a baked potato. But store-bought herb packets cost a few dollars each, and half the packet often wilts in the fridge before it gets used. A windowsill garden solves this waste. You cut what you need and leave the rest growing.
Growing herbs at home also teaches a useful skill. Children learn where food comes from. New gardeners learn the basics of watering, light, and soil without the work of a full outdoor bed. Many people who start with a small kit go on to larger gardens later. The kit is a gentle first step.
There is a comfort in it too. A row of green pots on the sill makes a kitchen feel alive, even in winter. When snow covers the yard in January, your basil is still green. That small patch of life matters more than most people expect.
What to Look for in a Kit: Diy Herb Garden Kit for Kitchen Windowsill Usa
Not all kits are equal. A good diy herb garden kit for kitchen windowsill use should include the basics in one box: containers or pots, seed packets or starter plants, growing soil or pellets, plant markers, and a simple guide. The best kits also include a drip tray to protect your sill from water.
Check the seed list first. A kit with basil, parsley, chives, and cilantro covers most cooking needs. Some kits add thyme, oregano, or mint. Mint is worth wanting, but keep it in its own pot. Mint roots spread fast and will crowd out other plants.
Look at the pots. Small plastic or peat pots work for starting seeds, but they dry out fast on a sunny sill. Heavier ceramic or self-watering pots hold moisture longer. If the kit comes with tiny pots, plan to move the seedlings to larger containers within a few weeks.
Soil matters more than people think. Good kits use a light seed-starting mix that drains well. Heavy garden soil from the yard is too dense for pots. It packs down, holds too much water, and can carry weed seeds and pests. If your kit includes compressed soil discs, soak them fully before planting. They should swell up soft and crumbly.
Light is the part most buyers forget. Most herbs need six hours of direct sun a day. A south-facing window in the United States gives the most light. An east or west window works for many herbs. A north-facing window is usually too dim, and your plants will grow tall and weak as they reach for light. If your kitchen window faces north, plan to add a small grow light, or pick shade-tolerant herbs like mint and parsley.
Types of Windowsill Herb Garden Kits
Shops sell several kinds of kits. Each suits a different buyer.
Seed kits are the most common. They include seeds, pots, and soil. They cost the least and give the most plants for the money. They also take the longest. Seeds may need one to three weeks to sprout, and two more months before you can harvest. Seed kits suit patient people who enjoy the full process.
Starter plant kits include small live plants instead of seeds. You get harvestable herbs in days, not months. They cost more than seed kits. They suit cooks who want fresh herbs right away.
Hydroponic countertop kits grow herbs in water with added nutrients instead of soil. They often include a built-in LED light. These kits work well in kitchens with poor window light. They cost the most, often over fifty dollars, and use some electricity. They also grow herbs fast and clean, with no soil to spill.
Self-watering planter kits sit between the others. They use soil but have a water reservoir below that feeds the roots from the bottom. They are kind to forgetful waterers. A windowsill herb garden starter kit of this type is a good gift for a busy person.
If you enjoy making things by hand, you can also build your own from parts. Small pots, a bag of seed-starting mix, and seed packets from a garden center cost about the same as a boxed kit. A homemade kit lets you pick exact herbs and pots. Many crafters who enjoy a diy terrarium kit for succulents and plants take the same approach with herbs, choosing their own containers for a personal look.
Cost and Price in the USA
Prices for a diy herb garden kit for kitchen windowsill usa shoppers find in stores and online fall into clear bands.
Simple seed kits cost between ten and twenty-five dollars. They are sold at craft stores, garden centers, and large home retailers. For that price you get three to six herb types, pots, and soil.
Mid-range kits cost between twenty-five and fifty dollars. These often add nicer containers, more seed types, and better guides. Self-watering planters sit in this range.
Hydroponic kits with lights cost between fifty and one hundred fifty dollars. The price depends on the number of plant pods and the quality of the light. Replacement seed pods and nutrients add ongoing cost.
Ongoing costs are small. A bag of potting mix costs under ten dollars and lasts for many repottings. Liquid plant food made for herbs costs about the same and lasts a season or more. Seeds bought on their own cost two to four dollars a packet. Once your kit is going, keeping it running costs only a few dollars a year. Compared with buying fresh herb packets every week at two to four dollars each, a windowsill garden pays for itself within a few months for most households.
Setting Up Your Kit Step by Step
Set up takes about thirty minutes. Work on a table covered with newspaper. Soil spills are easy to clean when you plan for them.
First, soak any compressed soil discs in warm water until they swell fully. Break them up with your fingers until the mix feels light and even. Fill each pot to about half an inch below the rim. Do not pack the soil down hard. Roots need air.
Next, plant the seeds at the depth the packet says. Most herb seeds go about a quarter inch deep. Small seeds like thyme can sit on the surface and be pressed in lightly. Cover them with a thin layer of mix. Water gently with a spray bottle or a small watering can with a fine rose. A hard stream of water can wash small seeds out of place.
Label every pot with the herb name and the date. Seedlings all look alike at first, and memory fades. The plant markers in most kits work fine for this.
Cover the pots with clear plastic wrap or a humidity dome if your kit includes one. This holds moisture in and speeds sprouting. Remove the cover as soon as seedlings appear, or mold can start.
Place the pots on your sunniest sill. A south-facing window is best in most of the United States. Turn the pots a quarter turn every few days so all sides get light. Plants lean toward the window if you do not.
Germination takes patience. Basil sprouts in five to ten days. Parsley can take two to three weeks. Keep the soil damp but not soggy during this time. A spray bottle works best. Once seedlings have two sets of true leaves, thin them to the strongest one or two per pot. Crowded seedlings grow weak.
Care and Upkeep Through the Year
Once your herbs are growing, care is simple but steady. Most failures come from too much water, not too little. Stick your finger an inch into the soil. If it feels dry, water. If it feels damp, wait. Pots must have drainage holes. Herbs sitting in standing water develop root rot, and the plant dies from the roots up.
Feed lightly. Herbs in pots use up nutrients in a few months. A half-strength liquid plant food every two to four weeks keeps them green. Too much food makes soft, weak growth with less flavor. When in doubt, feed less.
Harvest often. Cutting herbs back makes them bushier. Pinch basil from the top, just above a pair of leaves, and two new stems will branch out. Snip chives down to an inch above the soil, and they regrow. Never take more than a third of a plant at once. The plant needs leaves to make food.
Watch the seasons. In winter, daylight drops, and growth slows. Move pots to the brightest window you have. Keep them away from cold glass on freezing nights; a folded towel between pot and glass helps. Growth may nearly stop in December and January. That is normal. Plants rest and then surge again in spring.
In summer, a sunny sill can get very hot. Afternoon sun through glass can scorch leaves. If leaves turn pale or brown at the edges, move the pots back a few inches or add a sheer curtain. Water more often in heat. Small pots can dry out in a single hot day.
Repot when roots fill the pot. You will see roots coming out of the drainage holes, or growth will slow even with food and water. Move the plant to a pot one or two inches wider. Fresh soil gives it new room and new nutrients.
Pests are rare indoors but not unknown. Small flies around the soil are usually fungus gnats. They come from soil that stays too wet. Let the top inch dry out between waterings, and they leave. Aphids sometimes appear on new growth. A strong spray of water knocks them off. Avoid chemical sprays on herbs you plan to eat.
Safety in the Kitchen Garden
Herb kits are safe for most homes, but a few points deserve care.
Keep soil and plant food away from food prep areas. Wash your hands after handling soil or fertilizer and before cooking. Store liquid plant food out of reach of children and pets.
Know which plants are safe for pets. Most common herbs are fine, but some plants grown in kits can upset cats or dogs if chewed. The ASPCA keeps a list of plants that are toxic to pets, and it is worth a look before you set pots where a curious cat can reach.
If anyone in the home has plant allergies, note that some people react to the pollen of flowering herbs. Pinching off flower buds keeps herbs leafy and reduces pollen. Basil and cilantro flower fast in heat, so check them weekly.
Clean pots between plantings. Old soil can hold disease. Wash pots with hot soapy water, rinse well, and let them dry in the sun before reuse.
Frequently Asked Questions
How long before I can harvest from a seed kit? Most herbs need six to eight weeks from sowing before the first real harvest. Basil is often ready first. Parsley and thyme take longer. Start with starter plants if you need herbs this week.
Which herbs are easiest for beginners? Basil, chives, mint, and parsley forgive the most mistakes. They sprout well, grow fast, and recover from rough handling. An indoor herb growing kit for kitchen use built around these four rarely fails.
Can I grow herbs on a north-facing windowsill? It is hard. North windows give weak light most of the day. Mint and parsley may survive but grow slowly. A small LED grow light, run twelve to fourteen hours a day, fixes the problem for about twenty dollars.
Do I need special soil? A bag of seed-starting mix or light potting mix is enough. Do not use soil dug from the yard. It is too heavy for pots and may carry pests.
How often should I water? Check the soil, not the calendar. Water when the top inch feels dry. In winter this may be once a week. In a hot summer window it may be daily.
Can I move my windowsill herbs outside in summer? Yes, and most herbs love it. Move them out after the last frost. Harden them off first: give them a few hours of shade for several days, then full sun. Bring them back inside before the first fall frost.
A Short Final Word
A diy herb garden kit for kitchen windowsill growing is a small project with a large return. It costs little. It teaches real skill. It puts fresh flavor within arm’s reach all year. Start with easy herbs, give them sun and steady water, and harvest often. If you enjoy the making side of it as much as the growing, you may also like a diy candle making kit for beginners usa or a diy bath bomb kit for gifts and crafts for your next handmade afternoon. The sill is only the beginning.
For more background, see The Home Depot, JOANN, and Blick Art Materials. For more background, see Family Handyman, This Old House, and Bob Vila. See Michaels for more detail.
References
ASPCA. (n.d.). Pet care and animal welfare resources. https://www.aspca.org Blick Art Materials. (n.d.). Art and craft supplies. https://www.dickblick.com Bob Vila. (n.d.). Home improvement advice. https://www.bobvila.com Family Handyman. (n.d.). DIY home repair and maintenance. https://www.familyhandyman.com JOANN. (n.d.). Fabric and craft supplies. https://www.joann.com Michaels. (n.d.). Arts and crafts supplies. https://www.michaels.com The Home Depot. (n.d.). Home improvement products. https://www.homedepot.com This Old House. (n.d.). Home renovation guidance. https://www.thisoldhouse.com
Was this guide helpful?

About Lisa Anderson
The My Garden US editorial team writes practical, in-depth home and garden guides for American homeowners — tested advice, no fluff.
You May Also Like

How to Choose a Paint Palette for Acrylics Mixing at Home
July 27, 2026 0 views
DIY Slime Kit for Kids Crafts Safe USA: A Parent’s Guide
April 3, 2026 0 views
A Plain Guide to the DIY Photo Frame Kit for Wall Gallery Crafts
August 30, 2026 0 views