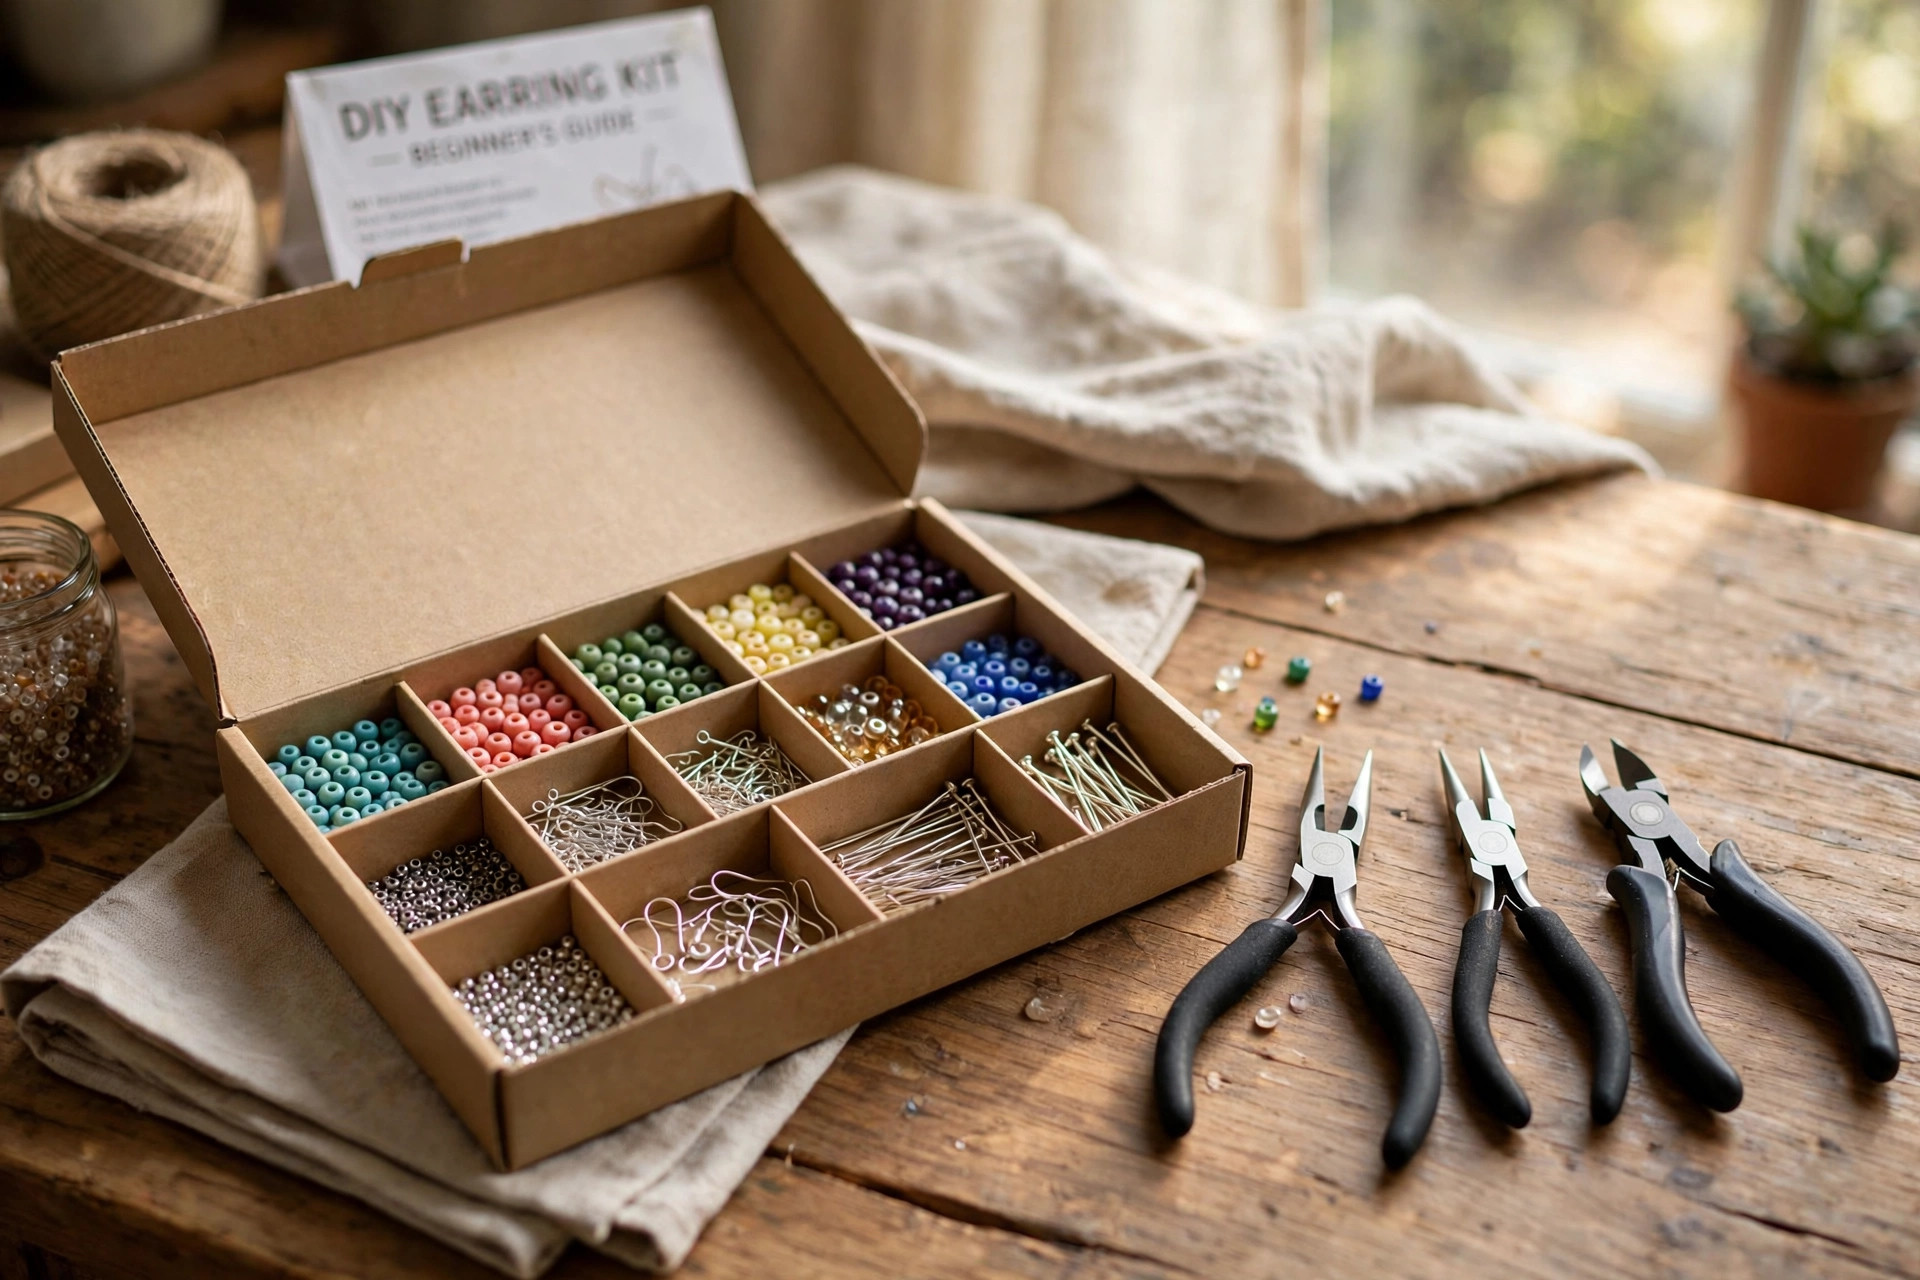

A diy earring kit for jewelry making beginners is one of the simplest ways to start a new craft. It puts the basic tools and parts in one box. There is no need to guess what to buy. The beginner can open the box and start the first pair of earrings the same day.
Earring making has grown into a popular home hobby. The work needs little space. It costs little to start. A pair of earrings can be finished in under an hour. Many people make gifts for family and friends. Some go on to sell their work at local fairs and online shops.
This guide explains what a starter kit should hold. It covers the types of kits on the market. It gives price ranges. It shows how to set up a small work area. It also answers common questions from people who have never made jewelry before.
Why a Starter Kit Makes Sense
A beginner faces one main problem. The craft store shelves are full of beads, wires, and tools. It is hard to know what is needed and what is not. A good kit solves that problem. The maker of the kit has chosen parts that work together.
The kit saves money as well. Buying each item on its own costs more. Pliers, wire cutters, beads, findings, and ear wires add up fast. A kit groups them at one price. The discount is real.
A kit also gives a plan. Most kits come with a small booklet or a link to lessons. The beginner follows the steps. The first projects teach the basic moves. Those moves stay useful for every project that follows.
People learn at different speeds. Some finish the first pair in twenty minutes. Others take a whole evening. That is normal. The kit does not expire. The tools last for years.
What to Look for in a Beginner Kit: Diy Earring Kit for Jewelry Making Beginners
Not all kits are equal. Some are full of low quality parts. Others skip key tools. A little study before buying pays off. Look at the list of contents. Check reviews from other buyers. A few minutes of research prevents disappointment.
Tools That Matter Most
Three tools do most of the work. Round nose pliers bend wire into loops. Flat nose pliers grip and hold parts flat. Wire cutters snip wire and headpins clean. These three tools are the heart of any kit.
A good kit includes pliers with smooth jaws. Rough jaws scratch the metal. The handles should feel right in the hand. Comfort matters when the work goes on for an hour. Spring loaded handles help beginners. They open the pliers on their own between squeezes.
Some kits add a crimping tool. It flattens small crimp beads onto wire. It is useful for designs with beading wire. It is not required for the first projects. The beginner can add it later.
Materials and Beads
Beads are the color and life of the earrings. A starter kit should have a fair mix. Glass beads are common. Acrylic beads are light and cheap. Wood beads give a warm look. Metal spacer beads add a finished touch.
The kit should include ear wires or hooks. Fish hook style wires are the most common. They slip through the ear and need no backs. Lever back wires close with a small latch. Post studs need butterfly backs. A kit with two styles gives the beginner a choice.
Headpins and eyepins are thin wires with a stop at one end. Beads slide onto them. The top end is bent into a loop. This is the main skill in earring making. The kit should hold plenty of these pins. Running out in the middle of a project is no fun.
Jump rings are small metal rings that link parts. A kit should include two sizes. Small rings join beads to ear wires. Larger rings can hold charms. A jump ring tool is not needed. The two pliers do the job.
Findings and Wire
Findings is the trade word for small metal parts. It covers ear wires, clasps, rings, and pins. A beginner kit should use findings made of a safe metal. Surgical steel is common. So is plated brass. Nickel free parts are best for people with sensitive skin.
A small spool of wire helps too. Beading wire is used in stringing designs. Memory wire holds a coil shape. A starter kit does not need much wire. A short length is enough for practice.
Types of Earring Kits
Kits fall into a few clear groups. Each group suits a different taste.
Bead earring kits are the most common. They center on glass and acrylic beads. The projects are simple. The results look bright and cheerful. These kits are a fine first choice.
Wire wrapping kits focus on technique. The beginner learns to wrap wire around beads and stones. The results look more refined. These kits take more patience. The skill pays off over time.
Charm earring kits come with small metal shapes. Hearts, stars, leaves, and animals are common. The work is mostly assembly. The earrings look charming and giftable. Young makers often like these best.
Clay and resin kits let the maker form the beads. Polymer clay is baked in a home oven. Resin is poured into molds. These kits add a whole extra craft. They suit people who like to shape things by hand.
Deluxe kits try to cover everything. They add bead boards, storage boxes, and extra tools. They cost more. They suit a beginner who is sure the hobby will stick.
Cost and Price
Prices for a diy earring kit for jewelry making beginners sit in a clear range. Basic kits cost between fifteen and thirty dollars. They hold the three pliers and a fair bead mix. They are enough to learn on.
Mid range kits cost between thirty and sixty dollars. They add better tools. The beads are nicer. Some include a bead board and a storage case. Many beginners find this range to be the sweet spot.
Deluxe kits cost between sixty and one hundred twenty dollars. They may include a full set of findings. Some add a book of project ideas. They are bought by people who plan to make earrings for a long time.
Craft stores run sales through the year. Michaels and JOANN both carry starter kits and mark them down often. Dick Blick is another strong source for tools. Online sellers like Fire Mountain Gems and Rio Grande serve makers who want to order findings in bulk later on.
The true cost of the hobby is low. After the kit, the only repeat cost is beads and findings. A bag of beads costs a few dollars. One bag makes many pairs. The pliers last for years with basic care.
Setting Up a Small Work Space
Earring making needs little room. A kitchen table works fine. A desk in a corner works too. The key is good light. A bright lamp near the work surface helps the eyes. Small parts are hard to see in dim light.
A bead mat or a piece of felt keeps beads from rolling. Beads on a hard table roll away at the worst moment. A mat stops that. A white or light colored mat makes small parts easy to find.
A bead organizer box for jewelry making storage is worth buying early. Small parts mix together in a bag. Sorting them takes time. A box with small compartments keeps beads, rings, and pins apart. The work goes faster when each part has its place.
A bead board is a flat tray with grooves. It helps plan a design before assembly. Many mid range kits include one. It is not required, but it helps the beginner see the full design at a glance.
Keep a small trash cup nearby. Snipped wire ends and broken beads go in the cup. This keeps the table clean. It also keeps small sharp bits away from children and pets.
Care and Upkeep of Tools
Pliers last a long time with simple care. Wipe the jaws with a dry cloth after use. A drop of oil on the hinge once a year keeps the action smooth. Store pliers in a pouch or a drawer. Do not toss them loose in a box with heavy items. The jaws can get nicked.
Wire cutters need more care. Cutting steel wire dulls the blades fast. Use the cutters only for soft craft wire. Never cut memory wire with fine cutters. It is too hard. It will chip the edge.
Beads store well in a cool dry place. Sunlight fades some colors over time. Keep finished earrings in a box or a pouch. Metal parts stay bright longer when kept away from damp air.
Silver plated findings can tarnish. A small anti tarnish strip in the storage box slows this down. A soft cloth brings back the shine. Gold plated parts need a gentle touch. Rubbing too hard wears the thin layer.
Safety
Earring making is a safe hobby. Still, a few rules matter. Wire ends are sharp. Snip wire with the cut pointed away from the face. Pick up snipped bits right away. They can prick bare feet.
Small beads are a choking hazard for young children. Keep beads and findings out of reach. Work at a table children cannot reach. Put everything away when the session ends.
Some people react to nickel in cheap metal parts. Itchy red skin near the ear is the sign. Switch to nickel free or surgical steel findings. Most good kits already use safe metals. Check the label before buying.
If the work uses a wood burning pen tips replacement set crafts project on the side, or any hot tool, keep it on a heat safe stand. Hot tips burn skin fast. Let tools cool before changing tips.
Good posture helps during long sessions. Sit with the back straight. Take a short break every half hour. Roll the shoulders. Rest the eyes. The hobby should feel pleasant, not tiring.
Frequently Asked Questions
How long does it take to make a pair of earrings? A simple beaded pair takes fifteen to thirty minutes once the basic moves are learned. The very first pair may take an hour. Speed comes with practice. There is no need to rush.
Do I need to know how to draw or design? No. Most beginner projects follow a pattern. The kit booklet shows where each bead goes. Over time, makers start to change colors and try their own layouts. Design skill grows on its own.
Can children use these kits? Older children can, with an adult nearby. The small parts and sharp wire ends need care. An embroidery kit for kids beginners easy patterns may suit younger children better, since it uses a blunt needle and soft thread. For earring kits, ages ten and up work best with supervision.
What if my wire loops look uneven? Uneven loops are the most common beginner problem. They come from gripping the wire at a different spot each time. Mark the pliers with a small dot of paint. Grip at the same mark every time. The loops will even out fast.
How do I fix a mistake? Most mistakes undo easily. Open the jump ring and take the part off. Straighten a bent wire with flat nose pliers. If a bead cracks, swap in a new one. Keep spare parts on hand. Mistakes are part of learning.
Where can I learn more techniques? The Spruce Crafts has free step by step lessons for jewelry making. Family Handyman covers workshop skills that help with tool care. This Old House and Bob Vila offer general DIY guidance that transfers well to craft projects. The Home Depot stocks work lamps and small storage that suit a craft corner.
Final Word
A diy earring kit for jewelry making beginners opens the door to a rewarding craft. The first pair may be simple. The tenth pair will show real skill. The tools in the kit serve for years. The beads invite play and color.
Start with a mid range kit from a trusted seller. Set up a small bright work space. Follow the booklet. Do not fear mistakes. Every skilled maker once made a lopsided loop. The joy is in the making. Pick up the pliers and begin.
References
Blick Art Materials. (n.d.). Art and craft supplies. https://www.dickblick.com Bob Vila. (n.d.). Home improvement advice. https://www.bobvila.com Family Handyman. (n.d.). DIY home repair and maintenance. https://www.familyhandyman.com Fire Mountain Gems and Beads. (n.d.). Jewelry making supplies. https://www.firemountaingems.com JOANN. (n.d.). Fabric and craft supplies. https://www.joann.com Michaels. (n.d.). Arts and crafts supplies. https://www.michaels.com Rio Grande. (n.d.). Jewelry making tools and supplies. https://www.riogrande.com The Home Depot. (n.d.). Home improvement products. https://www.homedepot.com The Spruce Crafts. (n.d.). Craft projects and tutorials. https://www.thesprucecrafts.com This Old House. (n.d.). Home renovation guidance. https://www.thisoldhouse.com
Was this guide helpful?

About Jennifer Lee
The My Garden US editorial team writes practical, in-depth home and garden guides for American homeowners — tested advice, no fluff.
You May Also Like
Best Embroidery Needles Set for Hand Sewing: A Complete Guide
June 6, 2026 0 views
Best Craft Scissors for Left Handed Kids: How to Choose the Right Pair
August 31, 2026 0 views
A Practical Guide to the DIY Bird Feeder Kit for Backyard Crafts USA
May 30, 2026 0 views