
Introduction
A charcoal grill gives food a flavor that no other cooker can match. Smoke from real wood coal adds depth to burgers, chicken, and steaks that gas simply cannot copy. Many new cooks feel nervous about charcoal. The coals seem hard to light and hard to control. This charcoal grill for beginners guide removes that fear. It walks through each step in plain order. By the end, any beginner can light a fire, set the heat, and cook a full meal with confidence.
Charcoal cooking is older than any modern appliance. The kettle grill, invented in the early nineteen fifties, brought that old method to the American backyard. Today it remains one of the most popular tools for outdoor cooking. The learning curve is short. Most beginners cook a fine meal on their very first try.
Why It Matters: Charcoal Grill for Beginners Guide
The main reason to learn charcoal grilling is flavor. Burning wood coal releases smoke and gases that drift into the food. This creates the taste people describe as smoky or grilled. Food cooked over gas heat gets brown and hot, but it misses that extra layer. A side-by-side test of two steaks shows the difference fast. The charcoal steak tastes richer. The crust has more character.
Charcoal also gives more control than most beginners expect. By moving the coals, a cook creates hot and cool zones inside one grill. Hot food sears over the coals. Thick food finishes gently away from the coals. This two-zone method solves the most common beginner problem: burnt outside, raw inside. Once learned, it works for every kind of meat and vegetable.
Cost is another strong point. A good charcoal kettle grill costs far less than most gas models. It has no gas tank to refill and no burners to replace. Charcoal itself is cheap and sold everywhere. For a beginner who is not sure how much they will grill, a low starting cost makes the choice easy. Sources like Weber and Napoleon offer well-built kettle models that last for years.
Finally, there is the simple joy of it. Tending a real fire feels different from turning a knob. Friends gather around a charcoal grill the way people have gathered around fires for ages.
How to Choose Your First Charcoal Grill
The market offers many shapes and sizes. For a first grill, simple beats fancy. Most experts point beginners toward the classic kettle grill. It is round, with a deep bowl for coals and a dome lid that traps heat. This shape gives even cooking and steady airflow. Models from Weber set the standard for the kettle design and have done so for decades.
Size matters next. An eighteen-inch kettle cooks for two to four people. A twenty-two-inch kettle handles six to eight burgers at once and suits a family. Larger grills cook more food but use more charcoal each time. A beginner feeding a small household does well with the standard twenty-two-inch size.
Look for a few useful features. A one-touch cleaning system, which is a lever that sweeps ash through vents in the bowl, saves real effort. A hinged cooking grate lets you add coals without lifting the food. A built-in lid thermometer helps as a rough guide. A lower vent plus an upper vent gives full control of airflow.
Barrel and offset smokers tempt some beginners, but they are harder to manage and need more fuel. A kamado-style ceramic cooker, such as those made by Big Green Egg, is excellent but costs far more. Start with a kettle. After one season of steady use, you will know exactly what you want next. Read more in our guide to the best charcoal grill for backyard bbq.
Charcoal Types Explained
Not all charcoal is the same. The two main kinds are briquettes and lump charcoal. Each has strengths.
Briquettes are pillow-shaped pieces made from pressed wood and natural binders. They burn long and steady with even heat. That even heat makes them friendly for beginners. A bag of briquettes lights the same way every time. The trade-off is more ash and a little less pure wood flavor. Big bags are sold at Home Depot and most grocery stores.
Lump charcoal is wood that has been charred in a kiln. It comes in rough chunks of different sizes. It burns hotter and faster, and it gives a cleaner, stronger wood flavor. It leaves less ash. The downside is uneven heat, since big and small chunks burn at different rates. Many cooks mix the two: briquettes for steady base heat and lump for flavor on top.
For a first cook, briquettes are the safer choice. Their steady burn forgives small mistakes. Once you can hold a steady temperature with briquettes, try lump for steaks and chops. Avoid match-light charcoal that is soaked in lighter fluid.
How to Light a Charcoal Grill
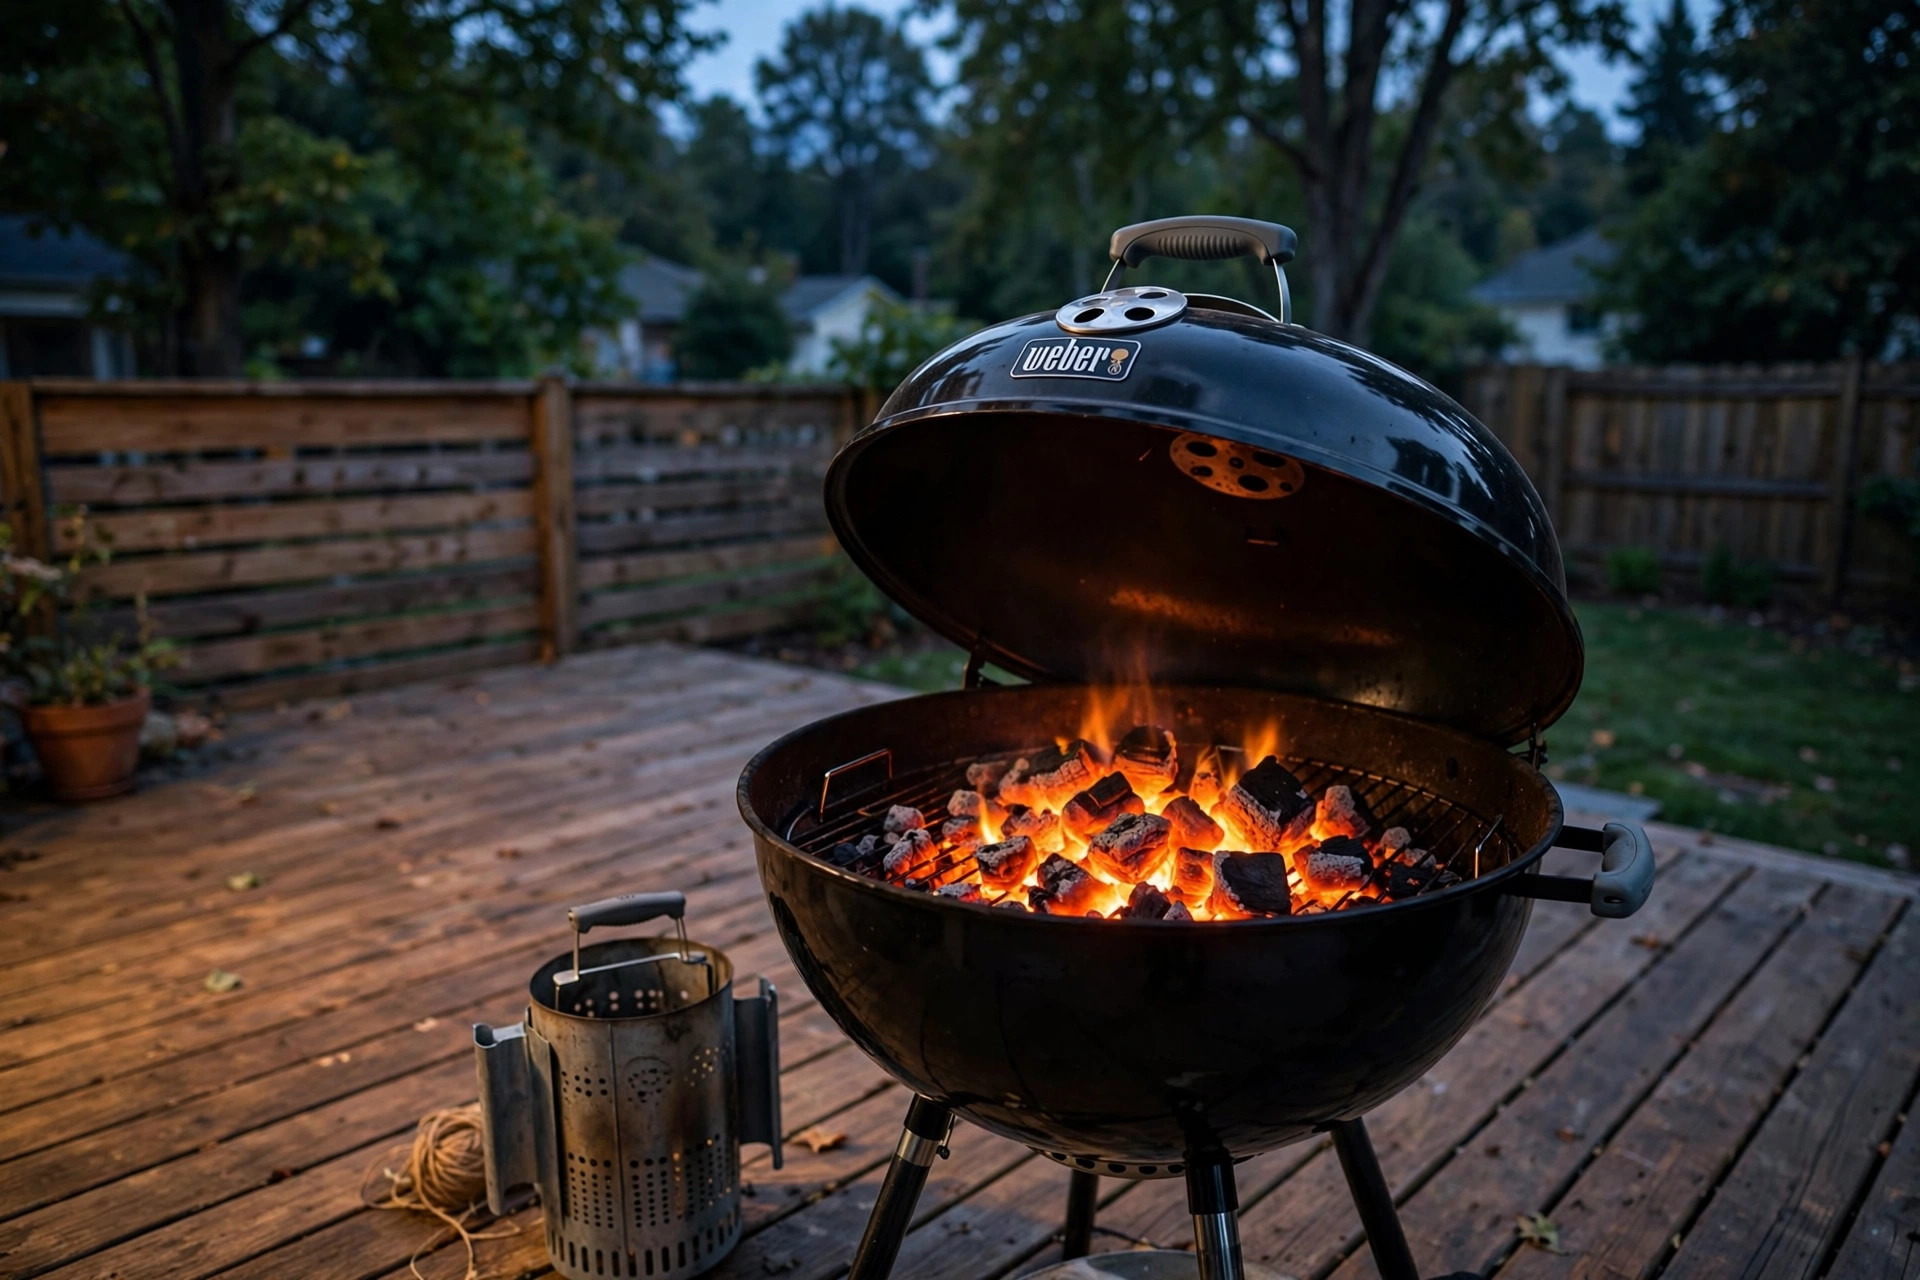
Lighting is the step beginners fear most. With a chimney starter, it is simple and safe. A chimney is a metal tube with a handle and a grate inside.
Fill the top of the chimney with charcoal. Place one or two sheets of newspaper in the bottom. Set the chimney on the lower grate of the grill and light the paper through the holes. The flame rises through the coals like a small furnace. In fifteen to twenty minutes the top coals turn gray with ash. Put on long heat gloves, grip the handle, and pour the coals into the bowl. That is all. No lighter fluid, no guessing.
Some cooks prefer electric starters, which are metal loops that heat up and ignite the coals in about ten minutes. The site AmazingRibs has tested many lighting methods and agrees that the chimney gives the cleanest start.
Once the coals are poured, spread them as your recipe needs. Then place the cooking grate on, put the lid on, and wait five minutes. The grill is ready when the grate is hot and the coals wear a thin coat of gray ash. If you want a fluid-free approach in more detail, see our article on how to start charcoal grill without lighter.
Setting Up Heat Zones
Heat control is the heart of charcoal cooking. The secret is never to spread coals in one even layer. Instead, push all the coals to one side of the bowl. This creates two zones. The side with coals is the direct zone, very hot, for searing. The empty side is the indirect zone, gentle, for finishing thick food.
Cook a thick chicken breast this way. Sear it two minutes per side over the coals to brown the skin. Then move it to the cool side, close the lid, and let the gentle heat finish it. The inside cooks through while the outside stays brown, not burnt.
The vents control the fire. More air means hotter coals. Open both vents wide for high heat. Close them halfway for medium heat. Close them almost all the way to cool a runaway fire. Small moves make big changes, so adjust a little and wait five minutes before adjusting again. With practice, you can hold any temperature from two hundred fifty to five hundred degrees. The Spruce Eats offers clear charts that map vent positions to temperatures for common grills.
What to Cook First
Start with forgiving foods. Hamburgers are the best first cook. They take only a few minutes per side, and a small error in timing still gives a tasty burger. Use direct heat, four minutes per side for a thick patty, and flip once. A slice of cheese in the last minute finishes it.
Chicken pieces come next. Legs and thighs are hard to ruin because their dark meat stays juicy. Use the two-zone setup. Sear over direct heat, then move to indirect heat with the lid closed for twenty to thirty minutes. Use a thermometer and pull the meat at one hundred sixty-five degrees inside.
Hot dogs and sausages teach heat control in a fun way. Pork chops show how a good sear builds flavor. Save the thick steak for the third or fourth cook. By then your hands will know the heat. Save the low-and-slow brisket for much later in the season.
Vegetables deserve a mention. Corn in the husk, thick onion slices, and bell peppers cook beautifully over direct heat. A little oil, salt, and five to eight minutes gives a fine side dish.
Cost and Price
A beginner charcoal setup is one of the cheapest ways into outdoor cooking. A quality twenty-two-inch kettle grill usually costs between one hundred fifty and two hundred fifty dollars. Cheaper kettles exist, but thin metal rusts fast and seals poorly.
Add the small tools. A chimney starter costs about twenty dollars. Long tongs cost about fifteen. A probe thermometer costs about twenty-five and is the single best purchase a beginner can make. Heat gloves cost about twenty. A grill brush costs about fifteen. All together, the full starter kit lands near three hundred dollars. That is less than many gas grills cost alone.
Fuel is cheap. A twenty-pound bag of briquettes costs about twenty dollars and cooks about four to six meals. Lump charcoal costs a little more per bag but you use less of it. For a family that grills twice a week in summer, fuel runs under ten dollars a week. Reviews at Consumer Reports compare kettle models across price points and show that mid-range grills hold up well over time.
Care and Upkeep
A charcoal grill asks for little care. After each cook, close all the vents. The fire dies for lack of air. When the grill is cool, empty the ash into a metal can. A quick brush of the cooking grate while it is still warm removes most food. For deep cleaning between seasons, see our guide to how to season cast iron grill grates.
Once or twice a year, wash the inside of the bowl and lid with warm soapy water. Dry it well. Check the vents for rust and oil the moving parts lightly. Store the grill with a cover or under a roof edge. Keep the charcoal in a dry place, since damp briquettes are hard to light.
If the cooking grate rusts, scrub it with a stiff brush and rub it with cooking oil while warm. Light surface rust is normal and harmless. Deep rust that flakes into food means the grate is due for replacement. Replacement grates for standard kettles are cheap and easy to fit.
Safety
Charcoal is safe when treated with respect. Set the grill on a flat, hard surface, at least ten feet from the house, deck rails, and low branches. Never use a charcoal grill indoors, in a garage, or under a low roof. Burning charcoal makes carbon monoxide, a gas you cannot see or smell. It can kill. Outdoor air is the only safe place.
Keep children and pets three feet away from the hot grill. Use long tools so your hands stay back from the heat. Wear long heat gloves when pouring coals or moving the grate. Keep a spray bottle of water near for small flare-ups, and keep a fire extinguisher within reach.
Let coals cool fully before emptying them. Even buried in ash, coals can stay hot for a full day. Wait at least forty-eight hours before putting ash in the trash, and use a metal can with a lid.
Frequently Asked Questions
How much charcoal should I use? For a hot direct cook, fill the chimney about three-quarters full. That gives one full load for a twenty-two-inch grill. For indirect cooking, use a full chimney and push it all to one side. For a long low cook, start with a full load and add eight to ten fresh briquettes each hour. With practice you will judge amounts by eye.
How long does charcoal take to light? A chimney starter lights a full load in fifteen to twenty minutes. Electric starters take about ten minutes. Coals are ready when the top pieces show a thin coat of gray ash and glow orange inside. Rushing this step gives food a sour taste from unlit coal.
Can I reuse charcoal? Yes. When a cook ends, close the vents and let the fire die. The unburnt coals can be used again. Shake off the ash and mix them with fresh charcoal next time.
Why does my food taste like chemicals? The most common cause is lighter fluid. Switch to a chimney starter and the problem goes away. Another cause is cooking before the coals are fully ashed over. Wait for the gray coat.
Do I cook with the lid on or off? Cooking with a lid on also traps the smoke that gives charcoal food its flavor. It tames flare-ups and cooks food faster. Cook lid-off only for quick searing of thin foods like hot dogs or shrimp. Thick foods need the lid to cook through.
How do I stop the grill from getting too hot? Close the vents partway to cut the air supply. Start with the top vent half open and the bottom vent one-quarter open. Wait five minutes and check again. If food is already burning, move it to the indirect side.
A Short Final Word
Charcoal grilling is a skill, not a mystery. The steps are few and they are simple. Light the coals with a chimney. Set up two zones. Use the vents to steer the heat. Cook simple food first. Follow this charcoal grill for beginners guide through one season and the method will feel natural. Light the chimney. The season is waiting.
See Broil King for more detail.
References
AmazingRibs.com. (n.d.). Barbecue and grilling science. https://www.amazingribs.com Big Green Egg. (n.d.). Kamado grills and outdoor cooking. https://www.biggreenegg.com Broil King. (n.d.). Gas and charcoal grills. https://www.broilkingbbq.com Consumer Reports. (n.d.). Product reviews and ratings. https://www.consumerreports.org Napoleon. (n.d.). Fireplaces, grills, and heating products. https://www.napoleon.com The Home Depot. (n.d.). Home improvement products. https://www.homedepot.com The Spruce Eats. (n.d.). Recipes and cooking guides. https://www.thespruceeats.com Weber. (n.d.). Grills and outdoor cooking. https://www.weber.com
Was this guide helpful?

About Robert Taylor
The My Garden US editorial team writes practical, in-depth home and garden guides for American homeowners — tested advice, no fluff.
You May Also Like
Best Outdoor Paper Towel Holder for Grill: What to Buy and Why
September 13, 2026 0 views
Best Outdoor Beverage Cooler for Patio: A Plain Guide
January 29, 2026 0 views
Best Outdoor Grill Tools Gift Set: A Plain Guide for Buyers
March 2, 2026 0 views