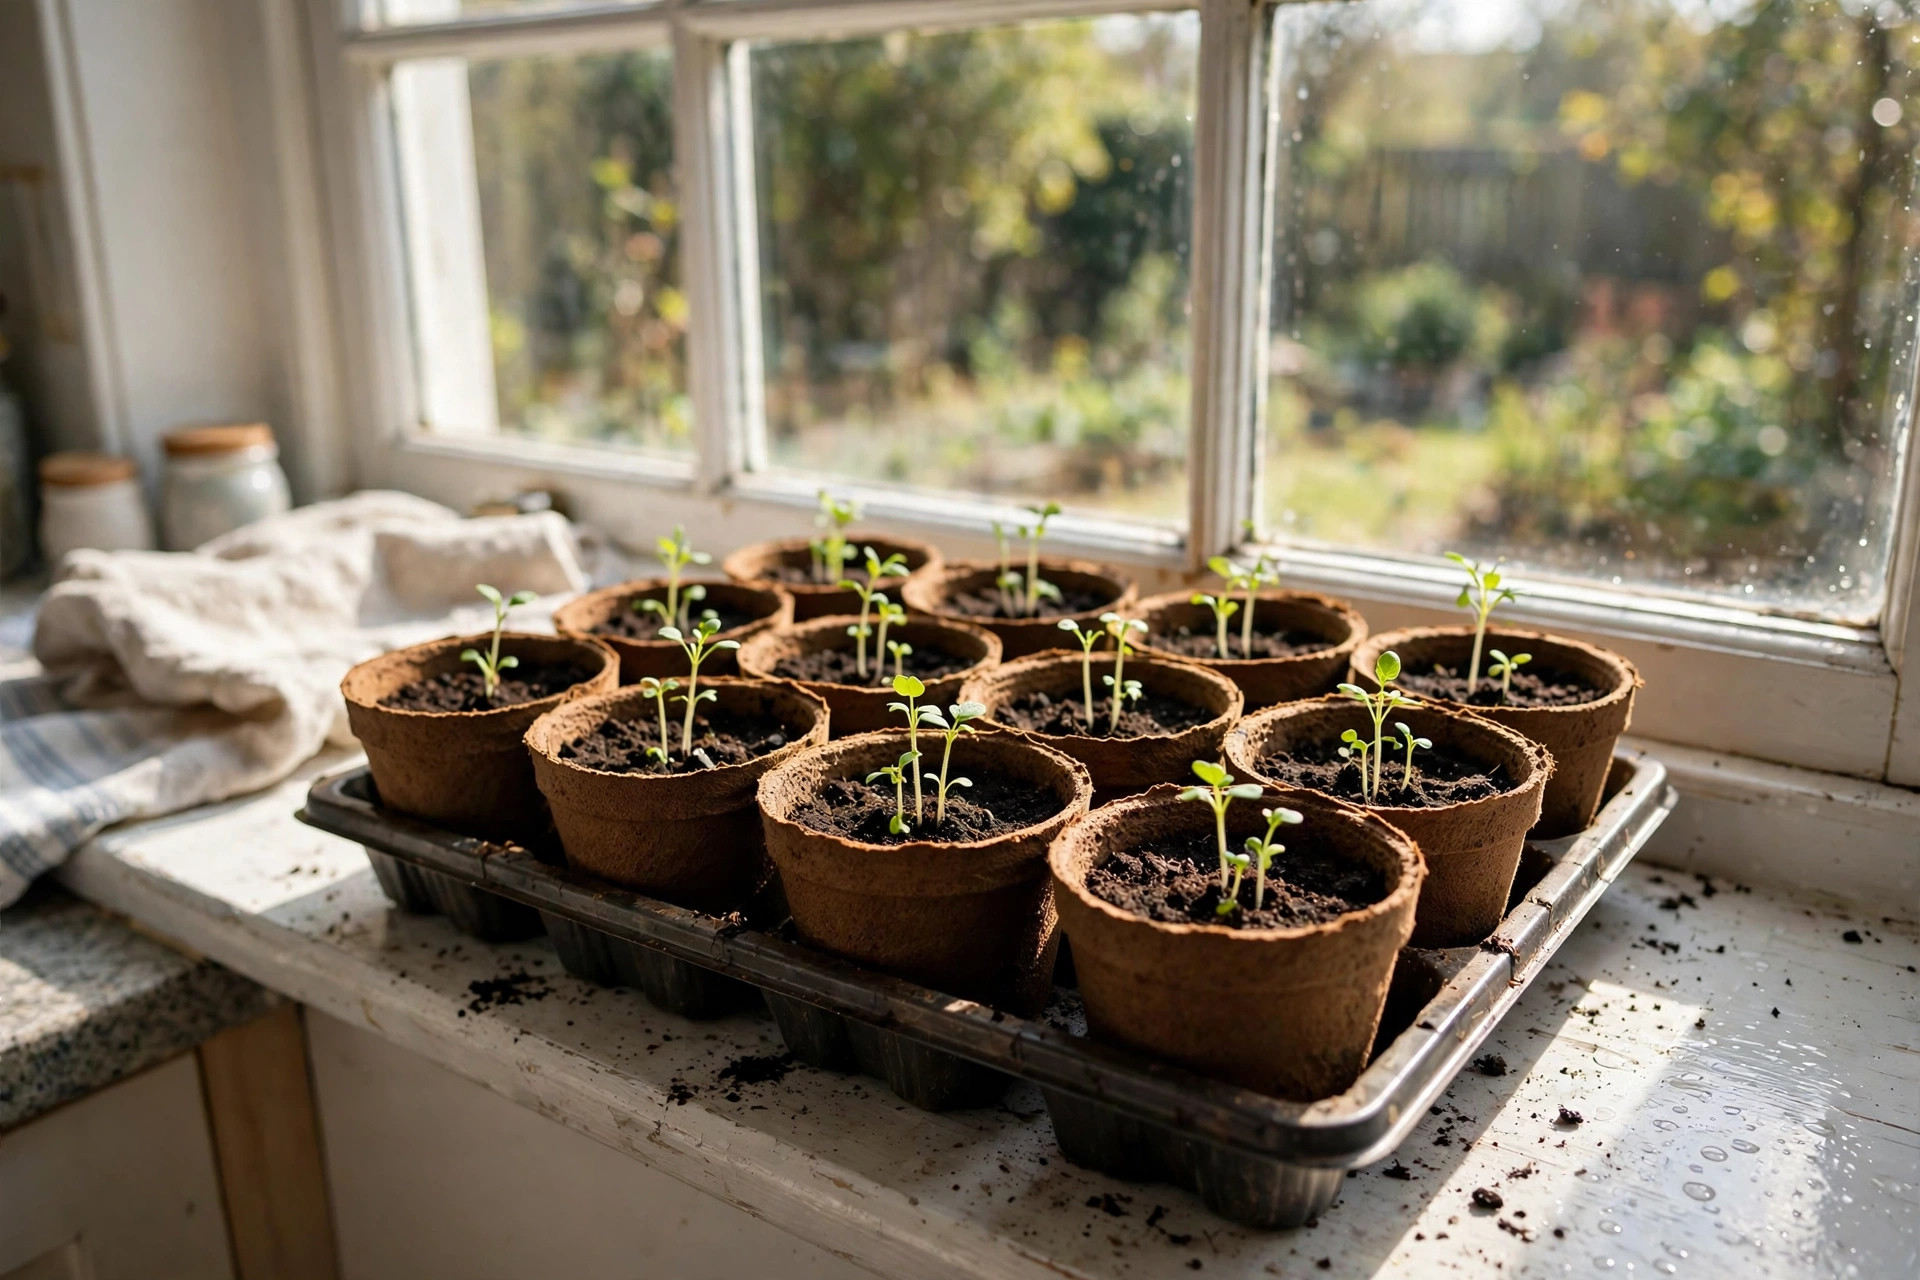

Every spring, millions of American homes turn a kitchen windowsill into a small garden. Seeds go into soil in March or April. By May, they move outside as strong young plants. This peat pots seedlings american homes guide explains one of the simplest tools for that work: the peat pot. A peat pot is a small round cup made of pressed peat moss. You fill it with soil, plant a seed, and water it. When the seedling is ready, you plant the whole pot in the ground. The roots grow straight through the walls. There is no pulling, no tearing, and no shock to the plant. This article explains how peat pots work, how to choose them, what they cost, how to care for seedlings in them, and what to watch out for. It closes with answers to common questions and a list of sources for further reading.
Why Peat Pots Matter for Home Gardeners
Most seeds do best when started indoors before the last frost. The seed gets warmth and steady care. The young plant grows strong roots. Then it moves to the garden bed. The problem comes at moving time. Young roots are soft and easy to hurt. When you pull a seedling from a plastic tray, roots tear. When roots tear, the plant stops growing for days. Some plants never recover. Tomatoes, peppers, cucumbers, and melons are all tender at transplant time.
A peat pot solves this problem in a simple way. The pot itself goes into the soil. The roots never leave their first home. They push through the moist peat walls and spread into the garden bed. Gardeners call this “transplanting without root disturbance,” and it is the main reason peat pots have been used in American homes for more than half a century.
There is a second reason. Peat pots break down in the soil. They add organic matter as they rot. A plastic cell, by contrast, goes into the trash or sits in a shed for years. Many families prefer to avoid plastic waste. A peat pot leaves nothing behind. It becomes part of the soil within a few weeks.
There is a third reason, and it is about time. Starting seeds indoors extends the growing season by four to eight weeks. In cold states, that extra time decides whether tomatoes ripen before the first fall frost. In warm states, it gives fall crops a head start. The small cost of a tray of peat pots pays for itself in earlier harvests.
How Peat Pots Work: Peat Pots Seedlings American Homes Guide
A peat pot is pressed from sphagnum peat moss, sometimes mixed with wood fiber or paper pulp. The walls are thick enough to hold soil for six to eight weeks. They are porous enough to let water pass through. When the pot sits in moist garden soil, tiny root hairs push into the peat. Bacteria and fungi in the soil begin to break the peat down. Within three to six weeks, the walls soften and open. The roots spread freely into the surrounding bed.
The key word is moist. A peat pot works only when it stays damp. If the pot dries out, it hardens. Roots cannot push through hard peat. The plant sits trapped in its cup while the garden grows around it. Many failures with peat pots come from this one mistake: the gardener plants the pot and forgets to water it well for the first week. Keep the soil around the pot moist, and the walls will soften as designed.
Some gardeners tear off the rim of the pot before planting. The rim often sits above the soil line and acts like a wick. It draws water out of the root zone and into the dry air. If you leave the rim on, bury it at least half an inch below the soil surface. Better still, fold it down or tear it away. Then the whole pot sits below the surface, where moisture stays.
Choosing the Right Peat Pots: What to Look For
Peat pots come in several sizes. Two-inch pots suit small seeds such as lettuce, herbs, and flowers. Three-inch pots suit tomatoes, peppers, and cucumbers. Match the pot to the plant. A small pot for a fast-growing plant means roots circle the inside before moving day. A large pot for a tiny seed wastes soil and space on the windowsill.
Look at the wall thickness. Thick walls last longer. They hold up through weeks of watering on a tray. Thin walls may split when you lift them. But very thick walls break down slowly in cool soil. For most home use, a medium wall works best. Squeeze a sample pot in the store. It should feel firm but not brittle.
Check the bottom. Some peat pots have drainage holes. Some do not. Holes help excess water escape. They also give roots an early exit. If your pots have no holes, poke two or three with a pencil before filling them.
Consider the source. Reputable seed companies and mail-order suppliers sell pots tested for garden use. Cheap pots from unknown makers may contain glues or binders that slow breakdown. Stick with known brands from garden centers or trusted mail-order seed and plant suppliers. For tested varieties and plant care guides, and for quality nursery growers when you buy started plants to grow beside your seeds, these sources are a sound place to look.
Types and Options
Round peat pots are the classic shape. They sit in a tray or on a saucer. Square peat pots fit together in a tray with no wasted space. Peat pellets are small disks of compressed peat in a thin net. They swell with water into short cylinders. Cut the net before planting, or remove it entirely.
Peat strips are long trays of connected cells. You snap off one cell at a time. They save money but tear unevenly. Some gardeners prefer biodegradable seed starting pots made from cow manure, coconut fiber, or recycled paper. These behave much like peat pots. Coconut fiber pots resist mold better in humid rooms. Manure pots add nutrients to the soil. Peat pots remain the most common choice because they are cheap and widely sold.
For gardeners who start hundreds of plants, soil blocks are another option. A soil block is a cube of pressed potting mix with no container at all. For a home windowsill with twenty or thirty seedlings, peat pots are simpler.
Cost and Price
Peat pots are among the cheapest garden supplies. A tray of twelve three-inch pots costs about two to four dollars. Bulk packs of one hundred pots cost ten to eighteen dollars. Peat pellets cost a little more per plant, roughly five to ten cents each in bulk. For a typical home garden of thirty seedlings, the pot cost is under five dollars. That is less than the price of a single tomato plant at a nursery.
Compare that with buying started plants. A six-pack of tomato seedlings costs four to seven dollars. A packet of tomato seeds costs two to four dollars and holds twenty to fifty seeds. Even after adding pots and soil, starting your own plants in peat pots saves money. The savings grow with each year, because the seed packets last several seasons when stored cool and dry.
Starting Seeds in Peat Pots, Step by Step
Fill each pot with moist seed-starting mix, not garden soil. Garden soil is too heavy for young roots and may carry disease. Leave a quarter inch of space at the top. Press the mix down lightly. Plant seeds at the depth shown on the packet. Cover with fine mix. Water gently from the bottom by setting the tray in a shallow pan of water.
Place the tray in a warm spot. Most vegetable seeds sprout best between 70 and 75 degrees. A heating mat under the tray speeds sprouting. Once seeds sprout, move the tray to bright light at once. A south-facing window works. A simple shop light hung two inches above the seedlings works better. Keep the light on fourteen to sixteen hours a day. Thin seedlings that lean and stretch are asking for more light.
Water from the bottom whenever the surface feels dry. Peat pots dry faster than plastic cells. Check them daily. Small pots in a sunny window may need water twice a day. Never let them sit in standing water for more than an hour.
Feed seedlings lightly after the first true leaves appear. True leaves are the second set of leaves, shaped like the adult plant. Use half-strength liquid fertilizer once a week. Full strength burns young roots.
About a week before moving day, harden the plants off. Set the pots outside in shade for two hours. Add an hour each day. End with a full day in sun and a night outside if frost is past. Hardened plants survive the move.
On planting day, dig a hole the size of the pot. Tear off the rim. Set the pot so its top sits half an inch below the soil surface. Firm soil around it. Water deeply. Mulch around the plant, not against the stem. Water daily for the first week so the peat walls stay soft and roots push through.
Care and Upkeep
Seedlings in peat pots need steady attention for six to eight weeks. Light is the most common shortfall. A dim windowsill produces weak, leggy plants. If you see long pale stems, add light. Temperature is the second shortfall. A cold draft at night slows growth. Keep seedlings above 60 degrees after sprouting.
Air flow matters more than most beginners think. A gentle fan, running a few hours a day, makes stems thicker and stronger. It also dries the pot surface between waterings, which holds mold back. Turn the tray a quarter turn each day so all sides get light.
Watch for damping off, a fungus that kills seedlings at the soil line. Stems pinch and fall over. Prevent it with clean pots, fresh seed-starting mix, and no overwatering. If it starts, remove the sick plants at once so it does not spread. A light dusting of cinnamon on the soil surface helps in mild cases, according to many home gardening how-to guides.
Label every pot. Use a plastic or wooden marker with the variety and date. Memory fails by May. Labels save the harvest plan.
Safety
Peat pots are safe for home use, but a few cautions apply. Peat dust can irritate lungs. Fill pots outdoors or in a ventilated room. Wear a simple dust mask if you fill many pots at once. Wash hands after handling potting mix. Bagged mixes can carry bacteria. Keep children from eating the mix.
Store unused pots in a dry place. Damp storage grows mold before planting season. Keep pots away from open flame. Dry peat burns.
In the garden, peat pots raise no safety concerns. They are not treated with pesticides in standard products. Check the label if you buy in bulk. Avoid pots with added chemical wetting agents when growing food crops. Plain peat and fiber pots are the safest choice for vegetables.
FAQ
How long do peat pots take to break down in the soil? Three to six weeks in warm, moist soil. In cool or dry soil, breakdown is slower. Keep the bed watered after planting. Tearing the rim off before planting speeds the process.
Can I plant the whole pot, or must I remove the seedling first? Plant the whole pot. That is the point of a peat pot. Removing the seedling defeats the design and risks root damage. Bury the pot fully so no peat shows above the soil line.
Do peat pots work for all vegetables? They work best for plants that dislike root disturbance: tomatoes, peppers, cucumbers, squash, melons, and eggplant. Root crops like carrots and radishes should be sown directly in the garden. Their roots do not transplant well in any container.
Why are my peat pots growing mold? Mold on peat walls is common in still, humid air. It is usually harmless to the plant. Improve air flow with a fan. Water from the bottom. Let the surface dry between waterings. If mold is heavy, wipe it off and move the tray to a brighter, airier spot. Garden specialists note that coconut fiber pots resist this problem better in humid homes.
Can I reuse peat pots? No. Once used, the walls are weak and may carry disease. They are meant for one season. Compost the old pots or dig them into the bed.
Are peat pots bad for the environment? Peat is a slow-renewing resource, and peat bogs store carbon. Some gardeners prefer coconut fiber or paper pots for that reason. If this matters to you, look for pots labeled from responsibly managed sources, or choose coconut fiber pots. Standard peat pots remain legal and widely used across American homes. University extension programs publish guidance on sustainable seed-starting choices.
A Short Final Word
The peat pot is a humble tool. It costs pennies. It asks for nothing but water and light. In return, it carries a seedling from windowsill to garden bed without a moment of shock. For American homes that start seeds each spring, it remains one of the most practical choices on the shelf. Choose the right size. Keep the pots moist. Bury them fully. Your seedlings will repay the care with strong growth and early harvests. For more seed-starting help, see our guides to lavender seed packets for Florida homes, planting garlic bulbs, and buying native grass seed. For planting calendars that show your local last-frost date, and for seed catalogs with tested varieties, the sources below are a good place to continue.
References
Burpee. (n.d.). Seeds, plants, and gardening supplies. https://www.burpee.com Gardening Know How. (n.d.). Gardening guides and plant care. https://www.gardeningknowhow.com Gurney’s Seed & Nursery Co. (n.d.). Seeds, plants, and garden supplies. https://www.gurneys.com Monrovia. (n.d.). Plants for home gardens. https://www.monrovia.com National Institute of Food and Agriculture. (n.d.). Agricultural research and extension. https://www.nifa.usda.gov Park Seed. (n.d.). Seeds, plants, and gardening supplies. https://www.parkseed.com Proven Winners. (n.d.). Plants and gardening inspiration. https://www.provenwinners.com The Old Farmer’s Almanac. (n.d.). Gardening calendars and advice. https://www.almanac.com The Spruce. (n.d.). Home and garden advice. https://www.thespruce.com White Flower Farm. (n.d.). Plants, bulbs, and garden supplies. https://www.whiteflowerfarm.com
Was this guide helpful?

About Emily Rodriguez
The My Garden US editorial team writes practical, in-depth home and garden guides for American homeowners — tested advice, no fluff.
You May Also Like
Succulent Variety Packs: An American Homes Guide
April 14, 2026 0 views
Lavender Seed Packets for Sale USA: How to Buy and Grow Them Well
March 5, 2026 0 views
Garlic Bulbs Planting Buying Guide USA: How to Choose and Grow Seed Garlic
February 11, 2026 0 views