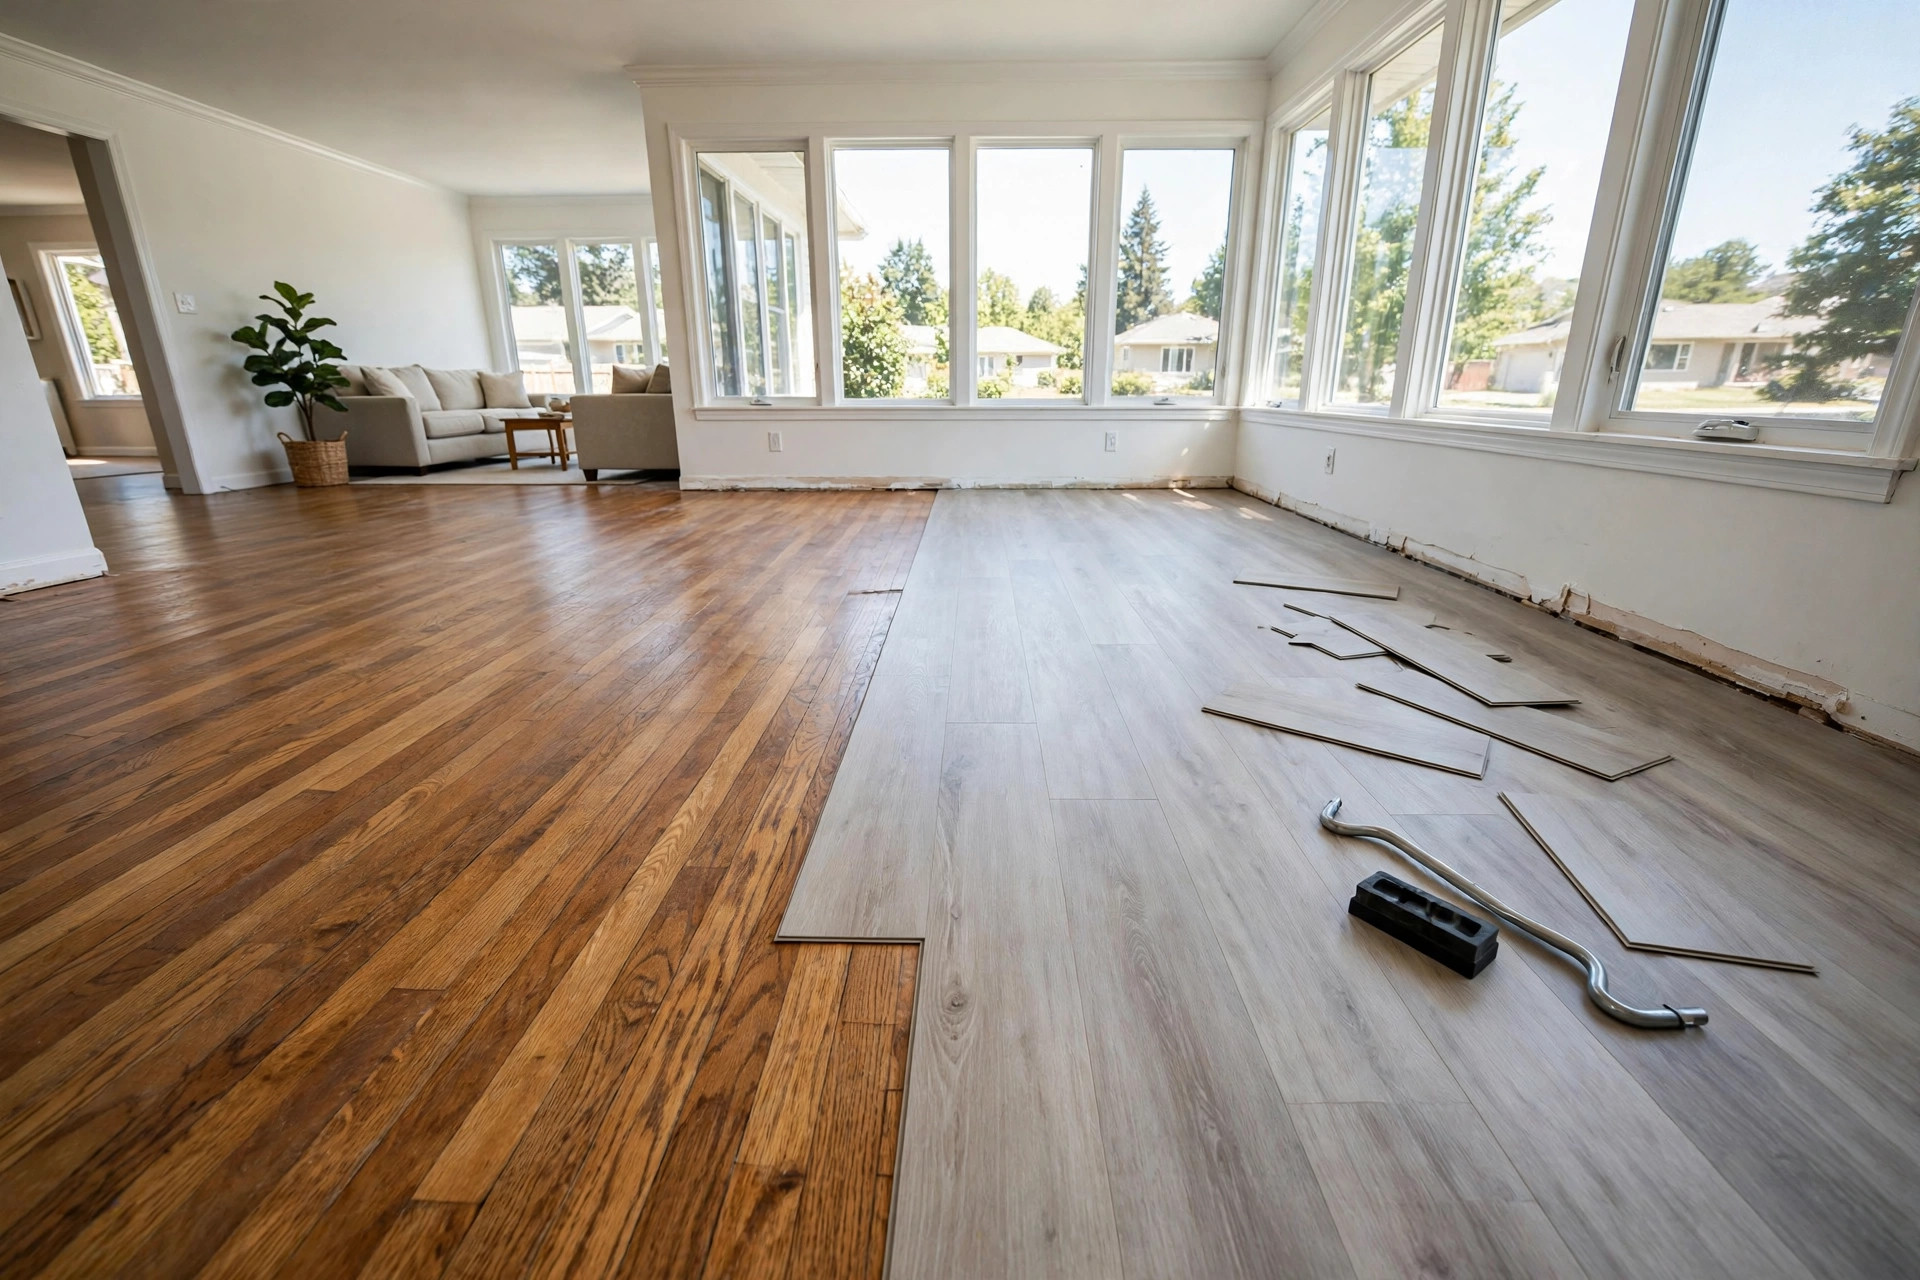

Many homeowners ask: can you install LVP over hardwood usa? The short answer is yes. In most homes, luxury vinyl plank can go right over an existing hardwood floor. This saves time, labor, and money. There is no need to tear out the old wood in most cases.
But the answer is not always simple. The old hardwood must be sound, flat, and dry. Loose boards must be fixed. Bad spots must be cut out. The height of the new floor can cause trouble at doors and steps. This guide walks through the whole job, step by step, in plain words.
Why Install LVP Over Hardwood?
Pulling up an old wood floor is hard work. It makes dust and noise. It costs extra. When you leave the old floor in place and lay LVP over it, you save on both labor and waste. Many installers call this a “floating floor over floor” job, and it is one of the fastest ways to refresh a room.
LVP is tough. It resists water, scratches, and dents far better than old wood. Pets and kids do less harm to it. A worn or dated hardwood floor can stay hidden under a fresh, modern surface. For busy family rooms, kitchens, and rental units, this is a smart fix.
There is another gain. The old hardwood acts as a firm base. When the planks below are tight and level, LVP lays flat and feels solid underfoot. You get a quiet floor with good body, without the cost of a new subfloor.
What to Look for Before You Begin: Can You Install Lvp Over Hardwood Usa
Not every old floor is a good base. Check these points first.
Solid boards. Walk the whole room. Mark any loose, warped, or broken boards. Screw loose boards down to the joists. Replace broken ones. If the old floor squeaks, drive screws to quiet it before you start.
Flat surface. LVP shows every bump. Lay a long straightedge on the floor. Most makers ask for no more than 3/16 inch of dip over 10 feet. Fill low spots with floor patch compound. Sand down high spots.
Moisture. Old wood must be dry. Test with a moisture meter made for wood. Readings above 12 percent call for care. Fix leaks and damp spots first. Never lay LVP over a wet floor.
Finish condition. The old finish should be firm. Peeling varnish can flake and make hollow spots. Rough-sand any flaking areas so the new floor rests on firm wood.
Height change. LVP adds about 5 to 8 millimeters to the floor height. Check door clearances, baseboards, and transitions to other rooms. You may need to trim door bottoms or add a reducer strip at thresholds.
How to Choose the Right LVP
Not all vinyl plank is alike. Pick a product that fits the room and the base.
Thickness and wear layer. Thicker planks hide small flaws better. Look for a wear layer of at least 12 mil for homes, 20 mil for busy rooms or rentals. The core type matters too: rigid core or SPC planks hold their shape over wood with small gaps.
Attached pad. Many planks come with a foam pad on the back. This adds comfort and sound deadening. If your LVP has no pad, use a thin underlayment made for vinyl. Do not use thick, soft underlayment; it lets planks rock and breaks the click joints.
Finish and look. Pick a color that suits the room. Light tones open small rooms. Wide planks suit large rooms. Some planks copy the look of oak or walnut so well that guests will not guess it is vinyl. Read recent luxury vinyl plank flooring reviews 2026 before you buy to compare wear layers and cores.
Warranty. Check the home-use warranty. Most good LVP carries 15 to 25 years for homes. Keep your receipt and a spare box of planks for future repairs.
Types of LVP Installation Over Wood
There are two main ways to fix LVP over hardwood.
Floating click-lock. Planks snap together at the edges and float over the old floor. No glue is needed. This is the most common choice for DIY work. It is also easy to remove later, which suits renters and anyone who may want the old wood back.
Glue-down. Planks are glued to the old wood with pressure-sensitive adhesive. This gives a hard, solid feel and works well in large rooms. It takes more skill and more time. Once glued, the planks are hard to take up without harming the old floor.
For most homes, floating click-lock is the better pick. It is faster, cleaner, and keeps the old hardwood intact underneath.
Cost and Price
Installing LVP over hardwood is one of the cheapest ways to get a new floor. Here are plain numbers for the USA.
Materials. Good LVP costs about 2 to 6 dollars per square foot. Underlayment, if needed, adds 0.25 to 0.50 dollars per square foot. Floor patch compound and screws are small extras.
Labor. Pro installation runs about 2 to 4 dollars per square foot. Preparing the old floor — screwing boards, filling gaps — may add 0.50 to 1 dollar per square foot.
Total. A typical room of 300 square feet often runs 1,200 to 3,000 dollars with labor. DIY work cuts the cost nearly in half.
Compare this with tearing out the old floor and sanding it down. A refinishing hardwood floors cost calculator can show you that refinishing alone can cost 3 to 8 dollars per square foot. Full tear-out and new wood can run far higher. LVP over the old floor wins on price in most cases.
Homeowners can compare prices and product lines at big home stores such as Home Depot and Lowe’s. For test reports and ratings, Consumer Reports publishes flooring reviews. General how-to advice is easy to find at The Spruce and This Old House.
Step-by-Step Installation
1. Clear the room. Move all furniture out. Take off shoe molding and baseboards you plan to reuse. Mark them so each piece goes back in its place.
2. Clean and prep. Sweep and vacuum well. Screw down loose boards. Fill gaps wider than 1/8 inch with patch compound. Let the filler dry, then sand it flush.
3. Level the floor. Check with a long level. Grind down ridges. Fill dips. The floor must be flat, not just smooth.
4. Acclimate the LVP. Bring the boxes into the room 48 hours before work starts. Stack them flat. Let them warm to room temperature. This keeps the planks from shrinking or growing after install.
5. Underlayment. If your planks lack an attached pad, roll out underlayment per the maker’s guide. Tape the seams. Cut it short of the walls by a hair.
6. Plan the layout. Measure the room. Plan so the first and last rows are not too thin. Stagger end joints by at least 6 inches. Start along the longest straight wall.
7. Lay the floor. Snap planks together row by row. Use a tapping block and pull bar. Keep a 1/4 inch gap at walls and pipes for movement. Cut planks with a utility knife and straightedge, or a fine-tooth saw.
8. Finish. Reinstall baseboards over the gap. Add transition strips where the new floor meets tile, carpet, or other wood. Clean the floor with a damp mop and a cleaner made for vinyl.
Retailers that carry wide LVP lines include LL Flooring. Makers such as Shaw and Mohawk publish install guides on their sites. Tile and floor specialists like Daltile also sell vinyl plank lines with detailed specs.
Care and Upkeep
LVP is easy to care for, which is one reason so many people choose it.
Daily care. Sweep or vacuum with a hard-floor setting. A damp mop with plain water or a vinyl-safe cleaner handles most dirt. Do not use steam mops; the heat can harm the joints.
Spills. Wipe spills soon. LVP is water resistant, but standing water at the seams is still a risk over time. In damp rooms, keep caulk at tubs and doors in good shape.
Scratches. Use felt pads under chairs and tables. Lift heavy items instead of dragging them. Keep pet nails trimmed. If you need a floor that takes dogs and boots, see waterproof flooring for basements reviews usa for tough product picks that also work over old wood.
Long term. A spare box of planks lets you swap a damaged piece. Click-lock rows can be taken up and relaid with care. Keep the room at normal home temperature and humidity year round.
Safety
Dust and fumes. Sanding old floors makes dust. Wear a dust mask. Old homes may have lead paint on trim; test before you sand it.
Sharp tools. Utility knives and saws cut fast. Cut away from your body. Keep blades sharp; dull blades slip.
Adhesives. If you glue down LVP, air out the room. Some adhesives have strong fumes. Follow the label for cure times before you walk on the floor.
Old finishes. Very old floor finishes may contain harsh chemicals. Do not dry-sand a floor if you do not know what is on it. A damp scuff-sand or a test patch is the safer path.
FAQ
Can you install LVP over hardwood without glue? Yes. Most LVP over wood is installed as a floating click-lock floor with no glue. The planks lock to each other and rest on the old floor. This is the easiest method and keeps the old wood safe underneath.
Will LVP over hardwood feel hollow? It can, if the old floor is uneven or the underlayment is too thick. A flat old floor and the right thin pad give a solid feel. Rigid-core planks also feel firmer than thin flexible ones.
Do I need underlayment over hardwood? It depends on the plank. If the LVP has an attached pad, you often need nothing more. If it does not, use a thin underlayment made for vinyl floors. Check the maker’s guide; the wrong pad can void the warranty.
Can LVP go over hardwood in a kitchen or bath? Yes, with care. Choose waterproof LVP with tight click joints. Seal edges at tubs and sinks with silicone. Keep standing water off the floor. It is far more forgiving than wood in wet rooms.
What if my hardwood is badly damaged? Fix the damage first. Replace broken boards and fill gaps. If the floor is cupped, buckled, or rotted in large areas, it is not a good base. In that case, tear out the bad sections or lay new plywood before the LVP.
How long does LVP over hardwood last? With good prep and care, 15 to 25 years is normal. Busy rooms with pets may wear faster. The old wood base does not shorten the life of the LVP when it is flat, dry, and sound.
A Final Word
So, can you install LVP over hardwood usa? Yes, in most homes, and it is one of the best low-cost floor upgrades you can make. The keys are simple: check the old floor, fix what is loose, make it flat, and pick a good rigid-core plank. Take your time with prep and the install will go fast. When the last baseboard is back on, you will have a fresh, tough floor that looks like new wood — at a fraction of the price of new wood.
References
Consumer Reports. (n.d.). Product reviews and ratings. https://www.consumerreports.org Daltile. (n.d.). Ceramic and porcelain tile. https://www.daltile.com LL Flooring. (n.d.). Hardwood, vinyl, and tile flooring. https://www.llflooring.com Lowe’s. (n.d.). Home improvement products. https://www.lowes.com Mohawk Flooring. (n.d.). Flooring products. https://www.mohawkflooring.com Shaw Floors. (n.d.). Flooring products. https://www.shawfloors.com The Home Depot. (n.d.). Home improvement products. https://www.homedepot.com The Spruce. (n.d.). Home and garden advice. https://www.thespruce.com This Old House. (n.d.). Home renovation guidance. https://www.thisoldhouse.com
Was this guide helpful?

About Sarah Mitchell
The My Garden US editorial team writes practical, in-depth home and garden guides for American homeowners — tested advice, no fluff.
You May Also Like
Replacing Single Cracked Floor Tile Guide: A Step-by-Step Plan for One Tile Only
February 25, 2026 0 views
Arabesque Tile for Shower Wall Reviews USA: What Shoppers Say Before They Buy
January 15, 2026 0 views
Encaustic Cement Tile for Sale USA: A Plain Guide for Homeowners
March 18, 2026 0 views