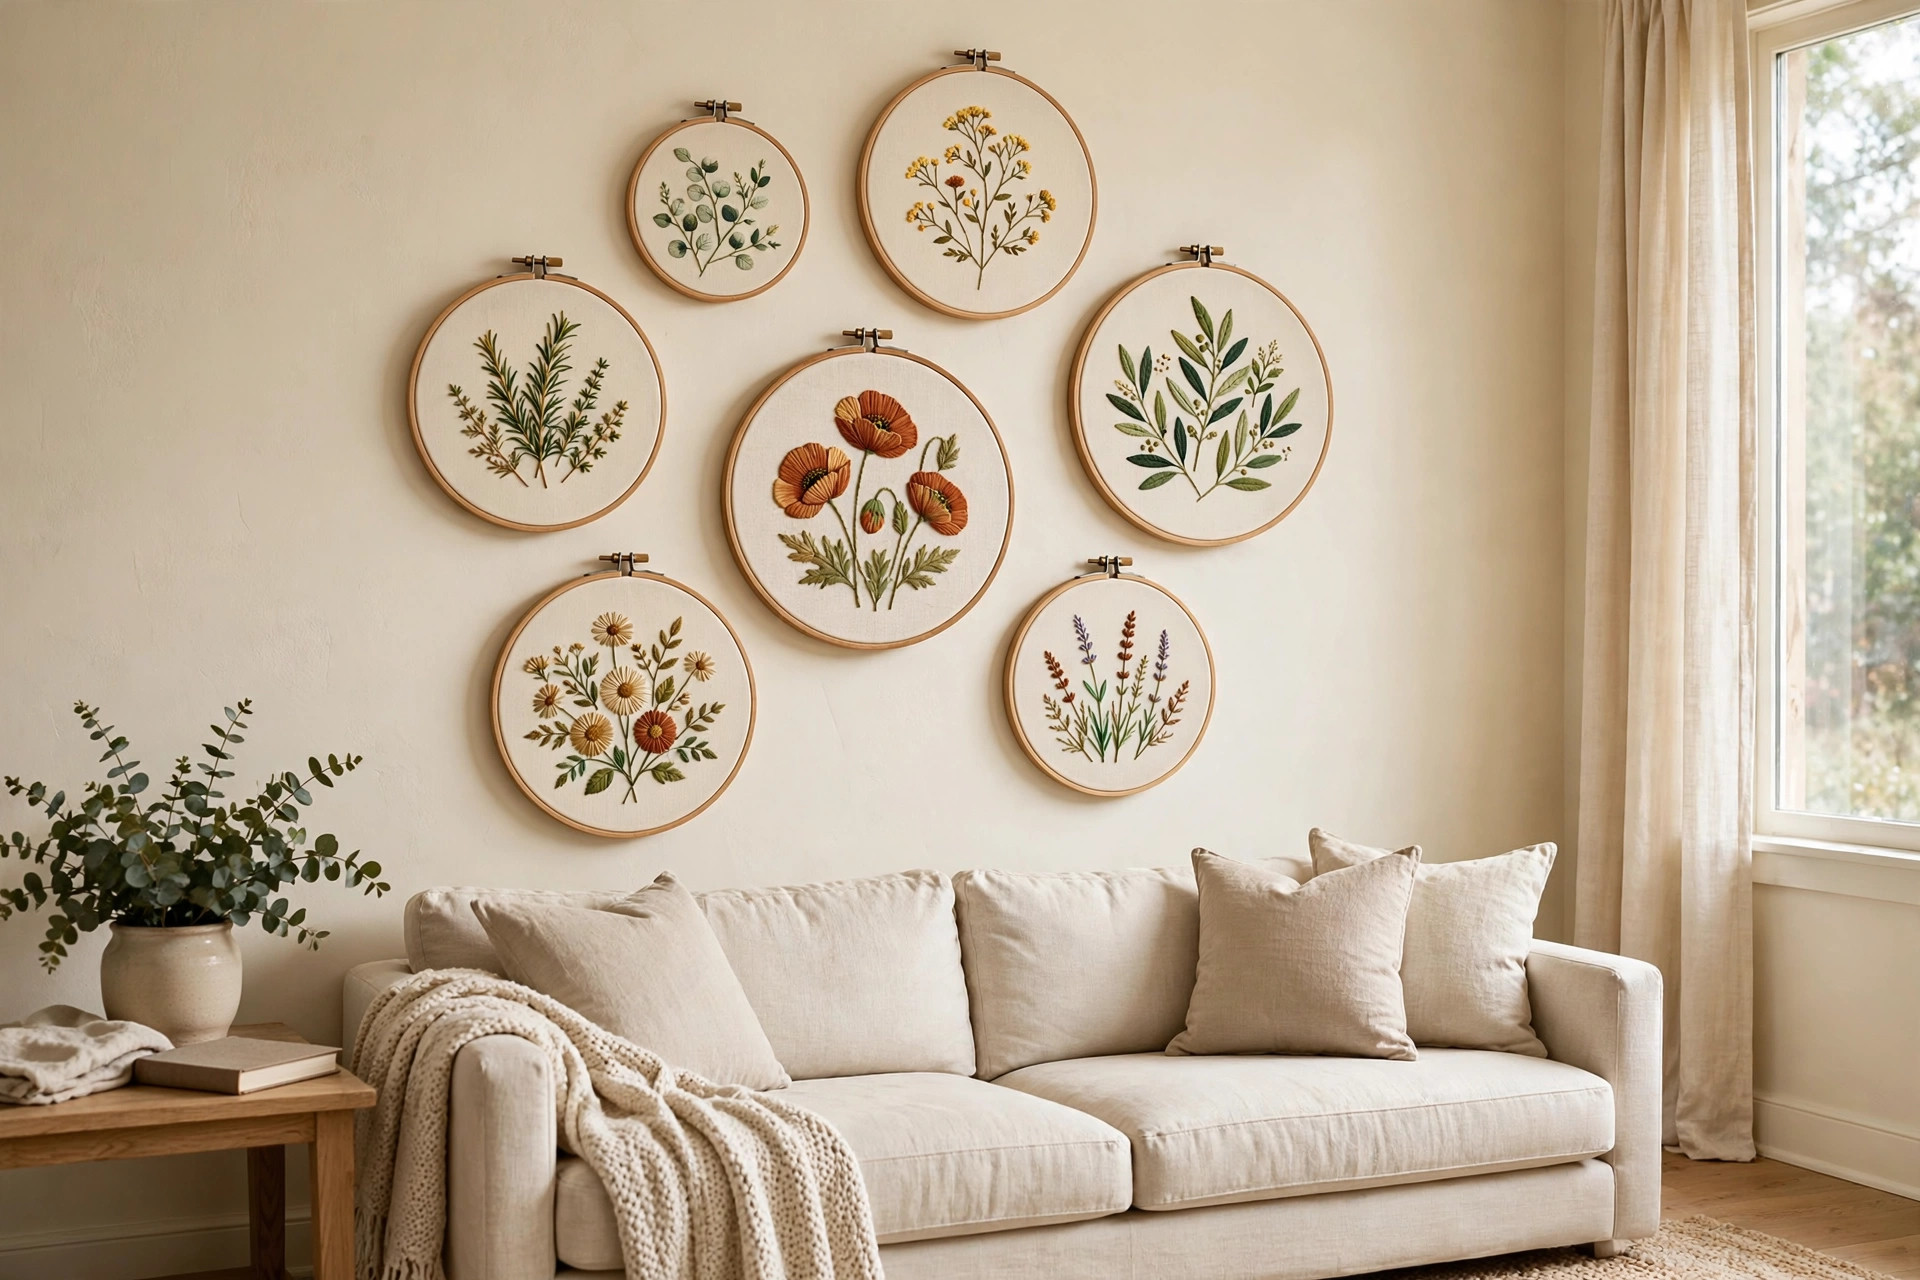

A wall can look bare for years before anyone does a thing about it. A framed print costs money. A painted canvas takes skill. The best embroidery hoop set for wall art diy projects offers a third path. It is cheap. It is honest work. It gives a home a handmade look that no factory print can copy.
Embroidery hoops were once only tools. Stitchers clamped cloth between two rings to keep it taut while they sewed. Then someone looked at a finished hoop, admired the neat wooden frame around the stitched design, and hung it straight on the wall. Today whole gallery walls are made of nothing but hoops, each one holding a small stitched picture. The effect is warm and personal.
This guide explains how to choose the best embroidery hoop set for wall art diy work. It covers materials, sizes, and prices. It covers how to hang hoops safely and how to keep them looking good for years. Everything here is written for a beginner who has never held a needle.
Why Hoop Wall Art Matters
Store-bought art has one weakness. A thousand other homes own the same print. Handmade hoop art has the opposite strength. No two pieces are alike. The stitches carry the small wobbles of a human hand. That is the point.
A set of hoops lets a beginner build a whole wall display for the price of one framed poster. A dozen hoops in graduated sizes can fill a large empty wall. Three small hoops can warm a narrow hallway. One large hoop can anchor a room. The wood frame is already there, built into the tool. There is no need to buy separate frames.
Hoop art is also kind to renters. Most hoops weigh very little. They hang on a single nail or even a removable adhesive hook. When the lease ends, the wall needs only a dab of filler. Dorm rooms, first apartments, and rented cottages all suit this kind of decor.
There is a deeper reason too. Work done by hand slows a person down. An evening spent stitching is an evening away from noise. The finished wall art is proof of hours spent well. Guests notice. They ask about it. A conversation starts.
What to Look For in a Hoop Set: Best Embroidery Hoop Set for Wall Art Diy
Not every hoop set is worth the money. A careful buyer checks a few plain facts before paying.
Wood Quality
Good hoops use smooth, light wood such as beech, bamboo, or birch. The wood should feel even all around. Run a finger along the inside edge. It should be smooth, with no splinters and no rough patches. Rough wood snags fabric and thread. Hold the hoop up and sight along the edge. It should form a clean circle. Sets from large craft supply stores and fabric retailers often meet this standard, and their return desks make exchanges easy if a piece arrives warped.
Hardware
Each hoop has a metal screw and bracket that tightens the outer ring. The screw should turn smoothly, and the metal should feel solid, not thin and bendy. Test each screw when the set arrives. Tighten and loosen it a few times. If it sticks or strips, return the set.
Size Range
A good set includes several sizes. Common diameters are three, four, five, six, and seven inches. Some sets add an eight or nine inch hoop for a centerpiece. Variety matters because wall displays look best with mixed sizes.
Depth of the Ring
Hoops come in different depths. Standard hoops are about half an inch deep. Deep hoops, sometimes called display hoops, are three-quarters of an inch or more. Deep hoops look better on walls. They cast a small shadow that gives the piece depth. They also hold fabric more firmly. For wall art, choose sets that are at least a half inch deep.
Finish
Some hoops are sold raw. Others are stained or painted. Raw wood suits a natural, farmhouse look and takes stain well if you wish to change the color later. Check that the finish is even. Art supply shops often stock both raw and finished sets, which makes comparison easy in one visit.
Types of Embroidery Hoop Sets
Hoop sets fall into a few clear types. Each suits a different plan.
Bamboo hoop sets. Bamboo is light, strong, and cheap. It resists splitting. Most beginner sets are bamboo. The color is a warm pale gold that fits many rooms. Bamboo sets are the best value for a first wall display.
Beechwood hoop sets. Beech is harder and smoother than bamboo, with a fine, even grain. Beech sets cost a little more. They look refined on a wall and take stain beautifully.
Plastic hoop sets. Plastic hoops are sturdy and washable, and they come in bright colors. They suit a child craft room or a playful kitchen wall. For a classic gallery wall, wood wins.
Flexi hoop sets. Flexi hoops use a plastic inner ring that bends to grip the fabric. They have no screw. They are simple to use and kind to delicate cloth.
Square and oval hoop sets. Square and oval sets add variety to a wall display. A square hoop among round ones draws the eye. Oval hoops suit tall, narrow designs such as flowers on stems.
Mini hoop sets. Tiny hoops, one to two inches across, work as filler pieces in a large arrangement. They are fiddly to stitch but charming in a cluster.
A beginner building a first wall display should start with a round wooden set of five to eight hoops in mixed sizes. Specialty shapes can come later, once the habit is set.
How to Choose Sizes for Your Wall
Size choice is part math and part taste. Measure the wall first. A display should fill roughly two-thirds of the wall width. A small cluster on a huge wall looks lost. A crowded sprawl on a small wall looks messy.
For a wall three feet wide, three hoops of five, six, and seven inches work well. For a wall six feet wide, plan seven to nine hoops from three to nine inches. Lay the hoops on the floor first. Move them around until the pattern pleases you. Take a photo of the layout. Then transfer it to the wall.
Odd numbers look better than even numbers. Leave two to three inches of breathing room between hoops. Hang the center of the display at eye level, about fifty-seven inches from the floor.
If you plan to stitch designs later, match hoop size to design size. Fill at least two-thirds of the hoop area with the design. When in doubt, choose the smaller hoop.
Cost and Price Guide
Embroidery hoop sets are among the cheapest craft supplies. Prices vary with size count, wood type, and brand.
A basic bamboo set of six hoops, three to seven inches, usually costs between five and twelve dollars at general merchandise stores and online marketplaces. These sets are fine for beginners. Check reviews for warping complaints before buying.
A mid-range beechwood set of eight to twelve hoops costs between fifteen and thirty dollars. The wood is smoother and the size range wider. This is the sweet spot for wall art. Most crafters never need more than this.
Premium sets with deep display rings and fine sanding run thirty to sixty dollars. These suit crafters who sell finished hoop art or give it as gifts.
Mini hoop sets of twelve to twenty-four tiny hoops cost eight to fifteen dollars. Square and oval specialty sets cost about the same as round sets of equal quality.
Beyond the hoops, budget for fabric, thread, and needles. A yard of plain cotton muslin costs a few dollars and fills many hoops. A starter pack of embroidery floss costs under ten dollars at discount craft chains. A full first project, hoops included, often totals under thirty dollars.
That total explains the appeal. For the price of one restaurant dinner, a person can fill a wall with handmade art and have supplies left for the next project.
Getting Started: From Hoop to Wall
A beginner needs only a few steps to go from a new set to finished wall art.
First, wash and iron the fabric. Cotton shrinks slightly on first wash.
Second, choose a simple design. A beginner does well with bold shapes: a leaf, a sun, a house, a word in simple letters. Trace the design onto the fabric with a water-soluble pen or a light pencil.
Third, mount the fabric in the hoop. Loosen the screw. Place the fabric over the inner ring. Press the outer ring down over it. Pull the fabric edges gently until the surface is taut like a drum. Tighten the screw.
Fourth, stitch the design. Basic stitches are enough: running stitch, backstitch, and satin stitch cover most simple designs. Work in good light. Take breaks.
Fifth, finish the back. Trim the extra fabric to about an inch beyond the hoop. Fold it to the back and glue it down with fabric glue. A neat back matters if the hoop hangs where the back might show, such as on a door or in a window.
Sixth, hang it. Small nails work for most walls. For plaster or brick, use proper wall anchors. Removable adhesive hooks suit renters.
Many home project guides cover hanging light frames, and hardware retailers stock the small nails and hooks these frames need.
Design Ideas for Hoop Wall Art
A set of hoops is a blank canvas. A few proven ideas help beginners start.
Botanical series. Stitch a different leaf, flower, or herb in each hoop. Use green thread on cream fabric. Hang them in a grid. This suits kitchens and sunrooms.
Word art. Stitch one word per hoop: home, love, laugh, gather. Hang the words in a row above a sofa or a bed. Keep the lettering large enough to read from across the room.
Seasonal rotation. Keep four small hoops for the seasons: a snowflake, a flower, a sun, and a leaf. Swap the display four times a year.
Fabric showcase. Not every hoop needs stitching. Pretty patterned fabric stretched in a hoop is wall art on its own. Quilting cottons with vintage prints look wonderful this way. This is the fastest route to a full wall.
Related craft projects pair well with hoop art. A sharp craft knife set for precision cutting helps trim fabric and backing boards cleanly. A stamp set for card making crafts can print simple motifs onto fabric before stitching. Small finished pieces make fine presents, much like a diy keychain kit for resin and crafts gifts does.
Care and Upkeep
Hoop wall art lasts for years with small care. Dust the hoops every month or two with a soft dry cloth.
Keep hoop art out of direct sun. Sunlight fades thread and fabric over months. A north-facing wall or a shaded hallway is ideal.
Watch the humidity. Damp rooms can warp wood and spot fabric. Bathrooms suit hoop art only if they are well vented. Kitchens are fine away from the stove.
Check the screws once a year. Wood shifts with the seasons, and a quarter turn restores the tension. If a hoop hangs crooked, fix it before the fabric stretches unevenly.
Safety Notes
Hang hoops securely. A hoop that falls from height can startle a child or a pet. Use nails or hooks rated for the weight, even though hoops are light.
Keep small hoops away from very young children. Mini hoops and loose screws are choking hazards. Hang small pieces high or keep them in adult spaces.
Mind the needlework itself. Store needles in a pincushion, never loose on a table. Count needles at the start and end of a session.
If you paint or stain raw hoops, work in a vented room and let finishes cure fully before hanging. Workshop safety guides cover ventilation and finish handling in plain terms.
Fire safety matters near candles and fireplaces. Wood hoops and cotton fabric burn. Keep hoop displays at least three feet from open flame and well above radiators.
Frequently Asked Questions
How many hoops do I need for a gallery wall? Five to nine hoops suit most walls. Start with seven in mixed sizes. You can add more later. Odd numbers look best.
Can I use the same hoops for stitching and display? Yes. That is the whole idea. Stitch in the hoop, finish the back, and hang it. The hoop is both tool and frame.
Do I need to be good at embroidery to make hoop wall art? No. Simple shapes and words look fine. Many crafters start with plain patterned fabric in hoops and add stitching as their skill grows.
What fabric works best in hoops? Plain cotton muslin and quilting cotton are the easiest. Linen looks refined but wrinkles more. Avoid stretchy knits, which distort under tension.
Can hoop art go outside? Covered porches are fine in dry weather. Rain, strong sun, and humidity will ruin fabric and warp wood. Treat outdoor hoop art as seasonal and bring it in.
A Final Word
The best embroidery hoop set for wall art diy work is not the most costly one. It is the set with smooth wood, solid screws, and a good spread of sizes. It is the set that gets used, not admired in a drawer.
Start small. Stitch one hoop. Hang it. Live with it for a week. Then stitch another. Walls fill one hoop at a time, and each one carries a small piece of the maker.
References
Amazon. (n.d.). Online shopping. https://www.amazon.com Blick Art Materials. (n.d.). Art and craft supplies. https://www.dickblick.com Family Handyman. (n.d.). DIY home repair and maintenance. https://www.familyhandyman.com JOANN. (n.d.). Fabric and craft supplies. https://www.joann.com Michaels. (n.d.). Arts and crafts supplies. https://www.michaels.com Target. (n.d.). Retail store. https://www.target.com The Home Depot. (n.d.). Home improvement products. https://www.homedepot.com This Old House. (n.d.). Home renovation guidance. https://www.thisoldhouse.com Walmart. (n.d.). Everyday low prices. https://www.walmart.com
Was this guide helpful?

About Emily Rodriguez
The My Garden US editorial team writes practical, in-depth home and garden guides for American homeowners — tested advice, no fluff.
You May Also Like
Paper Mache Kit for Kids Art Projects Home: A Parent’s Buying and Project Guide
March 28, 2026 0 views
How to Make Wood Slice Ornaments for Christmas Crafts DIY
July 6, 2026 0 views
Best Silicone Molds for Resin Crafts Jewelry: A Plain Guide
June 2, 2026 0 views