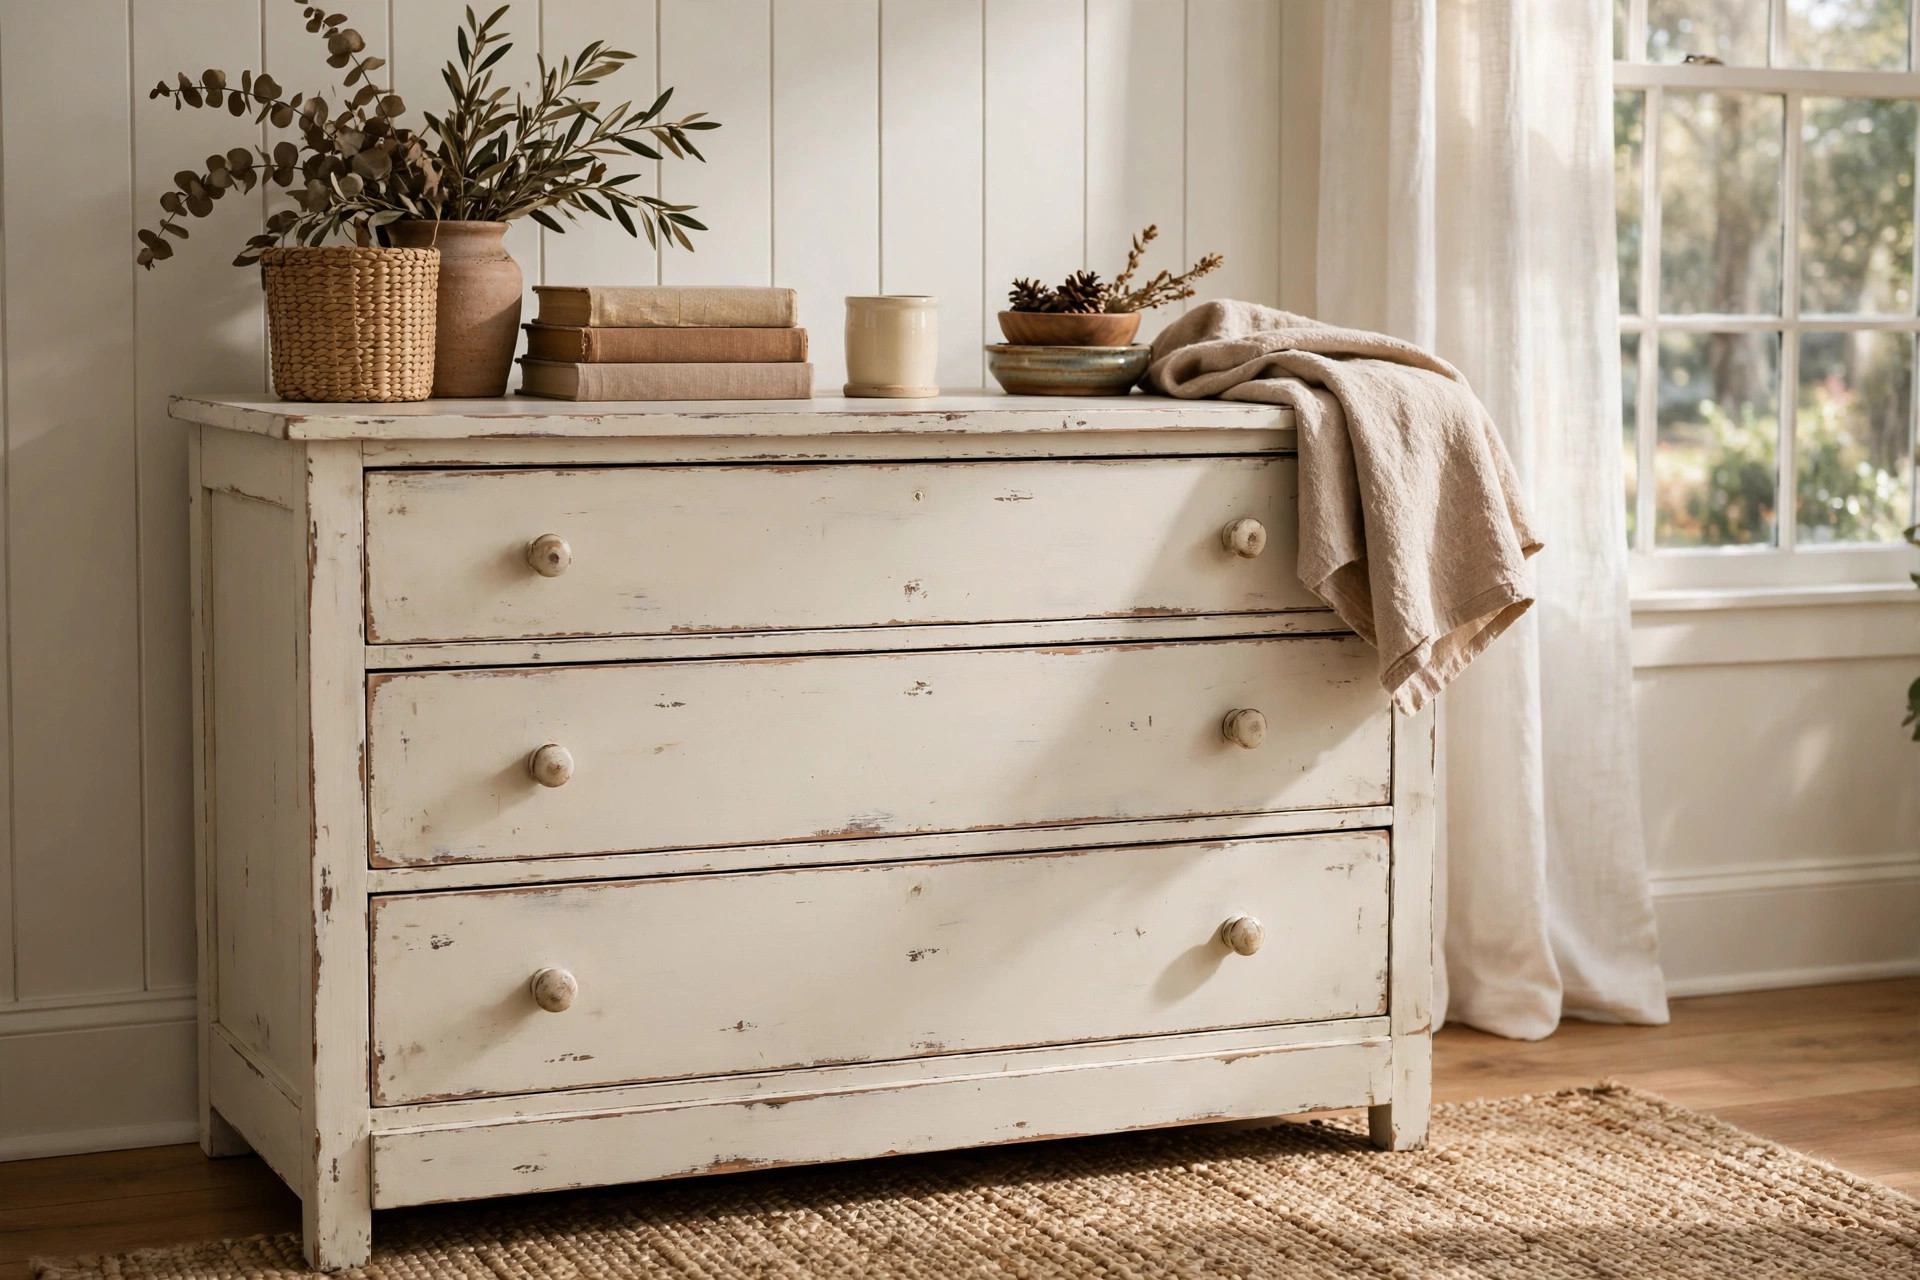

Old furniture has a quiet value. A chair with a wobbly past, a dresser with a scratched top, a small table that no longer matches the room. The best chalk paint for furniture diy projects gives these pieces a second life without a big budget or special skill. Chalk paint is a water-based paint with a thick, matte finish. It sticks to wood, metal, and even plastic with little prep work. This guide explains what chalk paint is, how to pick the right one, how to apply it, and how to keep the finish looking fine for years.
Why Chalk Paint Matters for Furniture DIY Projects
Chalk paint changed the way home crafters work. Before it came along, painting furniture was a long job. You had to strip old varnish, sand every inch, prime, and then paint two coats. Most people gave up before they started.
Chalk paint removed most of those steps. It sticks to bare wood, old paint, and varnish with little or no sanding. That is the main reason home crafters love it. A weekend project becomes a Saturday morning project.
The finish is soft and chalky, like old lime wash. It suits farmhouse, vintage, and cottage styles. It also suits modern rooms when used in gray, black, or deep blue. The look is warm and calm, not glossy or harsh.
Cost is another reason it matters. A quart of chalk paint can cover a small dresser or two chairs. Compare that to the price of new furniture, and the savings are clear. Old pieces that would be thrown away get a new job in the house.
The paint is also kind to beginners. It is thick, so drips are rare. It dries fast, so a second coat can go on the same day. If you make a mistake, a damp cloth wipes it off while it is still wet. Small chips and worn edges can be sanded lightly to make a soft, aged look. That forgiving nature is why so many guides for home crafters, from home repair journals to craft supply stores, put chalk paint near the top of the beginner list.
What to Look for When You Choose Chalk Paint: Best Chalk Paint for Furniture Diy Projects
Not every can labeled chalk paint is the same. Here are the points that matter most.
Adhesion
Good chalk paint sticks without heavy sanding. Look for brands that state clearly that no priming is needed on sealed wood. This is the core promise of chalk paint. If the label asks for full sanding and priming, it is not a true chalk paint in practice.
Thickness and Coverage
Chalk paint is thick by design. A good one covers dark wood in two coats. Thin, watery chalk paint takes three or four coats and costs more in the end. Read the label for the square footage per quart. A fair number is 75 to 100 square feet per quart.
Color Range
The best lines offer a wide range of colors, from soft whites to bold greens. If you like mixing your own shades, choose a line whose colors blend well. Many crafters buy white and gray as a base and mix small batches with accent colors. A good acrylic paint set for beginners canvas art is handy for mixing small custom tones, though chalk paint itself does most of the work on furniture.
Wax or Topcoat
True chalk paint needs a topcoat to be durable. Many lines sell a clear wax made for this purpose. Some sell a water-based poly topcoat instead. Wax gives a soft, hand-rubbed feel. Poly gives harder protection for table tops and kitchen pieces. Decide which one you want before you buy the paint, so the two products match.
Odor and Safety
Most chalk paint is water-based and low odor. This matters if you paint indoors. Check that the label says low VOC or zero VOC. Keep in mind that wax pastes have a stronger smell than the paint itself.
Types and Options
Chalk paint comes in a few forms. Each suits a different job.
Ready-Mixed Chalk Paint
This is the standard can from a paint brand. It is ready to use. Stir it well and brush it on. This form is best for beginners because the recipe is fixed and tested. Craft stores and home centers carry it in quarts and small sample pots.
Chalk Paint Powder Mix
Some lines sell a powder that you mix with water or with flat latex paint. This form is cheaper per quart. It also lets you turn any color of latex paint into chalk paint. The trade-off is that you must mix it well and test it. Mix only what you need for one project.
Spray Chalk Paint
A few brands sell chalk paint in spray cans. Spray gives a smooth, even coat with no brush marks. It works well on chairs with spindles and on metal pieces. The cans cost more per square foot than brushed paint. Work outdoors or in a ventilated garage when you spray.
Chalkboard Paint
Do not confuse chalkboard paint with chalk paint. Chalkboard paint turns a surface into a writing board. Chalk paint gives a matte furniture finish. The names sound alike, but the uses are different.
Cost and Price
Chalk paint costs more per quart than ordinary latex paint. A quart often sells for 20 to 35 dollars at a major home center. Small sample pots of 8 ounces sell for 5 to 10 dollars. Brushes, wax, and sandpaper add to the bill.
A typical dresser project breaks down like this. One quart of chalk paint: about 25 dollars. One tin of clear wax: about 15 dollars. A good brush: 10 to 15 dollars. Sandpaper and rags: 5 dollars. The total sits near 55 to 60 dollars. A new dresser of the same size can cost 200 dollars or more. The savings are real.
Sample pots are a smart buy for small pieces. A single chair, a picture frame, or a side table needs only 8 ounces. If you plan to paint often, buy quarts and keep the lids sealed tight. Store paint at room temperature. A cold garage in winter can spoil a can.
Watch for sales at craft stores. Chalk paint lines often go on sale before spring and in the fall. Coupons can cut the price by a third or more. Buying wax and brush sets together also saves money. Many project guides from DIY home sites suggest pricing the whole job, not just the paint, before you start.
How to Apply Chalk Paint to Furniture
Chalk paint is simple to use. The steps below work for most pieces.
Step 1: Clean the Piece
Wipe the furniture with a damp cloth and mild soap. Grease and dust stop paint from sticking. Let the piece dry fully. For kitchen chairs, wipe twice. Grease hides in corners.
Step 2: Light Sanding (Only If Needed)
True chalk paint needs little sanding. But glossy varnish can be too slick. A quick pass with 120-grit sandpaper on shiny spots is enough. You are not stripping the wood. You are just dulling the shine. Wipe off the dust with a damp cloth.
Step 3: Stir and Test
Stir the paint well. Chalk paint settles in the can. Brush a test patch on a hidden spot, like the back of a leg. Let it dry. Check the color and the adhesion. Scratch it lightly with a nail. If it holds, the paint is fine to use.
Step 4: Brush the First Coat
Use a natural bristle brush or a good synthetic brush. A proper brush set matters here; many painters keep a best craft paint brushes set for acrylics for detail work, but a wide flat brush does the large areas fastest. Brush in long, even strokes with the grain of the wood. The first coat will look streaky and thin. That is normal. Do not load the brush too heavily. Let the first coat dry for one to two hours.
Step 5: Brush the Second Coat
The second coat fills the thin spots. Brush in the same direction as the first. Two coats are enough for most pieces. Dark wood under light paint may need a third. Let each coat dry before adding the next.
Step 6: Distress (Optional)
If you want an aged look, sand edges and corners lightly with 220-grit sandpaper after the paint dries. Corners and edges wear first in real life, so that is where the aged look goes. Wipe off the dust.
Step 7: Seal with Wax or Topcoat
This step protects the finish. Rub clear wax on with a soft cloth in small circles. Let it sit for 15 minutes. Then buff it with a clean cloth. For a table top, use two thin layers of wax. If you prefer poly, brush it on thin and let it cure for the time stated on the can.
Step 8: Let It Cure
Chalk paint feels dry in hours but cures in days. Wax cures in about two weeks. Be gentle with the piece for the first week. Do not set heavy or hot objects on it right away.
Care and Upkeep
Painted furniture is easy to live with if you treat it well.
Dust painted pieces with a soft, dry cloth. For dirt, use a damp cloth and mild soap. Never use harsh cleaners. They dull the wax and wear the paint.
Keep painted furniture out of direct sun when you can. Strong sun fades color over time. A white dresser near a bright window may yellow. Move the piece a few inches away from the window, or use curtains.
Rewax table tops once a year. Wax wears where hands and plates touch. A thin fresh layer brings back the soft sheen. If a spot chips, dab on a little paint with a small brush, let it dry, and rewax the spot. Small fixes are quick and nearly invisible.
For outdoor use, chalk paint alone is not enough. Rain and sun will break it down. If a painted bench must live outside, seal it with an outdoor poly topcoat made for exterior use. Even then, bring the piece under cover in heavy weather. Many handyman guides note that painted outdoor furniture lasts two to three years before it needs a fresh coat.
Safety Notes
Chalk paint is safer than oil-based paint, but care is still needed.
Work in a room with fresh air. Open a window or run a fan. Low odor is not no odor. This matters most when you apply wax, which smells stronger than the paint.
Wear a dust mask when sanding. Old paint on vintage furniture may contain lead if the piece is older than 1978. Lead dust is dangerous. If you suspect lead paint, buy a lead test kit at a paint department before you sand. If the test is positive, do not sand. Either seal the piece as it is or get advice from a lead abatement expert.
Keep paint and wax away from children and pets while you work. Store cans with lids tight and out of reach. Clean brushes with soap and water right after use. Dried chalk paint is hard to wash out.
Dispose of old cans the right way. Let leftover latex paint dry out fully, then put it in the trash per your local rules. Wax tins go with household trash. Check your town’s rules for paint disposal. Clean water matters, and paint should never go down a storm drain.
Frequently Asked Questions
Do I need to sand before using chalk paint?
Usually not. Chalk paint sticks to most surfaces without sanding. A quick pass on very glossy spots helps. Clean the piece well. That matters more than sanding.
How many coats of chalk paint does furniture need?
Two coats cover most pieces. Thin or cheap chalk paint may need three. Dark wood under white paint may need three as well. Let each coat dry fully before the next.
Do I have to wax chalk paint?
Yes, for pieces you will touch and use. Wax or a poly topcoat protects the paint from water, dirt, and wear. Skip the sealer only on decorative pieces that no one handles. A frame on the wall can go without wax. A dining chair cannot.
Can I use chalk paint on metal or plastic?
Yes, with care. Clean the surface well. A light scuff with sandpaper helps on smooth metal. Use a primer made for metal if the piece will live outdoors. Indoor metal and plastic take chalk paint well once clean.
How long does chalk paint last on furniture?
Indoors, a sealed piece lasts many years. Chairs and tables get more wear than a dresser. Rewax yearly. Outdoors, expect two to three years before a recoat, even with sealer. Quality paint and good prep stretch the life. Many crafters also keep a watercolor paint set professional for artists home for touch-up blending and small art details, though chalk paint remains the base coat for furniture work.
Can I mix chalk paint colors?
Yes. Chalk paint mixes well. Start with white and add small amounts of color. Mix more than you need. Matching a custom mix later is hard. Test the mix on cardboard and let it dry before you paint the piece. Wet paint looks darker than dry paint.
A Final Word
The best chalk paint for furniture diy projects is the one you can apply with ease and live with for years. Choose a brand with good coverage and a true no-sand formula. Clean your piece, brush two coats, seal it well, and let it cure. Old furniture rewards the effort. A scratched table becomes the best-looking piece in the room. That is the quiet promise of chalk paint, and it holds true project after project. Browse paint lines at craft retailers or read project write-ups on home improvement sites for more ideas, and start with a small piece if you are new. A single chair is a fine first step.
References
Bob Vila. (n.d.). Home improvement advice. https://www.bobvila.com Family Handyman. (n.d.). DIY home repair and maintenance. https://www.familyhandyman.com JOANN. (n.d.). Fabric and craft supplies. https://www.joann.com Lowe’s. (n.d.). Home improvement products. https://www.lowes.com Michaels. (n.d.). Arts and crafts supplies. https://www.michaels.com The Home Depot. (n.d.). Home improvement products. https://www.homedepot.com The Spruce. (n.d.). Home and garden advice. https://www.thespruce.com This Old House. (n.d.). Home renovation guidance. https://www.thisoldhouse.com
Was this guide helpful?

About David Wilson
The My Garden US editorial team writes practical, in-depth home and garden guides for American homeowners — tested advice, no fluff.
You May Also Like
A Paint by Numbers Kit for Adults Relaxation: A Simple Path to Calm Evenings
February 28, 2026 0 views
Best Craft Storage Bins for Yarn and Fabric
April 15, 2026 0 views
The Best Craft Knife Set for Precision Cutting: A Complete Buyer’s Guide
July 21, 2026 0 views