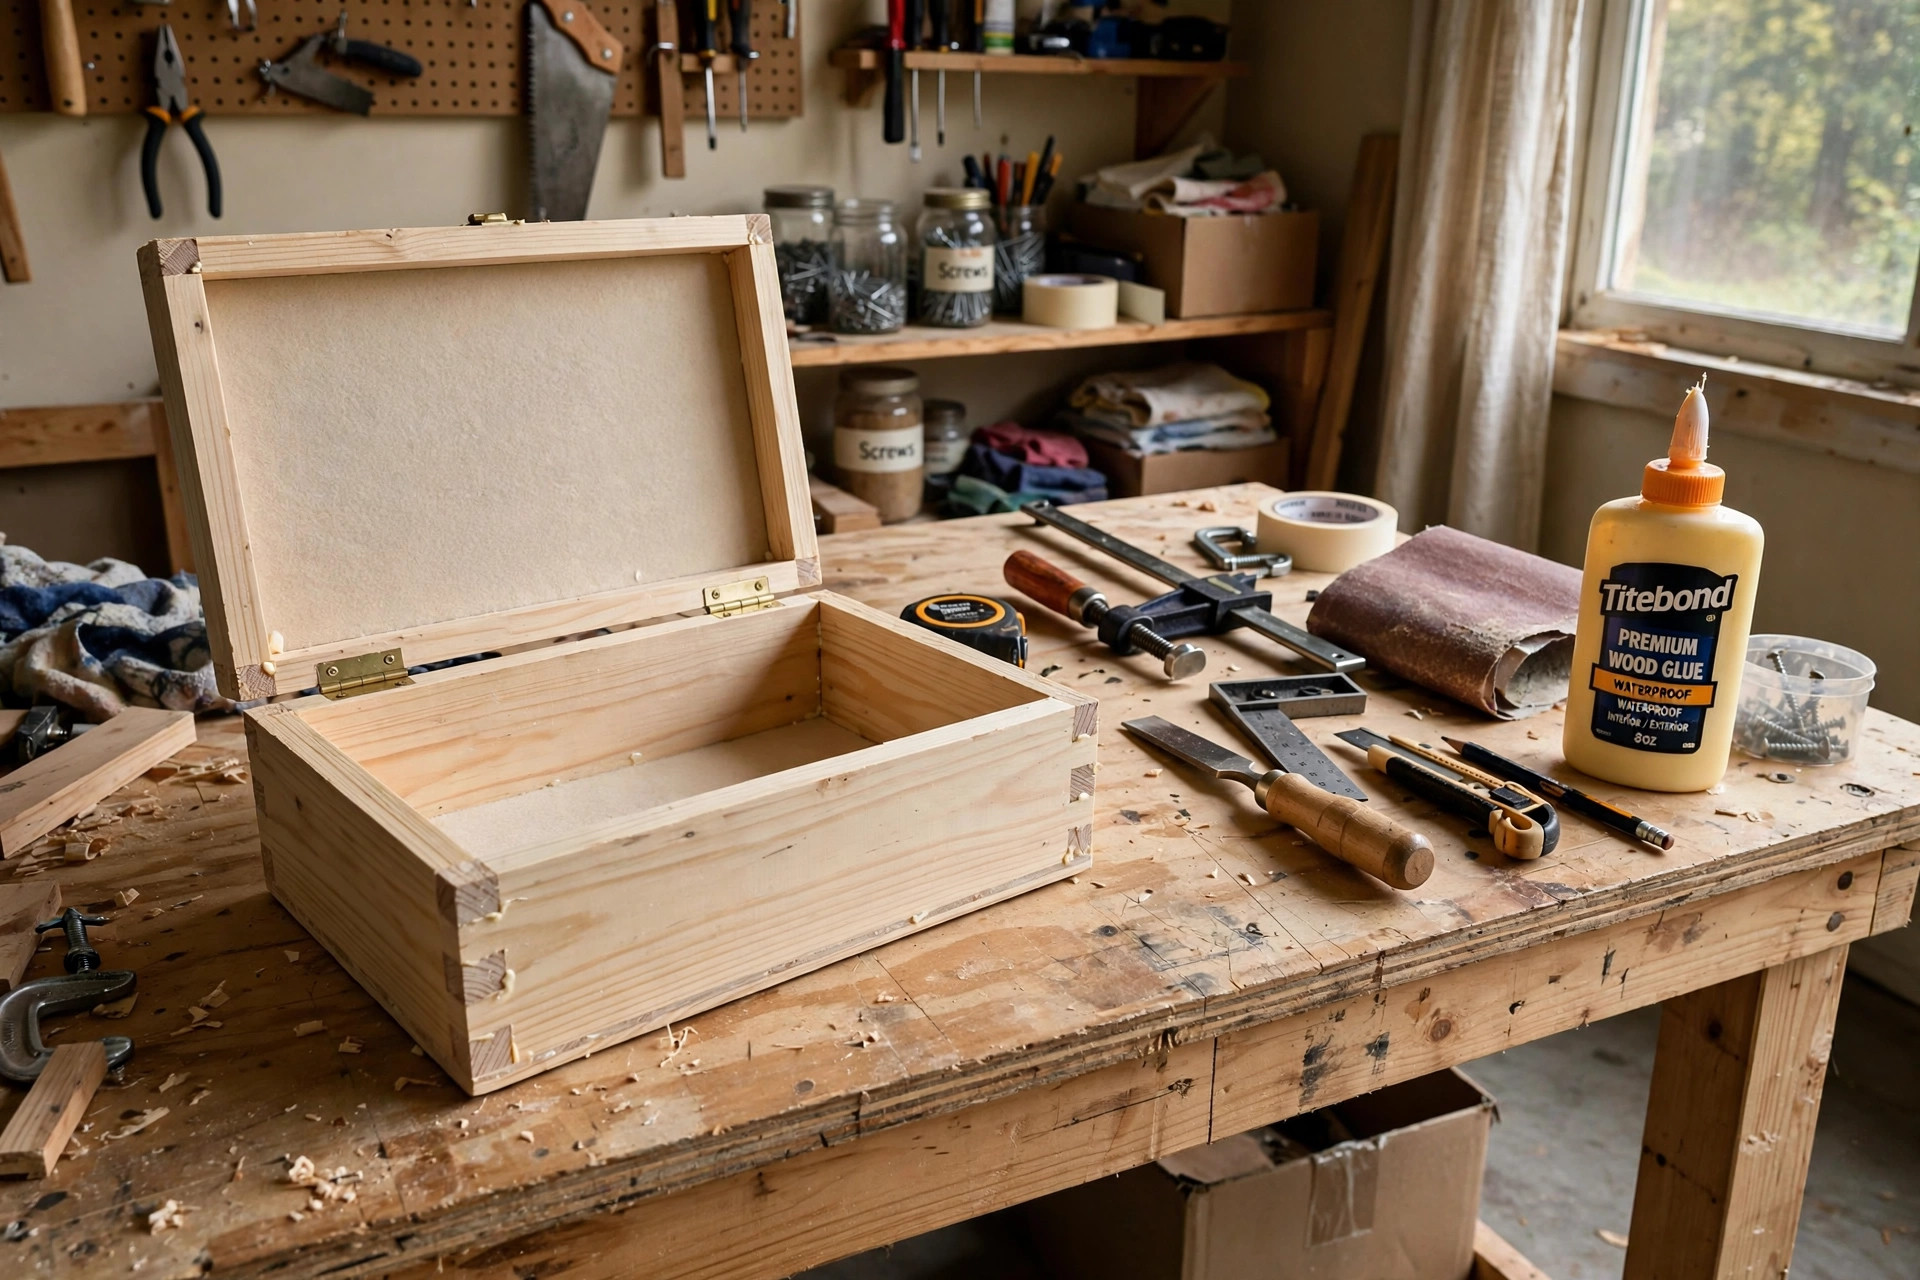

A diy jewelry box kit for woodworking beginners is one of the kindest ways to enter the craft of woodworking. Every piece arrives cut to size, every joint has been planned in advance, and the whole box can be finished on a kitchen table with a few hand tools. For a person who has never built anything from wood, that matters a great deal.
Why It Matters
Woodworking has a reputation for being hard to start. Many people picture a workshop full of costly machines and years of practice. A starter kit breaks that picture. It hands you a small project that can be finished in a weekend and keeps the hard parts, like milling boards to an exact thickness, out of your way.
A jewelry box is a good first project for several reasons. It is small, so it uses little wood and little space. It teaches real skills: measuring, gluing, sanding, and finishing. And the result is something useful and handsome enough to keep or to give as a gift. A box made by your own hands carries a meaning that a store-bought box can never carry.
The habit of building is what matters most at the start. A finished box on a dresser gives a beginner the courage to try a larger shelf or a small stool next. Kits exist to make that first success as likely as possible.
What to Look For When You Choose a Kit: Diy Jewelry Box Kit for Woodworking Beginners
Not all kits are equal. A good diy jewelry box kit for woodworking beginners should be honest about the skill it asks for and the tools it requires.
Pre-cut parts. The sides, bottom, and lid should arrive cut to final size. Some kits include parts that only need light sanding on the edges. This is the feature that makes the kit friendly to a true beginner.
Clear plans. Look for step-by-step instructions with drawings. The best plans show each stage of the build, not just the finished box. If the kit seller shows sample pages of the instructions, read them before you buy.
Joint style. Simple butt joints or box joints are best for a first build. Stay away from dovetails in your first kit unless the instructions walk you through them very slowly.
Wood species. Oak, maple, cherry, and walnut are common choices. Softer woods like pine are easier to sand but dent more easily. Hardwoods take a nicer finish. A first kit in a mild hardwood is a good middle road.
Felt lining and hardware. A fine kit often includes felt for the inside, small hinges, and a latch or knob. These small parts make the finished box feel complete and keep you from hunting through hardware stores.
Tools needed. The kit description should say what you need. A fair beginner kit asks only for glue, clamps, sandpaper, and a finish. If it asks for a table saw or a router, it is not a true beginner kit.
Good craft shops carry a wide range of such starter projects, and browsing a store like Michaels gives a clear sense of what a first box should include. For the hand tools you may still need, The Home Depot stocks clamps and sandpaper in every size a small box demands. Sewing and craft supply shops like JOANN are useful too, since they carry the felt and fabric many kits call for.
Types and Options
Kits come in several shapes, and each teaches a slightly different set of skills.
Flat-pack kits. These are the most common. Thin boards arrive in a box with a plan. You glue, clamp, and finish. They are the fastest path to a finished box.
Blank kits. The wood is cut roughly and you trim it to size. These ask for a little more sawing and measuring. They suit a beginner who already owns a hand saw and wants more practice.
Plans-only options. Some sellers offer only the drawings. You buy the wood yourself. This costs less but asks much more of you. Save this route for your second or third box.
Decorative styles. Some kits add inlay strips, brass corners, or a small carved lid. These extras make the box prettier but add steps. For a first build, choose the plainest kit you like. You can add decoration to your next box.
Trays and dividers. Some kits include a small lift-out tray or dividers that split the box into sections. A tray is a nice touch and teaches one more skill: fitting a piece that must slide in and out with ease. If your kit offers one, it is a fair step up from the plainest box without being much harder.
Box size. Starter kits range from tiny ring boxes of four inches across to larger boxes of twelve inches that hold a full set of necklaces. A medium box of about eight by six inches is a good first choice. It is big enough to hold real jewelry and small enough to clamp with ordinary hand clamps.
If you enjoy the craft side of the work, a related skill is worth a look later: the best wood burning kit for diy crafts lets you burn a simple design into a finished lid. And for a different first craft entirely, the best jewelry making kit for beginners adults shows the craft from the jewelry side rather than the wood side.
Cost and Price
Prices for a diy jewelry box kit for woodworking beginners stay modest. A simple flat-pack kit usually runs between fifteen and forty dollars. Kits in fine hardwoods, or with brass hardware and real felt lining, can reach fifty to eighty dollars.
Beyond the kit, plan for small extra costs. Wood glue, a set of small clamps, sandpaper in a few grits, and a bottle of finish add perhaps twenty to forty dollars if you own none of them. These are one-time purchases. They will serve every wood project you build for years.
The total first cost is small compared with buying a finished hardwood box of the same quality, which often sells for eighty dollars or more. You pay less money, you learn a skill, and you own the tools for the next build.
For price comparison, a look at Lowe’s or Woodcraft helps you learn what wood and small hardware should fairly cost. Woodworking magazines like Wood also run buyer guides that show what a fair price looks like for small box projects.
Care and Upkeep
A wooden jewelry box asks for little care, but a few habits keep it handsome for years.
Dust it gently. A soft dry cloth is enough. Stay away from wet cloths and spray cleaners, which can cloud a simple oil or wax finish.
Keep it out of hard sun. Long hours in direct sunlight can fade the wood and dry out the felt lining. A dresser top away from the window is the right home.
Refresh the finish. Once a year or so, rub on a thin coat of furniture wax or oil. This takes ten minutes and keeps the wood from looking dry.
Care for the felt. A small brush lifts dust from the lining. If the felt tears, new self-adhesive felt can be cut to size and pressed in, an easy repair even for a beginner.
Store with care. Heavy metal pieces can scratch the inside. A small cloth pouch for rings and a separate corner for bracelets keeps both the jewelry and the box in good shape.
Practical how-to advice for keeping small wooden items sound is easy to find. The project pages at Family Handyman and This Old House carry many articles on basic wood care, and the finish guides at Bob Vila explain oils and waxes in plain language. Art and craft supplies, including fine brushes and wax, are sold at Blick, which many woodworkers use for finishing supplies.
Safety
Even a small project asks for basic care.
Read the instructions first. Know every step before you cut, glue, or clamp anything.
Protect your eyes and lungs. Wear safety glasses when you sand or saw. Sand in a room with air moving, or wear a simple dust mask. Fine wood dust is not kind to lungs.
Use sharp edges with care. A hobby knife or chisel should cut away from your body. Keep fingers clear of the blade path.
Read glue and finish labels. Wood glue and finishes carry their own cautions. Work where air can move, and keep finishes away from open flame. Store both out of the reach of children.
Clamp before you trust. Wet glue is slippery. A part held only by hand can slide and ruin a joint. Clamps cost little and save much trouble.
Frequently Asked Questions
Do I need power tools to build a kit box?
No. A true beginner kit needs only hand tools: glue, small clamps, sandpaper, and a screwdriver for the hinges. If a kit asks for a saw or a drill, read the reviews to see whether owners finished it by hand.
How long does a first box take?
Most beginners finish in one weekend. A common rhythm is to glue the box on Saturday, sand and stain on Sunday, and apply the final coat of finish the next evening. Letting each coat dry fully is the slowest part.
What wood is best for a first kit?
A mild hardwood like oak or maple is a safe choice. It sands cleanly, holds glue well, and takes finish evenly. Pine is softer and easier to dent but also fine for a first try if the kit you like uses it.
Can a kit box hold heavy jewelry?
Yes, within reason. A glued hardwood box with a solid bottom holds rings, necklaces, and watches without strain. If you plan to store many heavy bracelets, check that the bottom panel sits in a groove rather than being glued on flat.
Should I stain or paint my first box?
For a first build, a clear finish is easiest. It shows the wood grain and hides no mistakes, but it also asks for the least skill. Stain adds color and needs even application. Paint is forgiving of small gaps but hides the wood. Any of the three is fair; clear oil is the simplest start.
What if my joints have small gaps?
Small gaps are normal in a first box. Wood filler tinted to match the wood, pressed into the gap and sanded smooth before finishing, makes them nearly invisible. Every woodworker uses filler sometimes, even on later projects.
Is this a good gift project?
It is one of the best. A handmade box with the giver’s care built into it pleases people far more than its cost suggests. Make your first box for yourself to learn, and make the second for someone you love.
A Short Final Word
A diy jewelry box kit for woodworking beginners asks little and returns much. You spend a weekend, you learn to measure, glue, sand, and finish, and you end with a box that sits on a dresser and says that you made it. No grand workshop is needed and no years of study stand in the way. Start with the plainest kit you like, follow the plan one step at a time, and let the first box be what it is: a beginning.
For those who catch the leatherworking bug from their first kit, the leather crafting tools kit for beginners usa is a natural next craft to explore. Whatever you build next, keep the first box. Years from now, it will still be the one that matters most.
References
Blick Art Materials. (n.d.). Art and craft supplies. https://www.dickblick.com Bob Vila. (n.d.). Home improvement advice. https://www.bobvila.com Family Handyman. (n.d.). DIY home repair and maintenance. https://www.familyhandyman.com JOANN. (n.d.). Fabric and craft supplies. https://www.joann.com Lowe’s. (n.d.). Home improvement products. https://www.lowes.com Michaels. (n.d.). Arts and crafts supplies. https://www.michaels.com The Home Depot. (n.d.). Home improvement products. https://www.homedepot.com This Old House. (n.d.). Home renovation guidance. https://www.thisoldhouse.com Wood Magazine. (n.d.). Woodworking projects and plans. https://www.woodmagazine.com Woodcraft. (n.d.). Woodworking tools and supplies. https://www.woodcraft.com
Was this guide helpful?

About Lisa Anderson
The My Garden US editorial team writes practical, in-depth home and garden guides for American homeowners — tested advice, no fluff.
You May Also Like
DIY Bath Bomb Kit for Gifts and Crafts: A Complete Guide
June 5, 2026 0 views
Paper Mache Kit for Kids Art Projects Home: A Parent’s Buying and Project Guide
March 28, 2026 0 views
The Best Craft Table Foldable for Small Apartments: A Practical Guide
February 19, 2026 0 views