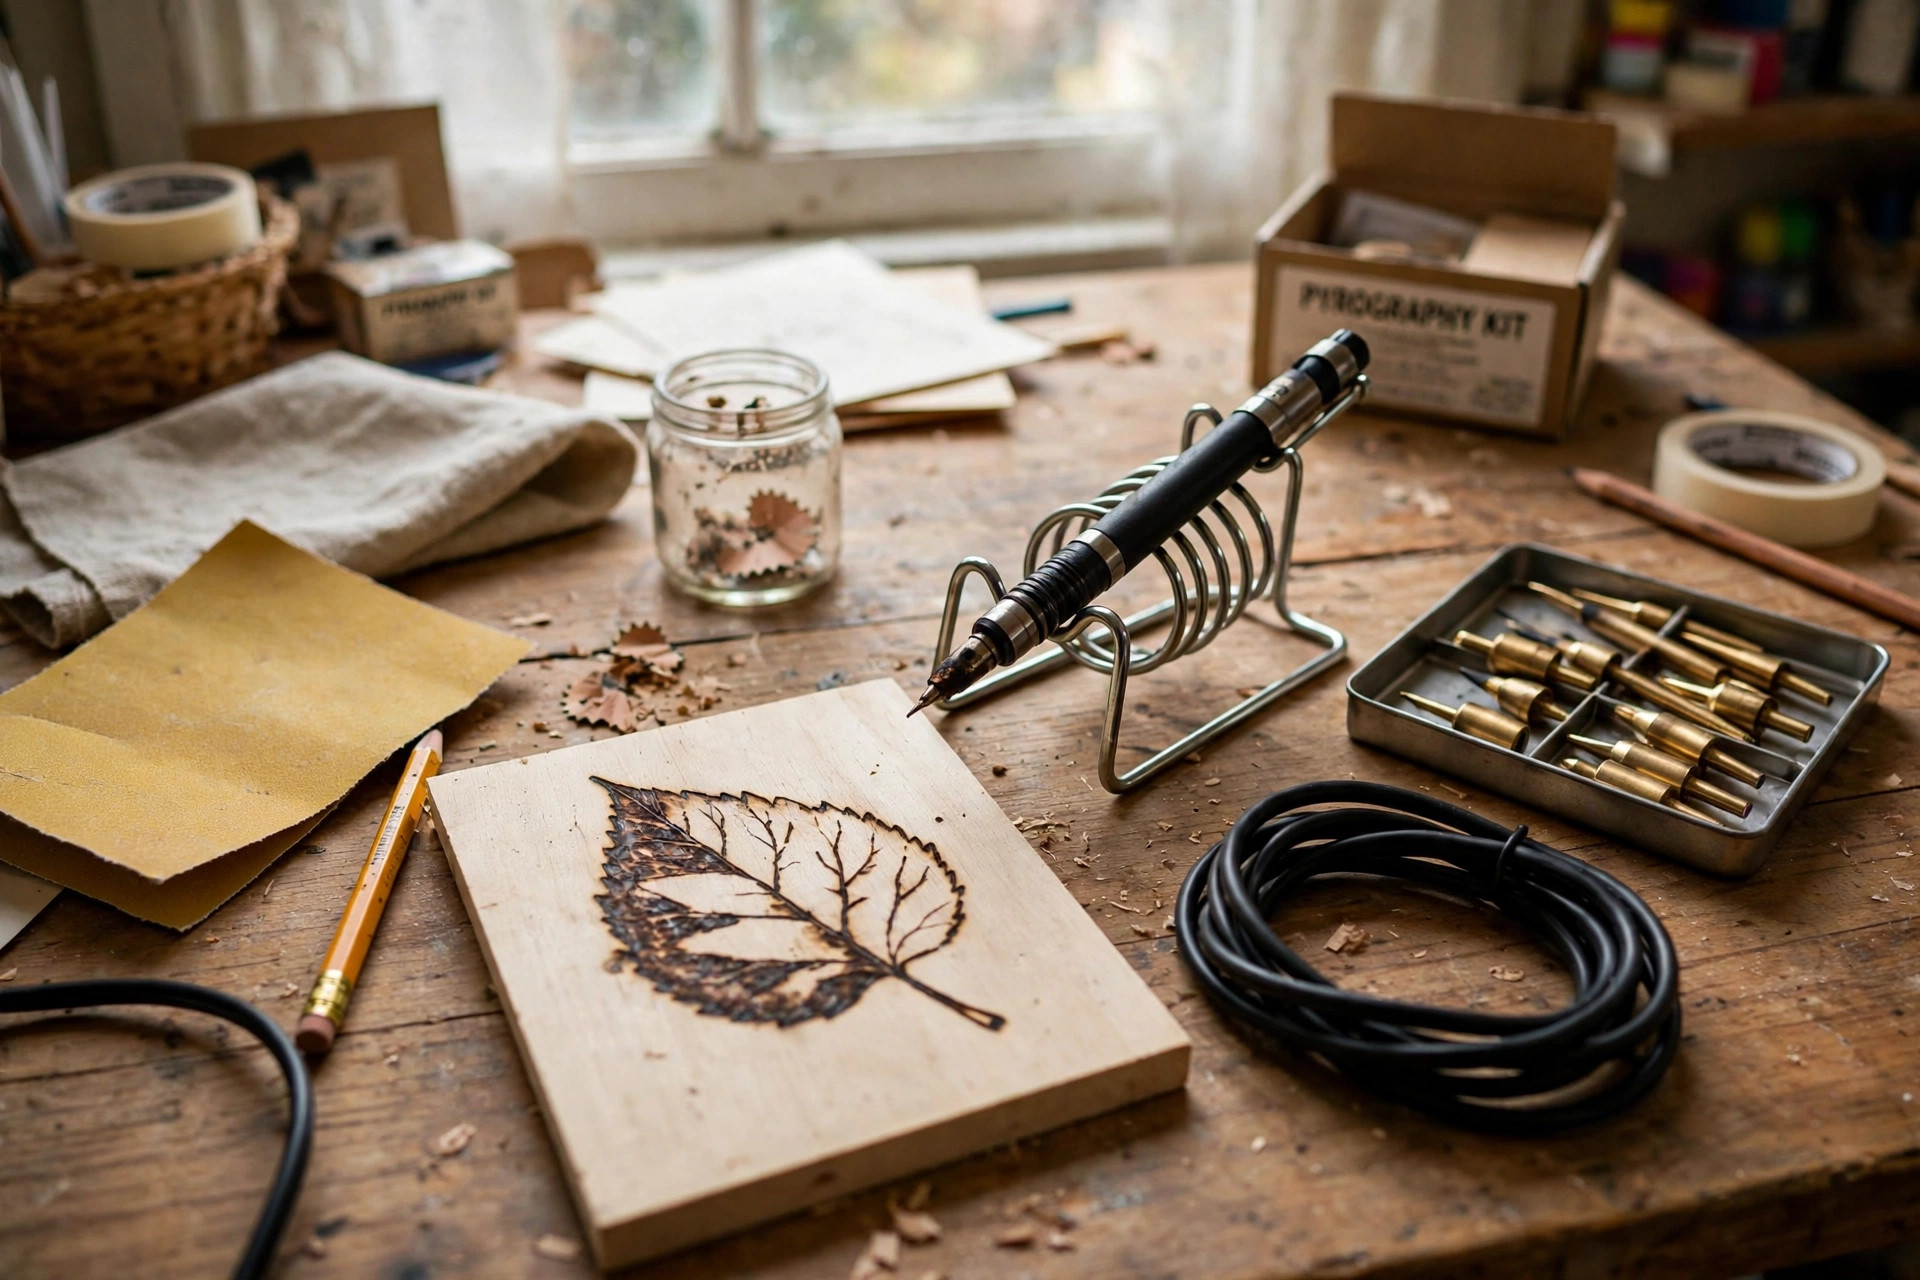

Wood burning has a long and quiet history. For years, craft makers used hot tools to draw lines, shade, and write words on wood. Today the craft is called pyrography, and it is easier than ever to start. The best wood burning kit for diy crafts is one that fits your hand, heats in a safe and steady way, and comes with the tips and tools you need for real home projects.
Many people buy their first kit for a simple reason. They want to make gifts, signs, and art by hand. A burned name on a cutting board feels warm and personal. A nature scene on a plaque can hang in a home for years. With the right kit and a little practice, these projects are within reach for almost any adult or teen.
This guide will walk you through the choice. You will learn what matters in a kit, how the main types differ, what to pay, how to care for your tools, and how to stay safe while you work. You will also find answers to the most common questions from new wood burners.
Why the Right Kit Matters
A wood burning tool is simple, but it is still a hot instrument. A poor kit can make the work hard and dull. A good kit makes the work calm and fun. When the tip holds its heat, lines flow smooth and even. When the grip stays cool, your hand does not tire. When the stand is firm, the hot pen rests in a safe place between strokes.
The best wood burning kit for diy crafts also grows with you. New users start with straight lines and simple letters. As skill grows, the same kit should allow shading, texture, and fine detail. Kits that come with many tips give you room to try new styles without buying a second set of tools.
Cost is another reason to choose with care. Kits range from under twenty dollars to over one hundred. A very cheap kit may lack heat control or carry weak tips that bend. An overpriced kit may add tools you will never use. The middle range often holds the best value for home craft work.
What to Look for When You Choose: Best Wood Burning Kit for Diy Crafts
Heat Control
Heat control is the first thing to check. Some pens have only one heat level. Others let you turn a dial from low to high. A variable dial is worth the extra cost. Soft wood needs less heat. Dark, deep lines need more. A dial lets you match the heat to the job and avoid scorch marks.
Tip Quality and Variety
The tip is the part that touches the wood. Look for kits with many tips: at least ten is good. Common tips include the universal point, the shading tip, the flow tip for writing, and the hot knife for cutting lines. Tips made of solid brass or wire hold heat well and last long.
Comfort and Grip
You will hold the pen for an hour or more on a big project. A soft grip helps. So does a short, light pen body. If the kit uses a separate power unit with a cord to the pen, the pen itself stays light and cool. That design is a plus for long work sessions.
Stand and Safety Parts
Every kit should include a stand. The stand holds the hot pen when your hands are free. Look for a heavy base that will not tip over. Some kits add a cleaning pad or a brass sponge to wipe the tip. These small parts keep the tool safe and clean.
Power and Cord Length
Most craft kits run on standard home current. Check the wattage. Pens from 25 to 60 watts suit most wood crafts. A long cord, at least six feet, gives you room to move around your table. For craft tables with storage drawers, keeping tools tidy is easier with a best craft table with storage for sewing room nearby.
Types of Wood Burning Kits
Solid Point Pens
The solid point pen is the classic starter tool. A solid brass tip screws into the end of the pen. It heats by its own resistance. These pens are simple and tough. They cost less and are easy to find. The downside is heat. They run at one temperature and take time to cool.
Wire Nib Pens
The wire nib pen is the choice of many skilled burners. A thin wire tip heats in seconds and cools just as fast. A control unit sets the exact heat. The pen stays light and the grip stays cool. Wire pens cost more, but they give fine lines and soft shading that solid pens cannot match.
Craft Pens with Stencils
Some kits are made for beginners and children under adult care. They include stencils, practice boards, and a simple pen. These sets are good for a first try. They teach line control and heat feel. Many buyers later move up to a wire nib pen once the basics are clear.
Multi Tool Stations
A multi tool station includes the pen, extra tips, a heat gun head, or even a soldering tip. These sets promise many uses in one box. They suit crafters who like to switch between tasks. Just check that the burning pen itself is of good quality, since it is the part you will use most.
What Wood to Use
The tool is only half of the craft. The wood matters too. Soft woods burn clean and take detail well. Basswood is a favorite of new burners. It is light, smooth, and low in sap. Pine is cheap and easy to find, but its grain can fight fine lines. Poplar and birch plywood also work well for flat projects like signs.
Avoid treated wood, painted wood, and pressed board. These release fumes that are not safe to breathe. If you plan to paint your burned design later, wood craft blanks for painting and signs give you clean, ready surfaces. When you want to add color with paint after burning, a best craft paint brushes set for acrylics rounds out the project.
Cost and Price Ranges
Prices for the best wood burning kit for diy crafts fall into three bands.
Under $25. Starter pens with a few tips. Fine for a first project or a gift. Heat control is often absent. Expect to upgrade if you take up the craft.
$25 to $60. The sweet spot for most home crafters. You get variable heat, ten to thirty tips, a stand, stencils, and sometimes practice wood. This range holds the best value.
$60 to $150. Wire nib systems and pro stations. Precise heat, fast tips, cool grips. Buyers in this range usually burn often and want pro results.
Watch for hidden costs. Extra tips, replacement pens, and wood blanks add up. A kit that includes practice boards saves you a store trip on day one.
Step by Step: Your First Project
1. Set up your space. Work on a firm table in a room with fresh air. Lay a heat proof mat under your work. 2. Choose your wood. Sand a basswood board smooth with fine sandpaper. Wipe off the dust. 3. Draw your design. Sketch lightly in pencil, or trace a printed design with transfer paper. 4. Heat the pen. Place the pen in its stand and turn on the heat. Let it warm fully before you start. 5. Practice first. Run lines on scrap wood. Try straight strokes, curves, and dots. Learn how fast to move. 6. Burn your design. Move the pen slow and steady. Let the heat do the work. Do not press hard. 7. Add shade. Use a shading tip at lower heat for soft tones and depth. 8. Cool and finish. Turn off the tool. Let the pen cool in its stand. Sand lightly and seal with a clear finish if you wish.
Take your time. Rushing leads to wobbly lines and burns that are too deep. Most new users improve a great deal within their first three or four boards.
Care and Upkeep
A wood burning kit lasts for years if you treat it well. Clean the tip often during work. A quick wipe on a brass sponge removes built up sap and keeps lines clean. Let the pen cool in its stand before you change a tip, and use pliers for hot tips, never your fingers.
Store tips in their case so they do not bend. Coil the cord loosely; tight bends break wires inside. Once a year, check the cord and plug for wear. If the pen smells of burnt plastic or the heat jumps on its own, stop using it and replace it. Safety always comes first.
Safety Rules You Must Follow
Wood burning is safe when you respect the heat. Keep these rules in mind.
– Work with air flow. Open a window or use a small fan. Wood smoke can irritate the lungs. – Never leave a hot pen alone. Turn the tool off when you step away. – Use the stand. Always rest the pen in its stand, never on the table. – Keep kids and pets away. The pen looks harmless but burns skin on contact. – Wear a mask for long sessions. A simple dust mask cuts down on fine smoke. – Unplug when done. Do not trust the switch alone. Pull the plug after each session.
Burning painted or treated wood is not safe. The fumes can be toxic. Stick to clean, natural wood, and your craft stays a healthy hobby. For general home craft safety habits, craft guides at Family Handyman and Bob Vila offer solid advice.
Where to Buy
Most buyers start at a craft store or a big home center. Michaels and Joann carry starter kits, tips, and basswood blanks. Dick Blick is a good source for artist grade tools and wood. Home Depot and Lowe’s stock pens, sandpaper, and sealers in the tool aisle. Walmart often has the lowest price on entry level kits.
Before you buy, read a few reviews on The Spruce and check repair and how to guides at This Old House. If you plan to pair wood burning with other crafts, a best hot glue gun for craft projects home is a handy partner tool for mixed media work.
FAQ
What is the best wood burning kit for diy crafts for a total beginner? A starter kit with a solid point pen, variable heat, at least ten tips, a stand, and practice boards is ideal. It teaches the basics at a low cost. Move up to a wire nib pen later if the craft takes hold.
How long does it take to learn wood burning? Most people burn clean lines within a week of practice. Simple letters and borders come first. Fine shading and portrait work take months. Short daily sessions build skill faster than one long weekend.
Can I use a wood burning kit on cutting boards? Yes, if the board is made of clean hardwood and you seal it with a food safe oil after burning. Do not burn the center of a board that will see heavy knife use. Decorative boards are the safest choice.
What is the difference between pyrography and wood burning? They are the same craft. Pyrography is the formal name, from Greek words for fire writing. Wood burning is the common name used in craft stores and guides.
Do I need a mask when wood burning? For short sessions near an open window, most adults are fine without one. For long sessions, or when burning woods like pine that give more smoke, a simple dust mask is smart.
Why are my lines dark and blobby? The heat is too high or you are moving too slow. Turn the dial down and keep the pen moving at a steady pace. Let the heat melt the line into the wood instead of pressing down.
A Final Word
The best wood burning kit for diy crafts is not the most costly one. It is the one you will pick up again and again. A steady pen, good tips, and safe habits turn a simple board into art you can give with pride. Start with a small project, practice on scrap wood, and let each board teach you something new. In time, the smell of warm wood and the feel of a smooth line become their own reward.
References
Blick Art Materials. (n.d.). Art and craft supplies. https://www.dickblick.com Bob Vila. (n.d.). Home improvement advice. https://www.bobvila.com Family Handyman. (n.d.). DIY home repair and maintenance. https://www.familyhandyman.com JOANN. (n.d.). Fabric and craft supplies. https://www.joann.com Lowe’s. (n.d.). Home improvement products. https://www.lowes.com Michaels. (n.d.). Arts and crafts supplies. https://www.michaels.com The Home Depot. (n.d.). Home improvement products. https://www.homedepot.com The Spruce. (n.d.). Home and garden advice. https://www.thespruce.com This Old House. (n.d.). Home renovation guidance. https://www.thisoldhouse.com Walmart. (n.d.). Everyday low prices. https://www.walmart.com
Was this guide helpful?

About Sarah Mitchell
The My Garden US editorial team writes practical, in-depth home and garden guides for American homeowners — tested advice, no fluff.
You May Also Like
Stencil Set for Wall Painting DIY Home Decor: A Practical Guide
July 3, 2026 0 views
Best Embroidery Starter Kit with Hoop Patterns: A Plain Guide for Beginners
September 17, 2026 0 views
Best Cordless Glue Gun for Detailed Craft Work
July 5, 2026 0 views