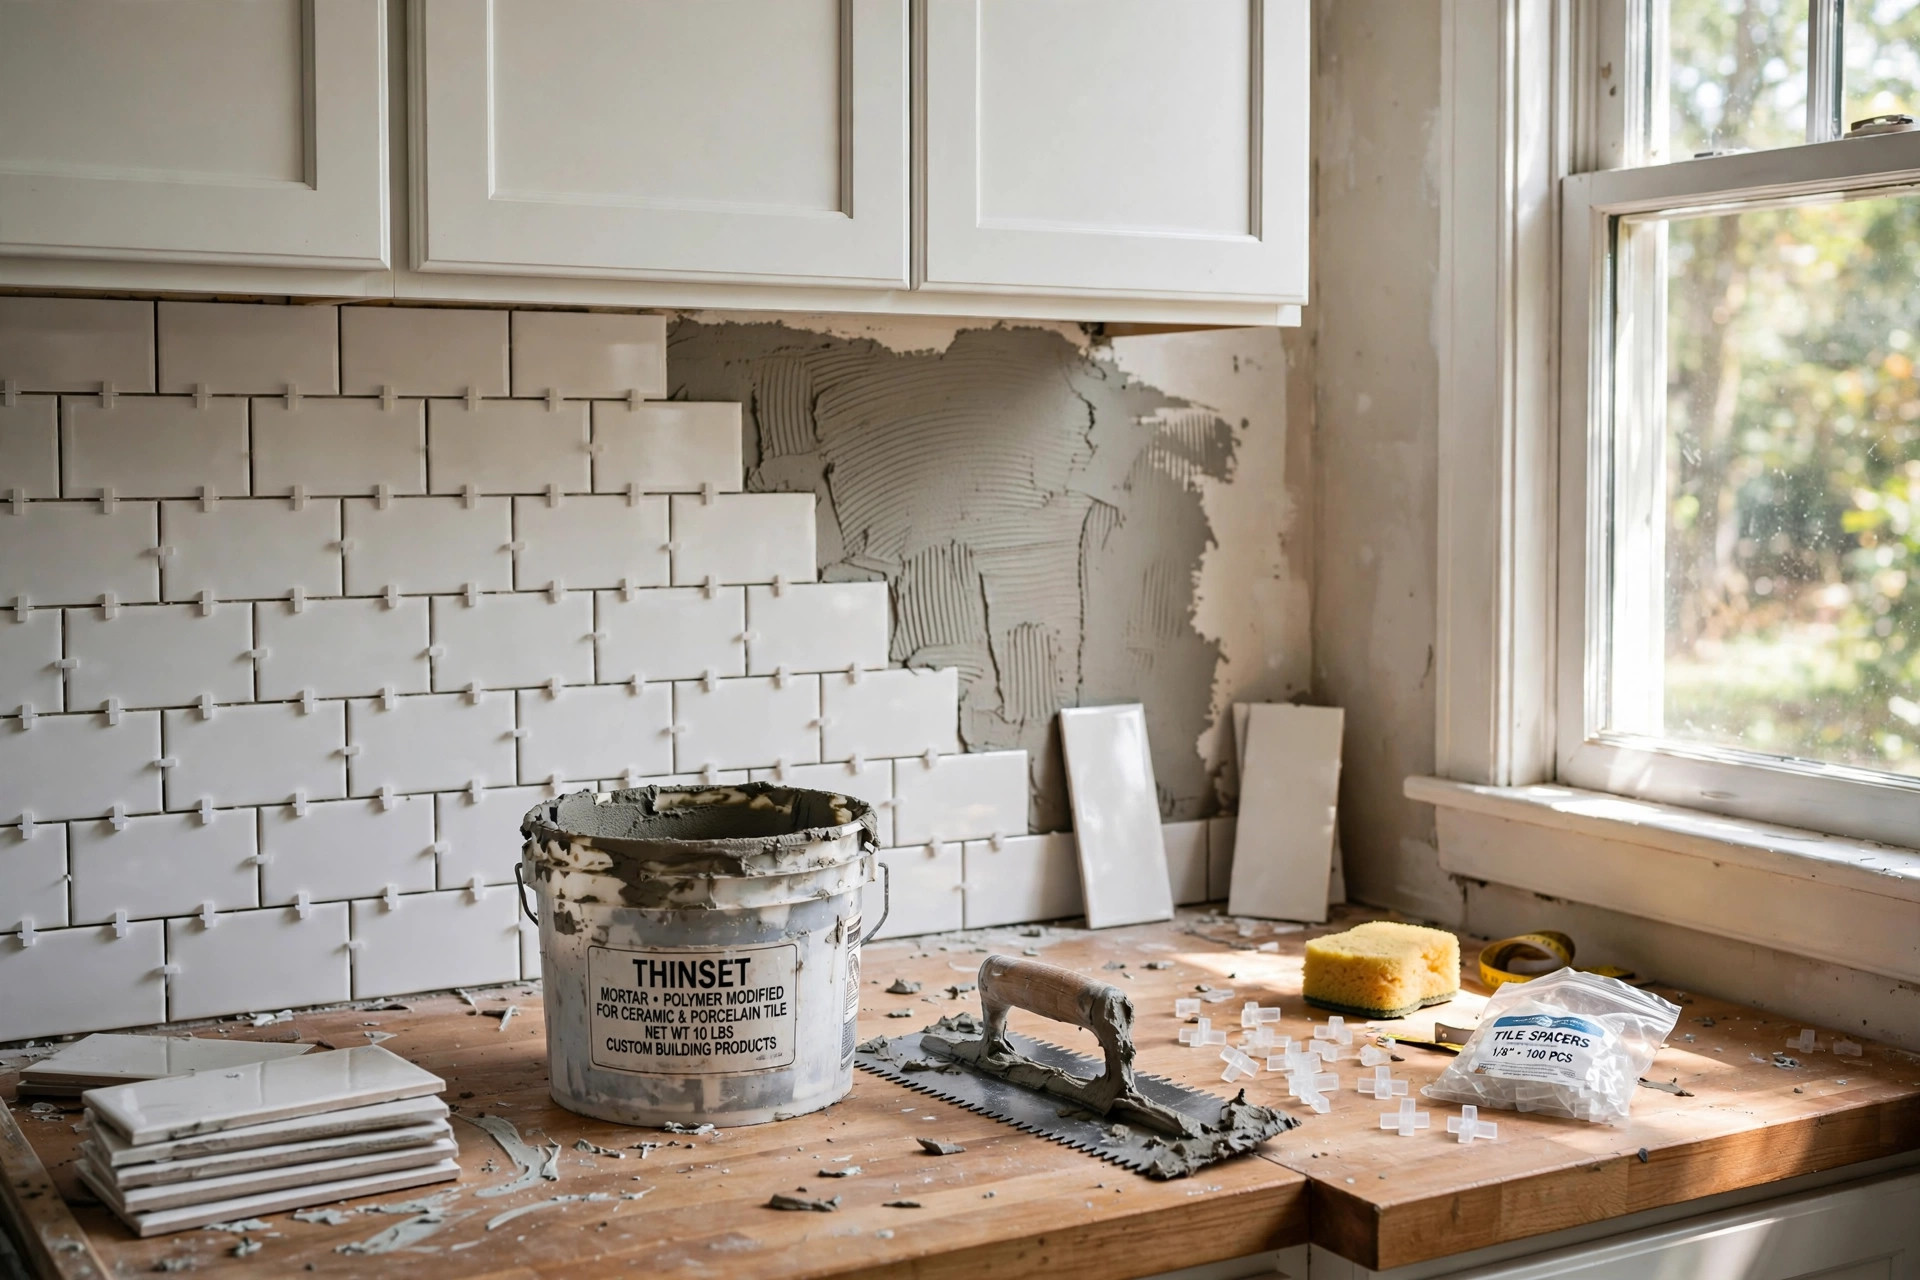

This installing tile backsplash for beginners guide takes you through the work one step at a time. You do not need past skill with tile. You need plain tools, plain care, and one free weekend. A backsplash is the small strip of wall between your counter and your upper cabinets. It catches splashes from the sink and the stove. Tile keeps that wall clean and easy to wipe. When it is set well, it also makes the whole kitchen look new.
Why a Tile Backsplash Matters
A painted wall behind a stove takes grease and steam every day. Over time the paint stains. It peels near the heat. Scrubbing wears it thin. Tile does not have these problems. Glazed tile has a hard glass face. Water and grease sit on top of it.
A backsplash also guards the wall joints. Where the counter meets the wall, water creeps into the seam. Tile and grout seal that seam. That keeps the drywall dry.
There is also the plain pleasure of the look. A kitchen backsplash is small. That small size makes it a good first tile job. You learn to spread mortar, set tile, cut tile, and grout. These same skills serve in a full terrazzo tile flooring cost per square foot project later, or in a bath.
Tools and Materials You Will Need: Installing Tile Backsplash for Beginners Guide
Gather your gear before you start.
For the wall work you need a level, a tape measure, a pencil, a notched trowel, tile spacers, a bucket, sponges, and a tile cutter or wet saw. A small manual cutter works for plain wall tile. For thick porcelain, rent a small wet saw for the day. You also need a grout float, clean rags, and a caulk gun.
Your materials are the tile, thinset mortar, grout, and caulk. Buy thinset made for wall tile. Choose unsanded grout for joints under one eighth of an inch. Wider joints take sanded grout. Buy a tile sealant if your grout is not the sealed kind. Many home centers carry all of this in one aisle, and the staff at a large store such as The Home Depot can point you to the right bags.
Measure the wall first. Multiply width by height in inches. Divide by 144. That gives you square feet. Add ten percent extra tile for cuts and breakage.
Before you buy, clear the wall. Turn off power to outlets on that wall at the breaker. Take off outlet covers and switch plates. Fill any holes with patch compound. Let it dry. Sand it smooth. Wipe the dust off with a damp cloth. A clean, sound wall is half the job done right.
Choosing Your Tile
Wall tile comes in many shapes. The old standby is the three-by-six subway tile. It is cheap, easy to cut, and forgiving to lay. Square tiles in four or six inches are also simple for a first job. Small mosaic sheets look rich and need fewer cuts. Large tiles cover more wall but are harder to level by hand.
Glazed ceramic is the best pick for a beginner. It cuts clean. It sticks well. It costs little. Porcelain is harder and denser. It resists stains better but cuts slower. Natural stone tile is lovely, yet it needs sealing and more care. The product guides at Daltile show how each tile type behaves on a wall.
Look at the edge of the tile. Square edges lay in tight lines. Rounded edges forgive small gaps. Check the tile rating. Wall tile does not need the hard wear rating of floor tile. If you plan later work with tile floors, read up on wood look tile pros and cons reviews before you choose flooring material.
Pick a color that serves the kitchen. Light tile makes a dark kitchen feel larger. Gloss tile throws light around the room. Matte tile is quiet and hides finger marks. Buy one extra box. Tile lots change color between runs.
Planning the Layout
Layout is where beginners win or lose. A good layout hides cuts in the corners. A bad layout leaves a thin sliver of tile in plain view.
Find the center of the wall. Mark it with a light pencil line. Dry-lay a row of tile across the counter with spacers. See where the ends fall. You want near-full tiles at the outer edges and even cuts at both ends. Move the center line a half tile if one end shows a sliver less than half a tile wide.
Plan the vertical lines too. Most backsplashes run from the counter top to the bottom of the upper cabinets. That is usually eighteen inches. Measure the tile height with spacers. See how the top row lands. A full tile at the top looks best under a cabinet. Cut the bottom row if needed. The cut edge hides under the counter line.
Mark your lines with a level, not by eye. Walls and counters are rarely true. A level line is the only honest guide. Snap light chalk lines or draw soft pencil marks. Dark marks show through thin grout.
Think about outlets. They sit in the middle of your tile field. You will cut tile around them. Plan so an outlet box lands near the center of a tile, not at a thin edge. Guides at Family Handyman walk through outlet cuts with clear pictures.
Setting the Tile, Step by Step
Work in small sections. Spread thinset on about two square feet of wall at a time. Use the flat side of the trowel to key the mortar in. Then comb it with the notched side at a steady angle. The ridges should run one way. Thinset skins over fast. If it dries before the tile lands, scrape it off and spread fresh.
Press the first tile into the mortar with a slight twist. Set it on your level line. Push the next tile beside it. Slip a spacer between them. Keep checking with the level. Mortar stays open for about fifteen to twenty minutes. That is your working window. The how-to articles at This Old House stress this point for good reason.
Cut tile as you reach the ends. For straight cuts, a manual snap cutter is enough for ceramic. Score the face once, firm and even. Snap the tile along the score. For corners and outlet holes, use nippers. Bite small pieces. Rushing breaks the tile. For porcelain, use the rented wet saw. Keep water on the blade. Cut slow. Let the blade do the work.
Wipe mortar off the tile faces as you go. Check every few tiles with the level. A wall that drifts at tile five will be badly off at tile twenty. Small fixes now save hard work later.
Let the wall rest overnight. Thinset needs a full day to set hard. Do not touch the tiles.
Grouting and Sealing
Grout fills the joints and locks the tiles together. Mix it to a thick peanut-butter texture. Let it slake for ten minutes. Mix it again. Work it in with a rubber grout float held at an angle. Push it deep into the joints. Pull the float across the tile faces to clear the excess.
Wait about fifteen minutes. The grout will firm up but not harden. Wipe with a damp sponge. Rinse the sponge often. Haze on the tile is normal. A second wipe after an hour clears most of it. Tile care guides from makers like Shaw Floors and Mohawk Flooring give the same order of steps.
Where the tile meets the counter, do not use grout. Counters move a hair with heat and use. Grout cracks there. Use kitchen caulk in a matching color. Run a smooth bead. Tool it with a wet finger. This one line saves you from cracks that would ruin the look in a year.
Seal the grout if the maker calls for it. Some new grouts seal themselves. Old-style cement grout needs a sealant. Apply it with a small brush. Wipe the tile faces clean. Sealed grout resists coffee and grease stains.
Cost and Price
A backsplash is one of the cheapest tile jobs. The wall area is small. Material costs stay low. Here are plain numbers for a normal kitchen wall of about thirty square feet.
Glazed ceramic tile runs from one to five dollars a square foot. Mosaic sheets run three to eight dollars. Porcelain runs three to seven dollars. A bag of thinset costs fifteen to twenty-five dollars. One bag covers your wall. Grout costs ten to twenty dollars. Caulk, spacers, and patch supplies add about twenty dollars more.
If you own the tools, the whole job costs under two hundred dollars. If you rent a wet saw for one day, add fifty to seventy dollars. New tools for a garage or shop differ from this list, but for tile you need little beyond the basics. For comparison with other tile work, see the notes on best garage floor mats for winter usa before you spend on unrelated flooring gear.
Hiring a tile setter changes the math. Labor for a backsplash runs five to fifteen dollars a square foot in most towns. A thirty-square-foot wall may cost three hundred to six hundred dollars in labor alone.
Care and Upkeep
Tile care is simple. Wipe the wall with a damp cloth and mild dish soap once a week. Grease near the stove needs a bit more soap. A paste of baking soda and water lifts old grease without harsh chemicals.
Do not use acid cleaners on grout. Vinegar and lime cleaners wear cement grout down over the years. Use a cleaner made for tile and grout. Reseal cement grout once a year. The job takes twenty minutes. It keeps stains from setting.
Check the caulk line at the counter once a year. If it pulls away, cut it out and run a fresh bead. Caulk is cheap. Water damage is not.
Keep a few spare tiles in the garage. If one tile cracks years from now, you can replace it. Pop the cracked tile out with a grout saw and a chisel. Set a new one in fresh thinset. Grout it. The repair is invisible if the tile matches. Design sites such as HGTV often show how small repairs keep a kitchen looking new for years.
Safety
Tile work is safe when you respect the tools. Wear safety glasses for all cutting. Tile chips fly fast. Wear work gloves when you handle cut tile. Fresh cut edges are sharp as a knife.
Turn off the breaker before you touch outlets on the wall. Test the wires with a voltage tester. Tile and water near live wires are a bad mix. Keep the wet saw on a ground-fault outlet.
Dust is the quiet hazard. Cutting tile makes fine silica dust. Work in fresh air when you can. Wear a dust mask rated for fine particles. Sweep dust with a damp broom. Do not dry-sweep it into the air. Retailers like Lowe’s and LL Flooring stock masks and glasses in the same aisle as the tile.
Thinset and grout dry your skin. Wear gloves when you mix and spread them. Wash your hands well after. Keep children and pets out of the work area until the grout is set. The wall looks done before it is truly hard.
Frequently Asked Questions
How long does a first backsplash take? Most beginners finish in two days. Day one is prep and setting. Day two is grouting and cleanup. Thinset needs a night to harden between the two days.
Can I tile over old tile? Sometimes. The old tile must be sound, flat, and clean. Rough up the glaze with sandpaper so the new thinset grips. Most teachers of the craft prefer a clean wall. Stripping old tile takes a day but gives the best bond.
Do I need a wet saw? Not for plain ceramic wall tile. A manual snap cutter handles straight cuts. Nippers handle small notches. Rent a wet saw only if your tile is thick porcelain or natural stone. One day of rental is enough for a backsplash.
What if my wall is not straight? Few walls are. Use your level lines, not the wall edge, as your guide. Small gaps at the top hide under the cabinet. Caulk covers the rest. The eye reads straight lines, not true walls.
Should I seal the tile too? Glazed tile needs no sealer. The glass face is already sealed by fire. Seal only the grout, and only if the grout maker says so. Natural stone tile is the exception. Seal stone tile before you grout it. The how-to pages at The Spruce explain stone sealing in plain steps.
What grout color should I pick? Light grout shows stains faster. Dark grout hides them but can stain light tile during the grout job. A mid-tone grout hides dirt and looks clean for years.
A Short Final Word
A tile backsplash is the kindest first tile job in the house. The wall is small. The tile is light. The tools are few. Follow the order: clean wall, true lines, small sections of mortar, rest overnight, grout with care, caulk the base. Together they make a kitchen wall that will serve for decades. Take your time on the layout. Check your level often. When you stand back on Sunday evening and see the finished wall, you will know a craft you did not know on Friday.
References
Daltile. (n.d.). Ceramic and porcelain tile. https://www.daltile.com Family Handyman. (n.d.). DIY home repair and maintenance. https://www.familyhandyman.com HGTV. (n.d.). Home and garden ideas. https://www.hgtv.com LL Flooring. (n.d.). Hardwood, vinyl, and tile flooring. https://www.llflooring.com Lowe’s. (n.d.). Home improvement products. https://www.lowes.com Mohawk Flooring. (n.d.). Flooring products. https://www.mohawkflooring.com Shaw Floors. (n.d.). Flooring products. https://www.shawfloors.com The Home Depot. (n.d.). Home improvement products. https://www.homedepot.com The Spruce. (n.d.). Home and garden advice. https://www.thespruce.com This Old House. (n.d.). Home renovation guidance. https://www.thisoldhouse.com
Was this guide helpful?

About James Carter
The My Garden US editorial team writes practical, in-depth home and garden guides for American homeowners — tested advice, no fluff.
You May Also Like
Kitchen Backsplash Tile for White Cabinets: A Complete Guide
July 10, 2026 0 views
Luxury Vinyl Plank Flooring Reviews 2026: What to Know Before You Buy
September 26, 2026 0 views
Mexican Tile for Bathroom Floor for Sale: A Plain Buyer’s Guide
June 21, 2026 0 views