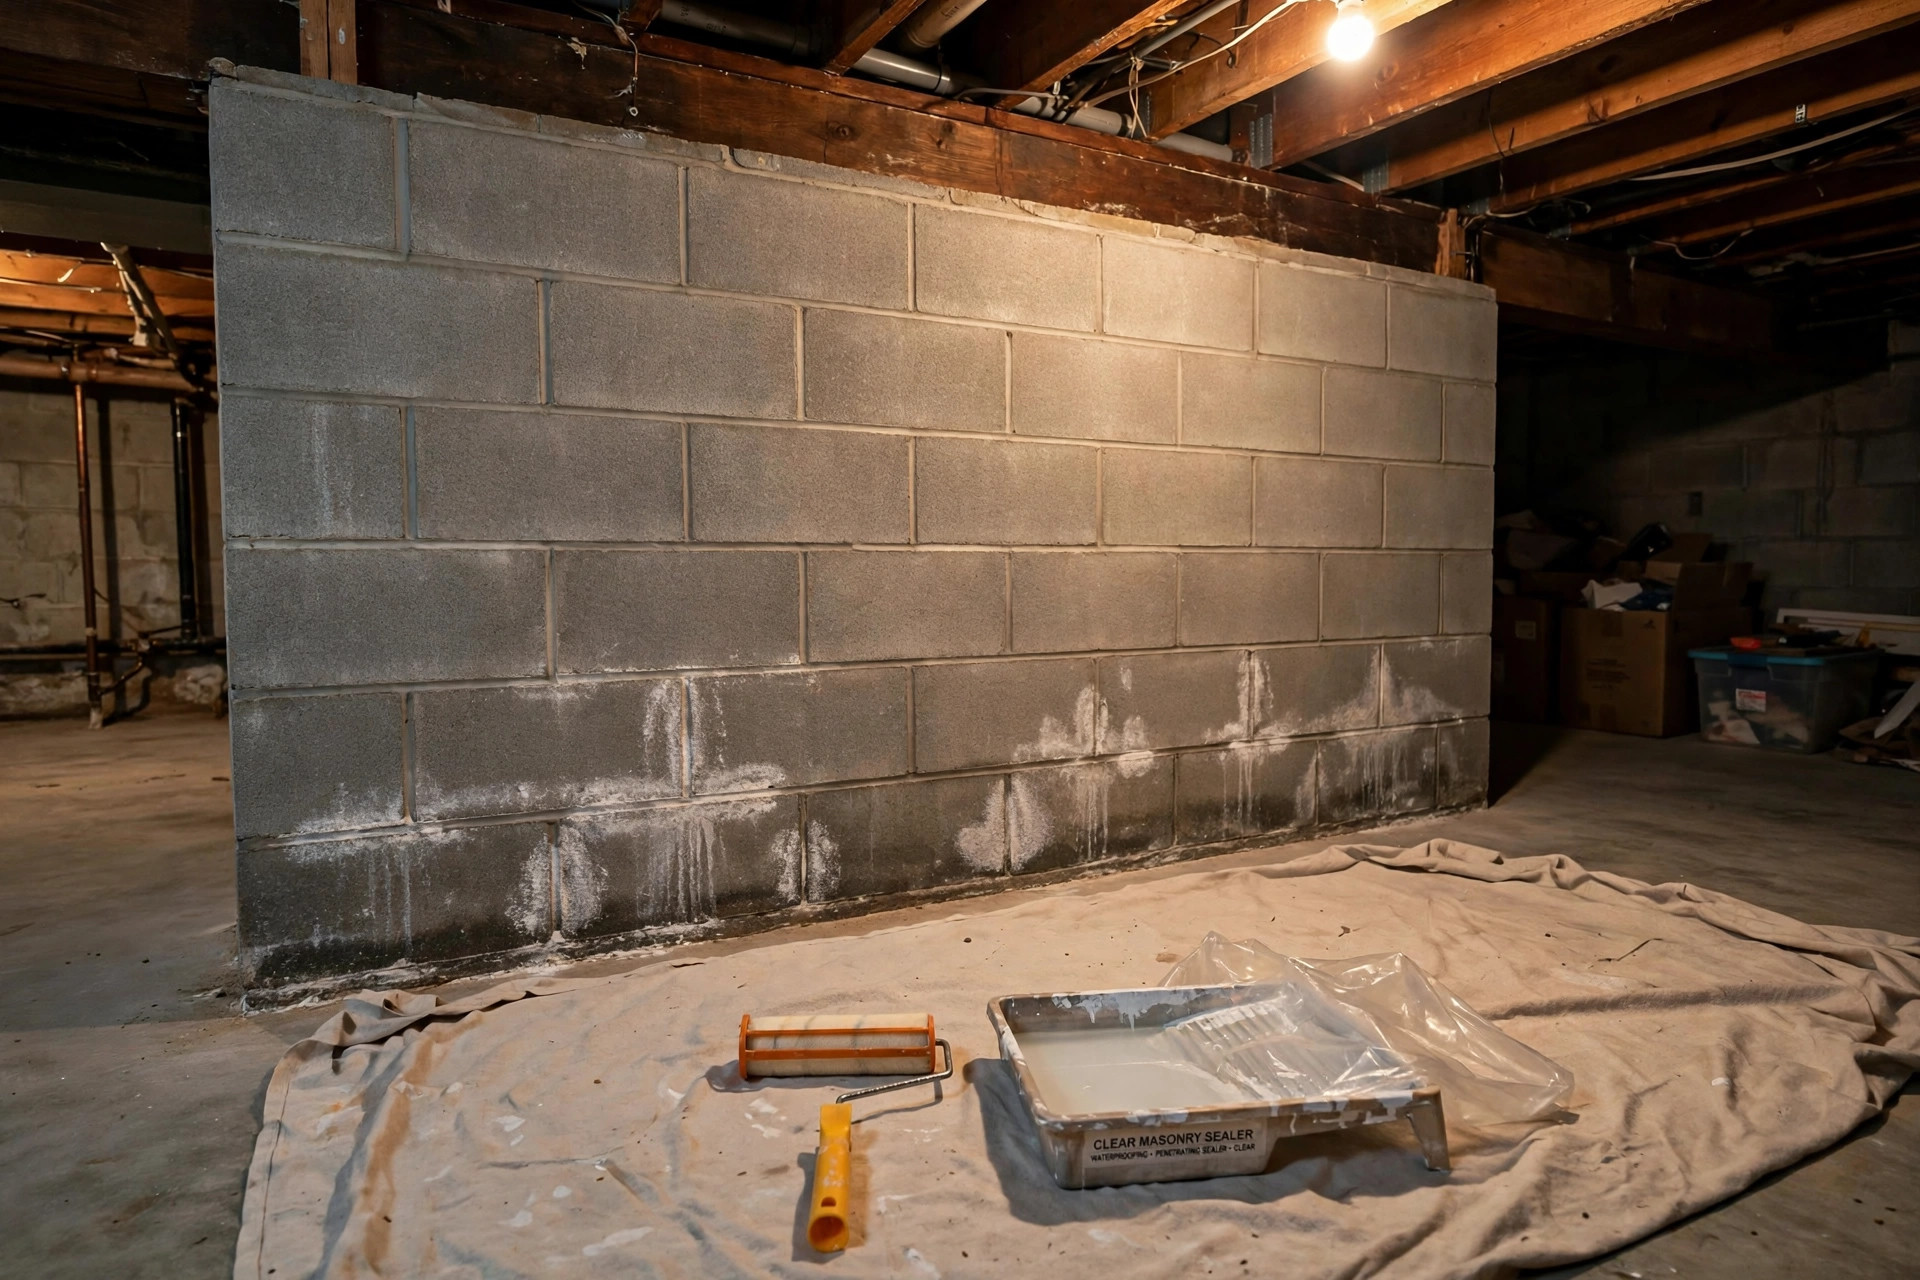

What You Need to Know
An efflorescence sealer for basement walls is one of the most searched fixes in the USA for white stains on concrete. These stains look like chalk dust. They sit on block walls and poured concrete. They often appear after a wet spring or a long winter. Many homeowners think the stains are mold. They are not. They are mineral salts. Water pulls the salts to the surface of the wall. When the water dries, the salts stay behind as white powder.
A sealer cannot push water back through a wall. It can only slow the movement of moisture into the wall from the inside face. If water pools against your foundation outside, a sealer will not fix that. But for walls that are mostly dry, with only light mineral staining, the right product can stop the white crust from returning.
What Efflorescence Is and Why It Appears: Efflorescence Sealer for Basement Walls Usa
Concrete, mortar, and block all contain natural salts. Ground water carries more salts. When water moves through a basement wall, it dissolves these salts. It travels toward the warm, dry air inside the basement. At the surface, the water evaporates. The salts cannot evaporate. They form a white crust.
Efflorescence itself is not harmful to health. It does not rot wood or spread like mold. But it is a sign that water is moving through your masonry. That signal matters. Constant moisture can lead to paint failure, musty smells, and in rare cases, damage to mortar joints. A basement waterproofing paint can help in some cases, but a dedicated sealer is often the first step for pure mineral staining.
Efflorescence comes back if the water keeps coming. Seal the salts in without stopping the water, and the pressure can push the coating off the wall. Deal with drainage first. Seal second.
What an Efflorescence Sealer Actually Does
A sealer for this job does two things. First, it fills the tiny pores in the concrete or block. Second, it forms a barrier that resists the passage of water vapor from the wall into the room. With less moisture reaching the surface, fewer salts are carried out. The white stains stop forming.
No sealer removes stains that are already there. You must clean the wall first. Paint a sealer over white crust and it will peel.
A sealer is also not a waterproofing membrane. It will not hold back standing water or stop a leak under pressure. If water runs down your wall during a storm, you need drainage work outside the house: grading soil away from the foundation, cleaning gutters, or adding drain tile. Guides at The Spruce and This Old House both stress exterior drainage as the true fix for wet basements.
Types of Sealers for Basement Walls
Penetrating Silane and Siloxane Sealers
These are the most common choice for efflorescence control. They soak into the concrete and line the pores with a water-repellent layer. Water beads on the surface instead of entering. The wall can still breathe, so trapped vapor escapes rather than pushing a coating off. They leave little sheen and pair well with paint made for concrete block walls.
Acrylic Film-Forming Sealers
These sit on the surface as a thin plastic film with a slight sheen. They block water and salts well on walls that stay fully dry, and they cost less than silane products. The weakness is adhesion. If moisture pushes from behind, the film can bubble and peel.
Epoxy and Urethane Coatings
These form a thick, hard shell that resists water and chemicals. They cost more and need careful mixing and a long cure time. They can trap moisture inside the wall if applied while the wall is wet. For plain efflorescence on an otherwise dry wall, they are usually more than you need.
Crystalline Waterproofing Products
These cement-based products grow crystals inside the pores of the concrete and block the paths water follows. They brush on like thick paint and leave a cement-gray finish. Most shoppers looking for an efflorescence sealer for basement walls in the USA still end up with a silane product.
How to Choose the Right Product
Start with the wall, not the shelf. Ask three questions.
First, is the wall dry most of the time? Press a square of plastic sheeting against the wall with tape and leave it for two days. If the side facing the wall is wet, moisture is coming through, and a surface sealer alone may fail. Fix drainage first.
Second, what is the wall made of? Poured concrete, concrete block, and brick take sealers a little differently. Block is more porous than poured concrete. It may need two coats. Product labels at stores like Lowe’s and Home Depot usually say which surfaces each product fits.
Third, will you paint over it? If yes, pick a penetrating sealer or a product the paint maker approves as a primer base. Paint makers such as Behr, Sherwin-Williams, and Benjamin Moore publish clear guidance on coating masonry. A film-forming sealer can act as a bond breaker under some paints, so check the labels of both products.
Read the coverage rate on the label, given in square feet per gallon. Measure your wall: height times length, minus large windows and doors. Buy about ten percent more than the math says. Running out mid-wall leaves a visible line.
Look for products rated for below-grade interior use. Above-grade sealers for driveways are not the same. Advice columns at Bob Vila often make this same distinction between interior and exterior masonry products.
Preparing the Wall Before You Seal
Preparation decides the result. A sealer applied over dust, grease, or old efflorescence will fail early. Take these steps in order.
Clear the room and move storage away from the wall. You need full access and air flow.
Brush off loose material with a stiff nylon brush. Knock down all white crust and flaking paint. Do not use a wire brush on soft mortar, which it can gouge.
Wash the wall. A mild solution of water and household cleaner removes dirt and oils. For heavy efflorescence, a masonry cleaner with a mild acid may be needed. Follow the label with care. Rinse well. Any cleaner left in the pores can interfere with the sealer.
Let the wall dry fully. A wall can look dry on the surface while the pores still hold water. Wait at least two to three dry days. A fan helps. A dehumidifier helps more. The sealer needs dry pores to soak in.
Repair cracks and holes. Fill small cracks with hydraulic cement or masonry caulk. A sealer bridges hairline pores, not a moving crack. Patch first, then seal.
Tape off what you do not want coated. Cover the floor edge with drop cloths and mask trim, pipes, and electrical boxes.
How to Apply the Sealer
Work on a dry day with the basement between about 50 and 90 degrees Fahrenheit. Cold slows curing. Heat speeds it too much. Open a window or run a fan for fresh air.
Stir the product. Do not shake it hard. Shaking whips in air bubbles that show up on the wall.
Apply with a brush, roller, or pump sprayer, as the label directs. A brush works the product into rough block best. A roller is faster on smooth poured walls. A sprayer covers large areas quickly but needs back-brushing to push the sealer into pores. On very porous block, work from the bottom up so drips do not streak dry areas. Keep a wet edge.
Apply the second coat while the first is tacky, or after the wait time the label gives. Two thin coats beat one thick coat. Thick coats skin over and trap solvent underneath.
Let the wall cure. Most products need 24 to 72 hours before the wall sees heavy moisture. Keep the room ventilated during the cure. Do not paint over the sealer until the label says it is ready.
Clean tools at once. Water-based products wash up with soap and water. Solvent-based products need mineral spirits. Never pour leftovers down a drain.
Cost and Price in the USA
Prices vary by type and brand. As a rough guide, a gallon of penetrating silane sealer runs about 30 to 60 dollars and covers roughly 100 to 200 square feet on block. Acrylic sealers run about 20 to 40 dollars per gallon. Epoxy kits run 60 to 120 dollars for a two-gallon kit.
A typical basement wall, say 8 feet high and 30 feet long, is 240 square feet. With two coats on block, you may need three to four gallons of penetrating sealer. That puts material cost between about 90 and 240 dollars. Add brushes, tape, drop cloths, cleaner, and patch material, and a full do-it-yourself job often lands between 150 and 350 dollars.
Hiring a contractor changes the math. A pro will charge for prep, which is most of the labor. Expect 3 to 7 dollars per square foot for a full prep-and-seal job on interior basement walls, depending on region and wall condition. Get two or three written quotes, and ask each contractor what product they use.
Do not forget the hidden costs. A dehumidifier rental adds to the bill if you do not own one. So does fixing the gutters or grading that may be the real cause. A cheap sealer over a wet wall is money lost. Spend the prep money first.
Care and Upkeep
A good sealer lasts years, but it is not forever. Sun does not reach a basement wall, so ultraviolet wear is not an issue. The enemy is water pressure from outside and physical damage from inside.
Check the walls each spring. Look for new white stains, damp spots, or peeling. Catching a small failure early keeps it small. Touch up worn areas with the same product. Keep the product label so you can match it years later.
Keep the basement humidity below about 50 percent. A dehumidifier with a drain hose does this without daily emptying. Lower humidity means less vapor drive through the wall. It also discourages mold and musty odors. This single habit does more for your walls than any coating.
Keep soil graded away from the foundation. The ground should slope down and away from the house for at least six feet. Keep gutters clean and downspouts extended away from the house. These outside steps protect the inside sealer. Ideas for keeping the whole lower level pleasant appear in home guides at HGTV, which often pair basement finishing advice with moisture control.
Do not stack boxes tight against the wall. A gap of a few inches lets air move along the surface and stops condensation behind stored goods.
Safety
Masonry sealers are chemicals. Treat them with respect. Work with fresh air moving through the space. A fan in a window, blowing out, clears fumes well. Wear nitrile gloves and safety glasses. If you spray, wear a respirator rated for organic vapors. A dust mask is not enough for solvent fumes.
Keep children and pets out of the work area until the wall is fully cured. Curing means the product has finished its chemical reaction, not just dried to the touch. The label gives the full cure time. Keep the number for poison control handy: 1-800-222-1222 in the USA.
Store leftover product in its original can, sealed tight, away from heat and out of reach of children.
Frequently Asked Questions
Will a sealer stop efflorescence forever?
No product stops it forever. A good sealer on a dry, well-prepared wall can hold for many years. If ground water pressure rises or drainage around the house fails, stains can return. Think of the sealer as one part of a system, with drainage, grading, and humidity control as the other parts.
Can I just paint over the white stains?
Paint alone will not hold. The salts keep pushing through. The paint will bubble and peel, sometimes within months. Clean the stains, apply a proper sealer or a waterproof paint made for basement walls, and then topcoat if you want color. Skipping the sealer step is the most common cause of failed basement paint jobs.
Is efflorescence dangerous to my health?
The white salts themselves are not toxic. They are minerals like calcium carbonate and sodium sulfate. But the moisture that brings them can feed mold, and mold can bother allergies and asthma. If you see dark or green growth along with the white stains, treat it as possible mold and clean it with proper protection.
Do I need to etch the concrete before sealing?
Most interior basement walls do not need acid etching. Etching is for smooth, dense concrete that resists penetration, like a power-troweled floor. Rough block and older poured walls usually take a sealer well after a good cleaning.
Can I apply sealer over old paint?
A penetrating sealer cannot soak through paint to reach the masonry, so applying it over paint defeats its purpose. Loose or peeling paint must be stripped first. When in doubt, remove the old coating and start from bare masonry.
How long should I wait before finishing the basement?
Wait until the sealer is fully cured and you have watched the wall through one wet season. Framing and drywall over a wall that still moves moisture will trap that moisture. The result is mold behind the walls where you cannot see it. Patience here saves thousands later.
A Final Word
An efflorescence sealer for basement walls in the USA is a sound, low-cost fix when the wall is mostly dry and the stains are light. Clean well. Pick a product made for below-grade masonry. Apply two thin coats. Keep the basement dry and the water outside. Done in that order, the white crust stays away, and the wall is ready for paint or for finishing. Skip the prep, and even the best product on the shelf will let you down.
References
Behr. (n.d.). Paints, primers, and stains. https://www.behr.com Benjamin Moore. (n.d.). Paints and stains. https://www.benjaminmoore.com Bob Vila. (n.d.). Home improvement advice. https://www.bobvila.com HGTV. (n.d.). Home and garden ideas. https://www.hgtv.com Lowe’s. (n.d.). Home improvement products. https://www.lowes.com Sherwin-Williams. (n.d.). Paints and coatings. https://www.sherwin-williams.com The Home Depot. (n.d.). Home improvement products. https://www.homedepot.com The Spruce. (n.d.). Home and garden advice. https://www.thespruce.com This Old House. (n.d.). Home renovation guidance. https://www.thisoldhouse.com
Was this guide helpful?

About Michael Thompson
The My Garden US editorial team writes practical, in-depth home and garden guides for American homeowners — tested advice, no fluff.
You May Also Like
Teak Oil vs Stain for Outdoor Furniture: A Plain Guide
September 15, 2026 0 views
Basement Waterproofing Paint Reviews and Cost: A Plain Guide for Homeowners
February 18, 2026 0 views
Two Tone Kitchen Cabinet Paint Ideas for American Homes
March 7, 2026 0 views