

Introduction
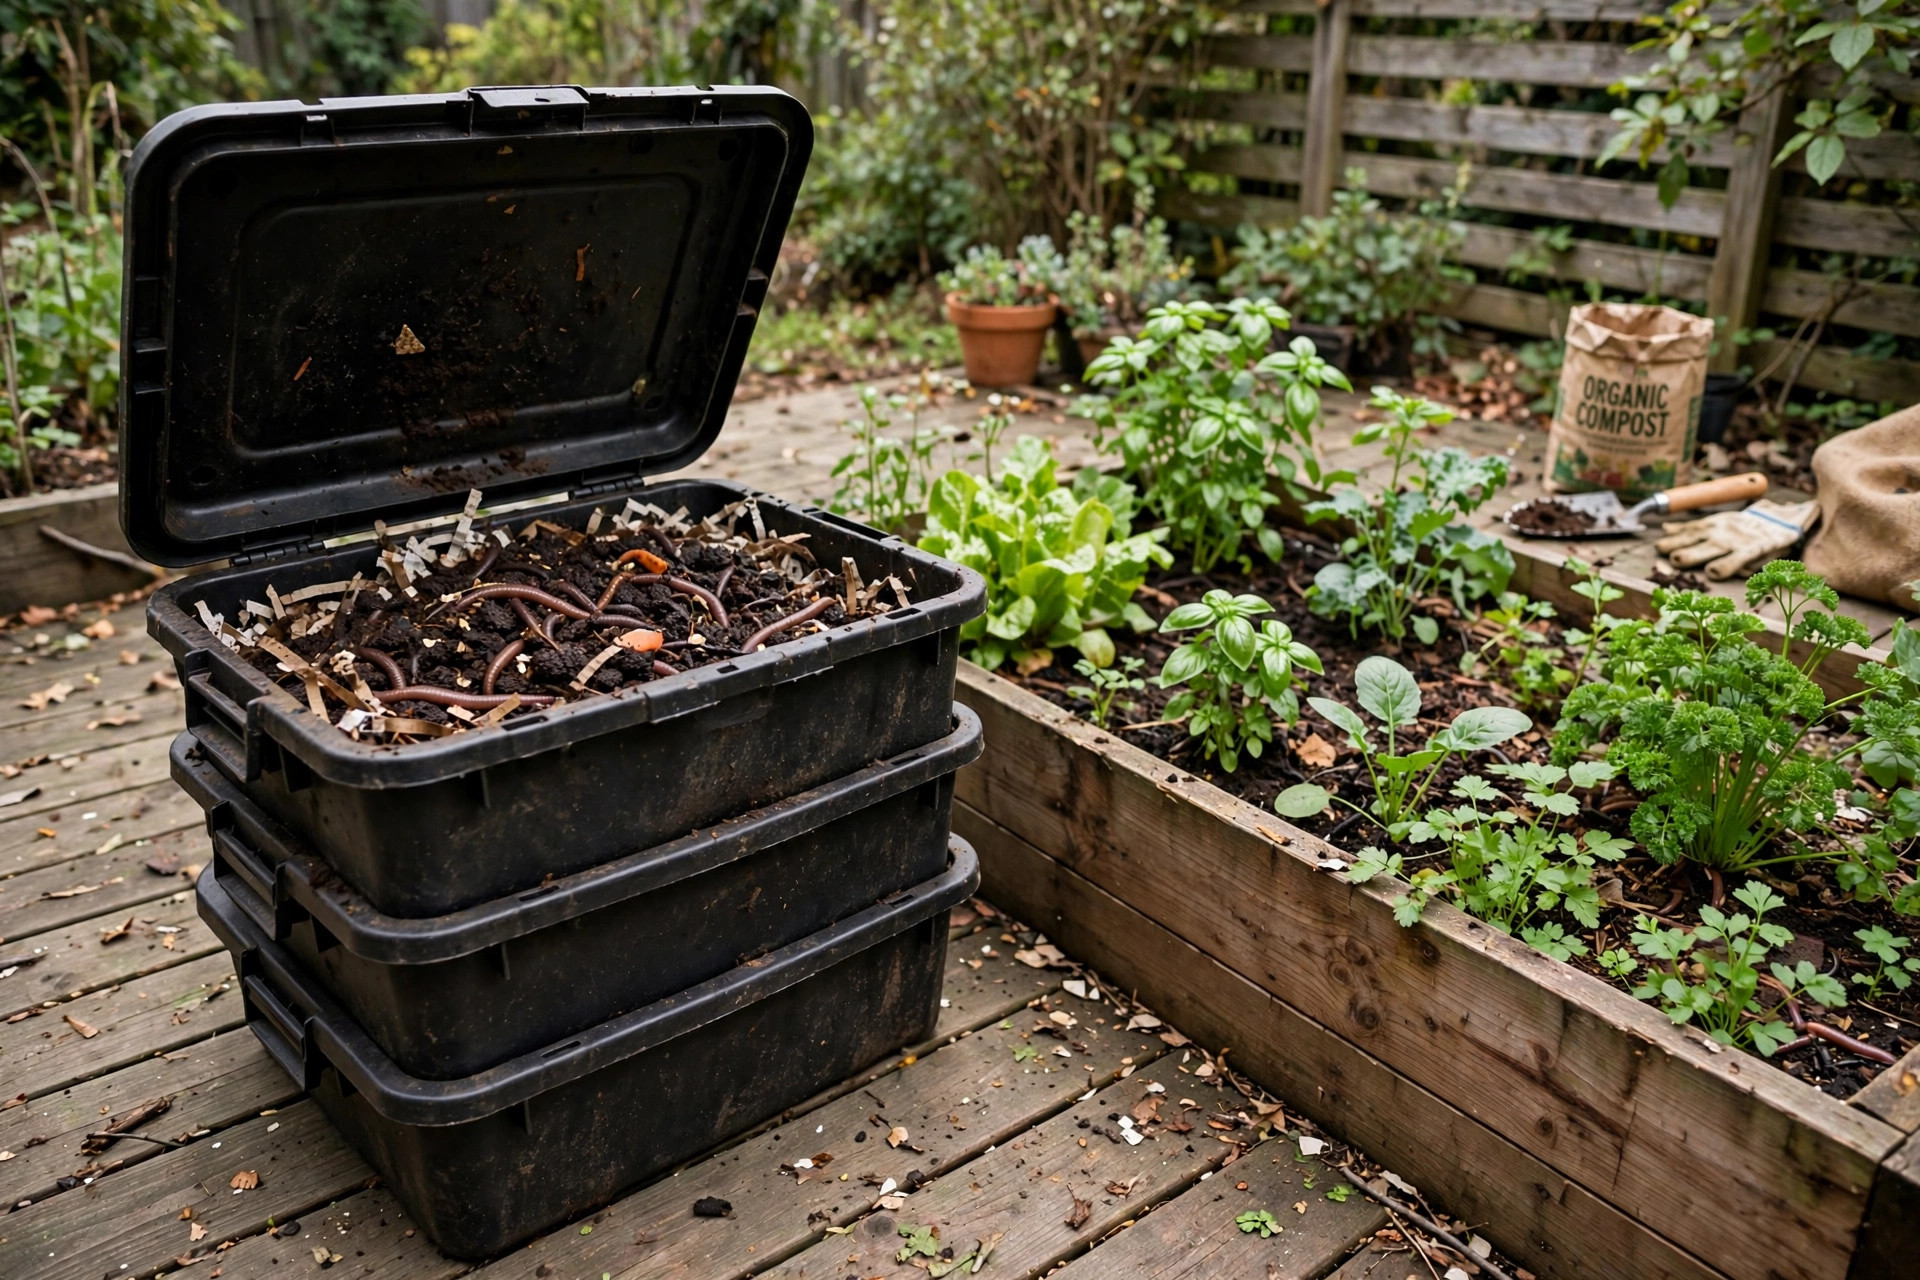
A vermicomposting bin for beginners guide starts with one simple fact. Worms eat your kitchen scraps. The scraps pass through the worms. What comes out is rich, dark compost. This process is called vermicomposting.
Many people hear the word worms and feel doubt. They picture a smelly box full of insects. That picture is wrong. A well-run worm bin smells like fresh soil. It sits quietly in a corner of the kitchen or garage. The worms do most of the work.
This vermicomposting bin for beginners guide walks you through the whole job. You will learn why worm bins matter. You will learn how to pick a bin, which worms to buy, and what to feed them. You will learn how to keep them healthy and how to harvest finished compost for your garden.
Worm composting is an old idea with new fans. Farmers have used worms for years. Now city dwellers use them too. A small bin fits under a sink. A larger bin sits in a garage. Both make the same rich compost.
Why a Worm Bin Matters: Vermicomposting Bin for Beginners Guide
Kitchen scraps are a problem for landfills. Food waste rots in piles. It makes methane gas. That gas warms the planet. When worms eat the same scraps at home, the problem shrinks. Your trash can gets lighter. Your garden gets fed.
A worm bin also teaches good habits. Children learn where food comes from. They see waste turn into soil. That lesson sticks with them.
The cost is small. The space is small. The reward is steady. Few garden projects pay back so fast.
What to Look For When You Choose a Bin
Not every bin works well. A good bin has five parts. Learn them before you buy.
Air Flow
Worms need air. Their bedding needs air. A bin with no air holes will turn wet and sour. Look for bins with holes in the lid or sides. Some bins stack trays. Air moves between the trays.
Drainage
Wet bedding is a common fault. A good bin has a drain or a spigot. Extra liquid drains into a lower tray. Gardeners call this liquid worm tea. Mix it with water before you use it on plants.
Size
Start small. A bin that holds 10 to 20 gallons is enough for most homes. A small bin is easier to manage. You can add a second bin later if you need more room.
Material
Most bins are made of plastic. Plastic is light and cheap. It holds moisture well. Wood bins breathe better but rot over time. Any solid box can work if you drill air holes.
Ease of Harvest
You must take the castings out. Stacked tray bins make this easy. Worms move up to fresh trays. You lift off the bottom tray. That tray holds finished compost. Simple bins need hand sorting. That takes more time.
When you compare models, check reviews at places like Home Depot or Consumer Reports.
Types of Worm Bins
Four main types exist.
Stacked Tray Bins
These are the most popular. Three to five trays stack in a tower. You add food to the top tray. Worms move up through the stack. Finished castings stay in the bottom tray. You remove that tray and empty it.
Single Bin Systems
A single bin is one box with a lid. It is cheap and simple. You fill it with bedding and worms. You bury food in the bedding. To harvest, you push the material to one side and add fresh bedding to the other. Worms move to the fresh side in a few weeks.
Flow-Through Bins
These are taller boxes with a grate at the bottom. You add food at the top. Castings get scraped from the bottom. Flow-through bins hold many worms. They suit serious composters. They cost more than simple bins.
A DIY bin is cheap and works well. Two plastic storage tubs make a fine bin. Drill air holes near the top. Drill drain holes in the bottom of the upper tub. Set it inside the second tub. The lower tub catches liquid.
If you already keep a compost bin for kitchen scraps, a worm bin is a good next step. Worm bins work indoors year round. Outdoor piles slow down in cold months.
Which Worms to Use
Not all worms suit a bin. The best worm is the red wiggler. Its Latin name is Eisenia fetida. Red wigglers live in the top layer of soil and leaf litter. They eat decaying plant matter. They breed fast. They handle bin life well.
Do not use earthworms from your yard. Garden earthworms dig deep. They do not like crowded bins. Buy red wigglers from a worm farm or garden supplier.
Start with one pound of worms. That is about 1,000 worms. One pound of worms can eat about half a pound of scraps per day. Give them time. A new bin needs two to three months to reach full speed.
Keep the worms cool. Red wigglers like temperatures between 55 and 77 degrees. Above 85 degrees, they die. A kitchen corner or garage shelf is ideal. In summer, move the bin to shade.
Setting Up Your First Bin
Setup takes about one hour.
Step One: Prepare the Bedding
Worms need bedding to live in. Bedding holds moisture and gives them a home. Shredded newspaper works well. Soak it in water. Squeeze it until it feels like a wrung-out sponge. Fluff it into the bin to a depth of four to six inches. Add a handful of garden soil. The soil gives the worms grit.
Step Two: Add the Worms
Place the worms gently on top of the bedding. They will burrow down on their own. Leave the lid off and keep a light on for the first night. The light keeps the worms in the bin while they settle.
Step Three: Add Food
Wait one day before you feed. Then bury a small amount of scraps under the bedding. Start with one cup of food. Do not overfeed a new bin. Uneaten food rots and makes the bin smell.
Step Four: Cover and Wait
Put the lid on. Leave the bin alone for one week. Then check it. If the food is gone, add more. If food remains, wait.
What to Feed Your Worms
Worms eat most plant-based scraps. Fruit peels, vegetable trimmings, coffee grounds, and tea bags are all fine. Crushed eggshells add grit. Shredded paper and cardboard count as food too.
Do not feed them meat, dairy, or oily foods. These scraps smell as they rot. They attract flies. Do not feed them onions or citrus in large amounts. Small amounts are fine. Large amounts make the bin acidic.
Chop scraps into small pieces. Small pieces rot faster. Some people freeze scraps first. Freezing breaks the cell walls. Thawed scraps break down quickly.
A good rule: feed about as much as the worms can eat in three to four days. Lift the bedding and look. If old food is gone, add new food. Bury each feeding in a different spot. This spreads the worms through the bin. Beginner feeding charts at The Spruce and Bob Vila give the same rule of thumb.
Many gardeners who grow their own food shop for seeds at Burpee and tools at Fiskars or Corona Tools.
Moisture and Temperature
Worms breathe through their skin. Their skin must stay moist. The bedding should feel like a wrung-out sponge. If it feels dry, mist it with water. If water drips when you squeeze it, it is too wet. Add dry shredded newspaper.
Check the bin once a week. Push the bedding aside. Look at the worms. Healthy worms are red and active. Pale or sluggish worms may signal a problem. The bin may be too wet, too dry, or too hot. Keep the bin out of direct sun.
Common Problems and Fixes
Every beginner hits a snag. Here are the common ones.
Bad Smell
A healthy bin smells like soil. A sour smell means too much food or too much water. Stop feeding for one week. Add dry bedding and fluff it to let air in.
Fruit Flies
Tiny flies hover around the bin. They come for exposed food. Bury all food under three inches of bedding. Cover the bedding with a sheet of damp newspaper. Keep the lid on tight.
Worms Climbing the Walls
Worms try to leave when conditions are bad. The bin may be too wet, too hot, or too acidic. Add dry bedding if it is wet. Move the bin to a cooler spot if it is hot. Leave the lid off with a light on until they settle.
If you need parts or a new bin, garden suppliers like Gardener’s Supply carry bin kits and accessories.
Harvesting Your Compost
After three to four months, the bin holds finished castings. The bedding will look dark and crumbly. Time to harvest.
The Migration Method
Push all the material to one side of the bin. Fill the empty side with fresh damp bedding. Bury food only in the fresh side. Wait two to three weeks. Most worms move to the fresh side. Scoop out the finished side.
The Light Method
Dump the bin contents onto a tarp under a bright light. Make small piles. Worms move away from light and burrow to the center of each pile. Scrape the outer layer of castings off. Wait ten minutes. Scrape again. Repeat until only worms remain. Return the worms to fresh bedding.
The Tray Method
If you use a stacked tray bin, the job is easy. The bottom tray holds finished castings. Lift it off. Empty it. Put it back on top as the new feeding tray.
Store finished castings in a bucket with a lid. Keep them slightly moist. Use them within a few months.
How to Use Worm Castings
Castings are gentle. They will not burn plants. Mix castings into potting soil. One part castings to three parts soil is a good blend. Seedlings grow strong in this mix. Top-dress garden beds with a one-inch layer. Scratch it into the soil surface. Water it in.
Make worm tea. Put one cup of castings in a cloth bag. Soak it in a gallon of water for one day. Stir it a few times. Strain it. Use the liquid to water houseplants and garden beds within a day.
Pair your castings with a good raised garden bed soil mix for strong results.
If you want to build a compost bin cheap for yard waste too, worm castings and outdoor compost make a strong team.
Cost and Price
A worm bin is one of the cheapest garden projects. A DIY bin costs 10 to 20 dollars. Two plastic tubs, a drill, and some newspaper are all you need. A stacked tray bin costs 80 to 150 dollars. Flow-through bins cost 150 to 300 dollars.
Worms cost 30 to 50 dollars per pound. Buy from a trusted worm farm. Good worms breed fast. You will never need to buy them again.
Bedding costs almost nothing. Shredded newspaper and cardboard are free. Food is free. It is your kitchen waste.
Care and Upkeep
A worm bin needs little care. Plan on ten minutes a week. Feed the worms two to three times per week. Check moisture each time. Add water or dry bedding as needed.
Once a year, give the bin a full clean. Harvest all the castings. Rinse the bin with water. Do not use soap. Soap harms worms. Refill with fresh bedding. Return the worms.
Safety
Worm bins are safe for homes with kids and pets. Still, follow a few rules. Wash your hands after you handle the bin. Keep the bin away from food prep areas. A laundry room or garage corner is better than a kitchen counter.
Do not let dogs eat the worms or the bedding. It may upset their stomachs. Keep the lid on.
If anyone in the home has a weak immune system, take extra care. Wear gloves when you handle the bin. Wash hands well. These steps keep the hobby safe for all.
FAQ
How long does it take to get finished compost?
Most bins produce their first harvest in three to four months. A new bin starts slow. The worm population must grow. After six months, you can harvest every two to three months.
Do worm bins smell?
A healthy bin smells like fresh soil. Bad smells mean too much food or too much water. Cut back on feeding. Add dry bedding. The smell will clear in a few days.
Can I keep a worm bin in my apartment?
Yes. A small bin fits under a sink or in a closet. It makes no noise. It has no smell when run well. Many apartment dwellers keep bins on a balcony or in a utility corner.
What if I go on vacation?
Worms can wait. Feed them well before you leave. Add extra damp bedding. They will be fine for two to three weeks. For longer trips, ask a friend to add food once a week.
How many worms do I need to start?
One pound of red wigglers is the standard start. That is about 1,000 worms. They eat about half a pound of scraps per day at first. The population doubles every two to three months in good conditions.
Can I put the bin outside?
You can in mild climates. Keep it in full shade. Protect it from rain. Rain floods bins. In winter, move it indoors before the first frost. Worms die in freezing temperatures.
A Short Final Word
A worm bin is a small box with a big job. It turns waste into wealth. It feeds your garden. It cuts your trash. It asks for ten minutes a week.
Start simple. A DIY bin and one pound of red wigglers are enough. Follow this vermicomposting bin for beginners guide step by step. Do not rush.
In a few months, you will hold dark, rich castings in your hands. You will spread them on your plants. You will watch those plants thrive.
References
Bob Vila. (n.d.). Home improvement advice. https://www.bobvila.com Burpee. (n.d.). Seeds, plants, and gardening supplies. https://www.burpee.com Consumer Reports. (n.d.). Product reviews and ratings. https://www.consumerreports.org Corona Tools. (n.d.). Garden and landscape tools. https://www.corona-tools.com Fiskars. (n.d.). Garden and cutting tools. https://www.fiskars.com Gardener’s Supply Company. (n.d.). Gardening tools and supplies. https://www.gardeners.com The Home Depot. (n.d.). Home improvement products. https://www.homedepot.com The Spruce. (n.d.). Home and garden advice. https://www.thespruce.com
Was this guide helpful?

About Lisa Anderson
The My Garden US editorial team writes practical, in-depth home and garden guides for American homeowners — tested advice, no fluff.
You May Also Like
Drip Irrigation Winterization Steps for Garden: A Complete Guide
July 3, 2026 0 views
Seed Packet Organizer for Gardeners: A Simple Way to Keep Every Packet in Order
May 26, 2026 0 views
The Best Garden Boots Waterproof for Mud: A Plain Guide
May 24, 2026 0 views