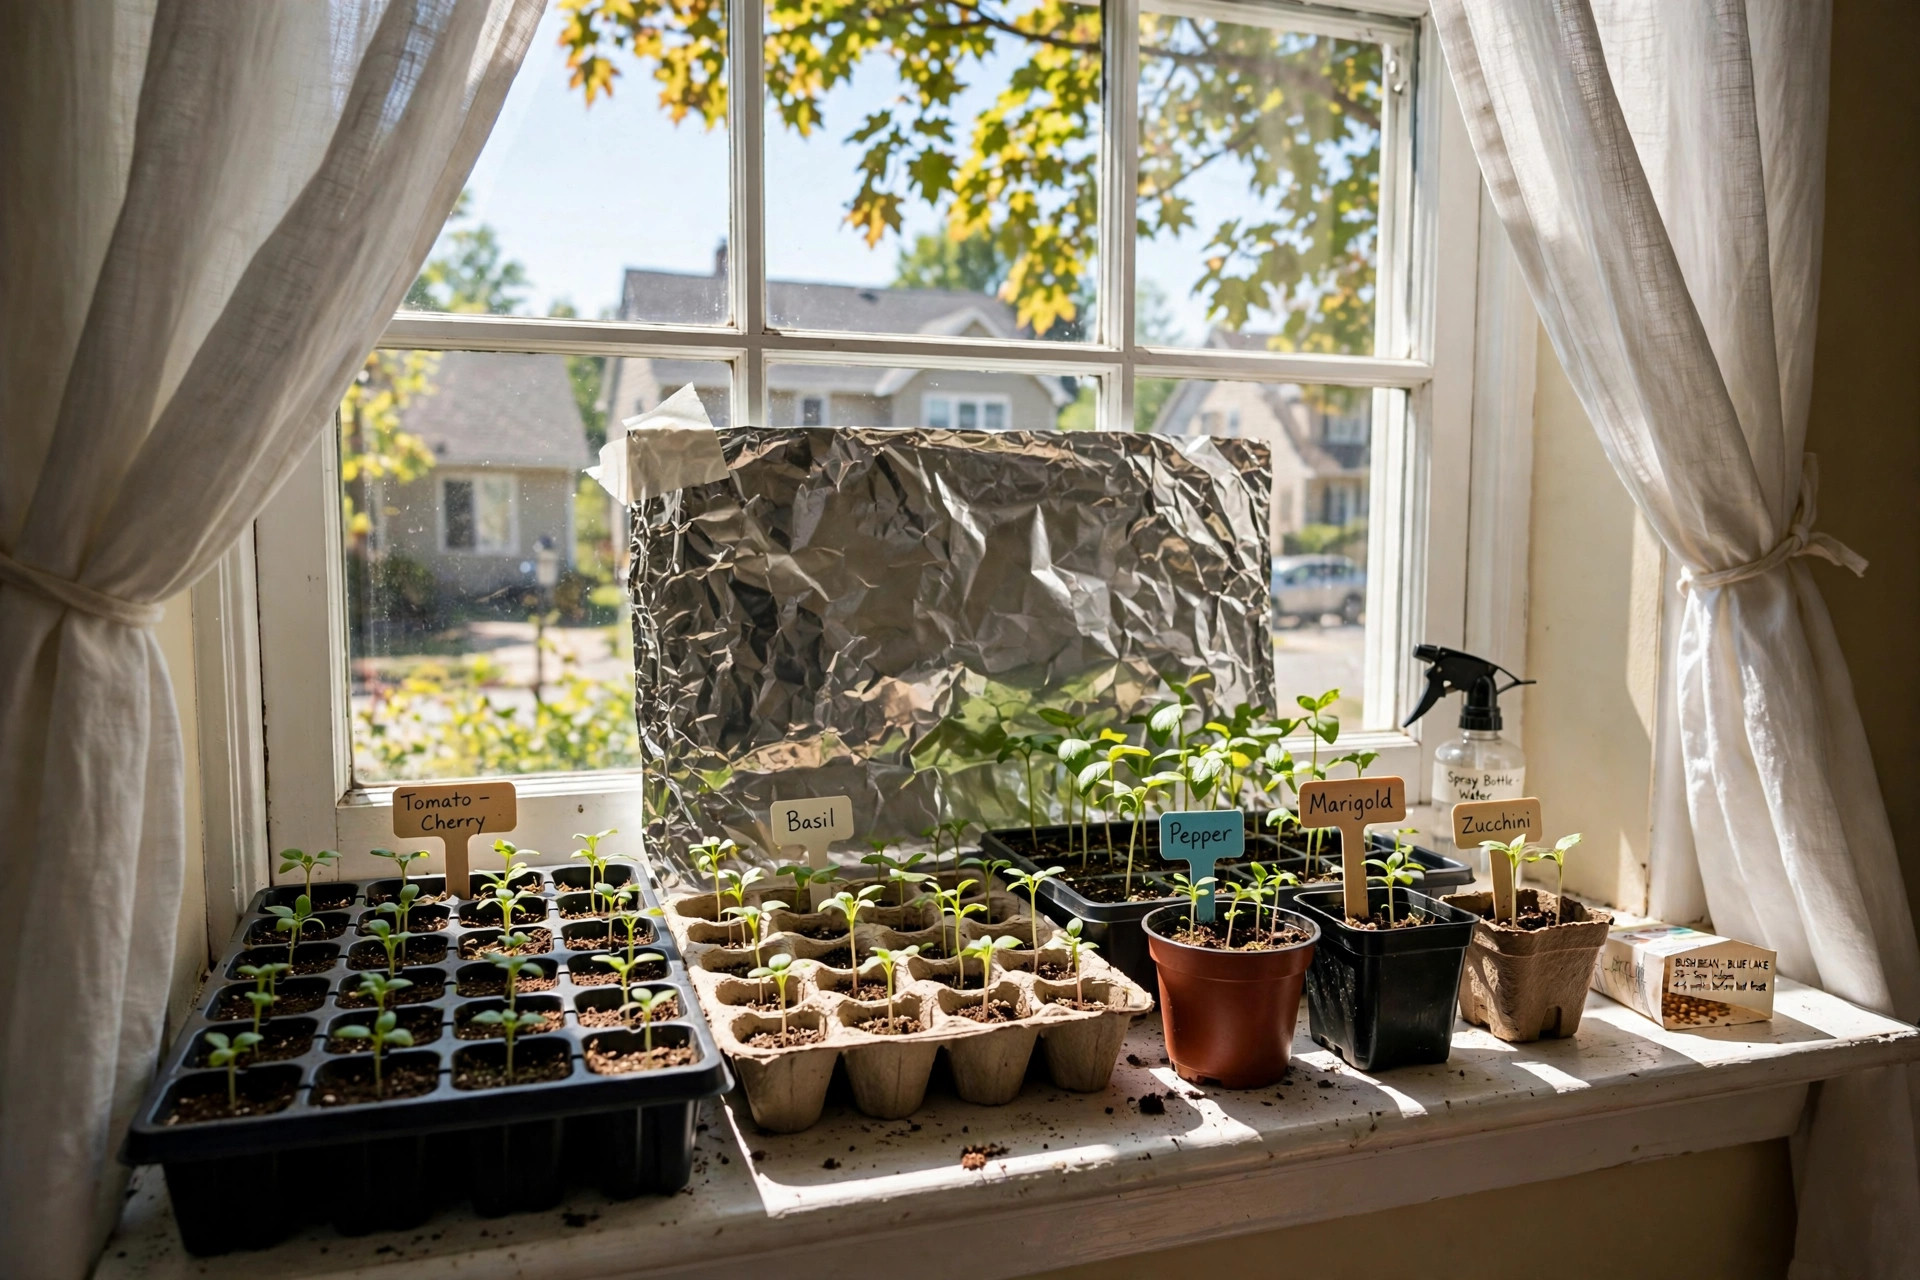
Many home gardeners wonder how to start seeds without grow light equipment. The good news is simple. Seeds have sprouted for thousands of years without electric lamps. All you need is a bright window, a few basic supplies, and a little patience. This guide shows you exactly how to start seeds without grow light gear, step by step, so you can raise strong seedlings for your garden.
Why It Matters
Starting seeds indoors gives your garden a head start. You can begin weeks before the last frost. This means earlier harvests and longer growing seasons. Most gardeners buy grow lights because they fear weak, leggy seedlings. That fear is fair. Poor light makes plants stretch and flop.
But a grow light is not the only answer. A bright windowsill can work just as well for many crops. Seeds do not care where light comes from. They only need enough of it. Learning how to start seeds without grow light saves money. It also keeps your setup simple. You avoid timers, cords, and electric bills.
This method suits small seed batches best. A family garden needs only a few dozen plants. Those fit on one or two windowsills. If you keep the scale modest, natural light is enough.
What You Need: How to Start Seeds Without Grow Light
You do not need much to start seeds without grow light help. Gather these items before you begin:
– Seed trays or small pots. Reused yogurt cups with drainage holes work fine. So do egg cartons and paper cups. – Seed starting mix. Buy a bag labeled for seed starting. You can also read up on seed starting mix vs potting soil to learn the difference. – Seeds. Choose varieties suited to your climate. Leaf lettuce, tomatoes, peppers, and herbs are good starters. – A south-facing window. In the northern hemisphere, south windows get the most sun. East windows are second best. For a broader method overview, see our indoor seed starting guide. – Aluminum foil or white poster board. These act as reflectors. They bounce light back onto the plants. – A spray bottle. Gentle misting keeps the soil moist without washing seeds away. – A small fan. A cheap desk fan builds strong stems. Moving air copies outdoor wind.
Most of these items cost little. You may already own them. Compare this with a grow light setup, which often costs fifty dollars or more before bulbs are replaced.
How to Choose the Right Window
Light is the whole trick when you learn how to start seeds without grow light units. Walk through your home on a sunny day. Note which windows get direct sun and for how many hours.
A south-facing window is ideal. It may give six or more hours of direct sun in spring. An east-facing window gives strong morning sun. A west window gives afternoon sun. North windows are too dim for most seedlings. Avoid them unless you have no other choice.
Keep the glass clean. Dust and grime block light. Wash the inside of the window before you set out your trays. Open the curtains fully. Move any objects that cast shadows.
Watch the sun angle through the season. In late winter, the sun sits low. Light reaches deep into the room. By late spring, it rides higher. You may need to move trays closer to the glass.
Step-by-Step Method
Step 1: Fill Your Containers
Moisten the seed starting mix before you fill the pots. It should feel like a wrung-out sponge. Fill each container to about a quarter inch below the rim. Press gently. Do not pack it hard.
Step 2: Plant the Seeds
Read the seed packet. It tells you the planting depth and spacing. Most seeds go about twice as deep as they are wide. Tiny seeds like lettuce can sit right on the surface. Press them down lightly.
Cover with a thin layer of mix. Mist the surface with water. Label each pot with the plant name and date. Simple masking tape and a pen work well.
Step 3: Keep Them Warm
Seeds need warmth to wake up. Most germinate best between 65 and 75 degrees Fahrenheit. The top of a refrigerator is a classic warm spot. A sunny windowsill behind closed glass also warms up nicely.
You can cover trays with clear plastic domes or plastic wrap. This holds in moisture and warmth. Remove the cover as soon as green shoots appear. Seedlings in still, wet air can rot.
Step 4: Give Them Light
Place the trays on your chosen windowsill the moment sprouts show. Keep the plants as close to the glass as you can. Even a few inches make a difference.
Set up your reflector now. Tape aluminum foil, shiny side out, to a piece of cardboard. Stand it behind the trays on the room side. It bounces window light back onto the far side of the plants. White poster board works too and is gentler on the eyes.
Rotate the trays a quarter turn every day. This stops seedlings from leaning hard toward the window. It keeps growth even on all sides.
Step 5: Water Carefully
Water from the bottom when you can. Set trays in a shallow pan of water for ten minutes. Let the mix soak it up. Then drain the pan. This keeps the surface dry and fights damping-off disease.
If you must water from the top, use the spray bottle. Keep the mix moist but never soggy. Seeds drown in standing water.
Step 6: Feed and Harden Off
Seed starting mix has little food in it. Once seedlings grow their first true leaves, feed them. Use a weak liquid fertilizer at half strength. Feed once a week.
About a week before transplant time, begin hardening off. Set the plants outside for an hour on day one. Add an hour each day. Shield them from strong wind at first. This slow step toughens them for real garden life.
Types of Seeds That Work Best
Not every crop does well without extra light. Fast, sun-hungry plants are easiest. Here are groups that adapt well:
Cool-season crops. Lettuce, spinach, kale, and peas sprout in cooler rooms. They tolerate the weaker light of early spring windows.
Herbs. Basil, parsley, cilantro, and dill start well on sills. They grow fast and forgive small mistakes.
Tomatoes and peppers. These need strong light, but a good south window serves them. Start them later in the season when days are longer. Turn trays often.
Flowers. Marigolds, zinnias, and cosmos are tough. They forgive less-than-perfect light.
Slow crops like onions and celery may struggle. They want long, bright days from the start. For those, a simple shop light may be worth the cost.
Cost and Price
One of the best parts of learning how to start seeds without grow light equipment is the price. Here is a fair estimate of what you will spend:
– Seed starting mix, one bag: 5 to 8 dollars – Seed packets, three or four kinds: 8 to 15 dollars – Trays or reused containers: 0 to 10 dollars – Aluminum foil and cardboard: items you already own – Spray bottle: 2 to 4 dollars – Small desk fan: 10 to 20 dollars
Total: roughly 25 to 55 dollars for your first season. After that, yearly cost drops to seeds and mix alone. Stored seed stays good for years if you keep it cool and dry. Learn how to store garden seeds long term and you will spend even less each spring.
A basic grow light setup costs 40 to 100 dollars. Replacement bulbs add more. Your electric bill rises too. The windowsill method wins on price for small gardens.
Care and Upkeep
Seedlings on a windowsill need daily attention. Check the soil each morning. Touch it with your finger. Water when the top feels dry.
Run the fan for a few hours each day. Set it on low so leaves just tremble. This builds thick, sturdy stems. Without air movement, stems grow thin and weak.
Keep the room cool at night. Temperatures around 60 to 65 degrees are ideal. Warm nights make seedlings grow too fast and too soft.
Watch for legginess. If stems stretch long and pale, the plants need more light. Move them closer to the glass. Add a second reflector. Clean the window again. These small fixes often solve the problem.
Thin crowded seedlings. If three sprouts share one cell, snip the two weakest at soil level. Do not pull them. Pulling disturbs the roots of the one you keep.
Common Problems and Fixes
Leggy seedlings. The most common complaint. Cause: too little light. Fix: move trays to a brighter window, add reflectors, and rotate daily.
Damping off. Seedlings fall over at the base and die. Cause: wet, still air and dirty containers. Fix: water from the bottom, run the fan, and clean pots with soap between uses.
Slow germination. Cause: cold soil. Fix: move trays to a warmer spot until sprouts show. A heat mat helps, but so does the top of the fridge.
Mold on the soil surface. Cause: too much water and poor air flow. Fix: scrape off the mold, let the surface dry, and increase fan time.
Pale leaves. Cause: poor nutrition after true leaves form. Fix: start the weak liquid fertilizer schedule.
Most problems trace back to light, water, or air. Fix one of those three and seedlings usually recover.
Safety Notes
This method is safe, but a few points matter.
Keep trays away from cold drafts. A window that leaks winter air can chill soil below 50 degrees. Seeds stall and rot in cold soil. Feel the glass on a cold night. If it is icy, move trays back a few inches after dark and return them in the morning.
Keep fertilizer and seed packets away from small children and pets. Liquid fertilizer is mild but not for drinking. Some seed coatings contain treatments. Store them on a high shelf.
Watch for heavy trays on narrow sills. Water adds weight. A full tray can tip and fall. Use a wide board under your trays to spread the load. Check that the sill can hold it.
If you run a fan near water, keep cords dry. Plug the fan into a grounded outlet. Do not let spray mist reach the plug.
Frequently Asked Questions
How many hours of sunlight do seedlings need?
Most seedlings want at least six hours of bright light each day. Eight hours is better. A south-facing window in spring usually provides this. If your window gives less, pick shade-tolerant crops like lettuce and herbs.
Can I start seeds in a north-facing window?
It is not advised. North windows give soft, indirect light. Seedlings grow weak and stretched there. If a north window is your only option, choose cool-season greens and harvest them small as baby greens.
Do seeds need light to germinate?
Most seeds do not need light to sprout. They need warmth and moisture. Light matters once the green shoot appears. Move trays to the window as soon as you see sprouts.
How close should seedlings be to the window?
As close as you can get them without touching cold glass. Leaves pressed against a freezing pane can be damaged. One to two inches from clean glass is a good rule.
When should I transplant seedlings outdoors?
Wait until after your last frost date for tender crops like tomatoes and peppers. Hardy crops like peas and spinach can go out earlier. Always harden plants off first with a week of outdoor visits.
Is a grow light ever worth buying?
For large batches or very early starts in dark climates, yes. A simple fluorescent shop light costs little and covers many trays. But for a modest home garden, the windowsill method described here works fine.
A Final Word
You now know how to start seeds without grow light equipment. The method is old and proven. Pick your brightest window. Use clean containers and fresh mix. Add a foil reflector. Rotate your trays. Run a small fan. These plain steps give you sturdy seedlings at almost no cost.
Start small this year. Grow a tray of tomatoes and a pot of basil. Watch what the light does through your window. Next year you will know your home’s sunny spots by heart. Gardening rewards this kind of simple attention. Your plants will show it in every leaf.
For more background, see Consumer Reports, Fiskars, and The Home Depot. For more background, see Lowe’s, Corona Tools, and Burpee. See The Spruce for more detail.
References
Burpee. (n.d.). Seeds, plants, and gardening supplies. https://www.burpee.com Consumer Reports. (n.d.). Product reviews and ratings. https://www.consumerreports.org Corona Tools. (n.d.). Garden and landscape tools. https://www.corona-tools.com Fiskars. (n.d.). Garden and cutting tools. https://www.fiskars.com Gardener’s Supply Company. (n.d.). Gardening tools and supplies. https://www.gardeners.com Lowe’s. (n.d.). Home improvement products. https://www.lowes.com The Home Depot. (n.d.). Home improvement products. https://www.homedepot.com The Spruce. (n.d.). Home and garden advice. https://www.thespruce.com
Was this guide helpful?

About Sarah Mitchell
The My Garden US editorial team writes practical, in-depth home and garden guides for American homeowners — tested advice, no fluff.