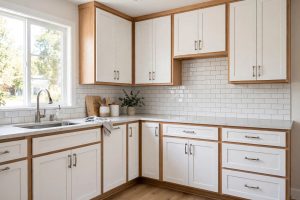
Kitchen cabinets age in plain sight. Doors yellow. Finish dulls. Grease builds up in corners. A full kitchen remodel can cost thousands of dollars. A fresh coat of paint can change the whole room for far less. But one question stops many homeowners before they begin. This spray vs brush painting cabinets guide usa walks through that choice from start to finish. Should you spray the cabinets or brush them? Both methods work. Both can look good. The right choice depends on your time, your tools, your space, and the finish you want. Read on and decide with clear facts.
Why the Choice Between Spray and Brush Matters
Cabinets are not like walls. Walls are flat and large. A few roller marks blend in and nobody looks twice. Cabinets are close to the eye. They sit at hand height and eye height. Every drip, every brush mark, and every rough edge shows under kitchen light. The method you choose sets the ceiling for how good the job can look.
Spraying lays paint down in a fine mist. The mist settles into a smooth film. When done well, sprayed cabinets look like factory work. Brushing lays paint down with bristles. The bristles leave texture. A skilled hand can make that texture look warm and hand crafted. A rushed hand leaves streaks that catch the light for years.
The choice also changes the job itself. Spraying moves fast but demands heavy preparation. Masking takes hours. Brushing moves slow but starts with little setup. Each path has its own costs and risks. Many homeowners pick a method for the wrong reason. They pick spraying because it sounds fast. They pick brushing because it sounds simple. The sections below show what each method really asks of you.
How Spraying Cabinets Works: Spray vs Brush Painting Cabinets Guide Usa
A paint sprayer forces paint through a small tip at high pressure or high volume. The paint leaves the gun as tiny drops. These drops land on the wood and flow together. The result is a thin, even coat with no brush marks.
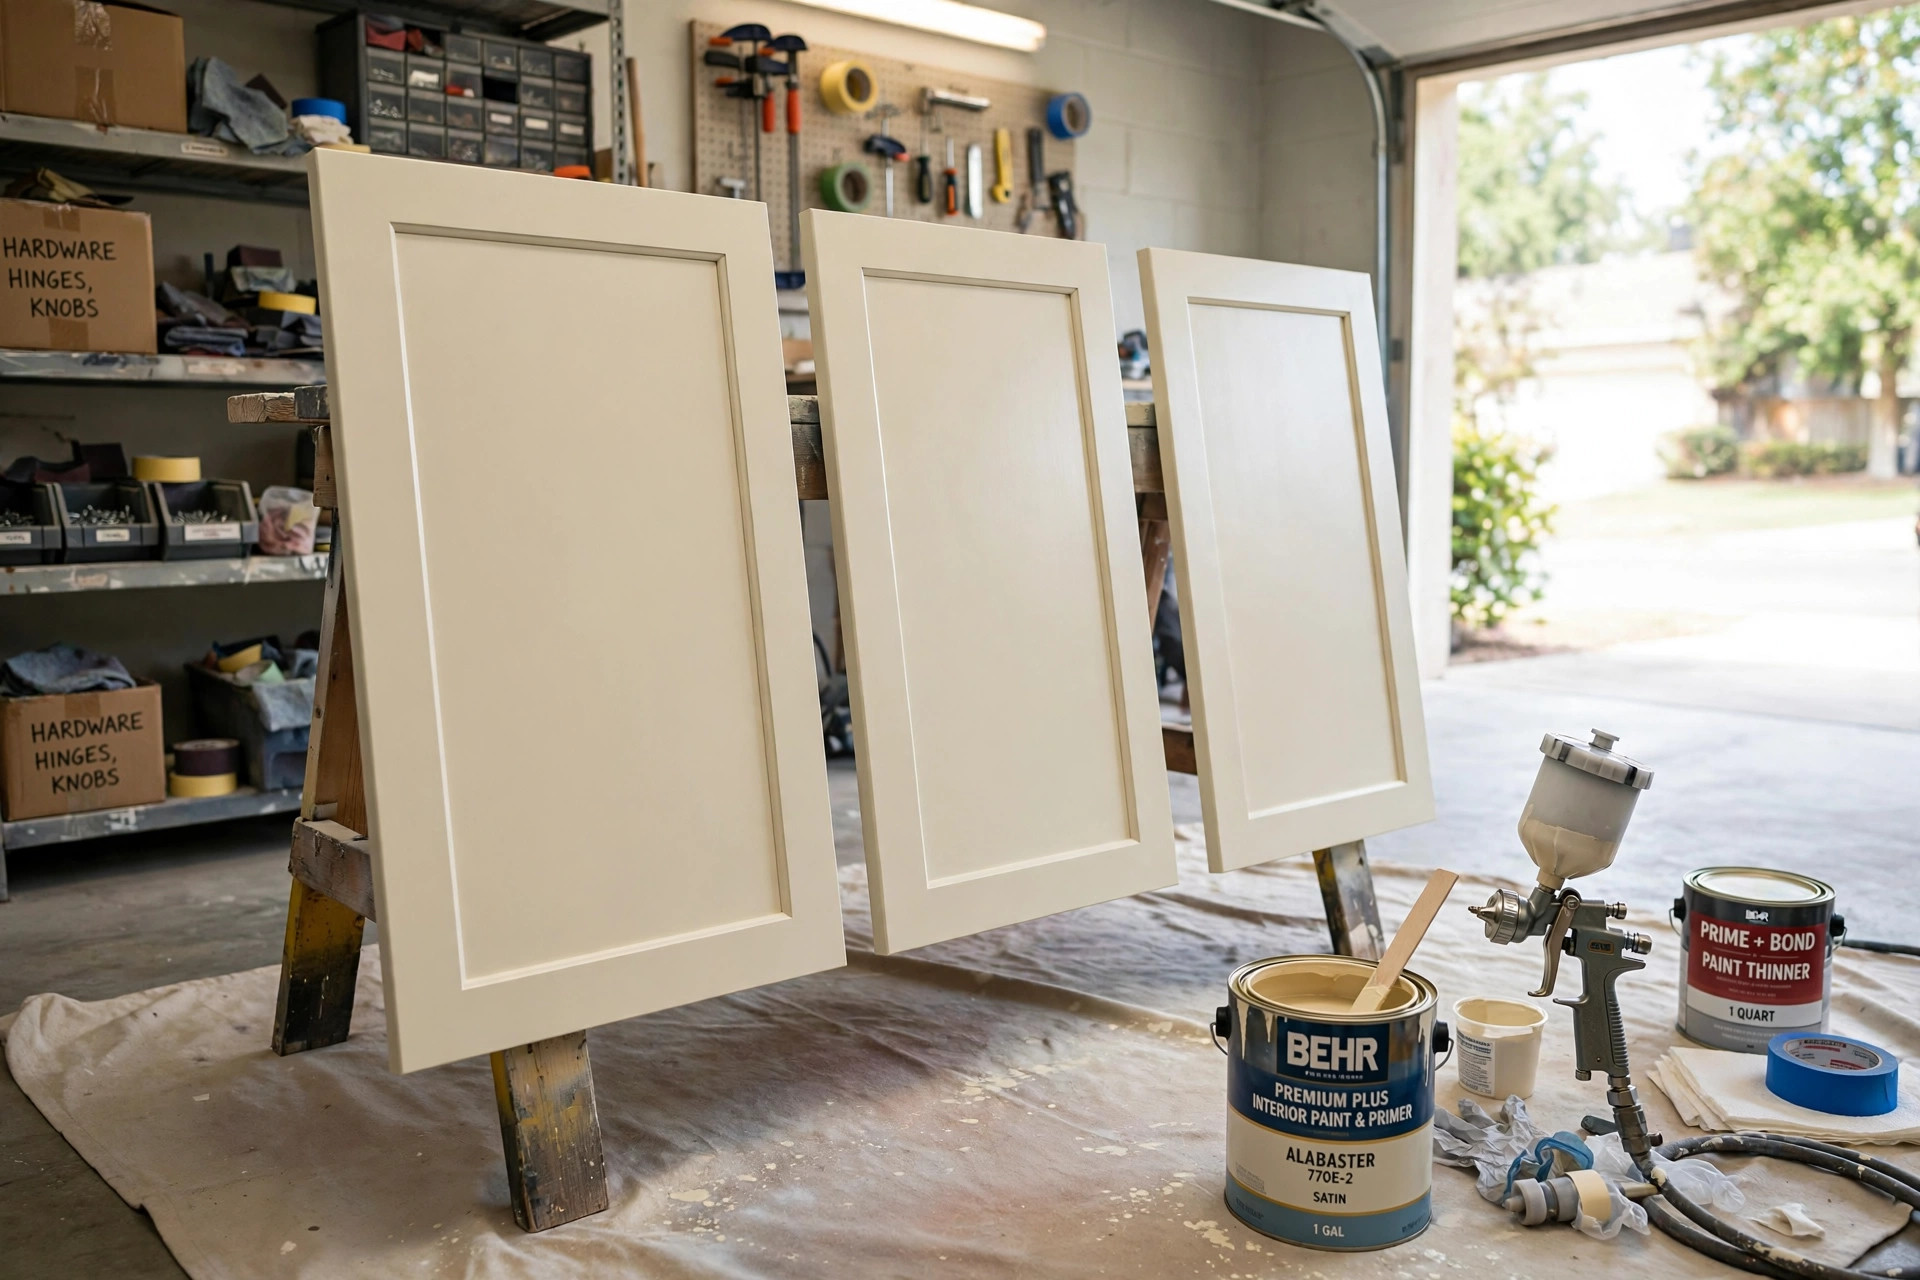
Spraying cabinets usually follows these steps. First, the doors and drawers come off their hinges. Each piece gets labeled so it goes back in the right spot. Second, all parts get a deep clean. Kitchen grease is the enemy of new paint. A degreaser or a mix of trisodium phosphate and water cuts through it. Third, the surface gets a light sanding. The goal is not bare wood. The goal is a dull surface that paint can grip. Fourth comes primer. Primer seals the old finish and gives the top coat a fair base. Fifth, the paint goes on in two or three thin coats. Thin coats dry harder and smoother than one thick coat. If you want help picking a unit, a good paint sprayer for home use can be found at most big hardware stores, and our roundup of the best paint sprayer for home use reviews explains the main types.
The speed of the spray gun is the main attraction. A door that takes twenty minutes to brush takes two or three minutes to spray. That math changes on a kitchen with twenty doors and ten drawer fronts. Spraying can finish the coating in a single afternoon. The same job with a brush can take three or four evenings.
But spraying has a heavy tail of preparation. Overspray is real. Paint mist floats and settles on everything nearby. The work area needs masking. Walls, floors, countertops, and appliances all need cover. Many homeowners build a small spray booth in a garage with plastic sheeting. Ventilation matters too. Paint fumes build up fast in a closed space. A respirator is not optional. It is basic safety gear.
Skill is the other factor. A sprayer in new hands can run. Runs happen when the gun moves too slow or sits too close. Dry spray happens when it moves too fast or sits too far. The texture turns rough and sandy. Practice on cardboard or scrap wood first. Twenty minutes of practice saves twenty hours of sanding out mistakes.
How Brushing Cabinets Works
Brushing is the old way. It is also the way most first timers understand. You load a brush, lay paint on the surface, and smooth it with long strokes. Cabinet paint today is better than it used to be. Many enamel paints level out on their own. Leveling means the brush marks melt away as the paint dries. This helps a careful brusher a great deal.
The preparation for brushing is nearly the same as for spraying. Clean, sand, and prime. No step can be skipped. Paint sticks to clean wood. It slides off greasy wood. The main difference is setup. Brushing needs no masking beyond painter tape on glass and hardware. No booth. No sheeting over the whole room. You can paint the doors on sawhorses in the garage and brush the frames right in the kitchen.
The pace is slower. Each door takes time. Each drawer front takes time. Drying between coats adds more time. A brushed kitchen cabinet job often runs a full weekend or longer. The work is steady rather than hard. Many homeowners prefer that rhythm. They can paint a few doors each evening after work.
Brush quality matters more than most people think. A cheap brush sheds bristles into wet paint. A good brush holds paint and releases it in an even line. For cabinets, a high quality synthetic brush works well with water based enamel. A two inch angled sash brush fits rails and stiles. A small foam roller can help on flat door panels. Some painters use a brush and foam roller together. The roller lays paint fast on flat areas. The brush smooths edges and corners. Paint maker Behr and others sell cabinet specific enamel paints that level well with a brush.
The limits of brushing show on close inspection. Even good brushing leaves some texture. In a kitchen with strong down lights, that texture can show. Some homeowners like it. It reads as hand finished. Others hate it. They want a glass smooth look. Know which group you belong to before you buy paint.
What to Look for When You Choose
Your Budget
Spraying costs more up front. A decent paint sprayer for home use runs from one hundred to three hundred dollars. Renting one costs less for a single weekend. Thinning supplies, masking paper, plastic sheeting, tape, and a respirator add more cost. Brushing costs less to start. A few good brushes, a small roller, sandpaper, and cleaner are enough. For a full price picture, our guide on spray painting kitchen cabinets cost near me breaks down what professionals charge in different areas.
Your Time
Spraying saves coating time but eats preparation time. On a small kitchen the two methods can take about the same total time. On a large kitchen spraying wins on speed. Brushing spreads the work out. That can be an advantage. A homeowner with limited free time may prefer two hours a night with a brush over one long masked off weekend with a sprayer.
The Finish You Want
This is the heart of the matter. A sprayed finish is smooth. A brushed finish has texture. No amount of skill erases that basic fact. Look at factory cabinets in a showroom. They are sprayed. If that glassy look is your goal, spraying is the honest path. If you like a soft hand painted look, brushing is fine and even charming.
Your Space
Spraying needs room. A garage or a covered patio works well as a spray area. Apartments and small homes make spraying hard. Overspray drifts through open doors. Neighbors notice. Brushing fits anywhere. You can brush cabinet doors on a balcony or in a spare room with a drop cloth.
Your Skill and Patience
Sprayers reward practice. Brushes reward patience. Be honest about which one you have more of. A first time sprayer who rushes the job gets runs and dry spots. A first time brusher who keeps a wet edge and does not overwork the paint gets a fair result.
Types of Sprayers and Brushes
Not all sprayers are the same. Airless sprayers push paint at very high pressure. They are fast and strong. They can be too much for small cabinet parts. High volume low pressure sprayers, called HVLP, use more air and less pressure. They give finer control and less overspray. Many cabinet painters prefer HVLP for doors and drawers. Handheld cup sprayers are the simplest option. They suit small jobs and touch ups.
Brushes also come in grades. Natural bristle brushes work best with oil based paint. Synthetic brushes work best with water based paint. Most cabinet jobs today use water based enamel, so synthetic is the common pick. A brush with flagged tips, meaning split ends on the bristles, holds more paint and lays it smoother. Foam brushes are cheap and leave a smooth film, but they wear out fast and can leave bubbles.
Primer choice supports both methods. A bonding primer grips slick old finishes. Shellac based primer blocks stains and tannin bleed from oak. Our guide to the best primer for drywall patches usa covers the same bonding principles, and the paint department at Home Depot stocks all three primer types. For cabinets, stain blocking primer earns its keep on older wood.
Cost and Price
Paint is the smallest cost. A gallon of quality cabinet enamel covers a normal kitchen with room to spare. Most homeowners spend forty to eighty dollars on paint and primer. Supplies add fifty to one hundred fifty dollars for brushes, sandpaper, cleaner, tape, and drop cloths. A sprayer purchase adds one hundred to three hundred dollars. Rental adds fifty to ninety dollars per day.
Hiring a professional changes the picture. Professional cabinet painters in the United States often charge three thousand to seven thousand dollars for a full kitchen. Spraying professionals usually spray. Their price includes the booth, the masking, and the skill. Doing it yourself saves most of that labor cost. It spends your time instead. Weigh the trade with open eyes.
Care and Upkeep
New cabinet paint needs time to harden. Water based enamel feels dry in hours. It reaches full hardness in two to four weeks. Treat fresh cabinets gently in that first month. Do not slam doors. Do not hang wet towels on handles. Clean with a soft cloth and mild soap. Avoid harsh cleaners and scrub pads.
Chips will happen over years. Keep a small jar of the paint for touch ups. A small artist brush fixes a chip in minutes. Sprayed finishes touch up less invisibly than brushed ones. A brushed dab of paint on a sprayed door can show as a dull spot. For sprayed cabinets, light sanding and a careful touch up coat blend best. Review sites like Consumer Reports test paint durability, and the how to library at This Old House has solid guides on touch up technique.
Grease is the slow killer of cabinet paint. Wipe cooking splatter soon after it lands. Range hoods help. A vented hood pulls grease out of the air before it settles on doors. With simple care, a good paint job lasts seven to ten years.
Safety
Cabinet painting involves dust and fumes. Sanding old paint creates dust. If your home was built before 1978, the old paint may contain lead. Do not sand it dry. Test for lead first. A lead test kit costs little at a hardware store. If lead is present, follow federal rules for safe handling or hire a certified firm.
Paint fumes need respect. Work with windows open and a fan moving air out. Wear a respirator rated for paint vapors when spraying. A simple dust mask is not enough for spray fumes. Wear gloves and eye protection. Keep children and pets out of the work area until paint is fully dry and the room is aired out. Bob Vila and The Spruce both publish clear safety checklists for home painting projects, and HGTV offers beginner friendly prep guides.
Frequently Asked Questions
Is spraying always better than brushing for cabinets?
No. Spraying gives a smoother finish. That is its main edge. But it needs more equipment, more masking, and more practice. A careful brushed job beats a sloppy sprayed job every time. Match the method to your space and skill.
Can I spray cabinets indoors?
You can, but it is hard. Overspray settles on every surface in the room. You must mask walls, floors, counters, and appliances. Ventilation is a must. Most homeowners spray doors outside or in a garage and brush the frames in place.
Do I need to sand between coats?
Light sanding between coats helps both methods. Use fine grit paper, around 220 grit. Sanding knocks down dust nibs and gives the next coat grip. Wipe the dust off with a tack cloth before the next coat.
How many coats of paint do cabinets need?
Two coats over primer is the standard. Some deep colors need three. Thin coats are better than thick coats. Thick coats run, sag, and dry soft. Patience between coats pays off in hardness.
What paint should I use on cabinets?
Use a paint made for cabinets or trim. Alkyd enamel or acrylic enamel are common picks. They dry hard and resist blocking, which is the sticking of two painted surfaces. Regular wall paint stays too soft for cabinet doors. Paint brands like Sherwin-Williams and Benjamin Moore both make enamel lines meant for cabinets and trim.
How long does a cabinet paint job last?
A well prepared job lasts seven to ten years in a normal kitchen. Heavy use, steam, and grease shorten that life. Good cleaning habits stretch it. Touch up chips early so moisture cannot get under the paint.
A Final Word
There is no single right answer in this spray vs brush painting cabinets guide usa. There is only the right answer for your kitchen. Spraying gives the smoothest finish and the fastest coating time. It asks for equipment, masking, and practice in return. Brushing asks for less gear and less space. It asks for time and a steady hand in return. Clean well. Sand lightly. Prime every time. Lay thin coats. Whichever method you choose, good preparation carries more weight than the tool in your hand.
References
Behr. (n.d.). Paints, primers, and stains. https://www.behr.com Benjamin Moore. (n.d.). Paints and stains. https://www.benjaminmoore.com Bob Vila. (n.d.). Home improvement advice. https://www.bobvila.com Consumer Reports. (n.d.). Product reviews and ratings. https://www.consumerreports.org HGTV. (n.d.). Home and garden ideas. https://www.hgtv.com Lowe’s. (n.d.). Home improvement products. https://www.lowes.com Sherwin-Williams. (n.d.). Paints and coatings. https://www.sherwin-williams.com The Home Depot. (n.d.). Home improvement products. https://www.homedepot.com The Spruce. (n.d.). Home and garden advice. https://www.thespruce.com This Old House. (n.d.). Home renovation guidance. https://www.thisoldhouse.com
Was this guide helpful?

About Michael Thompson
The My Garden US editorial team writes practical, in-depth home and garden guides for American homeowners — tested advice, no fluff.