
When the last warm evening of fall gives way to the first cold snap, most grill owners face the same yearly job: learning how to winterize gas grill for storage. A gas grill is built to take heat, rain, and wind, but months of cold, snow, and ice can still take a toll. Grease left on the grates turns sticky and invites mice. Moisture works its way into valves and burner tubes. A dead igniter battery means a slow and frustrating start in spring. The good news is that winterizing takes about one hour of honest work. The reward is a grill that fires up on the first try when the warm weather returns, with no surprise repairs and no rusted parts.
Why Winter Storage Matters
A gas grill is a simple machine, but it has many small parts that cold weather can harm. Rubber gas lines grow stiff when they sit in freezing temperatures for months. Spider webs and insect nests form inside burner tubes and block the flow of gas. That blockage is one of the most common reasons a grill will not light in spring. Leftover grease is another problem. It turns rancid over the winter and can give food an off taste for the first few cookouts of the new season.
Rust is the largest threat of all. When moisture sits on steel parts month after month, rust begins to form. It starts on the outside of the firebox and on the cart frame, then moves to the grates and the burners themselves. A grill that is put away dirty will age much faster than one that is put away clean. Taking the time to winterize now can add years to the life of the grill. It also saves money, since replacing burners, igniters, and heat tents costs far more than one afternoon of care.
There is a safety reason as well. A propane tank that sits outside all winter can suffer from a worn valve or a slow leak at the connection. Checking the tank and the gas line before storage means you will not face a dangerous surprise when you open the valve in spring.
What to Look For Before You Begin: How to Winterize Gas Grill for Storage
Before you start, look over the whole grill and note what it needs. Walk around it and check for loose knobs, wobbly legs, and rust spots on the frame. Open the lid and look at the grates. If the coating is flaking, you may want new grates in spring. Look at the heat tents or flavorizer bars that sit over the burners. If they are thin or full of holes, write that down. Check the grease tray and the drip pan. If the tray is full, that is your first sign that the grill needs a deep clean before it goes to sleep for the winter.
Tools and Supplies You Will Need
Gather your supplies before you begin so you do not have to stop halfway through. You will need a stiff wire brush, a brass brush for coated grates, a bucket of warm soapy water, and a few rags. You will need a plastic scraper or a putty knife for heavy grease. A bottle of spray degreaser helps on the firebox walls. Keep a pipe cleaner or a thin vent brush on hand for the burner tubes. A bottle of vegetable oil and a clean rag will season the grates when the cleaning is done. You will also want a new igniter battery, since the old one rarely survives the winter. Finally, buy a fitted grill cover if you do not own one, and have a dry storage spot picked out, such as a shed, a garage corner, or a covered patio.
How to Winterize a Gas Grill, Step by Step
Work through these steps in order. None of them are hard, and the whole job takes about an hour.
Step 1: Disconnect the Propane Tank
Safety comes first. Turn all burner knobs to the off position. Close the valve on the propane tank by turning it clockwise until it stops. Then disconnect the regulator from the tank. If your grill runs on natural gas, turn off the supply valve at the house. Never store a propane tank inside a garage, shed, or house. Keep it outdoors, upright, and away from heat and open flame. A shady spot against the house works well. A gas grill regulator that is worn or cracked should be replaced now rather than in spring, and our gas grill regulator replacement guide walks through the signs of a failing regulator and the safe way to swap it.
Step 2: Burn Off the Grease
Turn the burners on high and close the lid for about fifteen minutes. This burn-off turns stuck grease into ash and makes it far easier to remove. Turn the burners off and let the grill cool until it is warm but safe to touch. The burn-off will not replace a real cleaning, but it cuts the hard work in half.
Step 3: Clean the Grates and the Firebox
Remove the cooking grates and the heat tents or flavorizer bars. Scrape the grates with a wire brush, then wash them in warm soapy water. For coated cast iron grates, use a brass brush so you do not scratch the coating. If your grates need a full restoration, see how to clean gas grill burners properly for a deeper routine that covers burners, tubes, and the firebox in detail. Inside the firebox, use a plastic scraper on the walls and the bottom. Vacuum out the ash and the loose bits. Wipe the grease tray and replace the foil liner if your grill uses one. A clean firebox is the single best defense against winter rust and spring grease fires.
Step 4: Clean the Burner Tubes
Look at the burner tubes and the small gas ports along them. Use a pipe cleaner or a vent brush to clear any cobwebs, dust, or debris from inside the tubes. Spiders love to nest in burner tubes, and their webs block gas flow. This is the cause of many spring lighting failures. Clear each port with a toothpick or a thin wire. Do not widen the ports. Just clear them.
Step 5: Season the Grates
Dry the grates fully. Rub a thin coat of vegetable oil over the whole surface with a clean rag. Heat the grill on medium for ten minutes to bake the oil on, then let it cool. This light seasoning keeps the grates from rusting during the months they sit unused.
Step 6: Wipe Down the Outside
Wash the outside of the lid and the cart with warm soapy water and dry it well. Stainless steel parts can be wiped with a stainless cleaner to keep their shine. Check the side shelves, the handles, and the thermometer. Dry everything, since trapped moisture is what starts rust.
Step 7: Check the Igniter and the Battery
Press the igniter button and listen for a click. If the spark is weak or missing, replace the battery now. It costs very little, and a fresh battery in fall means one less problem in spring. Wipe the igniter tip clean of grease.
Step 8: Cover and Store
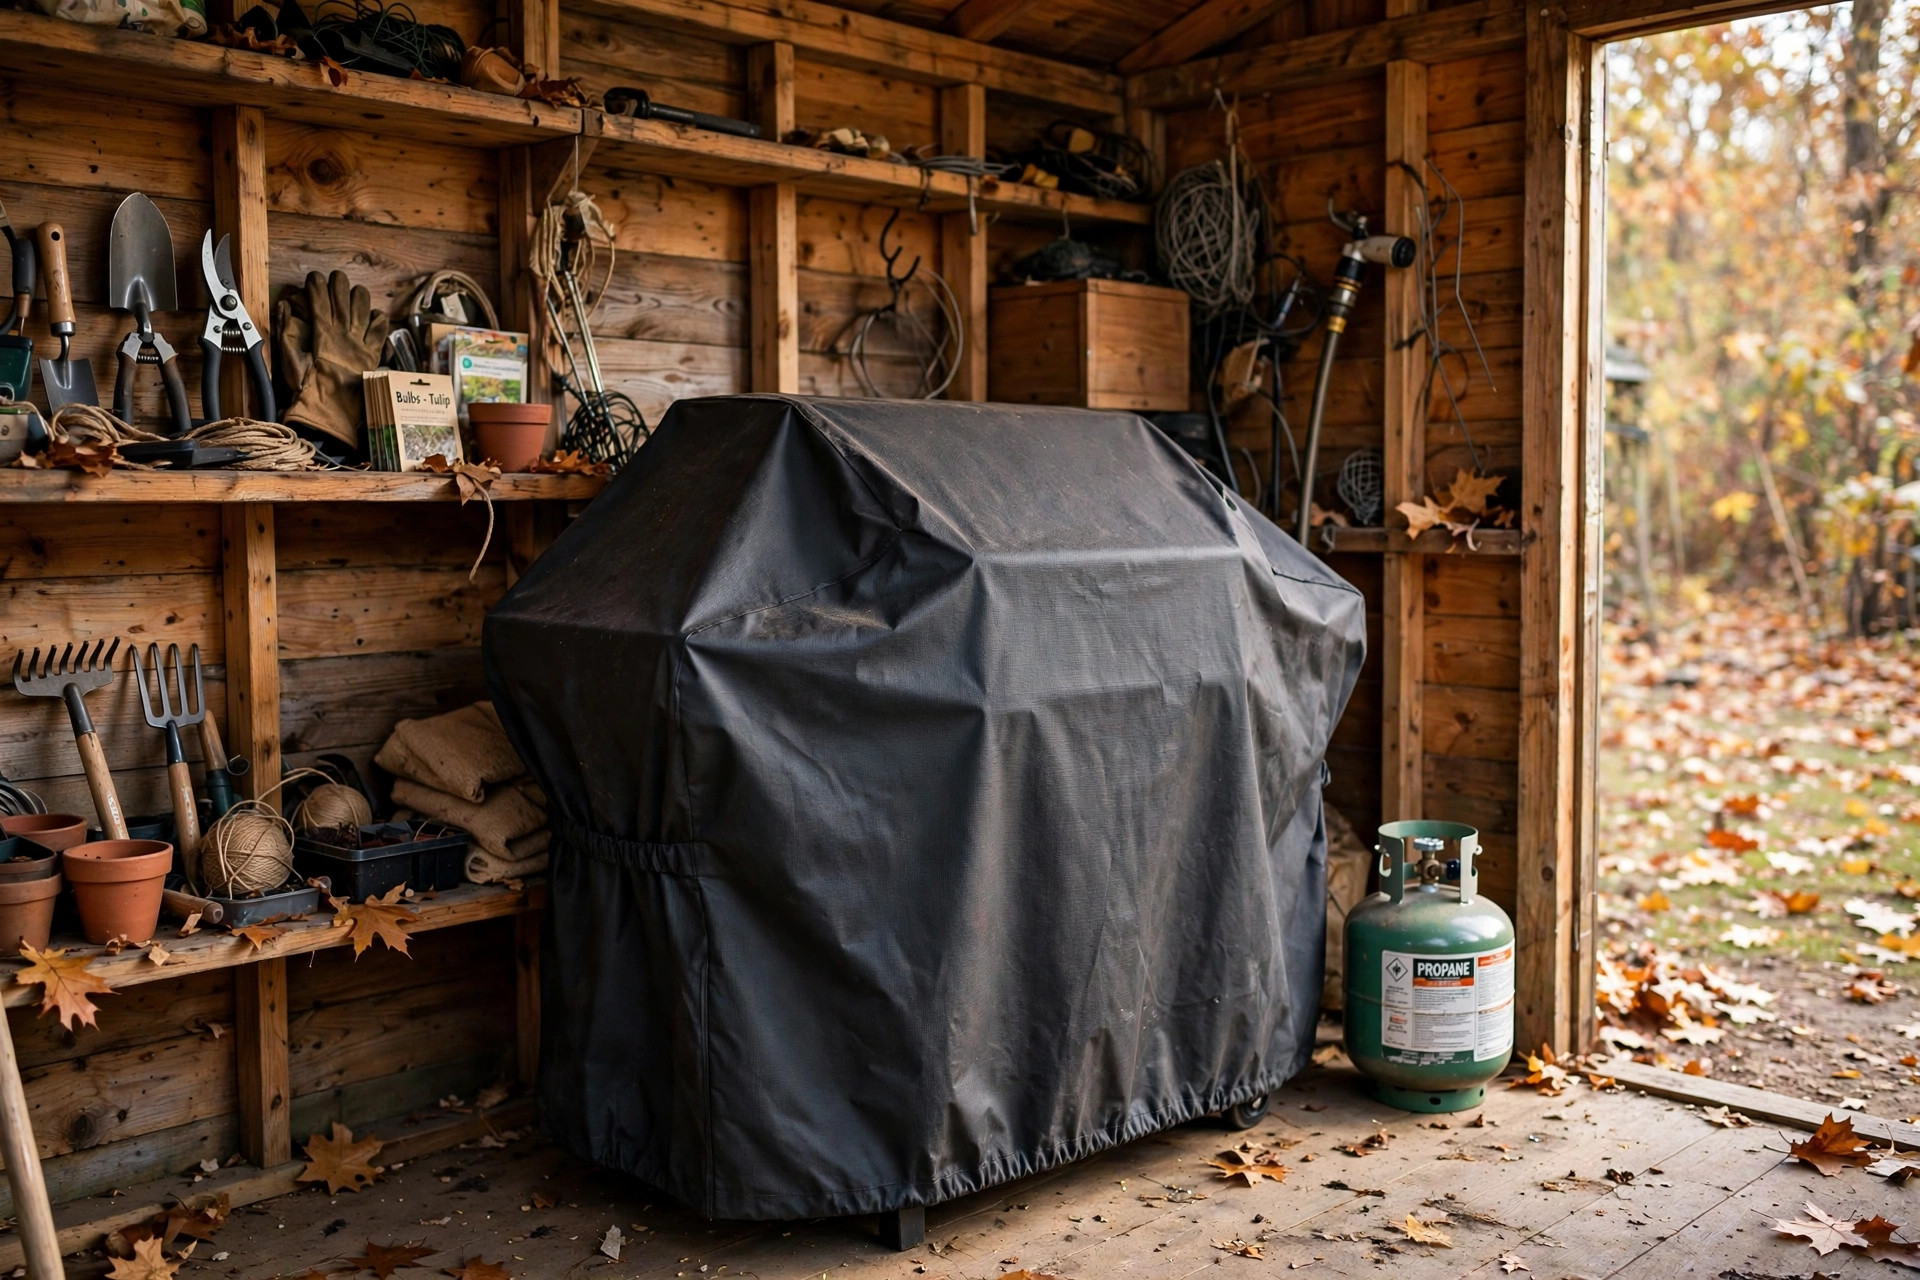
Roll the grill to its winter home. A dry shed or a covered patio is best. Put the fitted cover on and make sure it reaches all the way down. Leave the propane tank outside the cover and outside the shed, upright and secure.
Covers and Storage Options
A good cover is the most important purchase in this whole process. Look for a cover that fits your grill model closely. A loose cover flaps in the wind and lets rain in. The best covers are made of heavy vinyl or polyester with a waterproof coating and vents that let trapped moisture escape. Cheap thin covers tear after one season, so spend a little more for one that will last.
If you own a kettle-style grill rather than a gas model, covers matter just as much. Our review of the best grill cover for weber kettle compares the toughest options for round grills. The same rules apply: fit, weight, and vents.
Where you store the grill matters too. The best choice is a dry, covered space where snow cannot pile on the lid. A garage corner works, but remember that the propane tank must stay outdoors. If the grill must stay outside all winter, pick a spot against the house where the wind is weaker, and clear snow off the cover after every storm. Heavy snow can bend a lid and crack a side shelf.
What Winterizing Costs
Winterizing a gas grill is one of the cheapest chores in home care. If you already own a brush, a bucket, and rags, the cash cost can be under ten dollars. A bottle of spray degreaser costs a few dollars. A fresh igniter battery costs a few dollars. A fitted grill cover is the largest expense, usually between twenty and sixty dollars depending on the size and the brand. Makers such as Weber sell covers matched to their models, and big retailers like Home Depot carry covers for nearly every size.
Compare that to the cost of skipping the job. A set of replacement burners can cost fifty dollars or more. New cooking grates can cost forty. A new igniter assembly can cost thirty. Add the value of your time in spring, and the one-hour winter routine pays for itself many times over. For owners of other grill types, makers like Napoleon, Traeger, Broil King, and Big Green Egg publish care guides for their own models, and the same winter rules apply: clean, dry, cover, and store.
Care and Upkeep Through the Winter
Winterizing is not the end of the story. Check on the grill once or twice during the cold months. After each heavy snow, brush the snow off the cover so the weight does not press down on the lid. Make sure the cover is still snug and has not blown loose in a windstorm. Peek under the cover once in January and once in February. If you see moisture pooling inside, dry it out and check the vents. If a mouse has chewed into the cover, patch the hole or replace the cover before spring.
If you live in a mild climate and grill all winter, the rules are simpler. Keep the grill covered between uses, clean the grates after every cook, and empty the grease tray once a month. Food writers at The Spruce Eats and barbecue specialists at AmazingRibs both note that year-round grilling works fine as long as the grill stays clean and dry between cooks. Either way, the propane tank stays outdoors and upright, and the connection gets a soapy-water leak check at the start of every season.
Safety Rules to Follow
Gas and fire demand respect, even in a routine cleaning job. Always turn off the tank valve before you disconnect anything. Never bring a propane tank indoors, not even for one night. Do not store a tank in a shed, a garage, or a basement. Keep the tank away from grills, heaters, and anything that makes a spark. When you use spray degreaser, work outdoors or in a space with fresh air moving through. Wear gloves to protect your hands from sharp edges inside the firebox. Let the grill cool fully before you put the cover on. A cover placed on a hot grill can melt, and the trapped heat can warp parts. If you smell gas at any point, stop, move away, and check the connection with soapy water. Bubbles mean a leak, and a leaking line must be replaced before the grill is used again.
Frequently Asked Questions
Should I store my gas grill inside the garage for winter? You may store the grill itself in a garage or shed, but the propane tank must stay outdoors. Local fire codes in most places forbid indoor storage of propane tanks. Wheel the grill into the dry space and leave the tank outside, upright and secure.
Can I leave my gas grill uncovered in winter? You can, but it is a poor choice. An uncovered grill collects rain, snow, and ice in the firebox. The moisture rusts the grates, the burners, and the frame. A fitted cover is a small cost that protects a large investment. Independent testers at Consumer Reports rank grill covers among the most cost-effective accessories a grill owner can buy.
Do I need to empty the grease tray before storage? Yes. An old, full grease tray is a fire risk and a magnet for pests. Empty it, wash it, and put in a fresh foil liner. This takes five minutes and prevents rancid grease from coating the inside of the grill all winter.
How do I keep spiders out of the burner tubes? Clean the tubes well in fall, and cover the grill snugly. Some owners slip a small piece of fine mesh over the vent openings where air enters the tubes. Check the tubes again in spring before the first lighting. A quick pass with a pipe cleaner takes two minutes and prevents the most common spring lighting failure.
When should I winterize my gas grill? Winterize after your last cook of the season, usually in late fall when nighttime temperatures drop near freezing. Do not wait until the first snow. Grills are much easier to clean when the weather is still mild enough to work outdoors in comfort.
My grill will not light in spring. What should I check first? Start with the simple things. Check the igniter battery, then check that the tank valve is fully open. Clear the burner tubes of webs and debris. Then check the gas line for kinks and the regulator for damage. Nine times out of ten, one of these steps fixes the problem.
A Final Word
Learning how to winterize gas grill for storage is a small skill with a large payoff. One hour in the fall, a clean firebox, dry grates, a fresh battery, and a snug cover will carry your grill through the coldest months without harm. When spring arrives and the first warm evening calls, your grill will be ready. You will turn the valve, press the igniter, and hear the burners catch on the first try. That is the sound of a job well done.
References
AmazingRibs.com. (n.d.). Barbecue and grilling science. https://www.amazingribs.com Big Green Egg. (n.d.). Kamado grills and outdoor cooking. https://www.biggreenegg.com Broil King. (n.d.). Gas and charcoal grills. https://www.broilkingbbq.com Consumer Reports. (n.d.). Product reviews and ratings. https://www.consumerreports.org Napoleon. (n.d.). Fireplaces, grills, and heating products. https://www.napoleon.com The Home Depot. (n.d.). Home improvement products. https://www.homedepot.com The Spruce Eats. (n.d.). Recipes and cooking guides. https://www.thespruceeats.com Traeger. (n.d.). Wood pellet grills. https://www.traeger.com Weber. (n.d.). Grills and outdoor cooking. https://www.weber.com
Was this guide helpful?

About Lisa Anderson
The My Garden US editorial team writes practical, in-depth home and garden guides for American homeowners — tested advice, no fluff.
You May Also Like
How to Smoke Lamb on Charcoal Grill: A Simple Step-by-Step Guide
September 21, 2026 0 views
Charcoal Grill for Beginners Guide: Everything a First-Time Griller Needs to Know
July 16, 2026 0 views
Outdoor Kitchen Sink with Faucet Reviews: A Plain Guide for Homeowners
January 26, 2026 0 views