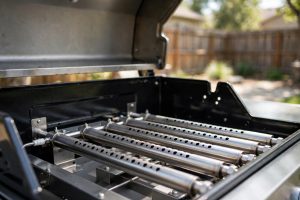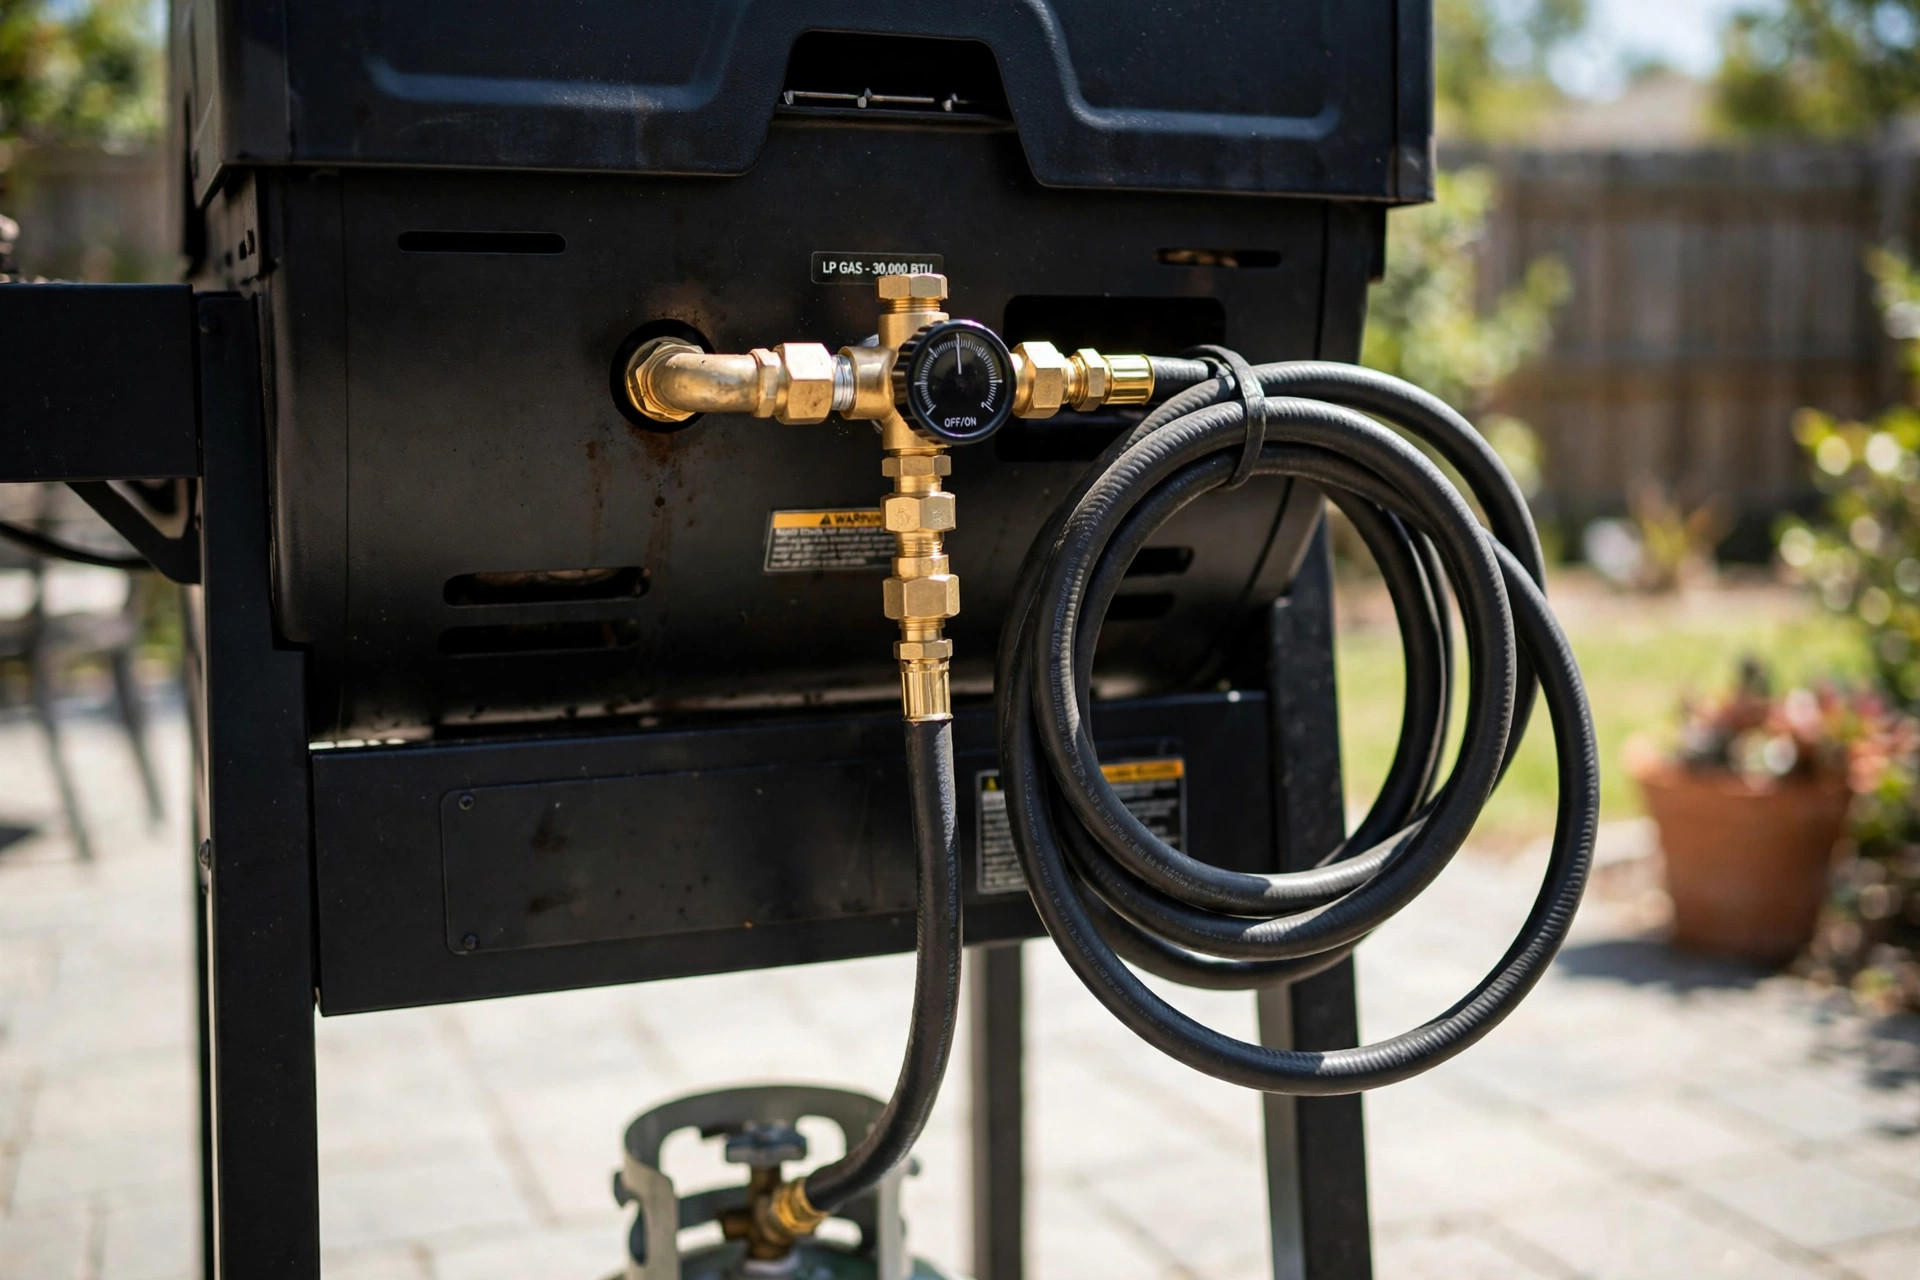

A gas grill regulator replacement guide is one of the most useful repair guides a grill owner can keep on hand. The regulator is a small part, but it does an important job. It sits between the propane tank and the grill and controls how much gas reaches the burners. When it works, the flame burns steady and even. When it fails, the grill acts like it has no fuel at all, even with a full tank.
Many people throw away a good grill because they think it is broken beyond repair. In truth, the problem is often just the regulator. A new one costs little and takes only a few minutes to install. This guide explains the signs of a bad regulator, the tools you need, and each step of the swap. It also covers how to reset a regulator that has tripped into safety mode, because that simple fix saves many owners from an unneeded purchase.
Why the Regulator Matters
Propane leaves the tank under high pressure. Your grill burners cannot use gas at that pressure. The regulator lowers the pressure to a safe, steady level. Without it, gas would flow too fast and the flame would be wild and unsafe. With a weak or broken regulator, too little gas reaches the burners and the grill will not heat up.
The regulator also holds a safety device. Most modern regulators include an excess flow valve. If gas rushes out too fast, the valve trips shut and chokes the flow. This protects you if a hose breaks or a fitting comes loose. It can also trip by accident when you open the tank valve too fast. Many so-called broken grills are simply grills whose safety valve has tripped. A reset takes two minutes and costs nothing.
Most regulators last between five and ten years. Heat, grease, insects, and weather wear them down. Spiders love to build nests in the vent holes. Rust can eat the metal parts.
Signs Your Regulator Needs Replacement: Gas Grill Regulator Replacement Guide
Before you buy a new part, look for these common warning signs.
Low flame on all burners. If every burner burns low and weak, even on high, the problem is probably not the burners. When only one burner is weak, the fault may lie with that burner tube. When all of them are weak at once, the gas supply is the likely cause. A guide on burner care such as how to clean gas grill burners properly can help you rule out dirty burners first.
The grill will not light at all. If the tank is full and the connections are tight, a dead regulator may be blocking all gas flow. Check this after you try the simple reset described later in this gas grill regulator replacement guide.
Yellow or orange flames. A healthy propane flame is mostly blue with small yellow tips. Tall yellow flames or soot on food mean the gas and air mix is wrong.
Hissing sounds or the smell of gas. A damaged regulator or hose can leak. If you smell gas, turn off the tank at once, move away from the grill, and find the leak before you light it again. A leak at the regulator body itself means the part must be replaced, not repaired.
Visible damage. Look at the regulator and hose. Cracks, chewed spots, dry rot, or heavy rust are clear reasons to replace the part.
Try a Reset Before You Replace
Many regulators trip into a low-flow safety mode by mistake. The most common cause is opening the tank valve too fast. The sudden rush of gas makes the safety valve think there is a leak, and it shuts the flow down to a trickle. Your grill then burns low or not at all.
Resetting takes no tools. Turn all burners OFF, close the tank valve fully, and unscrew the regulator from the tank by hand. Wait two to three minutes so pressure inside the regulator falls to zero. Reconnect by hand until snug — no wrench, since overtightening can damage the seal. Open the tank valve very slowly, a quarter turn first, pause, then fully. Light the grill and check the flame.
If the flame returns to full strength, your regulator was only tripped. No replacement is needed. If the grill still burns low after a careful reset, the regulator is likely worn out and should be replaced.
What to Look For in a New Regulator
Regulators come in a few types. Buying the right one matters for safety.
Match the connection type. Most backyard grills use a QCC1 Type 1 connection. Check your old regulator before you shop. The new part must match both the tank end and the grill end.
Match the pressure rating. Most gas grills use a low-pressure regulator rated at 11 inches of water column, usually stamped on the old part. Never install a high-pressure regulator on a low-pressure grill.
Hose length. Measure your old hose. A hose that is too short pulls tight; one that is too long can droop onto hot surfaces.
Built-in gauge. Some regulators include a small gauge that shows how much propane is left in the tank. It costs a few dollars more but saves you from running out mid-cook.
Brand compatibility. Most regulators are universal and fit many grill brands. Still, check your grill manual for any special notes. Major grill makers publish parts guides on their own sites, such as Weber and Char-Broil, which can help you confirm the fit. Reading consumer testing reports can also help you compare regulator quality across brands before you buy.
A basic regulator costs about the price of a bag of charcoal. A model with a gauge costs a bit more. Either way, it is one of the cheapest grill repairs you can make.
Tools You Need
The job is simple. Gather these items before you start:
– New regulator and hose, matched to your grill – Adjustable wrench or a pair of slip-joint pliers – A small brush or cloth for cleaning the fittings – A spray bottle with soapy water for leak testing – Work gloves if your hands are sensitive
That is all. No special tools are required.
Step-by-Step Replacement
Work on a cool grill. Never replace a regulator on a hot grill or near an open flame.
Step 1: Shut off the gas. Turn all burner knobs to OFF and close the tank valve fully.
Step 2: Disconnect the tank. Unscrew the regulator coupling nut from the propane tank by hand. Set the tank where it cannot tip over.
Step 3: Disconnect the grill end. Loosen the hose fitting at the grill manifold with a wrench while holding the manifold steady. Do not twist the manifold itself.
Step 4: Remove the old part. Lift out the old regulator and hose as one piece. Note how the hose was routed, keeping it clear of hot metal.
Step 5: Inspect the fittings. Wipe the manifold fitting and tank valve clean. Check for dirt, webs, or damage.
Step 6: Attach the new hose to the grill. Thread the fitting by hand first to avoid cross-threading, then tighten with the wrench until snug.
Step 7: Connect to the tank. Screw the coupling nut on by hand until snug. No wrench.
Step 8: Route and open slowly. Run the hose the old way, clear of the firebox. Open the tank valve slowly, a quarter turn first, then fully.
Step 9: Test for leaks. Spray soapy water on every connection. Bubbles mean escaping gas. Close the valve, tighten a little more, and retest. If bubbles persist, stop and get help.
Step 10: Light and heat. Light the burners one at a time. Confirm blue, steady flames, then heat the grill for ten minutes to reach normal cooking temperature.
Dispose of the old regulator as scrap metal. Never trash it with gas still trapped inside.
Types of Regulators and Options
Most owners need a standard low-pressure regulator with a QCC1 tank connection. That covers the great majority of propane grills sold in the United States.
Two-stage regulators exist for grills plumbed into a home propane system or outdoor kitchens with long gas lines. If your grill connects to a fixed home gas line instead of a tank, check the manual before swapping parts. A guide to fuel types like how to convert grill to natural gas can help you understand the difference between propane and natural gas setups.
Some regulators come with a built-in tank gauge. The gauge shows how much propane is left in the tank. Others come with extra-long hoses for built-in outdoor kitchen islands. Buy only the features you need. Pellet grill makers such as Traeger and kamado makers such as Big Green Egg mostly use different fuel systems, but their care guides still stress the same rule: keep fuel lines clean and fittings tight.
Cost and Price
A standard replacement regulator with hose costs roughly five to fifteen dollars. Models with gauges run a little higher. This makes the regulator one of the cheapest parts on the grill.
Compare that to the cost of a service call. A repair technician may charge fifty to one hundred dollars just to visit, plus parts. Doing the swap yourself takes about fifteen minutes and costs less than a pizza.
Because the part is cheap, some owners replace the regulator every few years as preventive care. Still, a regulator that passes the leak test and holds steady pressure does not need to be replaced on a schedule.
Care and Upkeep
A little care extends regulator life by years.
Protect it from weather. When the grill sits idle, close the tank valve. If you store the grill outside, use a grill cover. A quality cover keeps rain and sun off the regulator and hose. Storage tips such as those in how to winterize gas grill for storage apply here too.
Check the vent. The regulator has a small vent hole, often covered by a screen. Insects plug these vents. Check the vent each spring. Blow out dust with a short puff of air. A blocked vent can make the regulator behave like a bad one.
Keep grease away. Grease drips corrode metal and rot rubber. Wipe the hose with a damp cloth now and then. Keep the regulator upright so grease does not pool in it.
Test for leaks yearly. The soapy water test takes two minutes. Do it at the start of grilling season and any time you change the tank.
Replace damaged hoses promptly. If the hose is cracked or chewed, replace the whole regulator and hose assembly. Do not tape a damaged gas hose.
Retailers that sell grill parts, such as Home Depot, stock replacement regulators, so a new one is easy to find when the old one fails.
Safety Notes
Gas work demands respect. Keep these rules in mind.
– Never work on a regulator near an open flame or while smoking. – Always close the tank valve before disconnecting anything. – If you smell gas after a repair, shut off the tank and retest. Do not light the grill. – Never try to repair a regulator by taking it apart. The inside parts are set at the factory. Replace the whole unit. – If the tank valve itself leaks, the tank is the problem, not the regulator. Exchange the tank. – Teach everyone in the house how to shut off the tank valve. In an emergency, that one action matters most.
Grill safety advice from Napoleon and Broil King stresses the same point: when in doubt, shut off the gas and step back. Science-minded barbecue sites like AmazingRibs.com and cooking guides such as The Spruce Eats also cover regulator trouble as one of the first things to check when a grill misbehaves.
FAQ
How do I know if my regulator is bad or just tripped? Try the reset first. If full flame returns, the safety valve had tripped. If the grill still burns low, the regulator is likely worn out.
Can I use a universal regulator on my grill? Yes, in most cases. Match the tank connection type and pressure rating to your old part. Most backyard grills use a QCC1 connection at 11 inches of water column.
How long does a gas grill regulator last? Five to ten years is typical. Heat, weather, grease, and insects shorten the life. A yearly leak test and a good cover help it last longer.
Why does my grill work fine and then suddenly lose flame? The excess flow safety valve may have tripped, often from opening the tank valve too fast. Reset the regulator and open the valve slowly.
Is it normal for the regulator to feel cold or frosty? Light frost during heavy use is normal. Heavy icing can mean an overfilled tank or a struggling regulator. Shut off the gas and let it warm up.
Should I replace the hose at the same time? Most replacement regulators come with a new hose attached, so the question answers itself. If yours does not, inspect the old hose closely. Any cracks, soft spots, or chew marks mean it should go too.
A Final Word
A gas grill regulator replacement guide earns its place in your files because this small part causes such a large share of grill trouble. Learn the signs, try the reset, and do not fear the swap. The job needs one wrench, one bottle of soapy water, and about fifteen minutes. Your grill will thank you with a full, steady, blue flame, and your next cookout will go exactly as planned.
References
AmazingRibs.com. (n.d.). Barbecue and grilling science. https://www.amazingribs.com Big Green Egg. (n.d.). Kamado grills and outdoor cooking. https://www.biggreenegg.com Broil King. (n.d.). Gas and charcoal grills. https://www.broilkingbbq.com Char-Broil. (n.d.). Gas and charcoal grills. https://www.charbroil.com Consumer Reports. (n.d.). Product reviews and ratings. https://www.consumerreports.org Napoleon. (n.d.). Fireplaces, grills, and heating products. https://www.napoleon.com The Home Depot. (n.d.). Home improvement products. https://www.homedepot.com The Spruce Eats. (n.d.). Recipes and cooking guides. https://www.thespruceeats.com Traeger. (n.d.). Wood pellet grills. https://www.traeger.com Weber. (n.d.). Grills and outdoor cooking. https://www.weber.com
Was this guide helpful?

About Emily Rodriguez
The My Garden US editorial team writes practical, in-depth home and garden guides for American homeowners — tested advice, no fluff.
You May Also Like
Charcoal Grill Deals Near Me USA: Where to Find the Best Bargains
August 18, 2026 0 views
How to Winterize Gas Grill for Storage: A Complete Fall Guide
August 22, 2026 0 views
The Best Offset Smoker Under 500 Dollars: A Buyer’s Guide
March 6, 2026 0 views