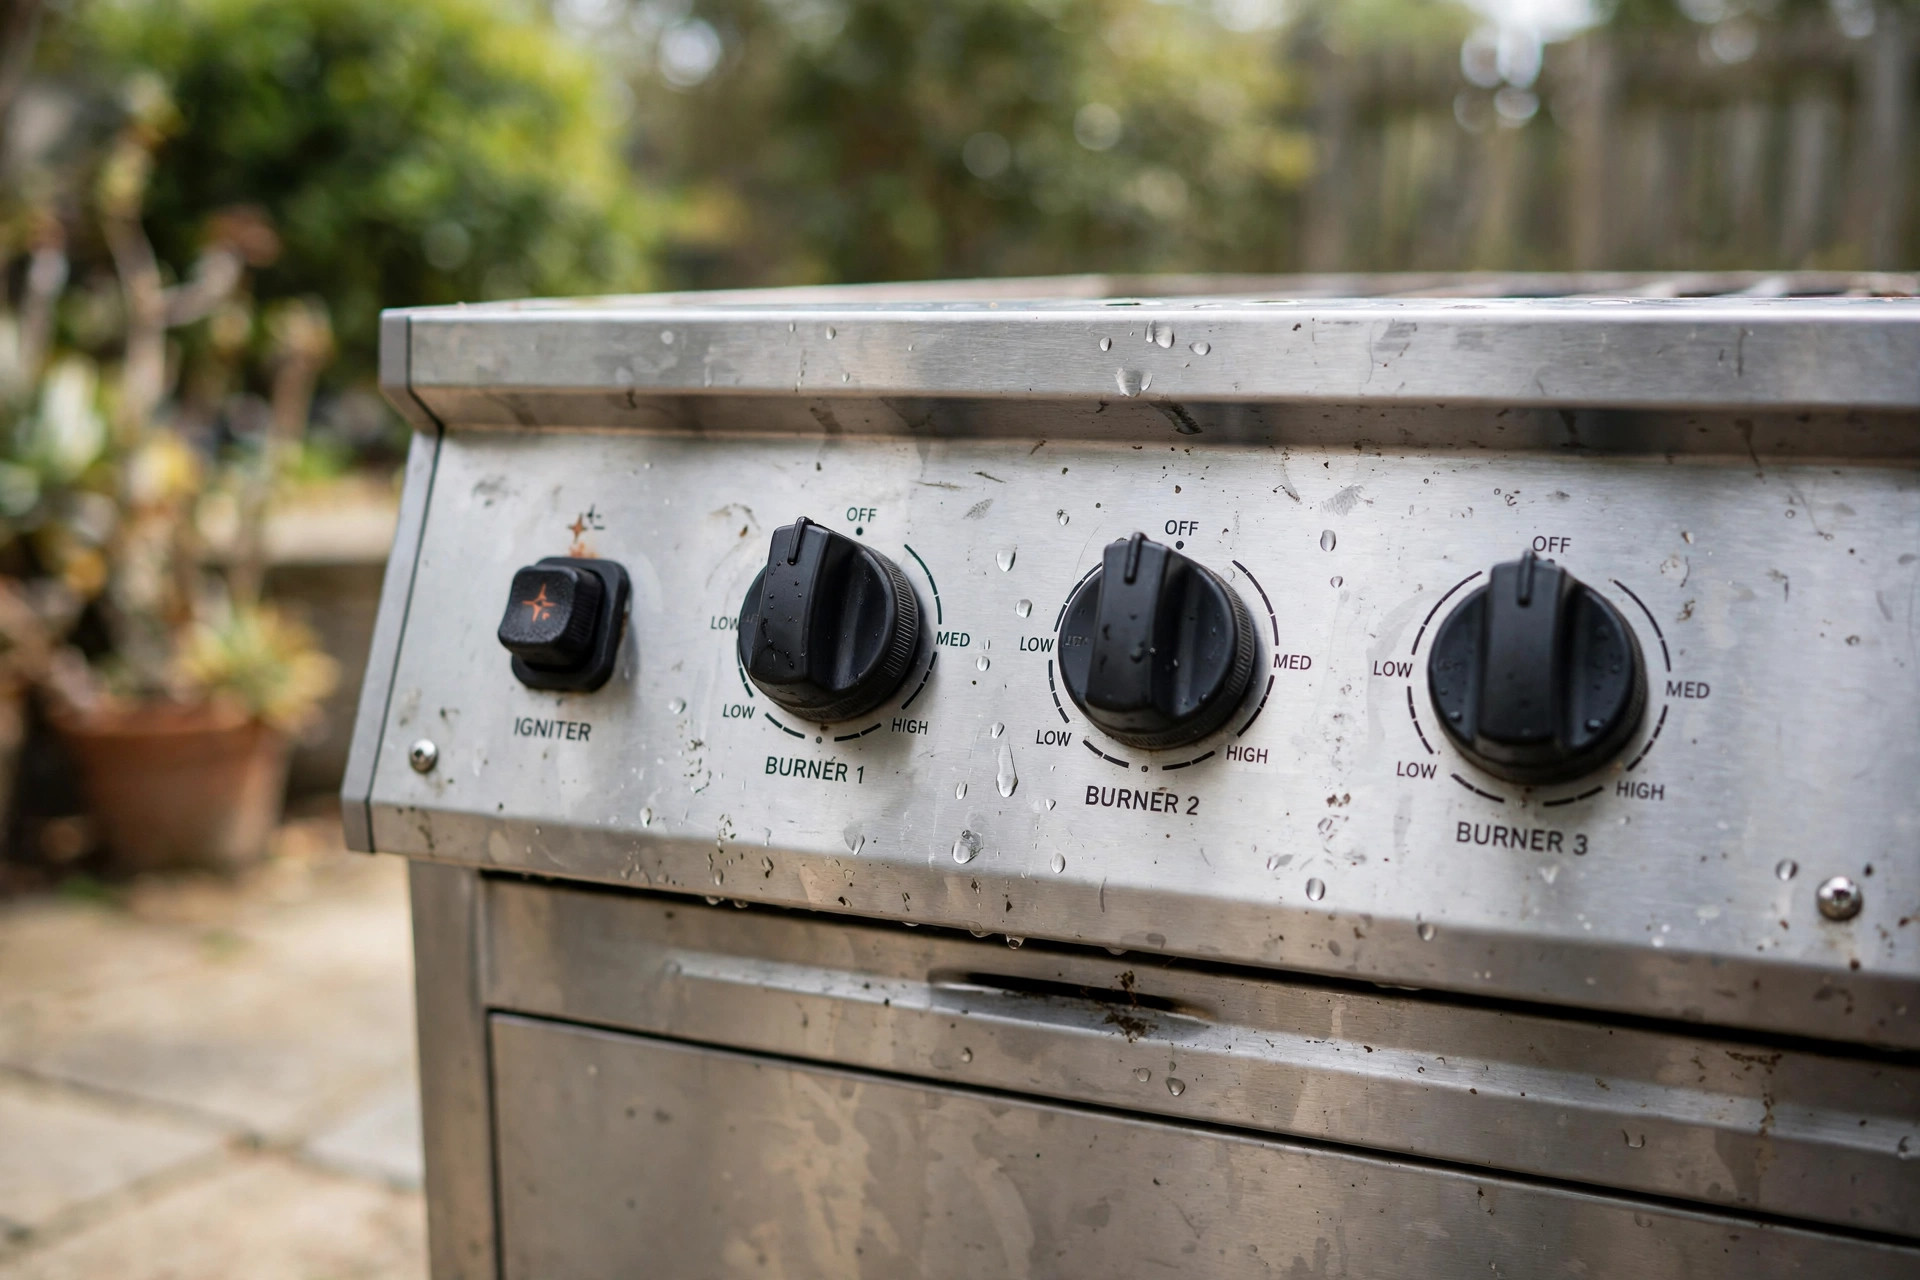

Few things spoil a cookout like a grill that will not light. You turn the knob, you press the button, and nothing happens. You reach for matches, and the match blows out in the wind. The food waits while you fight with the flame. This guide explains how to replace grill igniter button parts so the spark comes back. The job is simple. Most people can finish it in less than thirty minutes with basic hand tools.
Why the Igniter Button Matters
The igniter button is the small plastic button on the front of most gas grills. When you press it, it sends a spark to the burner. That spark lights the gas. Without it, you must light the grill by hand. A working igniter makes grilling safer and easier. You can light the grill from a safe distance. Your hands stay away from the flame.
Igniter buttons wear out over time. Rain, grease, and heat take their toll. The spring inside weakens. The wire corrodes. The electrode cracks. When any of these parts fail, the button stops making a spark. Learning how to replace grill igniter button parts keeps your grill in good working order for many years.
A dead igniter does not mean the grill is broken. The burners may be fine. The gas flow may be fine. The only bad part may be the button itself. Replacing it costs little. It saves you from buying a new grill before its time.
How the Igniter System Works: How to Replace Grill Igniter Button
To fix the igniter, it helps to know how it works. Most gas grills use one of two types.
Piezo Igniters
A piezo igniter uses a small crystal inside the button. When you press the button, a hammer strikes the crystal. The crystal makes a small electric charge. That charge travels down a wire to a metal tip near the burner. The charge jumps as a spark. The spark lights the gas.
You can tell you have a piezo igniter if the button makes a loud click when pressed. No battery is needed. The click is the sound of the hammer. Piezo buttons are common on older grills and small grills.
Battery Igniters
A battery igniter uses a small battery, often AA size, to power an electric spark. When you press or turn the knob, a spark jumps from the electrode to the burner. Many newer grills use this type. If your igniter button has a small cap that twists off to reveal a battery, you have a battery type.
Some grills have one igniter for all burners. Some have one igniter per burner. The steps to replace them are nearly the same.
Signs You Need a New Igniter Button
Watch for these signs. They tell you the button is near the end of its life.
First, no spark appears when you press the button. Look at the burner tube while a helper presses the button in daylight. If you see no spark, the button or wire may be bad.
Second, the button feels loose or sticks when pressed. The plastic housing can crack after years of heat. A cracked housing lets water in. Water ruins the parts inside.
Third, you hear the click but the burner will not light. This can mean the electrode tip is dirty or broken. It can also mean the wire has come loose.
Fourth, you must press the button many times before a spark appears. The crystal or the battery contacts are wearing out.
Before you buy a new button, rule out simple problems. Check that the battery is fresh if your grill uses one. Check that the wire is plugged in tight. Check that the electrode tip is clean. Sometimes a quick cleaning fixes the problem with no new parts. A guide on burner care, such as how to clean gas grill burners properly, can help you keep the whole burner area in shape.
What to Look For When Buying a Replacement
Not all igniter buttons are the same. Choose the right one for your grill.
Match the Type
Find out whether your grill uses a piezo or battery igniter. Check the owner’s manual. If the manual is lost, look at the button itself. A twist-off cap with a battery inside means a battery type. A simple push button with no cap is most likely piezo.
Match the Size
Igniter buttons come in different sizes. Measure the diameter of the hole in the control panel. Common sizes are around three quarters of an inch. A button that is too large will not fit. A button that is too small will fall through the hole.
Match the Wire Length
The new button comes with a wire that runs to the electrode. Measure the old wire. Buy a replacement with a wire at least as long. A wire that is too short cannot reach the burner.
Choose Quality
Cheap plastic buttons crack sooner. Look for a button with a solid housing and good reviews. Many grill makers sell exact replacement parts for their models. Weber, for example, stocks parts for its grills through its parts service. Buying from a trusted Weber parts page gives you a button made for your model.
Universal igniter buttons also exist. They fit many grill brands. They cost less. They work well if you match the size and type. Home improvement stores like The Home Depot carry both brand-specific and universal igniters.
Tools You Will Need
Gather these tools before you start. You will work faster with everything close by.
– New igniter button of the right type and size – Screwdriver, both flat and Phillips head – Pliers with a needle nose tip – Wire brush or old toothbrush for cleaning – Paper towel or clean rag – Flashlight or work lamp – Fresh battery, AA size, if your grill uses one
No gas tools are needed. You will not disconnect any gas line for this job.
How to Replace Grill Igniter Button Step by Step
Work on a cool grill. Never work on a grill that is hot or still warm from cooking. Turn all burner knobs to the off position. Turn off the gas at the tank or the supply valve.
Step 1: Find the Igniter Assembly
Open the grill lid. Look at the control panel where the knobs sit. The igniter button is usually in the center of the panel. Look under the panel. You will see the back of the button and a thin wire running to the burner area.
Step 2: Remove the Old Button
Most igniter buttons are held in place by a plastic nut on the back of the panel. Reach under the panel and unscrew the nut by hand. Turn it counterclockwise. If it is stuck, use pliers with care. Do not squeeze too hard, or the plastic will crack.
Some buttons are held by a small metal clip. Push the clip aside with a flat screwdriver. The button will slide out of the front of the panel.
Step 3: Disconnect the Wire
Follow the wire from the button to the electrode near the burner. Pull the wire connector off the electrode. Some connectors pull straight off. Some have a small tab you must press. Note how the wire is routed. You will route the new wire the same way.
If the electrode tip looks dirty, clean it now with a wire brush. A clean tip makes a stronger spark. This is also a good time to check the burner tubes for blockage, since dirty burners cause lighting trouble too.
Step 4: Install the New Button
Slide the new button into the hole from the front of the panel. Push it in until it seats flat. From behind, thread the plastic nut onto the button and tighten it by hand. Snug is enough. Do not over-tighten plastic nuts.
Step 5: Connect the Wire
Route the new wire along the same path as the old one. Keep the wire away from hot surfaces. Push the connector onto the electrode until it fits tight. Give it a gentle tug to make sure it will not slip off.
Step 6: Test the Spark
Turn the gas back on at the tank. Do not turn any burner knob yet. Press the igniter button and watch the electrode. You should see a small blue spark jump. If you have a battery type, make sure the battery is installed with the correct polarity.
Step 7: Light the Grill
Turn one burner knob to the high position. Press the igniter button. The burner should light within two or three clicks. If it lights, turn the knob off and repeat the test for each burner. If a burner will not light, check the wire connection again.
That is the whole job. You now know how to replace grill igniter button parts on most standard gas grills.
Cost and Price
Replacing an igniter button is one of the cheapest grill repairs. A universal push-button igniter often costs between five and fifteen dollars. Brand-specific buttons cost more. Some run twenty to forty dollars depending on the grill model.
A full igniter kit with button, wire, and electrode costs between fifteen and forty dollars. The kit is a good choice if the electrode is also worn. Battery igniter modules cost a bit more, often twenty to fifty dollars.
Compare these prices with a service call. A repair visit can cost seventy-five dollars or more. Doing the job yourself saves real money. If you want to compare part prices, consumer guides such as Consumer Reports and grilling resources like AmazingRibs offer buying advice on grill parts and models.
If several parts of the grill are worn at once, think about the full cost of repairs. A grill with rusted burners, a bad regulator, and a dead igniter may cost more to fix than to replace. For regulator trouble, see the gas grill regulator replacement guide to judge whether a repair makes sense.
Care and Upkeep
A little care makes the new igniter last longer. Keep the grill covered when not in use. A grill cover keeps rain off the control panel. Water is the main enemy of igniter parts.
Clean the electrode tip once a month during grilling season. Wipe away grease with a paper towel. Scrub off rust with a wire brush. Grease and rust block the spark.
Check the battery once a season if your grill uses one. Old batteries leak. A leaking battery can ruin the battery holder. Replace the battery each spring as a habit.
Tighten the plastic nut if the button gets loose. A loose button wiggles and wears out the wire. A quick hand-tighten takes seconds.
When grilling season ends, clean the whole grill before storage. Cover it or move it to a dry spot. A winterized grill starts the next spring with fewer problems. For full seasonal care, read how to winterize gas grill for storage.
Safety
Gas grills are safe when used with care. Keep these rules in mind during this repair and every time you grill.
Work only on a cold grill. Let the grill cool for at least one hour after cooking. Hot metal burns skin fast.
Turn off the gas at the tank before you start. Turn all knobs to off. If you smell gas while working, stop at once. Step away. Let the area air out. Do not press the igniter while gas is leaking.
Keep your face and hands away from the grill when testing the spark. Stand to the side. Light the grill with the lid open. Never light a grill with the lid closed. Gas can build up under a closed lid and flare.
Teach children to stay away from the grill during repairs. Store matches and lighters out of reach. If you are unsure about any step, ask a grill dealer for help. Char-Broil offers support pages for its grills through Char-Broil. Napoleon covers its models at Napoleon.
Frequently Asked Questions
How long does an igniter button last?
Most last three to five years. Rain, heat, and grease shorten their life. A covered grill keeps the button working longer.
Can I still use my grill if the igniter is broken?
Yes. You can light the burners with a long match or a long-nosed lighter. Open the lid first. Turn on one burner. Hold the flame near the burner. Stand back as you light it. Replace the igniter soon so you do not have to light it by hand.
Why do I hear a click but see no spark?
The wire may be loose. The electrode may be dirty. The gap between the electrode and the burner may be too wide. Clean the tip and check the wire. If the problem stays, the button may be bad.
Are universal igniter buttons any good?
Yes, if you match the size and type. Measure the old button and wire. A universal button of the right size works as well as a brand part. Brand parts fit best on high-end grills. Traeger lists parts for its pellet grills at Traeger, and Big Green Egg does the same at Big Green Egg.
How do I know if the problem is the battery?
If your grill uses a battery igniter, replace the battery first. It costs little. If the spark comes back, the battery was the problem. If not, check the wire and the button.
Where can I learn more about grill recipes and care?
The Spruce Eats publishes grilling guides and recipes at The Spruce Eats. It is a good place to learn what to cook once your grill lights reliably again.
Final Word
Learning how to replace grill igniter button parts is a small skill with a big payoff. The job takes minutes. The parts cost little. The reward is a grill that lights on the first click, every time. Keep the electrode clean, keep the grill covered, and check the battery each spring. Your grill will serve you well for many cookouts to come.
References
AmazingRibs.com. (n.d.). Barbecue and grilling science. https://www.amazingribs.com Big Green Egg. (n.d.). Kamado grills and outdoor cooking. https://www.biggreenegg.com Char-Broil. (n.d.). Gas and charcoal grills. https://www.charbroil.com Consumer Reports. (n.d.). Product reviews and ratings. https://www.consumerreports.org Napoleon. (n.d.). Fireplaces, grills, and heating products. https://www.napoleon.com The Home Depot. (n.d.). Home improvement products. https://www.homedepot.com The Spruce Eats. (n.d.). Recipes and cooking guides. https://www.thespruceeats.com Traeger. (n.d.). Wood pellet grills. https://www.traeger.com Weber. (n.d.). Grills and outdoor cooking. https://www.weber.com
Was this guide helpful?

About Robert Taylor
The My Garden US editorial team writes practical, in-depth home and garden guides for American homeowners — tested advice, no fluff.
You May Also Like

Best BBQ for Fathers Day Gift: How to Choose the Right One
May 15, 2026 0 views
Pellet Grill Grease Fire Prevention Tips for Safe Backyard Cooking
July 20, 2026 0 views
Best Rotisserie Attachment for Gas Grill: A Plain Guide to Picking the Right One
July 6, 2026 0 views