
Hardwood floors bring warmth to a house. They also show every mark. A dragged chair, a dog’s claws, or a dropped pan can leave a scratch. Many owners turn to hardwood floor scratch repair kit reviews before they buy. A good review tells you what the kit can fix and what it cannot. This guide gathers that knowledge in one place. It explains how these kits work, which types are worth your money, and how to use them so the repair holds.
Why Scratches Deserve Quick Attention
A scratch in a hardwood floor is more than a mark on the surface. Deep scratches cut through the finish and expose bare wood. Once the wood is open, moisture can enter. Dirt works into the grain. Over months the damage grows, and a small line becomes a dark stain. Quick repair keeps the problem small and cheap. It also protects the value of the home, since floors are one of the first things buyers notice.
Most kits aim at light to medium scratches. They do not replace a full refinish. If you are weighing repair against a bigger job, read our refinishing hardwood floors cost calculator to compare the numbers. For everyday marks, though, a repair kit is the right tool. A kit costs a few dollars and takes half an hour, while a refinish takes days and costs a hundred times more.
How Scratch Repair Kits Work: Hardwood Floor Scratch Repair Kit Reviews
Wax Sticks and Fill Pencils
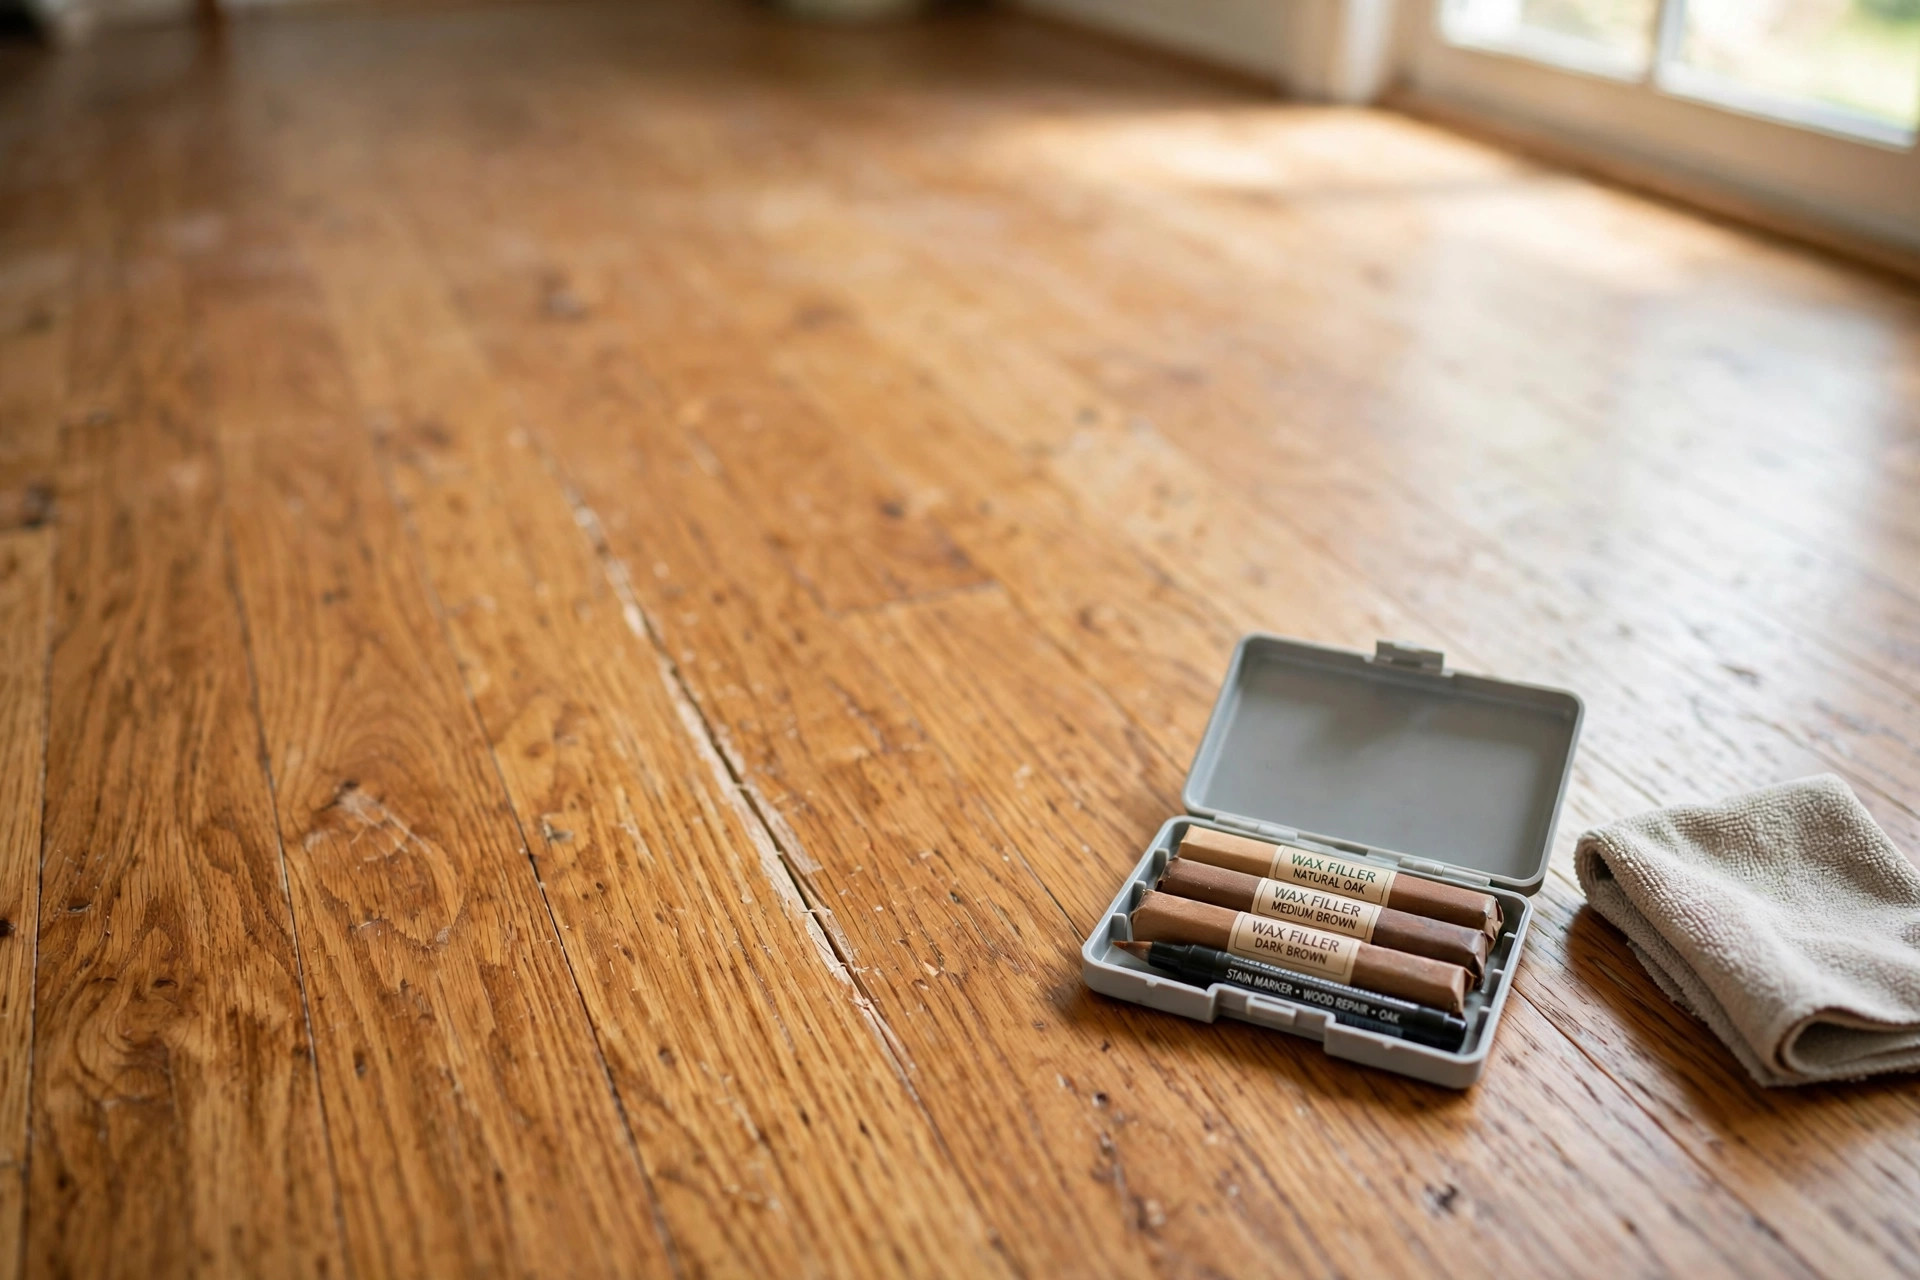
The simplest kits use wax filler sticks. You rub the wax into the scratch until it fills the gap. Then you buff it smooth with a cloth. These sticks come in wood-tone colors. Many kits include six to ten shades so you can blend to match your floor. Wax fillers suit shallow scratches in the finish layer. They are easy to use and hard to do wrong.
Marker Pens
Stain markers work like thick felt pens. You draw over the scratch, and the stain colors the bare wood. They do not fill the gap. They only hide it. Markers work best on thin hairline scratches where the color loss is the main problem. Two coats often give a deeper tone. You must wipe off excess quickly or it stains the sound wood around the scratch.
Putty and Fill Compounds
Wood filler putty handles deeper gouges. You press it into the damage with a small plastic knife. It hardens in place. Then you sand it flush and stain it. This method takes more skill but gives a longer-lasting fix. Putty kits often include sandpaper in fine grits.
Polyurethane Finish Pens
Some kits add a clear finish pen. After the color is set, you brush on a thin coat of finish. This seals the repair and blends the shine. It matters because an unsealed repair looks dull next to the glossy floor. Reviewers who skip this step often complain that the fixed spot stands out in bright light.
Two-in-One Stain and Seal Pens
A newer style of kit combines stain and sealant in one pen. You apply the color end first, then flip to the seal end. These save a step and cost little more than plain markers. They suit renters who want a fast fix before a move-out inspection.
What to Look For When You Choose
Color Match
The most common complaint in hardwood floor scratch repair kit reviews is poor color match. Floors vary. Red oak, white oak, maple, and walnut each have their own tone. Old floors also darken with age. Pick a kit with many shades. Test on a hidden spot, such as inside a closet, before you touch the main floor.
Scratch Depth
Know your damage before you shop. Surface scratches that catch no fingernail need only a marker or a finish touch-up. Scratches you can feel with a nail need wax filler. Gouges you can see into the wood need putty. Buying the wrong type wastes time and money.
Finish Type
Floors finished with polyurethane differ from floors finished with wax or oil. Water-based kits bond poorly to oil-finished wood. If you do not know your finish, test in a corner. A drop of water that beads up usually means polyurethane. A drop that soaks in slowly suggests oil or wax.
Ease of Use
Reviews praise kits with clear printed steps. Video guides help too. The best kits need no special tools. They include an applicator, a buffer cloth, and clear mixing rules. Avoid kits that ask you to melt wax with a knife unless you have done it before.
Types of Kits Compared
All-in-One Box Kits
These boxes pack wax sticks, markers, putty, and a finish pen in one case. They cost more, but they cover every scratch type. They suit homes with heavy wear, such as houses with dogs. If pets are part of the problem, our article on scratch resistant flooring for large dogs usa looks at longer-term answers.
Marker-Only Sets
These are the cheapest option. A set of eight or ten stain pens costs little and stores in a drawer. They are perfect for quick touch-ups before guests arrive. Their weakness is durability. The color fades with mopping and must be redone.
Professional Fill Kits
Pro-style kits use hard wax that you melt and level with a blade. Floor refinishers use these. The repair is tough and can take foot traffic. The learning curve is steeper. Practice on scrap wood first.
Cost and Price Ranges
Most marker sets sell for five to fifteen dollars. Wax stick sets with ten or more colors run ten to twenty-five dollars. All-in-one kits with putty and finish pens cost twenty to forty dollars. Pro melt-wax kits can reach fifty dollars or more.
Price tells you little about quality here. A ten-dollar marker set from a known brand often beats a thirty-dollar mystery box. Read reviews that mention your floor species and finish. A kit that shines on maple may fail on walnut. Retailers such as The Home Depot and Lowe’s carry the main brands, and their customer review sections are full of photos from real floors.
Also check what the kit does NOT include. Some sets lack a finish sealer, so you must buy one separately. Others include coarse sandpaper that can scratch a fine finish. A kit that looks cheap may cost more once you add the missing parts. Many floor-care makers, including the makers behind the big flooring brands, publish care charts that pair each finish with the right repair product.
Step-by-Step: Using a Repair Kit the Right Way
Step One: Clean the Area
Sweep the scratch with a soft broom. Then wipe it with a damp cloth and let it dry. Dust and grit ruin a repair. A clean surface also helps you judge the true color.
Step Two: Choose the Color
Lay out the shades next to the scratch in daylight. Wood tone shifts under lamp light. Many reviewers at This Old House suggest picking a shade slightly darker than the floor. Darker blends better than lighter.
Step Three: Fill or Color
For wax sticks, rub across the scratch at an angle until it is full. For markers, draw along the scratch in smooth strokes. For putty, press it in and scrape off the excess with the plastic knife.
Step Four: Level and Buff
Wait the time the instructions give. Then buff with the cloth using firm pressure. For putty repairs, sand lightly with the fine paper after the fill has cured. Work along the grain, never across it.
Step Five: Seal the Repair
If your kit has a finish pen, brush one thin coat over the repair. Let it dry fully before you walk on it. Two thin coats beat one thick coat. Sealing keeps the color from washing out.
Care and Upkeep After the Repair
Prevention saves more floor than any kit. Place felt pads under chair legs and table feet. Replace the pads once a year because they wear thin. Put mats at every door so grit stays outside. Grit is sandpaper under shoes.
Mop with a damp mop, never a wet one. Water is the enemy of wood floors. Vacuum with a hard-floor setting so the beater bar does not hit the wood. Our guide to the best vacuum for hardwood floors reviews usa covers models that clean without scratching.
Recoat high-traffic lanes every few years. A fresh finish coat protects the wood and makes future scratches shallow ones. Floor care guides from Shaw Floors and Mohawk Flooring list products matched to each finish type.
Safety Notes
Work in a ventilated room when you use putty or finish pens. The fumes are mild but real. Keep all products away from children and pets. Some stain markers contain solvents that stain skin and clothing. Wear the gloves if the kit includes them. Store kits in a cool dry place. Melted wax sticks make a mess and lose their shape.
Test every product in a hidden spot first. A color that looks right in the box can turn orange on old oak. A five-minute test saves a weekend of regret.
Common Mistakes Reviewers Report
Many buyers skip the cleaning step and trap dust in the wax. Others pick one shade and use it on the whole house. Floors change color from room to room as light shifts. Match each room on its own.
Another common error is overfilling. A wax mound looks worse than the scratch. Less is more. You can always add a second pass.
Some owners use marker pens on deep gouges. The color hides the line but the dent remains. Deep damage needs filler first, color second.
A last error is haste. Rushing the drying time leaves a soft repair that picks up dirt. Give putty the full cure time on the label, even if the surface feels dry. Patience is the cheapest tool in the box.
FAQ
Will a repair kit make scratches disappear completely?
Light scratches often vanish. Deep gouges will improve but may stay visible at an angle. Most reviewers call the result good from standing height. No kit equals a professional refinish.
How long does a repair last?
Marker touch-ups may need redoing every few months in busy rooms. Wax fills can last a year or more. Putty repairs sealed with finish often last several years. Heavy traffic shortens every repair.
Can I use a repair kit on engineered hardwood?
Yes, if the scratch is in the finish or the top veneer. If the scratch cuts through the thin veneer to the core, a kit cannot fix it. Board replacement may be the only answer.
Do these kits work on gray or whitewashed floors?
They can, but color match is harder. Gray floors need gray-toned fillers, not brown ones. Some owners mix two shades to get close. Test first.
Are repair kits safe for pets?
Once dry, most are safe. Keep pets out of the room during the work and until the finish has cured. Check the label for cure times.
Should I hire a pro instead?
For a handful of scratches, a kit is the smart choice. For rooms full of deep damage, a pro refinish gives a better result for the money. Compare quotes before you decide.
Can one kit cover my whole house?
Most kits last through dozens of small repairs. Wax sticks run out fastest on large jobs. If your whole house needs help, buy a second kit of the same brand so the colors stay consistent.
A Short Final Word
Hardwood floor scratch repair kit reviews agree on one point. These kits work when you match the product to the damage. Clean the floor, test the color, fill the scratch, and seal the work. Spend ten minutes on care and the repair will serve for years. For deeper learning, browse care articles at The Spruce and LL Flooring, and check independent test results at Consumer Reports and Bob Vila. A little patience gives you back the floor you paid for.
References
Bob Vila. (n.d.). Home improvement advice. https://www.bobvila.com Consumer Reports. (n.d.). Product reviews and ratings. https://www.consumerreports.org LL Flooring. (n.d.). Hardwood, vinyl, and tile flooring. https://www.llflooring.com Lowe’s. (n.d.). Home improvement products. https://www.lowes.com Mohawk Flooring. (n.d.). Flooring products. https://www.mohawkflooring.com Shaw Floors. (n.d.). Flooring products. https://www.shawfloors.com The Home Depot. (n.d.). Home improvement products. https://www.homedepot.com The Spruce. (n.d.). Home and garden advice. https://www.thespruce.com This Old House. (n.d.). Home renovation guidance. https://www.thisoldhouse.com
Was this guide helpful?

About Sarah Mitchell
The My Garden US editorial team writes practical, in-depth home and garden guides for American homeowners — tested advice, no fluff.
You May Also Like

Best Flooring for Kitchens with Dogs USA: A Practical Guide for Pet Owners
January 28, 2026 0 views
Berber vs Frieze Carpet: A Full Comparison for USA Homes
September 9, 2026 0 views
What to Ask About a Flooring Installation Warranty
March 8, 2026 0 views