
Introduction
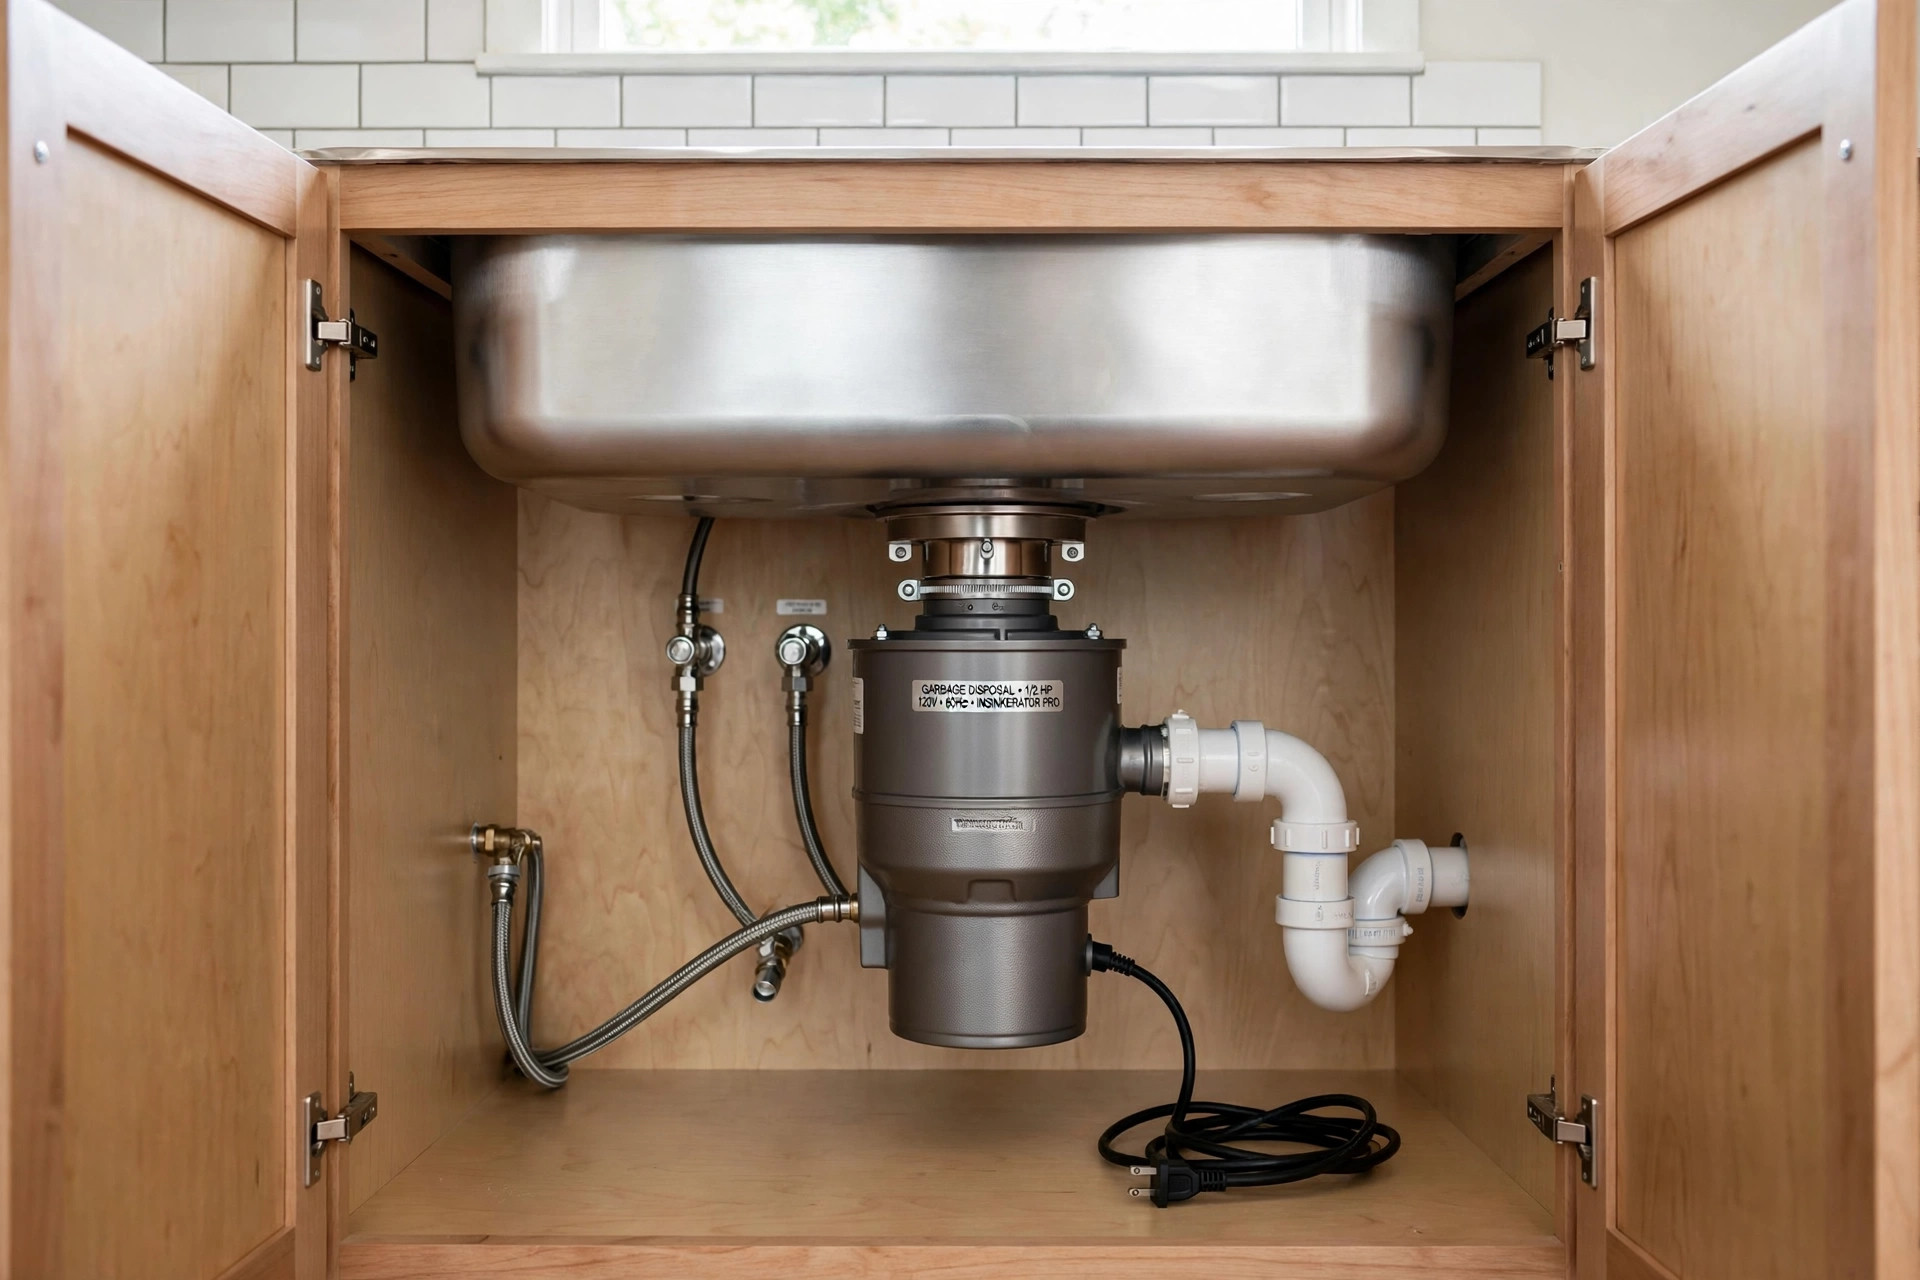
Garbage disposal installation in California homes USA kitchens has become one of the most common small projects a homeowner can take on. The unit fits under the sink. It grinds food scraps into fine bits. The bits flow down the drain with water. This keeps the trash can lighter and the kitchen cleaner.
California homes come in many forms. There are old bungalows in Los Angeles. There are new tract houses in the Central Valley. There are condos by the bay in San Francisco. Each home has its own plumbing and its own rules. A disposal that works well in one house may not fit in another.
This guide walks through the full process. It explains why disposals matter. It shows what to look for when you shop. It compares the main types. It gives cost ranges. It covers care and safety. It answers the questions buyers ask most often.
Why It Matters: Garbage Disposal Installation California Homes Usa
A garbage disposal changes daily kitchen work. Scraps from plates can go straight down the drain. Peels and rinds vanish with a flip of a switch. The trash bag fills more slowly. Odors from rotting food drop.
In warm parts of California, food waste turns bad fast. A trash can in a Fresno or Riverside kitchen can smell by evening. A disposal cuts that problem. It sends scraps out through the sewer or septic system instead of letting them sit.
A disposal can also protect the drain. When used well, the rush of water helps move grease and small bits along. But a bad unit or a careless habit can clog a line. That is why correct choice and correct installation matter so much.
What to Look For When You Choose
Start with the motor. Disposal motors are rated in horsepower. A 1/3 horsepower unit suits a light-use kitchen. It handles soft scraps fine. A 1/2 horsepower unit is the most common choice for a family. It grinds most daily waste. A 3/4 horsepower or full 1 horsepower unit suits heavy cooks. It grinds chicken bones and fibrous scraps with less strain.
Next, check the grind stages. Basic units have one stage. The food passes through one grind ring. Two-stage and three-stage units grind finer. Fine grounds flow better. They lower the risk of clogs in older pipes.
Sound matters too. Cheap units are loud. A good unit has insulation around the shell. Some have special mounts that cut vibration. In an open-plan California home, a quiet unit makes a real difference. Families that cook late at night will value a low-decibel model even more.
Next, think about the splash guard and drain connection. A sturdy rubber guard keeps food in and stops spray. Check that the unit has a dishwasher inlet if your dishwasher needs one. Most units ship with a knock-out plug on the inlet. You remove it only when you connect a dishwasher hose.
Look at the feed type. Continuous feed units run while you add food. You turn on the water, flip the switch, and push scraps in. Batch feed units run only when you insert a stopper lid. Batch feed is safer for homes with small children. Continuous feed is more common and faster.
Check the warranty. Many units carry two to five years of cover. Better models carry seven to ten years. A long warranty often signals stronger parts.
Types and Options
Continuous Feed Disposals
This is the standard type found in most American kitchens. The unit stays on while food goes in. It is quick. It handles a steady stream of scraps after a big meal. Most brands offer this style first.
Batch Feed Disposals
A batch feed unit grinds only when the stopper is in place. You load the chamber, set the stopper, and it runs. The lid keeps hands and utensils out. Families with young children often choose this type for safety.
High-Power and Septic-Safe Models
Some homes run on septic systems. Rural California homes in the hills and deserts often do. Septic-safe disposals pair with enzyme cartridges. The enzymes break down food solids so the tank is not strained. These units cost more, but they protect the septic system.
Compact Units for Tight Cabinets
Older California bungalows can have small sink cabinets. Compact disposals fit those spaces. They trade some power for size. For a one or two person home, a compact unit may be all you need.
When you shop for related sink upgrades, a guide on undermount stainless sinks can help you match the right basin to your new unit. If you want cleaner water at the tap as well, read up on under sink filters. And for a handy faucet upgrade over the range, see pot filler faucets.
California Rules and Permits
California has rules that affect disposal installation. Many cities and counties ban new disposals where homes use septic systems or where sewer lines are weak. Some water districts limit disposals during drought years because they use extra water.
Building codes also matter. The California Plumbing Code sets rules for traps, drains, and electrical connections. A disposal needs a grounded outlet under the sink. Many older homes lack one. Adding an outlet may need a permit and a licensed electrician.
Homeowners associations can add their own limits. Condos and townhomes often ban disposals in shared buildings. Check your HOA rules before you buy.
Before work starts, call your city building office. Ask two questions. Is a disposal allowed in your area? Is a permit needed for the install? The answers keep you clear of fines and failed inspections.
Cost and Price
A basic 1/3 horsepower unit costs about 80 to 120 dollars. A mid-range 1/2 horsepower unit runs 120 to 200 dollars. A high-end 3/4 or 1 horsepower unit with sound insulation costs 200 to 350 dollars. Septic-safe models sit at the top of the range.
Professional installation in California often costs 150 to 400 dollars. The price depends on the city. Work in San Francisco or Los Angeles costs more than work in smaller towns. If new wiring or a new outlet is needed, add 100 to 250 dollars.
A simple swap takes a plumber one to two hours. The plumber removes the old unit and mounts the new one on the same flange. A first-time install takes longer. The plumber must cut the drain pipe, add the flange, wire the outlet, and test the full run.
Do-it-yourself installation can save money. But it is not for everyone. You must be sure with electrical work and plumbing joints. A leak under the sink can ruin a cabinet fast.
For honest price data, check product ratings at Consumer Reports. For step-by-step project guides, This Old House offers clear walk-throughs. For plain advice on home projects, The Spruce covers disposals in detail.
Care and Upkeep
A disposal lasts longer with good habits. Always run cold water before you start the unit. Keep the water running during the grind. Let it run for ten to fifteen seconds after the sound clears. Cold water keeps grease solid so the grind can push it through.
Feed food in small bits. Do not dump a full plate at once. Soft scraps like cooked rice, soft fruit, and cooked vegetables are fine. Small chicken bones are fine in strong units.
Some foods should never go down a disposal. Grease and oil coat pipes and harden. Coffee grounds pack into sludge. Pasta and rice swell with water. Onion skins and artichoke leaves wrap around the grind plate. Celery and corn husks are too fibrous. Eggshell membranes can catch on the impellers.
Clean the unit each month. Drop a tray of ice cubes in and run it. The ice scours the grind chamber. Then grind a few lemon or orange peels. They freshen the smell. Never pour harsh drain cleaner into the unit. It can harm the seals and the metal.
Check the reset button now and then. It sits on the bottom of the unit. If the motor stalls, the button pops. Press it after the unit cools. If it trips often, the unit may be worn out.
Appliance makers post care guides on their sites. Whirlpool and GE Appliances both offer kitchen appliance resources. Bosch lists tips for long appliance life. For energy-wise homes, Energy Star has guidance on efficient kitchens.
Safety
A disposal is safe when it is treated with respect. Never put a hand into the chamber. Use tongs to pull out a stuck spoon. Always turn the unit off before you reach under the sink.
Keep the splash guard in place. It blocks food and water from flying up. Replace it if it tears. A torn guard lets bits spray the cabinet.
Teach children the rules. The switch should be out of reach for small kids. A batch feed unit adds a layer of protection. Never let a child play near the sink while the unit runs.
Watch for warning signs. A unit that hums but does not spin has a jam. Turn it off. Use the hex key that came with the unit to turn the flywheel from below. This often frees the jam.
If the unit leaks from the bottom, the seals are gone. Replace the unit. Water and motors do not mix. A leak at the top flange may need a new mounting gasket. Tighten or replace it before the cabinet wood swells.
Home repair sites give solid safety steps. Bob Vila explains common fixes. Big retailers like Home Depot and Lowe’s sell parts and show install basics.
Frequently Asked Questions
How long does a garbage disposal last?
Most units last eight to twelve years. Heavy use shortens the life. Good care extends it. When the grind slows or the unit leaks, it is time to replace it.
Can I install a disposal myself?
Yes, if you have basic skills. A swap on an existing mount is the easiest job. You will need plumber’s putty, a screwdriver, and the hex key. If new wiring is needed, hire an electrician. Electricity under a wet sink is not a place to learn.
Are garbage disposals legal in all of California?
No. Rules vary by city and county. Some areas limit or ban new installs. Areas with septic systems often restrict them. Always check local rules before you buy.
What size disposal do I need?
A 1/3 horsepower unit suits a small home with light cooking. A 1/2 horsepower unit suits most families. A 3/4 or 1 horsepower unit suits heavy cooks and large homes. Bigger motors run smoother and last longer.
Will a disposal work with a septic tank?
It can, with care. Use a septic-safe model with enzyme treatment. Go easy on the volume of food waste. Have the tank pumped on schedule. Some counties still say no, so check first.
Why does my disposal smell bad?
Food bits stick to the chamber walls and the splash guard. They rot and smell. Clean the unit with ice and citrus peels each month. Scrub the splash guard with a brush and dish soap. Running more water during use also helps.
A Final Word
Garbage disposal installation in California homes USA buyers plan should start with the rules, not the store shelf. Check your city code. Check your HOA. Know your plumbing and your wiring. Then pick a unit that fits your cooking style and your cabinet space.
A well-chosen disposal makes kitchen work lighter every single day. It cuts trash odor. It speeds cleanup. It lasts for years with simple care. Take your time on the choice, and the unit will pay you back daily.
References
Bob Vila. (n.d.). Home improvement advice. https://www.bobvila.com Bosch. (n.d.). Home appliances. https://www.bosch-home.com Consumer Reports. (n.d.). Product reviews and ratings. https://www.consumerreports.org ENERGY STAR. (n.d.). Energy efficient products. https://www.energystar.gov GE Appliances. (n.d.). Kitchen and home appliances. https://www.geappliances.com Lowe’s. (n.d.). Home improvement products. https://www.lowes.com The Home Depot. (n.d.). Home improvement products. https://www.homedepot.com The Spruce. (n.d.). Home and garden advice. https://www.thespruce.com This Old House. (n.d.). Home renovation guidance. https://www.thisoldhouse.com Whirlpool. (n.d.). Home appliances. https://www.whirlpool.com
Was this guide helpful?

About Emily Rodriguez
The My Garden US editorial team writes practical, in-depth home and garden guides for American homeowners — tested advice, no fluff.
You May Also Like
Kitchen Pantry Cabinets: Where to Buy in the USA
July 2, 2026 0 views
Garbage Disposal Installation: A Plain Guide for American Homes
August 22, 2026 0 views
Shaker Cabinet Doors for California Homes
August 24, 2026 0 views