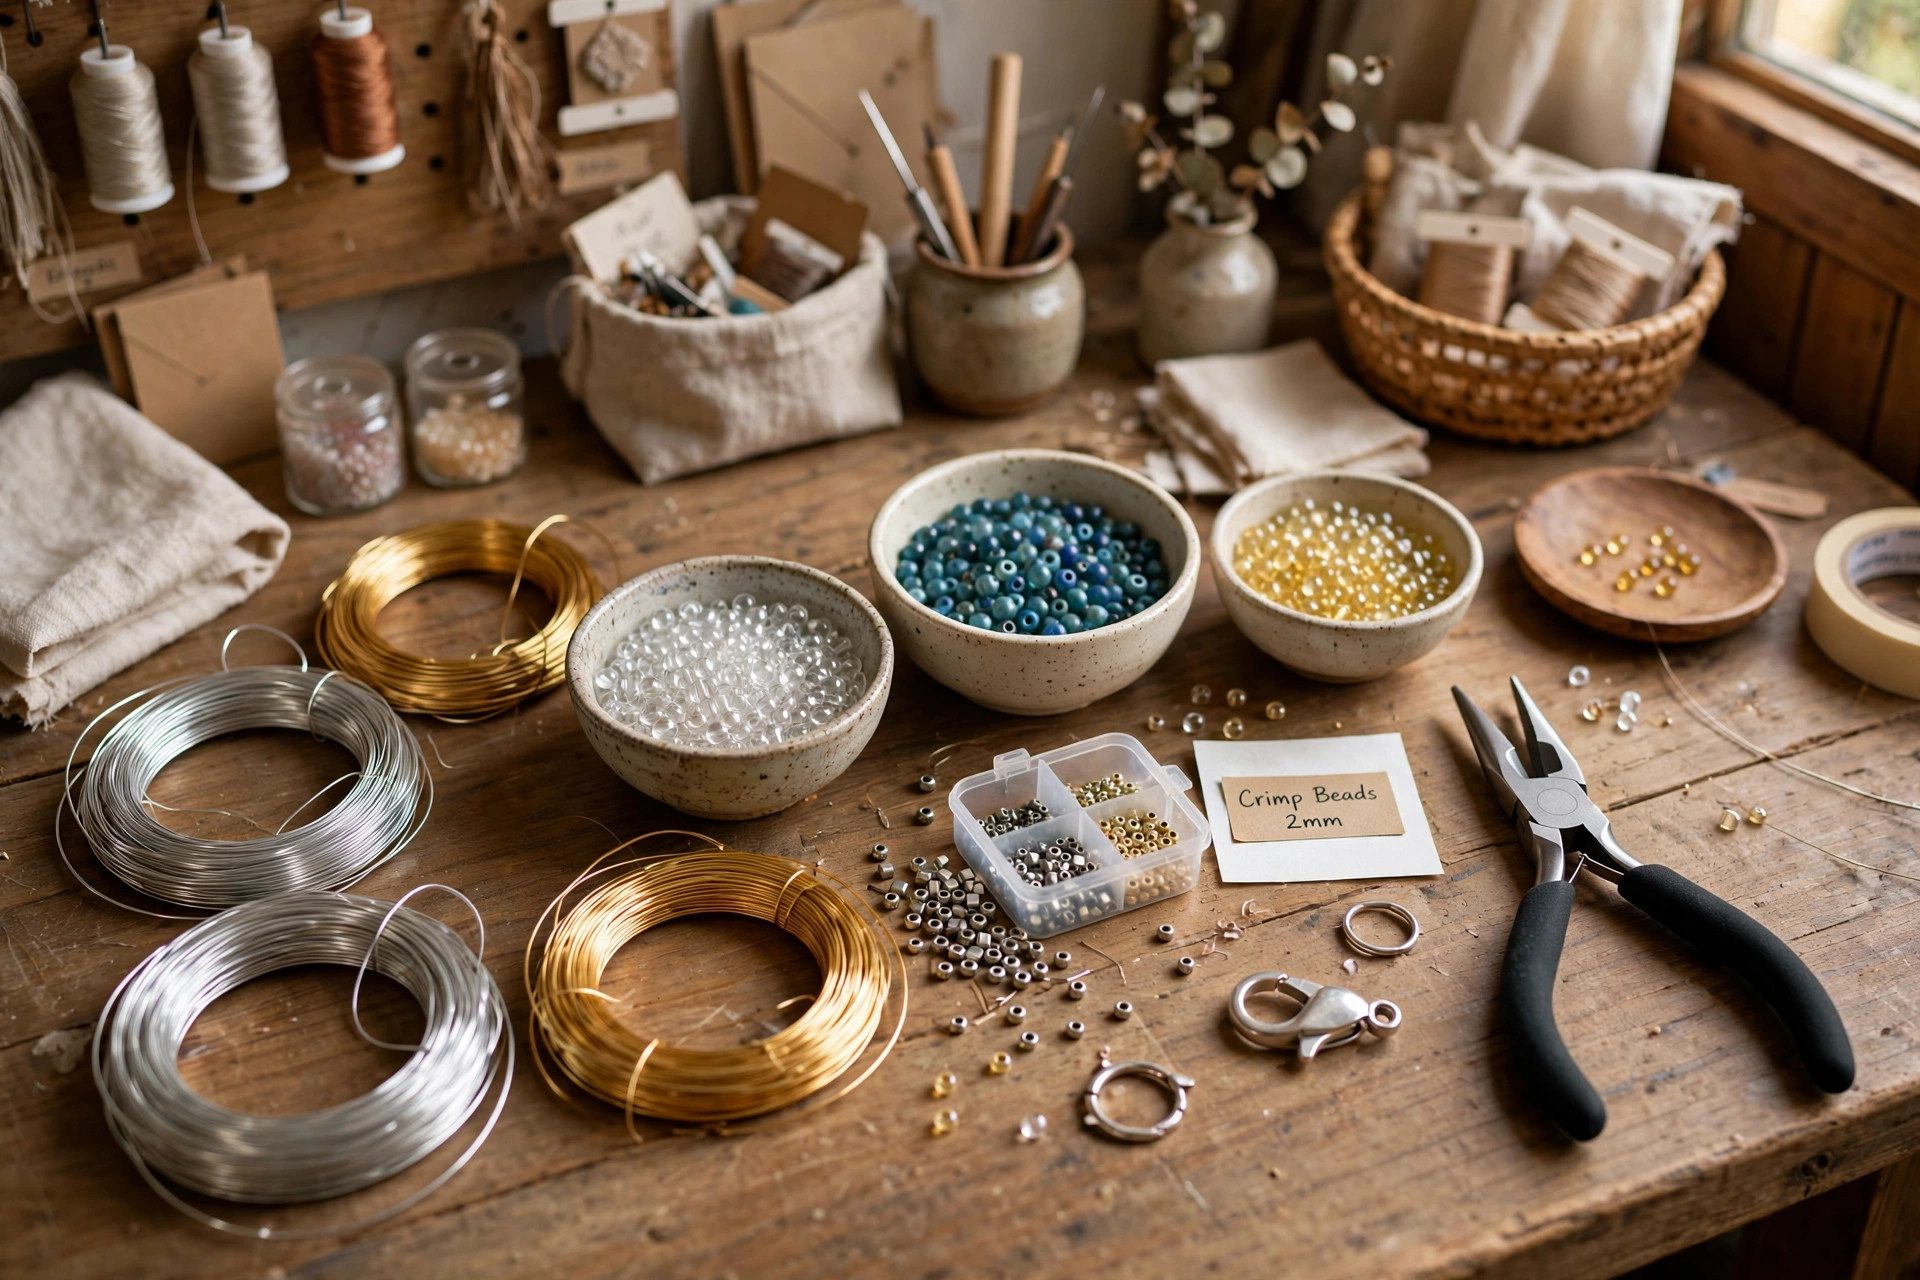

A good necklace starts with a strong string. Many crafters learn this the hard way. They spend hours on a lovely design. Then the cord snaps on the first day. The beads roll across the floor. The work is lost. That is why bead stringing wire for necklace making crafts matters so much. It is the hidden backbone of the piece. No one sees it when the necklace is worn. But it decides whether the necklace lasts a week or lasts for years.
This guide explains what bead stringing wire is. It shows the types you can buy. It tells you how to choose the right size. It covers cost, care, and safety. The words are plain. The advice is practical. By the end, you will know how to string a necklace that holds together.
Why the Right Wire Matters
A necklace hangs around the neck. It moves all day. It rubs against clothes. It gets pulled when you take it off. A weak thread cannot take this work. Cotton cord frays. Ordinary thread stretches. Elastic wears out fast. Bead stringing wire is made for this job. It is built to carry weight and to bend without breaking.
The right wire does three things. First, it holds the beads in place. Second, it keeps its shape so the necklace drapes well. Third, it resists wear at the clasp, which is where most failures happen. A cheap cord may cost less at the store. But it costs more in ruined projects.
Good wire also makes the work easier. It is stiff enough to thread beads without a needle. This saves time. It also gives the maker better control over the design. You can lay the strand on a table and see how it will look. You can move beads around before you finish the ends.
What to Look For When You Choose: Bead Stringing Wire for Necklace Making Crafts
Start with the beads you plan to use. Heavy beads need strong wire. Glass beads, stone beads, and crystal have real weight. Light beads, like wood or acrylic, need less strength. Hold the beads in your hand. Feel their weight. That tells you how strong the wire must be.
Next, look at the bead holes. The wire must pass through them. This sounds simple. But some beads have small or rough holes. Stone beads can have sharp edges inside the hole. These edges can cut into weak wire over time. A coated wire stands up to this better than plain thread.
Also think about drape. Drape is how the necklace hangs. A very stiff wire makes a rigid necklace. It may stand out from the neck in an odd way. A more flexible wire hangs in a soft curve. For a close fit choker, you may want more stiffness. For a long chain of beads, you want soft drape. Match the wire to the style.
Color matters too. Most bead stringing wire has a nylon coating. This coating comes in colors like gold, silver, black, and clear. Pick a color close to your beads. Then the wire stays invisible between the beads.
Types of Bead Stringing Wire
Bead stringing wire comes in several forms. Each has its uses.
Nylon-Coated Steel Wire
This is the most common type. It is made of many thin steel strands twisted together. Then it is coated with nylon. The steel gives strength. The coating protects the beads and keeps the wire smooth. It comes in many diameters. This wire works for most projects. It is the first choice for glass and crystal necklaces. You can find wide selections at craft stores such as Michaels and Joann.
Plain Tigertail Wire
Tigertail is an older form of steel wire. It is strong but stiff. It does not drape as well as modern coated wire. It can kink if bent too sharply. Some crafters still use it for heavy stone necklaces. But most makers have moved to the newer flexible types.
Silk and Nylon Thread
Silk thread is the classic choice for pearls. It is soft and gives a beautiful drape. It is not as strong as steel wire. It must be knotted between beads to protect them. Nylon thread is stronger than silk and costs less. Both are best for light beads and fine work.
Stretch Cord
Stretch cord is elastic. It is easy to use because the necklace slips over the head. No clasp is needed. But it wears out. It is not a good choice for a necklace you want to keep for years. Use it for quick fun projects.
Monofilament Line
Monofilament looks like fishing line. It is clear and strong. But it is stiff and hard to knot. It can also be damaged by light over time. It suits simple clear bead designs where you want the line to vanish.
How to Choose the Right Size
Wire size is measured in diameter. Common sizes run from very fine to heavy. The package often lists the number of strands too. More strands mean more flexibility.
Here is a simple rule. Match the wire to the bead weight.
– Fine wire, about 0.010 to 0.012 inches, suits light beads. Use it for small glass seed beads and thin pearls. – Medium wire, about 0.014 to 0.018 inches, suits most craft necklaces. It handles standard glass and crystal beads well. – Heavy wire, about 0.019 to 0.024 inches, suits stone beads and large pendants.
When in doubt, test a short piece. String ten beads on it. Hold it up. See how it drapes. Bend it gently. If it feels right, cut your working length. If you want more guidance on picking supplies for your first projects, a beginner jewelry kit guide can help you build a full set of tools.
The number of strands also matters. A seven-strand wire is fine for light work. A nineteen-strand wire bends more softly. A forty-nine-strand wire is the most flexible of all. It feels almost like thread but keeps steel strength. For a necklace that must drape in a soft curve, choose more strands.
Cost and Price
Bead stringing wire is not costly. A small spool often costs between two and eight dollars. A larger spool of thirty to one hundred feet may cost eight to twenty dollars. The price depends on the brand, the strand count, and the length.
Brand-name wire costs more than store brands. The brand names often test more strictly. They list true diameters and true strand counts. Store brands can be fine for practice pieces. For a gift or a piece you plan to sell, spend the extra dollar on a trusted brand.
Buy wire by the spool, not by the foot, if you make many necklaces. The per-foot cost drops a lot. A thirty-foot spool can string dozens of necklaces. Keep the extra spools in a dry place. Wire does not spoil, so stocking up is safe.
You can compare prices across big craft retailers like Amazon, Walmart, and Etsy before you buy. Prices shift with sales. A small wait can save money.
Also count the small extras. You will need crimp beads, clasps, and jump rings to finish the ends. These small parts cost a few dollars per project. A starter set of findings often costs under ten dollars and covers many necklaces.
How to String a Necklace Step by Step
You need the wire, your beads, crimp beads, a clasp, and flat-nose pliers. A pair of wire cutters helps too. Keep your tools in order with a good craft storage organizer for small rooms, so small parts do not roll away.
1. Cut the wire. Add about six inches to your planned necklace length. This gives you room to work the ends. 2. Slide a crimp bead onto the wire. Then slide one end of the clasp on. Then pass the wire back through the crimp bead. 3. Pull the wire so a small loop forms around the clasp. The loop should be tight but free to move. 4. Flatten the crimp bead with flat-nose pliers. Give it a firm squeeze. This locks the wire in place. 5. Thread your beads in the planned order. Leave about two inches at the end. 6. Repeat the crimp steps at the other end with the second half of the clasp. 7. Trim the extra wire close to the crimp bead.
Test the clasp before you wear the piece. Pull gently on both ends. If a crimp slips, redo it. A loose crimp is the most common failure point.
Do not cut the wire with regular scissors. Steel wire will ruin scissor blades. Use flush cutters made for jewelry work.
Care and Upkeep
A finished necklace needs little care. Wipe it with a soft dry cloth after wearing. This removes skin oils and dust. Do not soak a strung necklace in water. Water can seep under the coating and reach the steel inside. Over time this can cause rust.
Store necklaces flat or hanging. Do not bunch them in a drawer with other jewelry. Hard beads can scratch soft ones. Clasps can tangle. A simple hook board or a lined tray works well.
Check your necklaces once a year. Look at the wire near the clasp. This is where wear shows first. If the coating looks frayed or the wire feels rough, restring the piece. Restringing takes less time than the first stringing. Your beads are already chosen and your design is set.
Keep spare wire away from heat and sun. Heat can soften the nylon coating. Strong light can fade colored coatings. A closed box in a cool room is the best home for your spools.
Safety Notes
Bead stringing wire is a craft supply, not a toy. The cut ends are sharp. They can prick skin. Trim ends close and tuck them inside a crimp cover when you can.
Small beads are a choking hazard for young children and pets. Work on a tray with raised edges so beads do not scatter. Pick up every dropped bead at once. Keep your work area closed off from small children.
Read product labels before you buy. Some older or very cheap wires may carry coatings you do not want against the skin. Choose wires sold for jewelry use. Advice on safe craft practice is published by resources like Family Handyman and This Old House, and general craft safety notes appear at Dick Blick.
If you sell your necklaces, tell buyers how to care for them. A small care card adds a professional touch. It also cuts down on complaints when a piece needs restringing years later.
Common Mistakes to Avoid
Many beginners use wire that is too thin. The necklace feels fine at first. Then it stretches or breaks after a few wears. Match the wire to the bead weight from the start.
Another mistake is pulling crimps too tight. The crimp should hold the wire firm. But the loop at the clasp needs a little room to move. If the loop is crushed flat, the wire will bend at one sharp point. That point will break first.
Some makers skip the test pull. They finish the necklace and gift it right away. Then the clasp fails on the first wear. Always test. A gentle tug takes five seconds and saves embarrassment.
Do not reuse old wire from a broken necklace. Old wire has bends and weak spots you cannot see. Cut fresh wire. The cost is tiny. The peace of mind is worth it.
If you also work with other materials, you may enjoy a resin art jewelry making kit for pendants that pair well with wire-strung strands.
FAQ
What is the best wire for a first necklace? A medium nylon-coated steel wire with nineteen strands is the best start. It suits most glass and crystal beads. It drapes well. It is easy to handle. Buy one spool in a neutral color like clear or silver.
How long should I cut the wire? Add about six inches to the finished length you want. A sixteen-inch necklace needs about twenty-two inches of wire. The extra length gives you room to attach the clasp at both ends.
Can I use fishing line instead? You can, but it is not the best choice. Fishing line is stiff and hard to knot. It can also weaken in sunlight. Bead stringing wire is made for this job and costs about the same.
Why did my necklace break at the clasp? The clasp area takes the most stress. A loose crimp, a sharp bend, or wire that is too thin for the bead weight can all cause failure. Restring with the right size wire and set the crimps with care.
How many strands should the wire have? Seven strands suit light beads. Nineteen strands suit most craft necklaces and give good drape. Forty-nine strands give the softest drape for fine work with many small beads.
Where can I learn more about craft techniques? General craft how-to guides appear at Bob Vila and Home Depot, which both cover workshop and craft basics for home makers.
A Final Word
Bead stringing wire for necklace making crafts is a small supply with a big job. It carries the weight of your design. It sets how the piece hangs. It decides how long the piece lasts. Choose the size with care. Set your crimps with patience. Test before you wear or gift.
Start with one good spool and a simple design. String a short strand of glass beads. Wear it. See how it feels. Each necklace you finish will teach you something. Soon the wire will feel like an old friend. Your beads will sit where you place them. Your clasps will hold. That is the quiet reward of this craft.
References
Amazon. (n.d.). Online shopping. https://www.amazon.com Blick Art Materials. (n.d.). Art and craft supplies. https://www.dickblick.com Bob Vila. (n.d.). Home improvement advice. https://www.bobvila.com Etsy. (n.d.). Handmade and craft marketplace. https://www.etsy.com Family Handyman. (n.d.). DIY home repair and maintenance. https://www.familyhandyman.com JOANN. (n.d.). Fabric and craft supplies. https://www.joann.com Michaels. (n.d.). Arts and crafts supplies. https://www.michaels.com The Home Depot. (n.d.). Home improvement products. https://www.homedepot.com This Old House. (n.d.). Home renovation guidance. https://www.thisoldhouse.com Walmart. (n.d.). Everyday low prices. https://www.walmart.com
Was this guide helpful?

About David Wilson
The My Garden US editorial team writes practical, in-depth home and garden guides for American homeowners — tested advice, no fluff.
You May Also Like
Bead Loom Kit for Bracelet Making Beginners: A Complete Guide
July 8, 2026 0 views
Sewing Machine Needles Assortment for Fabrics USA: A Complete Buyer Guide
April 17, 2026 0 views
How to Make Wood Slice Ornaments for Christmas Crafts DIY
July 6, 2026 0 views