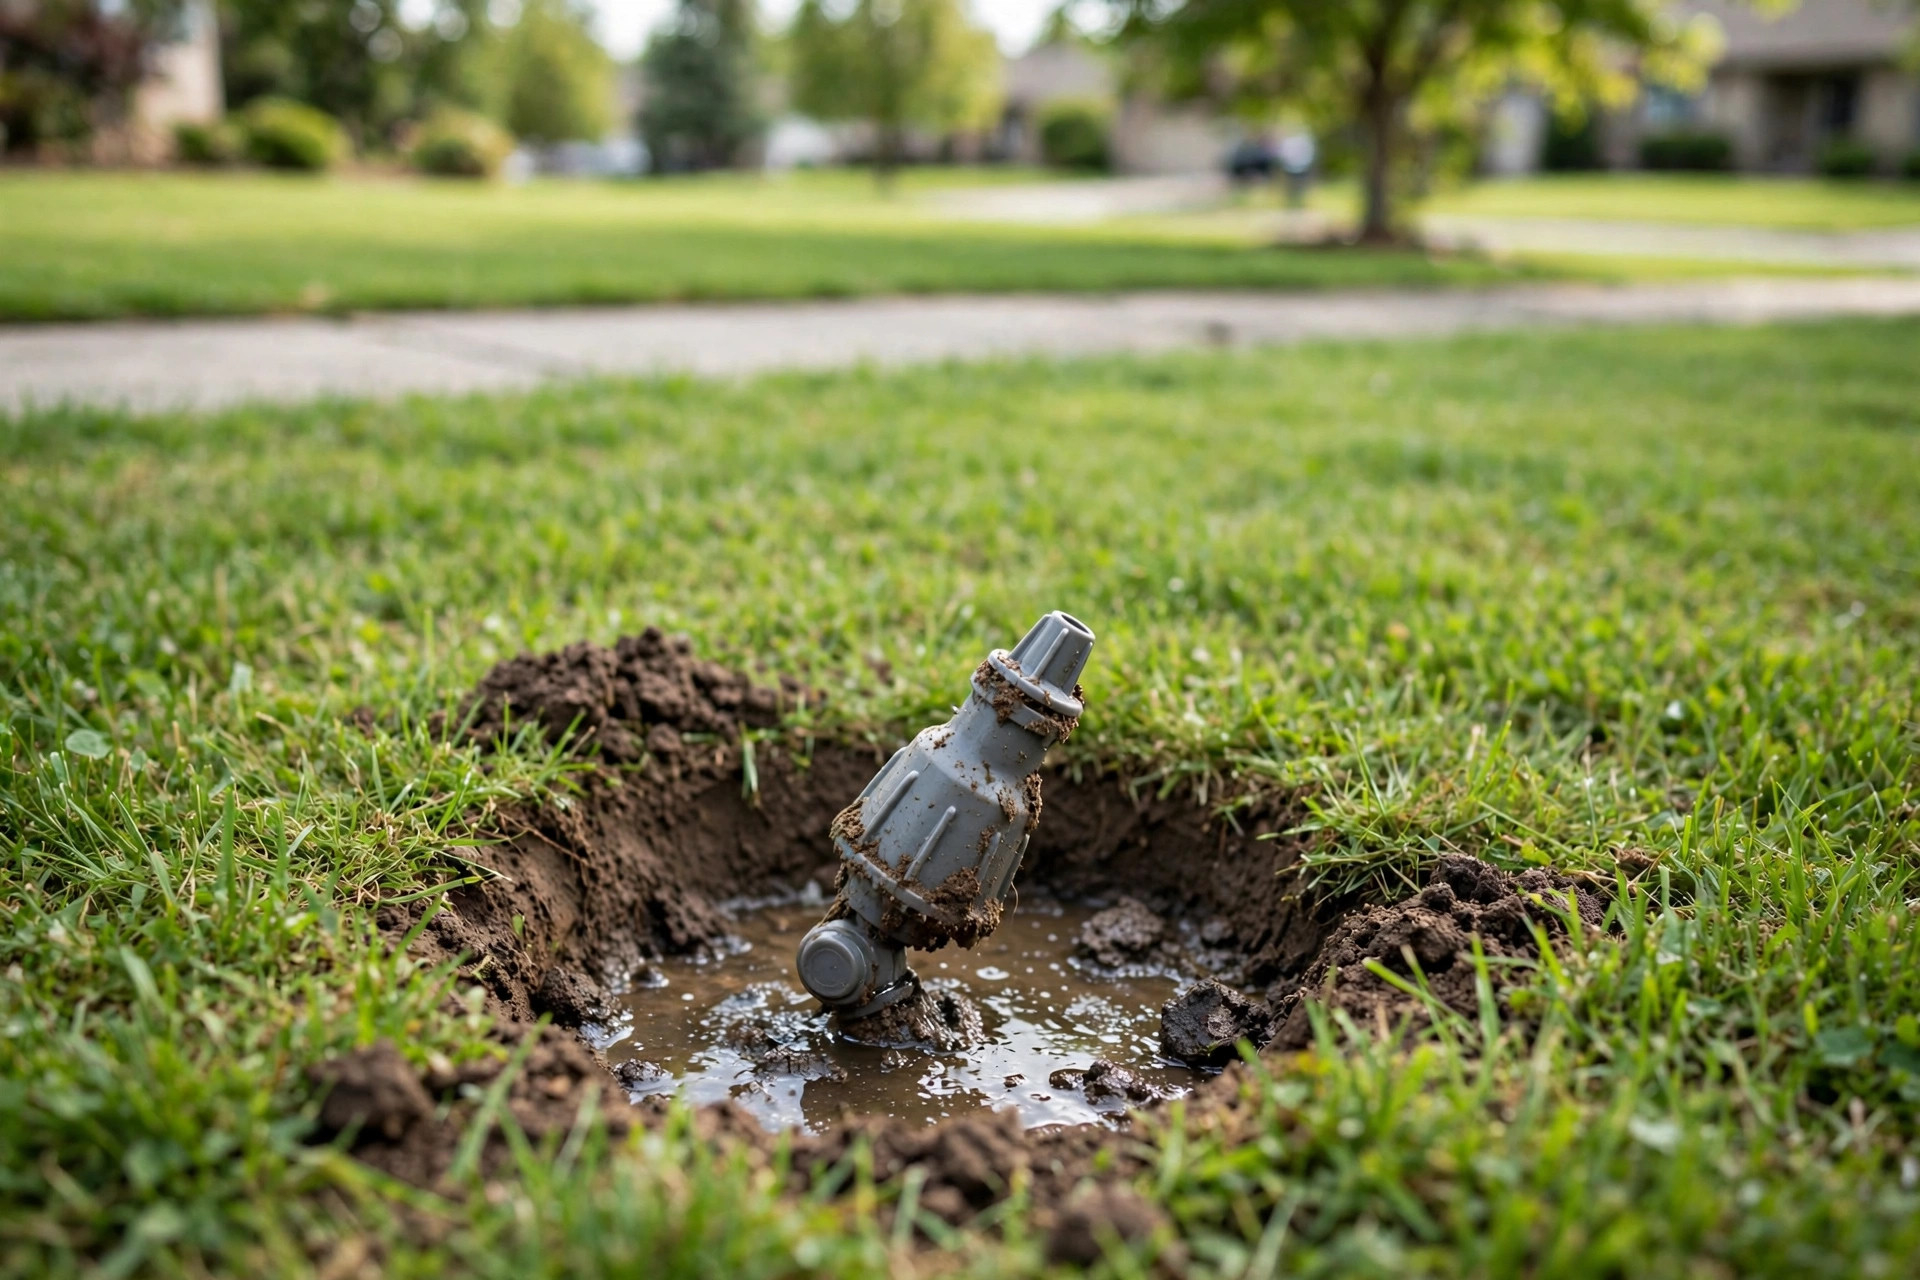

A sprinkler head that leaks can waste a great deal of water in a short time. Learning how to fix sprinkler head leaks will save money on the water bill and keep the lawn green and healthy. The job is not hard. Most homeowners can do it with basic tools and a few small parts.
Why It Matters
A leak at a sprinkler head is more than a small drip. When a head leaks, water runs even when the system is off. It can puddle on the lawn. It can run down the sidewalk and into the street. Over a month, one bad head can waste hundreds of gallons of water. The water bill rises. The lawn suffers.
Water that leaks at the base of a head does not reach the grass roots where it is needed. The plants near the head may rot from too much water. The plants a few feet away may turn brown from too little water. Fixing the leak brings the balance back.
There is another reason to act soon. A leak often means something is broken under the ground. A cracked head can let dirt and small stones into the pipe. Dirt inside the pipe can clog other heads on the same zone. A small repair today can prevent a larger repair later in the season.
Common Causes of Sprinkler Head Leaks: How to Fix Sprinkler Head Leaks
Before learning how to fix sprinkler head leaks, it helps to know why they happen. Most leaks come from a short list of causes.
A cracked head is the most common cause. Lawn mowers and weed trimmers hit heads by accident. Cold weather can also crack the plastic. A hairline crack lets water escape at the base or from the side.
Worn seals are another common cause. Every sprinkler head has rubber seals and gaskets. Over years of sun and heat, these seals dry out and shrink. Water pushes past them. A head with worn seals may leak from the top even when the zone is not running.
Debris is a third cause. Sand, soil, and grass clippings collect around the head. When the zone shuts off, dirt can settle into the threads and seals. A small piece of grit can stop a seal from closing all the way. The result is a slow steady leak.
Low head drainage causes a different kind of leak. If a head sits at the lowest point of a zone, water in the pipe drains out through that head after each watering cycle. This is not a broken part. It is a design issue. A head with a built-in check valve can stop this drainage. The check valve holds the water in the pipe until the zone runs again.
Broken risers cause leaks too. The riser is the small vertical pipe that connects the head to the underground pipe. If it is cracked or loose, water bubbles up around the head. This kind of leak is easy to see but may be easy to fix.
What to Look For Before You Start
Watch the system run first. Turn on the zone with the problem head. Look for mist spraying from the side of the head. Look for water pooling at the base. Note whether the leak happens only while the zone runs, or all the time. A leak that runs all the time often points to a worn seal, a cracked body, or low head drainage.
Next, mark the problem head with a small flag. Then turn off the water to the sprinkler system at the main shutoff valve. Do not skip this step. Working on a pressurized line will soak you and can damage the system.
Tools and Parts You Will Need
You do not need many tools. Most of this work can be done with items from a basic toolbox.
Gather a flat screwdriver and a Phillips screwdriver. You will need them to remove screws on the head cap. A small adjustable wrench helps loosen threaded fittings. A narrow trowel or a hand shovel is needed to dig around the head. Keep a bucket of clean water and a rag close by. You will use them to wash dirt from the parts.
For replacement parts, take the old head to the store if you can. Sprinkler heads come in many types: spray heads, rotor heads, and pop-up heads. The nozzle pattern also matters. If you plan to add more heads, read our guide on how to install pop up sprinklers yourself for the basics of head placement and spacing.
Buy a spare head of the same brand and model when possible. Also pick up Teflon tape, which wraps around threaded joints to make a tight seal.
How to Fix Sprinkler Head Leaks, Step by Step
Follow these steps in order. Take your time. The whole job often takes less than one hour.
Step 1: Turn Off the Water
Find the main shutoff valve for the sprinkler system and close it. Run the zone for a few seconds to release pressure in the pipes. The head should stop spraying.
Step 2: Dig Around the Head
Use the trowel to dig a neat circle of soil around the head. Go about six inches deep. Set the soil aside on a tarp or in a bucket. You want a clear work area with no loose dirt falling into the pipe. Keep the hole wide enough to fit both hands.
Step 3: Unscrew the Head
Grip the head and turn it counterclockwise. Most heads screw onto a threaded riser. If it is stuck, wrap a rag around it and use the adjustable wrench. Be gentle. The riser and the pipe below it can break if you force the turn. Once loose, lift the head off the riser.
Step 4: Inspect the Head and the Riser
Look at the head first. Check the body for cracks. Pull the pop-up stem up by hand and let it fall back. It should move freely and seat firmly. If the stem sticks or the seal looks worn, the head is the problem.
Now look at the riser. Check for cracks and loose threads. Look down into the pipe opening. If you see dirt or small stones, wash them out with clean water. Do not let soil fall into the open pipe. Cover the opening with a rag while you work.
Step 5: Clean or Replace the Seal
If the head body is sound but the seal is dirty, wash the seal and the stem in the bucket of clean water. Remove any grit with the rag. Apply a thin layer of silicone lubricant made for irrigation parts.
If the seal is torn or cracked, replace it. Many brands sell seal kits for a few dollars. If no kit is available, replace the whole head. A new head costs less than the water a bad seal will waste in one month.
Step 6: Wrap Threads With Teflon Tape
Before you put the head back, wrap the riser threads with Teflon tape. Wind the tape clockwise around the threads, three or four turns. The tape fills small gaps and stops leaks at the joint.
Step 7: Screw the Head Back On
Thread the head onto the riser by hand first. Turn clockwise until it is snug. Then tighten about a quarter turn more with the wrench. Do not over-tighten. Plastic threads can crack under too much force. Point the nozzle in the right direction for the zone. Most spray heads turn by hand at the top.
Step 8: Test the Zone
Turn the water back on. Run the zone. Watch the head through a full cycle. Check for leaks at the base. Check the spray pattern. The water should reach the lawn evenly with no mist blowing sideways. If the head still leaks, repeat the steps with a new head.
Step 9: Refill the Hole
Once the head runs clean, pack soil back around it. Tamp the soil gently with your foot. The top of the head should sit level with the lawn surface, or just slightly above it.
Types of Sprinkler Heads and Their Leak Fixes
Spray heads, also called fixed spray heads, pop up and send a fine fan of water. They are common in small lawns and flower beds. Their most common leak is a worn wiper seal around the stem. Cleaning or replacing the seal usually fixes it.
Rotor heads turn a stream of water back and forth across a larger area. They are common on large lawns. Leaks on rotor heads often come from the top seal where the rotating turret meets the body. Wash the turret and the seal well.
Gear driven rotors are a type of rotor head with internal gears. They are quiet and efficient. When their seals fail, the whole head is often replaced. For brand options and specs, the manufacturer pages at Toro list common head types and their repair parts.
Impact heads, the older clicking type, have fewer seals and rarely leak at the body. Their leaks are usually at the threaded connection. A wrap of Teflon tape and a firm tightening often fixes them.
Cost and Price
Learning how to fix sprinkler head leaks saves a service call. A professional repair visit often costs between 75 and 150 dollars. The do-it-yourself cost is much lower.
A replacement spray head costs 5 to 15 dollars. A rotor head costs 15 to 35 dollars. A seal kit costs 3 to 8 dollars. Teflon tape costs about 2 dollars and will last for many repairs. A small bag of replacement risers costs under 10 dollars.
A single head leaking one gallon per minute wastes over 40,000 gallons in a month. At average water rates, that is a large charge on the bill. Fixing the leak in one afternoon is one of the best returns in home maintenance. For a broader view of system costs, see our article on affordable lawn sprinkler installation cost estimate.
Care and Upkeep
After the repair, a little upkeep will keep the system tight for years.
Check the heads each spring before the watering season starts. Turn on each zone and walk the line. Look for puddles, weak spray, and heads that do not pop up fully.
Keep mower blades and trimmer lines away from heads. Most cracks come from yard equipment. Mark head locations with flags before mowing in the spring.
Flush the system once a year. Open the end cap or the flush valve on each zone and let water run for one minute. This washes sand and grit out of the pipes. If you use a smart sprinkler controller for usa homes, run the flush cycle through the app and check the flow readings for any sudden change, which can signal a new leak.
In cold regions, winterize the system before the first freeze. Blow the water out of the pipes with compressed air, or hire a service to do it. Frozen water expands and cracks heads, risers, and pipes. One missed winter can cause a dozen leaks in the spring. Small air compressors used for this job need regular care; the manuals at Briggs and Stratton cover basic upkeep for small engines.
Safety
Sprinkler repair is safe work, but a few rules apply.
Always turn off the water before you open a line. A pressurized pipe can spray hard and fast. Keep your face away from the head when you first turn a zone on. The pop-up stem can rise with force.
Wear gloves when you dig. Broken glass and sharp stones hide in the soil. Wear eye protection when you flush a line. Dirt and water can spray back at you.
If your system runs on well water, the pump may start on its own. Turn off the breaker to the pump before you work on the heads.
Keep children and pets away from the work area. Small parts and Teflon tape are easy to swallow. An open hole in the lawn is a trip hazard.
Frequently Asked Questions
Why does my sprinkler head leak when the system is off?
The most common reason is low head drainage. Water in the pipe flows out through the lowest head after the zone stops. A head with a built-in check valve stops this. A worn seal or a cracked head can leak too. Replace the seal or the head.
Can I fix a cracked sprinkler head, or must I replace it?
Replace it. Glue and tape do not hold under water pressure for long. A new head costs only a few dollars. Take the old head to the store to match the type and spray pattern.
How do I know if the leak is from the head or the pipe?
Dry the area. Turn the zone on for one minute, then off. Watch where the water first appears. Water bubbling from the base of the head points to the head or the riser. Water rising from the soil a few inches away points to a broken pipe, which needs a larger dig and a repair coupling.
How long does a sprinkler head repair take?
Most head repairs take 30 to 60 minutes. Digging takes the most time. Replacing the head itself takes only a few minutes once the hole is open.
Should I use pipe dope or Teflon tape on the threads?
Use Teflon tape for sprinkler head threads. It is clean and made for plastic threads. Wrap the tape three to four turns in the direction of the threads.
When should I call a professional?
Call a professional if the leak comes from a broken underground pipe, if several heads on one zone leak at once, or if the valve box is full of water. These signs point to a bad zone valve or a main line break. That work needs larger tools and more skill.
A Short Final Word
Knowing how to fix sprinkler head leaks puts you in control of your yard and your water bill. The tools are simple. The parts are cheap. Watch the system run, find the bad head, and work through the repair one step at a time.
References
Toro. (n.d.). Irrigation and sprinkler products. https://www.toro.com Briggs & Stratton. (n.d.). Engines and outdoor power equipment. https://www.briggsandstratton.com
Was this guide helpful?

About Emily Rodriguez
The My Garden US editorial team writes practical, in-depth home and garden guides for American homeowners — tested advice, no fluff.
You May Also Like

Best Lawn Roller for Leveling Uneven Ground
July 6, 2026 2 views
How to Install Drip Line for Shrubs
March 6, 2026 0 views
Landscape Curbing Cost Per Foot in the USA: A Plain Guide to Prices
July 29, 2026 0 views