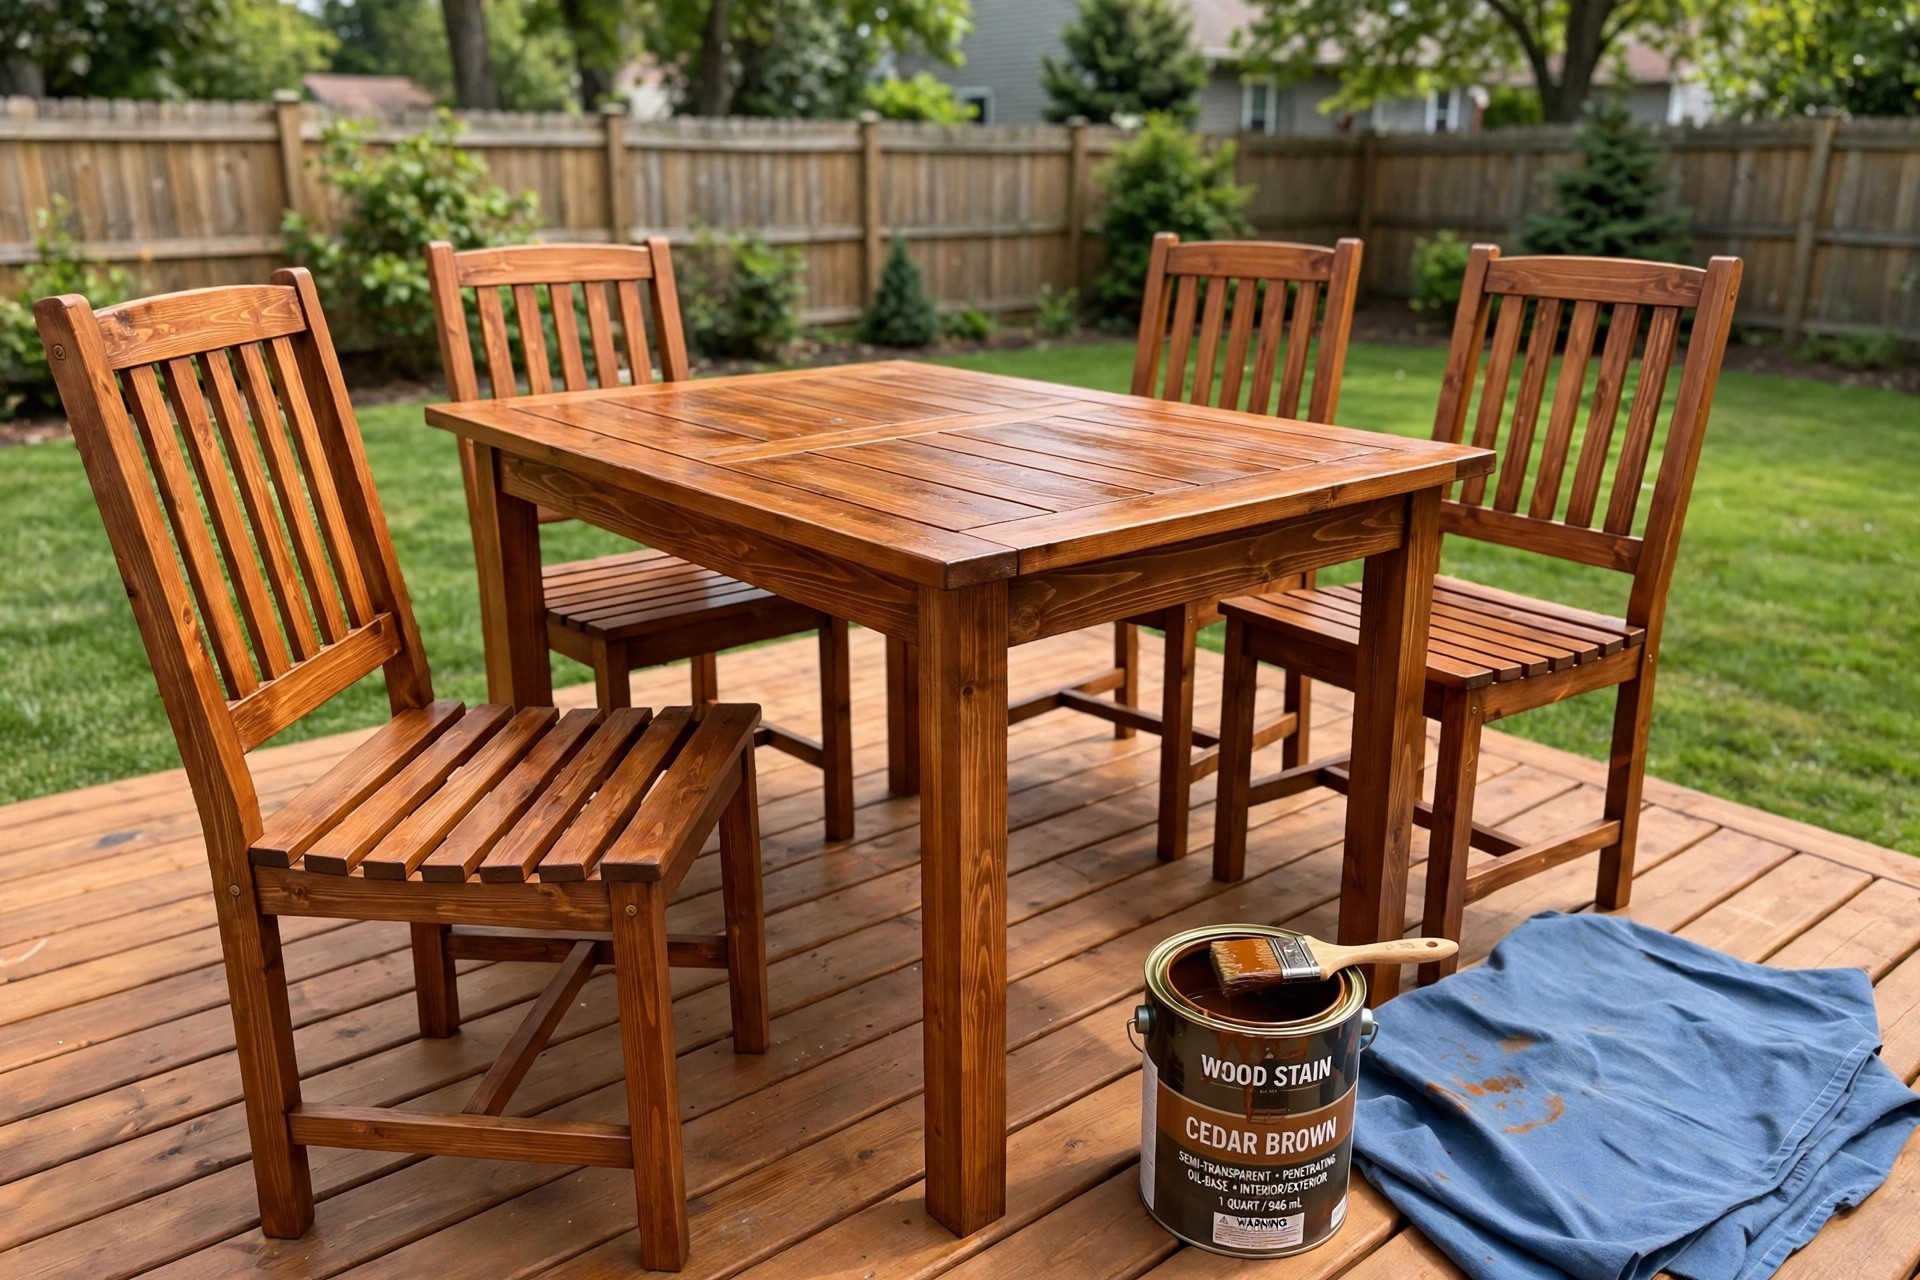

Wood left out in the weather will turn gray and dull. Rain, sun, and wind pull the life out of it. Many people think a tired set of chairs is done for good. It is not. Learning how to stain wooden patio furniture is one of the most useful home projects a person can do. It costs little, it takes one weekend, and it can bring old wood back to a warm, rich color that looks close to new.
This guide walks through the whole job. It covers what stain does, what supplies to buy, how to prepare the wood, how to apply the stain, and how to keep the finish strong through the seasons. Every step is written in plain words so that even a first time worker can follow along.
Why Wood Needs Stain
Patio furniture lives outside. It faces more weather in one summer than an indoor table faces in ten years. The sun is the main enemy. Its rays break down the surface of the wood. This makes the fibers dry and rough. The color fades to a flat gray. Rain is the second enemy. Water soaks into bare wood and then dries out. This cycle of wet and dry makes boards crack and split.
Stain fights both problems. It soaks into the wood and adds color. It also blocks some of the sun’s rays. Most outdoor stains also contain ingredients that fight mold and mildew. They slow down the damage from water. A good stain does not make wood last forever. But it can add years of life to a set of chairs or a table.
There is a difference between paint and stain. Paint sits on top of the wood and hides it. Stain soaks in and lets the grain show through. For patio furniture, stain is usually the better pick. When it wears, it fades gently instead of flaking off in sheets.
If your set is made of teak, you may also want to read our teak patio set maintenance tips guide for advice that fits that wood. For older sets with heavy damage, our page on how to refinish teak outdoor furniture walks through deeper repairs.
What You Will Need: How to Stain Wooden Patio Furniture
Gather your supplies before you start. Here is a full list.
– Outdoor wood stain in the color you want – Wood cleaner or deck wash – Sandpaper in 80 grit and 120 grit, or a sanding sponge – A paint brush with natural bristles, two to three inches wide – A rag or foam applicator for wiping – Wood filler for small cracks – A putty knife – Painter’s tape – Drop cloths or old sheets – Rubber gloves – Safety glasses – A dust mask – A bucket and a stiff brush or sponge
Buy an outdoor stain, not an indoor one. The label should say it is made for decks, fences, or outdoor furniture. Check that it matches your wood type. Cedar, pine, teak, and oak each take stain a little differently. If you plan to buy new outdoor furniture instead of fixing the old set, sites like IKEA show many wood options and their care needs.
How to Prepare the Wood
Preparation is the most important part of the job. Stain on dirty or rough wood will look poor and wear fast. Take your time here.
Step One: Clean
Start by brushing off loose dirt and leaves. Then wash the furniture with wood cleaner and water. Follow the directions on the cleaner bottle. Use a stiff brush to scrub the grain. This opens the pores of the wood so the stain can soak in. Rinse well with a garden hose. Do not use a pressure washer on high power. It can tear the soft parts of the wood and leave marks. Let the furniture dry fully. This often takes one full day in dry weather.
Step Two: Fix and Fill
Look over every piece. Check for loose screws and wobbly joints. Tighten what you can. Fill small cracks and holes with outdoor wood filler. Push the filler in with a putty knife and smooth it flat. Let it dry as the label says. Do not skip this step. Cracks will show through the stain and collect water later.
Step Three: Sand
Sand all surfaces that will be stained. Start with 80 grit paper to remove old gray fibers and rough spots. Then go over everything again with 120 grit paper for a smooth finish. Always sand in the direction of the wood grain. Sanding across the grain leaves scratches that stain will darken and show. Wipe the dust off with a damp rag or a tack cloth. The wood should feel smooth and look clean and even.
If the old finish is thick paint or varnish, use a chemical stripper to take it off. Apply the stripper, wait as directed, and scrape the old finish away. Then wash and sand as described above.
How to Choose the Right Stain
The stain aisle can confuse a first time buyer. Many types look alike. The main choices are oil based and water based. Each has real strengths.
Oil Based Stains
Oil based stains soak deep into the wood. They bring out the grain and give a rich, warm look. They last longer than water based stains in harsh weather. The trade off is in cleanup and drying. You must clean brushes with mineral spirits. Drying takes longer, often a full day between coats. They also have stronger fumes, so work outside or in open air.
Water Based Stains
Water based stains dry fast, often in two to four hours. Cleanup needs only soap and water. They have milder fumes. The color stays true longer and resists fading from sun. The trade off is that they do not soak as deep. On very dry wood they may wear faster than oil based stains.
Color and Opacity
Stains come in levels of coverage. Transparent stains show the most grain with the least color. Semi transparent stains add more color while still showing the grain, and they are the most popular choice for patio furniture. Solid stains hide the grain and look much like paint.
Test the color first. Apply a small amount on a hidden spot, like the underside of a chair. Let it dry fully and check it in daylight before you stain the whole set.
How to Stain Wooden Patio Furniture: The Full Method
Now the main work begins. Work on a dry day with no rain in the forecast for at least two days. Pick a time when the temperature is between fifty and eighty degrees. Direct hot sun can dry the stain too fast and leave marks. Light shade or an overcast morning is ideal.
Step One: Set Up
Lay drop cloths under and around the furniture. Tape off any metal parts, cushions, or areas you do not want stained. Put on your gloves, glasses, and dust mask. Stir the stain well. Do not shake the can. Shaking makes bubbles that land on the wood. Stirring mixes the color without air.
Step Two: Apply the First Coat
Dip the brush about one third of the way into the stain. Tap off the extra against the rim of the can. Brush the stain on in the direction of the grain. Work in small sections, about two feet at a time. Use long, even strokes. Keep a wet edge so one section blends into the next without a line.
Stain one full piece at a time. If you are working on a chair, stain all of that chair before you move to the table. This keeps the color even. Watch for drips and puddles. Stain that pools in corners will dry dark and sticky. Smooth out any excess with the brush.
Step Three: Wipe the Excess
Let the stain sit for five to fifteen minutes, as the label directs. Then wipe the surface with a clean rag. Wiping removes extra stain that the wood cannot absorb. It keeps the finish even and gives the color a rich, deep look instead of a blotchy one.
Step Four: Let It Dry
Let the first coat dry as the label directs. This is often four to six hours for water based stains and twelve to twenty four hours for oil based stains. Do not rush. Touching or stacking the pieces too soon will ruin the finish. Keep the furniture dry and dust free while it dries.
Step Five: Add the Second Coat
Most patio furniture needs two coats. A second coat deepens the color and adds protection. Sand very lightly between coats with fine paper, around 220 grit. This helps the second coat grip. Wipe off the dust. Apply the second coat the same way as the first. Let it dry fully. Then wait the full cure time before heavy use. Drying means the surface feels dry to the touch. Curing means the stain has fully hardened, which can take two to seven days. If rain threatens before the stain cures, move the pieces under cover.
Sealing and Protecting After Stain
Many outdoor stains have a sealer built in. These products are called stain and sealer in one. They are a good pick for patio furniture because they save a step. If your stain has no sealer, add a clear outdoor sealant on top. The sealant keeps water out and slows sun damage.
For extra protection, many owners buy weatherproof patio furniture covers heavy duty enough to survive storms. Covers keep rain and sun off the furniture when it is not in use. They are one of the cheapest ways to make a stain job last longer. A good cover costs far less than a new stain job.
The Cost of the Project
Staining patio furniture is a low cost project. Here is a rough look at the numbers for a set of four chairs and a table.
– Wood stain, one gallon: twenty five to fifty dollars – Wood cleaner: ten to fifteen dollars – Sandpaper and sponges: eight to twelve dollars – Brushes and rags: ten to fifteen dollars – Wood filler, tape, drop cloths: ten to fifteen dollars – Safety gear: five to ten dollars
Most people spend between sixty and one hundred and twenty dollars in total. One gallon of stain is usually enough for a full dining set. A professional would charge several hundred dollars for the same job. Doing it yourself saves real money.
Care and Upkeep Through the Year
A stain job will not last forever. With care, a good job lasts two to three years before it needs a fresh coat.
Clean the furniture twice a year with mild soap and water. Check each spring for worn spots, especially on arms and seat edges where hands and clothes rub. Touch up these spots with a small brush before the wear spreads.
Browse collections on sites like Wayfair if you want ideas for cushions, covers, and shade that match a freshly stained wood set.
Safety Notes
Stain products are safe when used with care. Read the label on every product before you open it. Work in open air so fumes can drift away. Wear gloves to keep stain off your skin. Wear safety glasses when you sand or scrub. Wear a dust mask when you sand to keep fine dust out of your lungs.
Keep stain and cleaners away from children and pets. Store leftover cans in a cool, dry place out of reach. Rags soaked with oil based stain can catch fire on their own if they are balled up. This is a real danger. Spread used rags flat outside to dry, or soak them in water and seal them in a metal can before you throw them away. Never pile oily rags in a trash bin.
Frequently Asked Questions
How long does it take to stain wooden patio furniture?
Plan one full weekend. Day one is for cleaning, filling, and sanding. Day two is for staining and drying. The work itself takes about six to eight hours for a dining set. Drying and cure time add more days before heavy use.
Can I stain over old stain?
Yes, if the old stain is in fair shape. Clean and sand the surface well. Then apply the new stain in the same color family. If the old finish is peeling, strip it off first.
Do I need to sand between coats of stain?
A light sand between coats helps the second coat stick. Use fine paper, around 220 grit. Sand gently. Then wipe the dust away with a tack cloth. Do not sand hard enough to cut through the first coat.
What is the best time of year to stain patio furniture?
Spring and early fall are best. The air is warm but not hot. Aim for fifty to eighty degrees with low humidity. Never stain when rain is expected within twenty four hours.
How do I keep stain off my deck or patio floor?
Lay drop cloths under the furniture with extra room around the edges. Tape the legs where they meet the floor if you are worried about drips. Wipe up spills at once with a damp rag. Dried stain on stone or concrete is hard to remove.
Should I stain the underside of the furniture?
Yes, if you can reach it. The underside faces moisture from the ground. A coat of stain there adds real protection. Turn chairs and tables upside down to reach the bottom. This is easier with a helper.
A Short Final Word
Knowing how to stain wooden patio furniture gives new life to pieces that looked ready for the curb. The job needs patience more than skill. Clean well. Sand smooth. Brush with the grain. Wipe the excess. Let it dry. These simple steps, done in order, give a finish that looks like a professional did it.
Start on a dry morning with all your supplies in reach. Check your work in daylight. When the last coat dries and you set the chairs out on the deck, you will see the payoff. Warm wood, rich color, and a set that is ready for years of summer evenings.
References
IKEA. (n.d.). Outdoor furniture and home furnishings. https://www.ikea.com Wayfair. (n.d.). Patio furniture, cushions, and outdoor decor. https://www.wayfair.com
Was this guide helpful?

About Lisa Anderson
The My Garden US editorial team writes practical, in-depth home and garden guides for American homeowners — tested advice, no fluff.
You May Also Like

Patio String Light Poles for Backyard: A Plain Guide
June 17, 2026 0 views
How to Anchor Gazebo to Patio: A Safe and Simple Guide
April 7, 2026 0 views
Why an Outdoor Firewood Log Holder With Cover Belongs Near Every Fire Pit
January 13, 2026 0 views