
Many homeowners want to know how to sharpen mower blades without removing them from the mower. It is a fair question. Taking the blade off takes tools, time, and care. Sharpening it while it stays on the deck is faster and simpler. The good news is that it can be done well, and it can be done with care. This guide will walk you through the whole job in plain steps. You will learn why sharp blades matter, what tools you need, how to stay safe, and how to get a clean edge that leaves your grass neat and healthy.
Why Sharp Blades Matter
A dull blade does not cut grass. It tears it. The torn ends turn brown within a day or two, and the whole lawn starts to look tired and gray. Torn grass is also more open to disease. When a blade is sharp, it cuts each stem cleanly. The lawn looks greener, and the grass grows back stronger.
A sharp blade also helps the mower. The engine does not have to work as hard when the cut is clean. That means less strain on the motor, less fuel used, and a longer life for the machine. Makers of mowers, such as Toro and John Deere, both stress that a sharp blade is one of the simplest ways to keep a mower running well.
Most experts say a blade should be sharpened after every 20 to 25 hours of mowing. For a normal suburban lawn, that means two or three sharpenings each season. If you mow sandy ground, or if the mower hits twigs and stones, the blade will dull faster. Look at the grass after you mow. If the tips are ragged and brown, the blade is telling you it needs attention.
Safety First: How to Sharpen Mower Blades Without Removing
Before you learn how to sharpen mower blades without removing them, you must put safety first. A blade can cut you even when the engine is off. Take the following steps every time:
1. Disconnect the spark plug. Pull the spark plug wire off the plug on a gas mower. On a battery mower, remove the battery. On a corded electric mower, unplug the cord. This keeps the engine from starting by accident. 2. Let the mower cool. If you just finished mowing, the engine and the blade may be hot. Wait until everything is cool to the touch. 3. Wear thick gloves. Use heavy work gloves, the kind sold for yard work. They guard your hands from nicks. 4. Wear eye protection. Small bits of metal can fly when you grind. Safety glasses are a must. 5. Work on flat ground. Park the mower on a flat, hard surface such as a driveway or a garage floor. Do not work on a slope. 6. Keep children and pets away. Set up in a spot where no one can bump you or the mower.
One more point. Gas mowers must be tipped the right way. The air filter side should face up, or oil and fuel can leak into the filter. Check the manual if you are unsure. Briggs and Stratton offers free engine manuals online that show the right way to tip each model.
Tools You Need
You do not need a full workshop. Most of the tools are common and cheap.
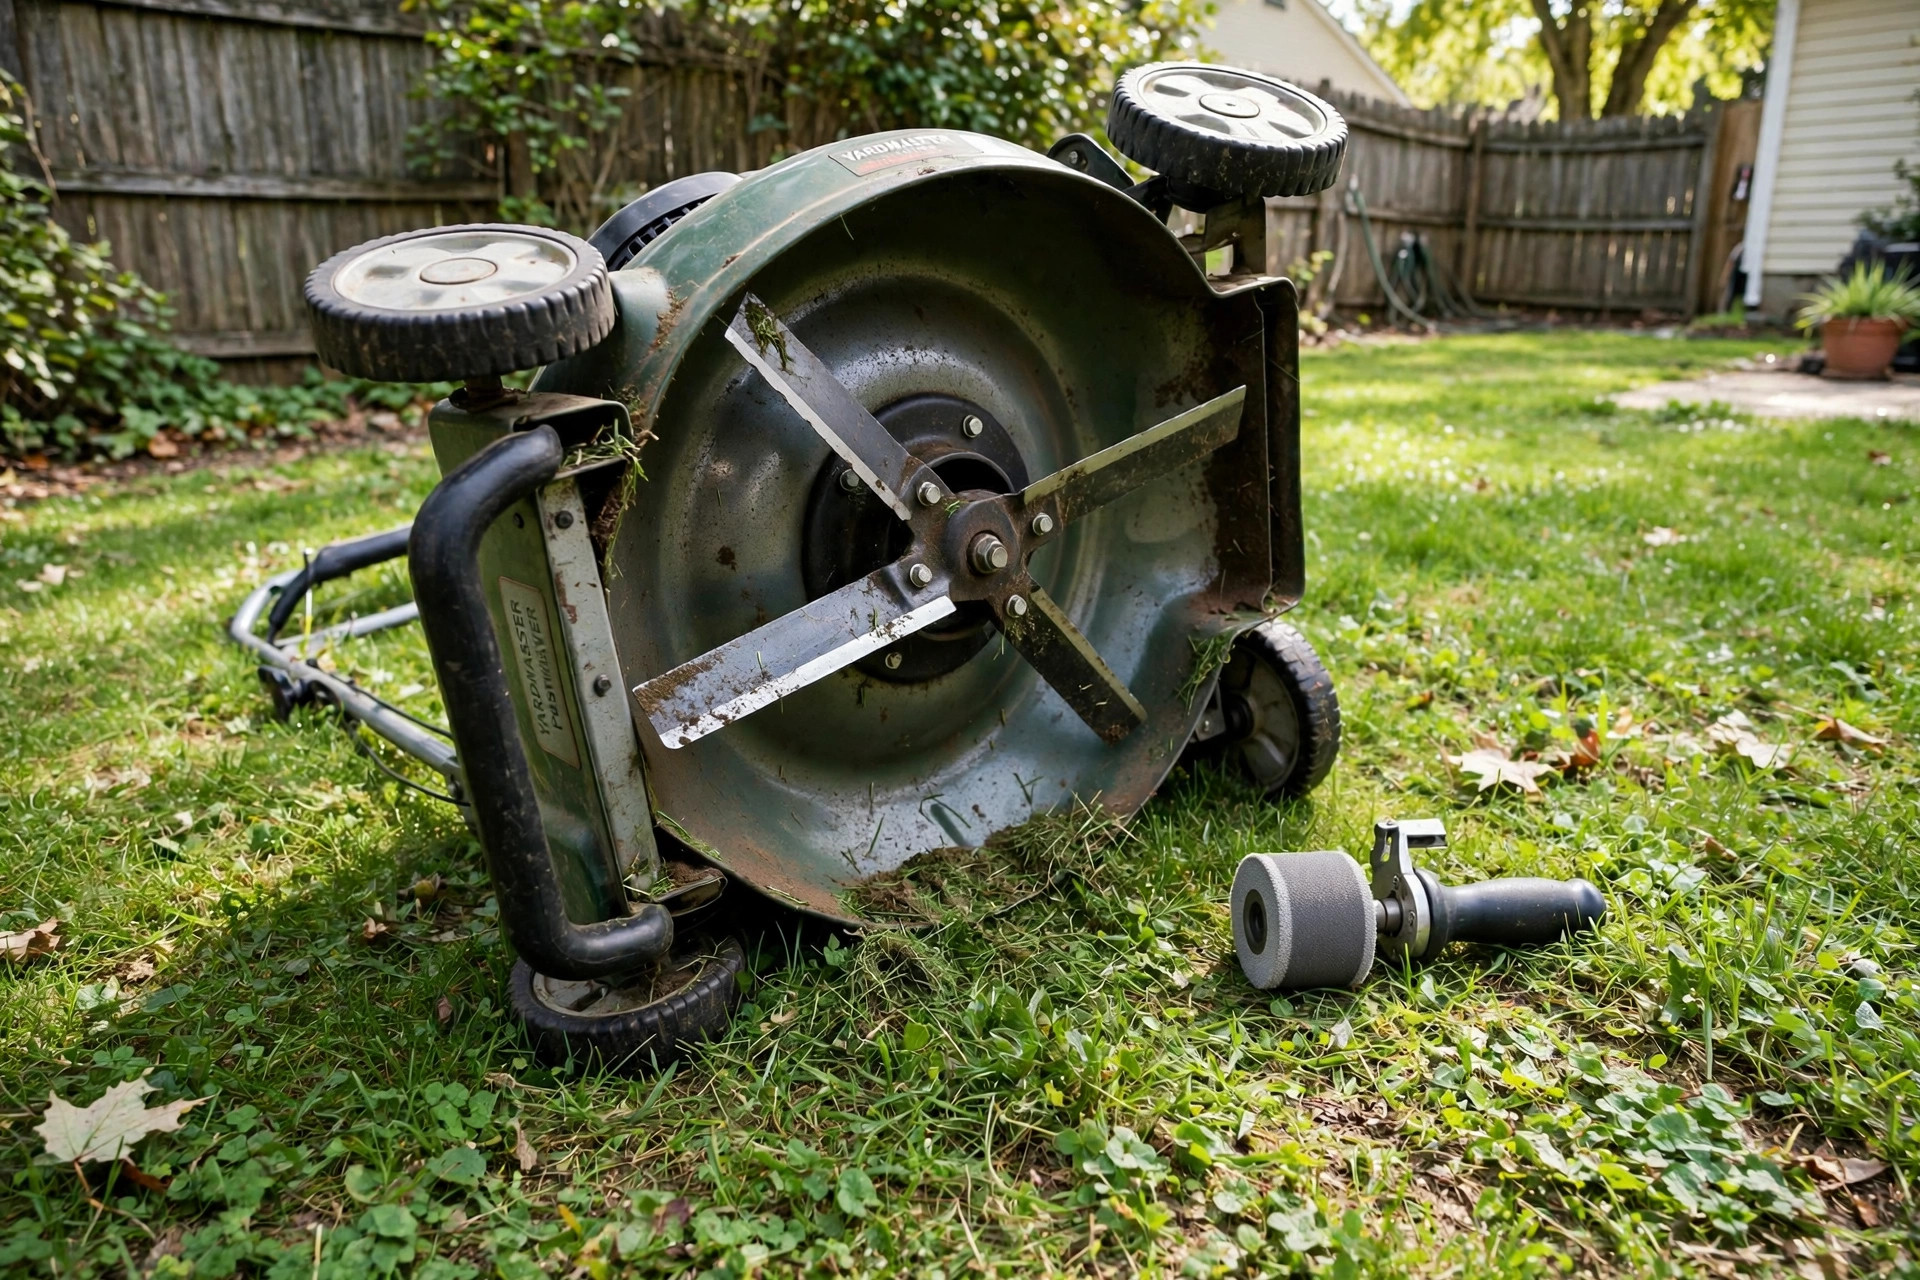
– A mower sharpening stone or grinding bit. The most popular tool is a rotary sharpening stone that fits a drill. It is shaped to match the angle of the blade. A small hand file also works, though it takes longer. – A drill or a file. A cordless drill will drive the sharpening stone. If you have no drill, a flat metal file will do. – Thick work gloves. Heavy leather or canvas gloves. – Safety glasses. Any good pair of shop glasses. – A block of wood. A short length of 2×4 can brace the blade so it does not spin while you work. – A rag and a wire brush. For cleaning caked grass off the deck and blade. – A pair of pliers or a wrench. You may need these to check that the blade bolt is tight afterward.
If you already change your own oil with a lawn mower oil change kit, you likely own half of these tools already. The sharpening stone itself is the one item most people need to buy, and it costs only a few dollars.
How to Sharpen Mower Blades Without Removing Them
Here is the heart of the job. Work slowly. Do one section of the blade at a time.
Step 1: Get the Mower Ready
Move the mower to a flat, hard surface. Disconnect the spark plug wire or remove the battery, as described above. If you have a gas mower, drain or run the fuel tank low so gas does not spill when you tip the mower. Tilt the mower so you can see the blade under the deck. Remember to keep the air filter side facing up.
Step 2: Clean the Blade
Use the wire brush and rag to scrape away caked grass, dirt, and rust from the blade. A clean blade lets you see the cutting edge clearly. It also lets the sharpening tool bite the metal instead of sliding on grime. Wipe the deck clean too, so no loose bits fall in your eyes later.
Step 3: Brace the Blade
The blade must not spin while you sharpen it. Slide a short block of wood between the blade and the deck, or hold the blade with one gloved hand on the dull back edge. Never grip the sharp edge. A wedge of wood is the safer choice because it keeps both hands free.
Step 4: Check the Angle
Look at the cutting edge of the blade. Most mower blades are ground to an angle of about 30 degrees. The sharpening stone for a drill is shaped to follow this angle. Hold it flat against the bevel, the angled part of the blade, and it will sit in place on its own. If you are using a file, push it along the bevel at that same angle, moving in one direction only.
Step 5: Sharpen One Side
Turn on the drill at a medium speed and move the stone along the full length of the cutting edge, from the center of the blade toward the tip. Use steady, even strokes. Do not press hard. Light, repeated passes are better than one heavy grind. The metal should start to shine along the edge. This is a good sign.
Count your strokes. If you make ten passes on one side of the blade, make ten on the other. Even work keeps the blade in balance, which matters a great deal.
Step 6: Sharpen the Other Side
Most walk-behind mowers have a single bar blade with two cutting edges. Move your brace if needed and sharpen the second edge the same way, with the same number of strokes. Keep the angle steady and the pressure light.
Step 7: Feel the Edge
When the edge shines and feels sharp to a light touch with a gloved finger, stop. A mower blade should be sharp like a good kitchen knife, not like a razor. An edge that is too thin will fold or chip the next time it hits a twig. Test by looking down the edge in good light. It should be straight and smooth, with no big nicks left.
Step 8: Wipe Down and Check the Bolt
Wipe the blade clean with the rag. Check that the blade bolt is tight. A loose blade is dangerous. If the bolt moves, tighten it with a wrench, following the torque setting in your manual. When you are sure the blade is firm, tip the mower back upright. Reconnect the spark plug wire or battery.
Step 9: Test Mow
Mow a small strip of grass and look at the results. The cut should be clean and even. The grass tips should look snipped, not frayed. If the cut looks ragged, the blade may need a few more passes, or it may be too worn to sharpen and need replacing. You can find new blades locally by looking up where to buy lawn mower blades near you.
Tips for a Better Edge
A few small habits make a large difference.
– Do not overheat the metal. If the blade gets very hot while you grind, stop and let it cool. Heat can soften the steel and ruin the temper of the blade. Dip a rag in water and cool the blade between passes if you like. – Work in good light. A bright garage or a sunny driveway lets you see the edge clearly. – Sharpen early in the season. Do the job before the grass starts to grow fast. That way you start the year with a clean cut. – Check balance. Sharpening without removing the blade means you cannot hang it on a nail to test balance, as you would with the blade off. That is why even strokes on both sides matter so much. If the mower starts to shake when it runs, stop. A shaking mower can mean an out-of-balance blade. In that case it is wise to take the blade off or to call a lawn mower blade sharpening service near you to check the balance. – Do not sharpen a badly bent blade. If the blade is bent, cracked, or has deep chunks missing, sharpening will not save it. Replace it. A damaged blade can throw pieces at high speed.
Care and Upkeep
Sharpening is only one part of blade care. A little upkeep through the season will keep the edge longer.
Clean the deck after each mow. Wet grass sticks to the underside of the deck and holds dampness against the steel, which breeds rust. A quick scrape with a stick or brush takes a minute and pays off.
Spray a light coat of oil on the blade at the end of the season. Many owners use a simple spray lubricant to fight rust during winter storage. Store the mower in a dry place, off damp concrete if you can.
Check the blade bolt at the start of each season. Bolts can loosen over time from vibration. A quick check with a wrench is cheap insurance.
Also, keep up with the rest of the mower. A clean air filter, fresh oil, and a good spark plug all help the engine run smooth. If you handle your own upkeep, an article on lawn mower oil change kits for homeowners walks through the oil part of the job.
Cost and Price
One of the best parts of this job is how little it costs. A drill-mounted sharpening stone sells for about five to fifteen dollars at most hardware stores. A flat file costs about the same. Gloves and safety glasses are one-time buys that most homeowners already own.
Compare that with a shop sharpening, which often runs twenty to forty dollars per blade, plus the trip to the shop and back. Doing it yourself with the blade still on the mower takes about fifteen to twenty minutes once you have done it once. The savings add up over a season of two or three sharpenings.
If the blade is too worn to sharpen, a new blade for a walk-behind mower usually costs fifteen to thirty dollars. Riding mower blades cost more. When you price a new blade, check that it matches your exact mower model.
Frequently Asked Questions
Can I sharpen the blade without tipping the mower?
You need to see and reach the blade, so the mower must be lifted or tipped. Some owners lift the front of a riding mower with ramps. For a walk-behind, tipping it on its side is the normal method. Always keep the air filter side up on a gas mower.
How do I know when the blade is sharp enough?
Look for a bright, smooth edge with no rough nicks. It should feel sharp through a glove, like a kitchen knife. Test mow a small patch. If the grass tips are cut clean and look green, the blade is ready.
Will this work on a riding mower?
Yes, with care. A riding mower is heavy and hard to tip. Many owners drive the front wheels onto sturdy ramps so they can reach under the deck. Never crawl fully under a raised mower. If you cannot reach the blade safely, remove the deck or have a shop do the job.
Can I use an angle grinder?
You can, but it is easy to take off too much metal or overheat the blade with a grinder. A drill stone or a hand file gives you more control. If you do use a grinder, use a light touch and short passes.
How often should I sharpen?
Every 20 to 25 hours of mowing is the common rule. For most homes, that means two or three times per mowing season. Sharpen sooner if you mow sandy soil or hit rocks and roots.
What if the mower vibrates after sharpening?
Stop the mower at once. Vibration can mean the blade is out of balance or the bolt is loose. Check the bolt first. If the bolt is tight and the shaking stays, the blade may need to be removed and balanced, or replaced. Do not keep mowing with a shaking deck.
A Short Final Word
Learning how to sharpen mower blades without removing them puts a handy skill in your hands. The job is quick, the tools are cheap, and the reward shows up every time you look at your lawn. A clean cut makes the grass greener, the mower happier, and the work lighter. Take the safety steps seriously, keep your strokes even, and do not rush. Do it once and you will wonder why you ever put it off.
References
Toro. (n.d.). Lawn mowers and outdoor power equipment. https://www.toro.com Deere & Company. (n.d.). Lawn care and agricultural equipment. https://www.deere.com Briggs & Stratton. (n.d.). Small engines and outdoor power products. https://www.briggsandstratton.com
Was this guide helpful?

About David Wilson
The My Garden US editorial team writes practical, in-depth home and garden guides for American homeowners — tested advice, no fluff.
You May Also Like

Lawn Weed Identification Chart With Pictures: A Homeowner’s Guide
July 7, 2026 0 views
Tall Fescue Seed for Shade Reviews: What Grows Well Under Trees
September 20, 2026 0 views
Flagstone Walkway Ideas for Backyards
May 30, 2026 0 views