
A drip line can change the way you water your yard. Instead of a sprinkler that throws water across the lawn, the sidewalk, and your fence, a drip line puts water right at the roots of each shrub. This guide shows you how to install drip line for shrubs in one weekend with basic tools and plain steps.
The focus keyword for this guide is how to install drip line for shrubs. By the end of this page, you will know what parts to buy, how to lay the line, and how to keep the system running for years.
Why Drip Lines Work Well for Shrubs
Shrubs do best when water goes deep and slow to the root zone. A spray head wets the leaves and the air. Much of that water dries before it helps the plant. It can also invite leaf disease, because wet leaves stay damp through the night.
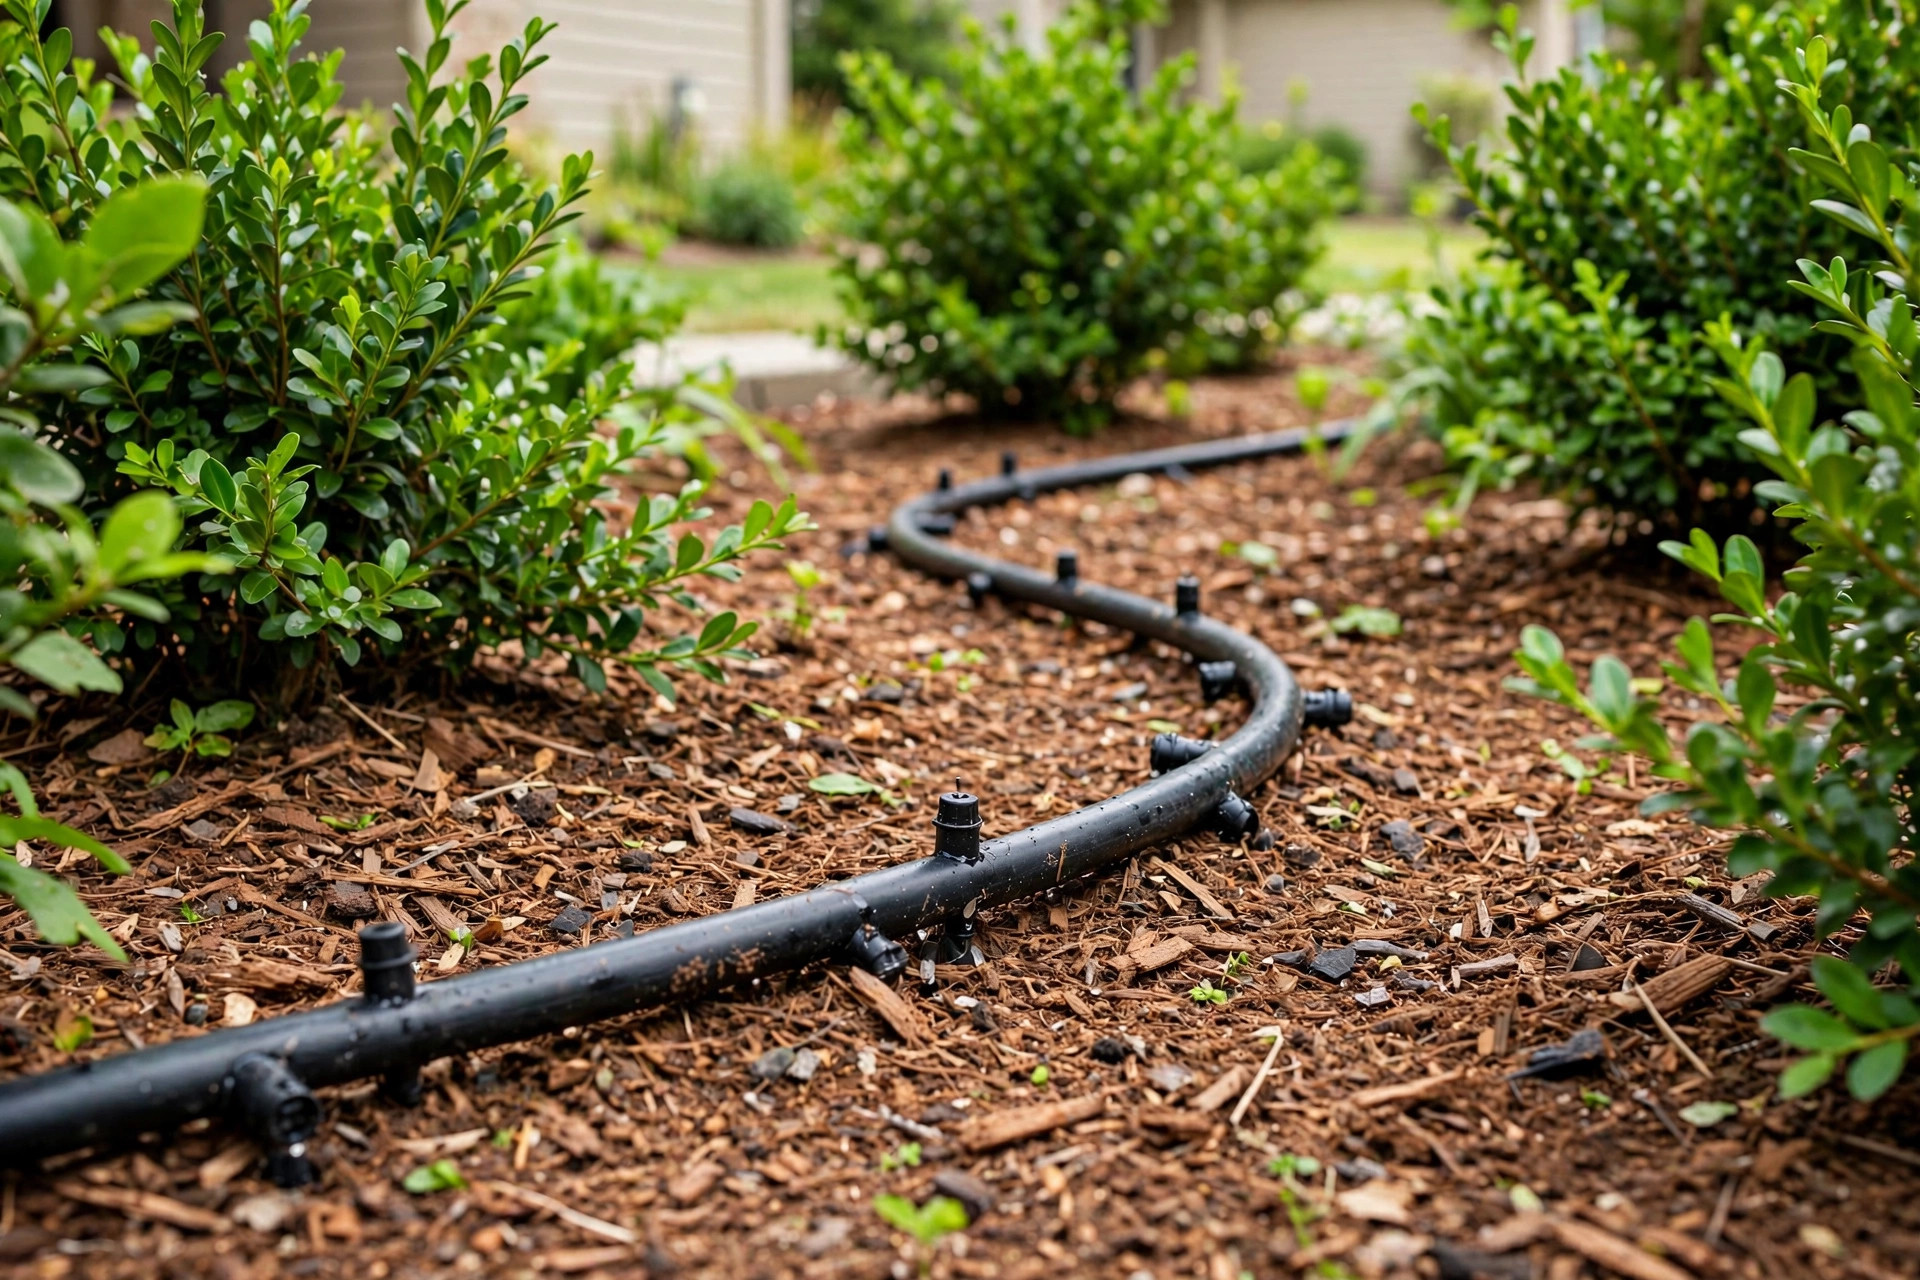
A drip line, sometimes called emitter tubing, has small holes called emitters built into the line. Each emitter lets out a small steady drop of water, often one half or one gallon per hour. The water soaks straight down into the soil. The roots drink, and almost nothing is lost to wind or sun.
Homeowners like this system because it cuts water bills. Studies from extension offices often report water savings of thirty to fifty percent over spray watering for beds and shrubs. It also cuts weed growth, since the soil between plants stays dry. And it saves time. Once the line is in place, you turn it on with a timer and let it run.
What You Will Need: How to Install Drip Line for Shrubs
Most of the parts come from a home center or garden shop. You do not need a plumber. A short list follows.
– Half-inch poly mainline tubing. This is the main pipe that carries water along the bed. – Quarter-inch or half-inch drip line with emitters. The emitters are already in the line, spaced every six, nine, or twelve inches. – A drip irrigation kit head assembly. This usually includes a filter, a pressure regulator, and a backflow preventer that screws onto an outdoor faucet. – A timer. A battery timer screws onto the faucet and runs the water on a set plan. – Fittings. Look for tees, elbows, and couplers made for drip tubing. – End caps or figure-eight ends. These close the ends of the lines. – Stakes. Plastic hold-down stakes keep the line where you put it. – A hole punch and a pair of snips. These make clean cuts and clean holes in the mainline.
You may also want mulch. A layer of bark or wood chips over the line hides it and slows water loss from the soil.
How to Choose the Right Parts
Before you buy, walk your shrub bed with a tape measure. Note how long the bed is and where each shrub sits. This tells you how much tubing you need.
Mainline tubing
Half-inch poly tubing is the standard main pipe for small and medium beds. It carries enough water for most home shrub plantings. If your run is very long, over one hundred feet, check the kit instructions for limits on flow.
Emitter spacing
For shrubs, nine- or twelve-inch emitter spacing works well. Six-inch spacing is better for flower rows or sandy soil that drains fast. Clay soil holds water longer, so wider spacing is fine.
Flow rate
Shrubs usually like one-half to one gallon per hour per emitter. Larger bushes and small trees may need two or four gallons per hour. Many drip lines let you pick the flow rate when you buy.
Pressure regulator
Drip parts work best at low pressure, often twenty to thirty pounds per square inch. House water pressure can run at sixty or more. A pressure regulator at the faucet head brings it down to a safe level. This is one part you should not skip.
Timer
A simple hose-end timer costs little and runs on a battery. Set it to water once or twice a week for thirty to ninety minutes. A smart sprinkler controller for USA homes can also run drip zones and change the plan when it rains.
How to Install Drip Line for Shrubs: Step by Step
Plan for two to four hours for a normal bed. Here are the steps in order.
1. Plan the layout on paper
Sketch the bed. Mark each shrub and the faucet. Draw the mainline path along the front or back of the bed. Then draw branch lines that loop past each shrub. Keep the design simple. Fewer bends make better water flow.
2. Set up the faucet head
Screw the backflow preventer, filter, and pressure regulator onto the outdoor faucet in that order. Many drip starter kits bundle these in one box. Then screw on the timer. Check for drips at each joint before you go on.
3. Lay the mainline tubing
Roll the half-inch mainline along the bed from the faucet. Cut it with snips to fit. Stake it down every two or three feet so it does not curl back up. Leave the end open for now.
4. Punch holes and add the drip lines
Where each shrub sits, use the hole punch to make a clean hole in the mainline. Push in a small barb fitting, then connect the quarter-inch drip line. Loop the drip line around each shrub in a circle about twelve to eighteen inches from the trunk. This matches the root zone where roots spread out.
For rows of shrubs, run one drip line down the whole row on each side of the bushes. Stagger two parallel lines for larger plants.
5. Close the line ends
Cap the end of each drip line with an end cap or fold it and use a figure-eight fitting. Close the end of the mainline too. A clean closed end keeps pressure even and stops dirt from getting in.
6. Turn on the water and flush
Open the faucet and let water run through the open ends for a minute. This flushes out bits of plastic and dirt. Then close the ends, let the lines fill, and walk the bed. Look at each emitter. Every one should drip steadily.
7. Cover with mulch
Spread two to three inches of bark or wood chips over the bed. The mulch hides the line, keeps the soil cool, and slows evaporation. Keep mulch a few inches away from the shrub trunks so the bark stays dry.
8. Set the timer
Start with one deep watering per week. Let the system run long enough to wet the soil six to eight inches deep. Push a screwdriver or trowel into the soil after a run to check. If the soil is dry below two inches, add time. If it is soggy, cut the time back.
Cost and Price
A basic drip kit for a bed of ten to twenty shrubs usually costs between forty and one hundred twenty dollars. The timer, filter, and regulator often make up half of that cost. Extra tubing, stakes, and mulch add a bit more.
Compare that with the cost of an in-ground spray system. An affordable lawn sprinkler installation cost estimate often runs several hundred dollars for one zone and needs a contractor. A drip line is a do-it-yourself job and uses far less water each month, so the payback comes fast on the water bill.
Water cost is the other half of the math. A spray zone for a shrub bed can run five to fifteen gallons per minute. A drip zone for the same bed may use two to four gallons per minute total. Over a full summer, that gap shows up on the bill.
Care and Upkeep
A drip system asks for little, but it is not set-and-forget. A short spring check each year keeps it healthy.
Flush the lines. Each spring, open the end caps and let water run for a minute to clear winter grit.
Clean the filter. The filter at the faucet head catches grit and rust. Unscrew it, rinse it, and put it back. A clogged filter is the top cause of weak emitters.
Check emitters. Walk the bed while the system runs. If an emitter has stopped, poke it gently with a thin wire or pull the line back and punch a new hole. Ants and hard-water scale are the usual suspects.
Watch the timer battery. Replace the battery once a year before the dry season starts.
Winterize in cold climates. Drain the lines before hard frost. Blow out the mainline with a small compressor if you have one, or at least open the ends and let the water drain out. This keeps freezing water from splitting the tubing.
Safety Notes
Drip irrigation is a low-risk project, but a few points matter.
Always use a backflow preventer at the faucet. This small device keeps garden water from flowing back into your house water if pressure drops. Many local codes require it, and most kits include one.
Turn off the faucet before you change a fitting. Pressurized lines can pop apart when you pull a barb out.
Keep drip lines and mulch away from the trunks of shrubs. Soil or mulch piled against the bark can hold moisture and cause rot.
If your yard has a pool or a hot tub nearby, plan the lines so water runs away from wet areas and drains well. The safety rules from the U.S. Consumer Product Safety Commission cover pools, not garden lines, but good drainage habits matter everywhere.
Comparing Drip to Sprinklers
Many homeowners ask whether they should just install pop up sprinklers themselves for the beds too. For lawns, sprays make sense. For shrubs, drip almost always wins.
A spray head throws water in an arc. It wets leaves, stems, mulch, and air. On a windy day, a third of the water may never reach the soil. A drip line loses almost nothing to wind and puts water only at the roots.
Sprays also make the soil surface wet all over, which invites weeds. Drip keeps the spaces between shrubs dry, so weeds struggle.
There is one case where sprays help shrubs: a brand-new planting in very hot weather. A short daily spray can cool new plants while roots settle. Once the shrubs are established, switch to drip.
Common Mistakes to Avoid
Too many emitters, too little time. People often add lots of emitters and run the system for ten minutes. Drip works the other way. Fewer emitters and longer runs push water deep where roots live.
Lines on top of thick mulch only. Water can run sideways through dry mulch and never reach the soil. Set the line on the soil under the mulch, or water long enough to soak through.
Skipping the filter. One small piece of grit can plug a whole emitter. The filter is cheap insurance.
One zone for sun and shade. Shrubs in full sun drink more than shrubs in shade. If one timer runs both, split them into two zones or add extra emitters on the sunny side.
Ignoring slope. Water runs downhill, even in a drip line. On a slope, put the mainline at the top and run drip lines across the hill, not down it.
Frequently Asked Questions
How long should I run a drip line for shrubs?
Most shrubs do well with one to two deep waterings a week in summer. A run of forty-five to ninety minutes is common. Check soil moisture six inches down after a run. Sandy soil needs more frequent, shorter runs. Clay soil needs less frequent, longer runs.
How many emitters does each shrub need?
A small shrub usually needs one or two emitters. A medium shrub needs two to four. A large bush or small tree needs four to six, spread around the root zone. Add emitters as the plant grows.
Can I connect drip line to a garden hose faucet?
Yes. That is the most common setup for homes. Screw the filter, pressure regulator, and timer onto the faucet, then connect the mainline. Use a backflow preventer to protect your house water.
Will a drip line work on a slope?
Yes, with care. Run lines across the slope so each emitter gets fair pressure. Use pressure-compensating emitters, which give the same flow whether they sit high or low on the hill. Flush the lines more often on slopes, since grit settles at the low end.
How long does drip line last?
Quality poly tubing lasts ten to twenty years above ground and longer under mulch. The filter and timer may need replacement every five to seven years. Sunlight breaks tubing down faster, which is one more reason to cover the lines with mulch.
Should I water shrubs at night or in the morning?
Morning is best. Watering early lets any wet leaves dry by noon. Drip lines wet little foliage, so timing matters less than with sprays, but morning still wins. Avoid long runs late at night, when the soil stays cold and wet.
A Short Final Word
Installing drip line for shrubs is one of the simplest upgrades a homeowner can make. The parts are cheap, the tools are basic, and the work fits into a weekend. In return, you get healthier shrubs, fewer weeds, and a smaller water bill. Major equipment makers like Toro and John Deere sell starter kits, and engine and pump guides from Briggs and Stratton can help if your water comes from a well or a pump system. Draw the plan, lay the lines, cover with mulch, and let the timer do the daily work. Your shrubs will show the thanks in the first full season.
References
Toro. (n.d.). Lawn and garden irrigation products. https://www.toro.com Deere & Company. (n.d.). Lawn care and landscaping equipment. https://www.deere.com Briggs & Stratton. (n.d.). Engines and outdoor power equipment. https://www.briggsandstratton.com
Was this guide helpful?

About Robert Taylor
The My Garden US editorial team writes practical, in-depth home and garden guides for American homeowners — tested advice, no fluff.
You May Also Like
Cheap Landscape Rock Delivery Near Me: A Guide to Low Prices and Bulk Loads
February 24, 2026 0 views
Crabgrass Killer for Lawns Reviews: A Homeowner’s Guide
January 30, 2026 0 views
How to Get Rid of Moles in Yard: A Plain Guide for Homeowners
September 15, 2026 0 views