Furniture breaks. A chair leg comes loose. A table edge splits. A drawer front falls off. The question is simple. What is the best wood glue for furniture DIY repairs? The answer is not one single bottle. It depends on the wood, the joint, and how much stress the repair will take. This guide will help you choose the right glue for common home furniture repairs.
Most home furniture repairs use one of three glue types. PVA glue, also called yellow wood glue, handles most jobs well. Polyurethane glue works for tough outdoor repairs. Hide glue suits antique and fine furniture. Each type has strengths. Each type has limits. The right choice makes the difference between a repair that lasts ten years and one that fails in ten days.
Why the Right Wood Glue Matters for Furniture Repairs
A good furniture repair must hold under real use. People sit on chairs. They lean back. They pull drawers open every day. Children climb on sofas and tables. A weak glue joint will fail at the worst moment. The right adhesive turns a loose joint into one that is stronger than the wood around it.
Good wood glue does more than hold. It fills small gaps. It resists moisture from daily cleaning. It sands down smooth so the repair looks clean. Some glues accept stain and finish. Others do not. Knowing these facts before you start saves you from ugly repair marks on your furniture.
Price is not the best guide. The cheapest bottle on the shelf may fail on a stressed chair leg. The most expensive bottle may be wrong for a simple veneer patch. Match the glue to the job. Your repairs will last longer and look better.
How to Choose Wood Glue for Home Furniture Fixes: Best Wood Glue for Furniture Diy Repairs
Start by looking at the broken joint. Is it a clean break with wood on both sides? PVA wood glue is the best pick. The joint is old and dusty? Clean it first, then use PVA or hide glue. The repair will sit outside on a porch bench? Choose polyurethane glue or a waterproof PVA.
Check the gap size. Small tight joints need thin, strong glue like PVA. Wide gaps need glue that fills space, such as epoxy or polyurethane. Large gaps with end grain may need a different approach entirely, such as dowels or screws with glue.
Think about time. Most PVA glues need about thirty minutes of clamping and a full day to cure. Polyurethane glue sets faster but foams as it cures. Hide glue gives you time to adjust but needs heat to work. Plan your repair around the glue you choose.
Read the label. Good wood glue lists open time, clamp time, and full cure time. It states whether it sands and stains well. It tells you if it is safe for indoor use. These details matter more than brand names.
Main Types of Wood Glue for DIY Repairs
PVA Glue (Yellow Wood Glue)
PVA stands for polyvinyl acetate. Yellow wood glue is the workhorse of home furniture repair. It is strong, easy to use, and cleans up with water. It works best on tight-fitting joints in pine, oak, maple, and plywood.
Standard yellow glue holds chair legs, table aprons, drawer boxes, and broken spindles. Waterproof versions, often labeled Type II or Type III, handle bathroom and kitchen furniture where moisture is common. For most indoor repairs, standard yellow glue is enough.
PVA needs tight joints. It is not a gap filler. It needs clamping to reach full strength. Unclamped joints may hold at first but can fail later. Apply a thin even coat to both surfaces. Join them within the open time on the label. Clamp for at least thirty minutes.
Polyurethane Glue
Polyurethane glue, such as the well-known products described at Gorilla Glue, expands as it cures. This makes it good for joints with small gaps. It bonds wood to wood, but also wood to metal, stone, and ceramic. It is fully waterproof when cured.
The foam can be messy. It pushes out of the joint and must be cut away after curing. It stains skin and clothes. Wear gloves. It needs moisture to cure, so lightly dampen one surface before joining. Clamp well.
Use polyurethane for outdoor furniture, porch rails, and repairs that mix wood with other materials. It is stronger than needed for a simple indoor chair fix. For indoor work, PVA is easier and cleaner.
Hide Glue and Liquid Hide Glue
Hide glue is the oldest wood glue in use. Traditional hot hide glue is melted and brushed on warm. Liquid hide glue comes ready to use in a bottle. Both are valued for antique furniture and fine woodwork.
Hide glue has a special advantage. It is reversible. Warm water or heat softens it. This matters for antiques that may need repair again in the future. Modern glues create bonds that cannot be undone without damage.
Hide glue takes stain and finish better than PVA. It does not creep under heat the way some modern glues can. For a broken antique chair or a valuable table, hide glue is often the best choice. Sources on fine repair work, such as This Old House, note that traditional glues still have a place in careful restoration.
Epoxy for Special Cases
Epoxy is a two-part glue. You mix resin and hardener, then apply. It fills large gaps and bonds almost anything. It is very strong and waterproof. It is the right pick for rotten spots, loose dowels, and missing wood.
Epoxy is hard to use for beginners. Mix ratios matter. Working time is short. Cured epoxy is hard to sand and does not take stain well. Save it for repairs where nothing else will work.
Best Wood Glue for Common Furniture Repairs
Different repairs need different glues. The table below is not a table. These are the most common home repairs and the glue that fits each one.
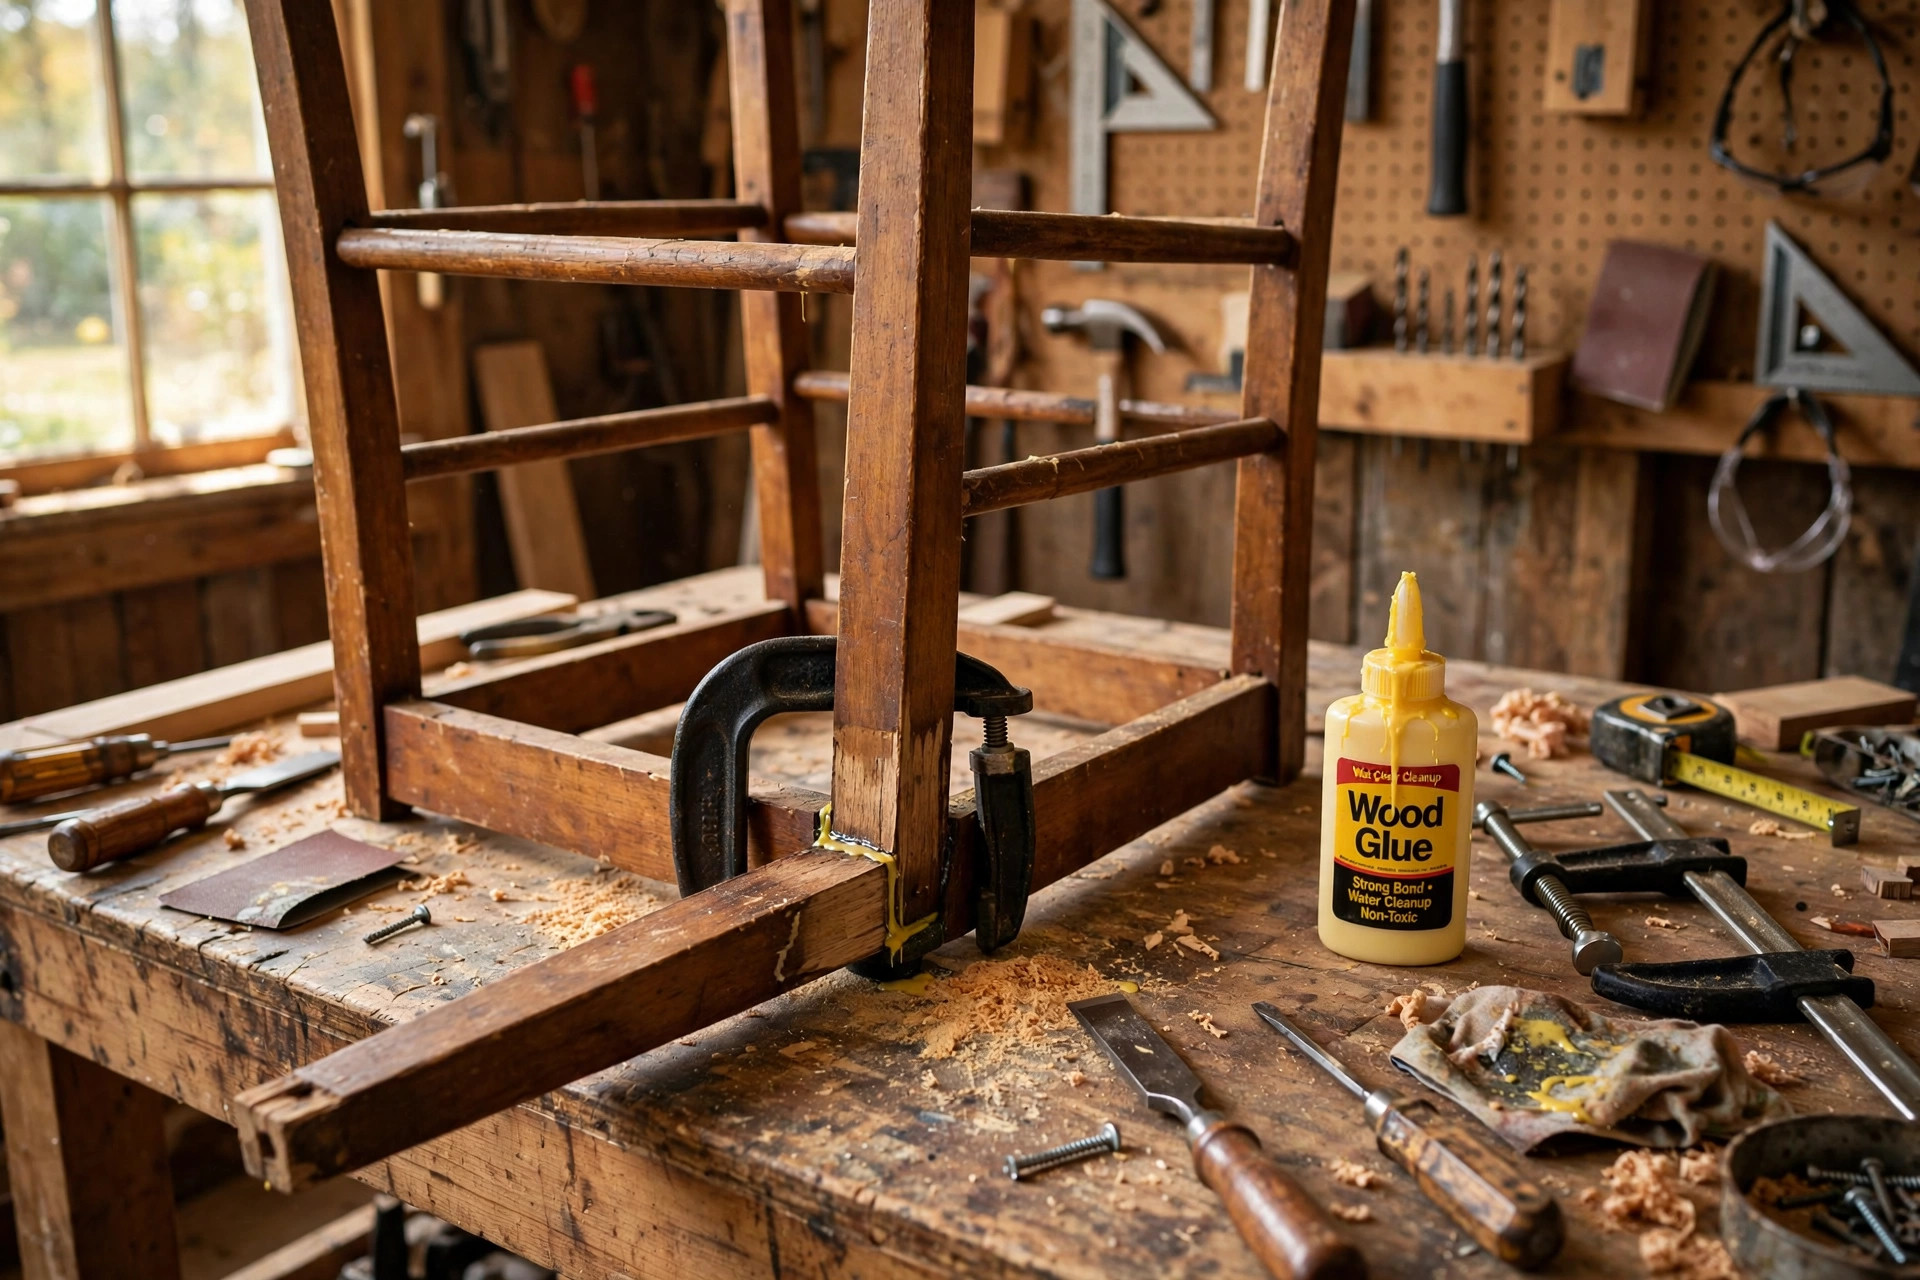
Loose chair legs and rungs are the number one home repair. Use yellow PVA glue. Take the joint apart. Scrape off old glue. Apply fresh glue to both parts. Tap together. Clamp for one hour.
Split table tops and edges also take PVA well. Force glue into the split with a thin blade or string. Clamp across the split with light pressure. Wipe off squeeze-out with a damp cloth before it dries.
Broken drawer fronts and boxes need PVA. Dovetail joints and finger joints fit tight. A thin coat on each face gives a bond stronger than the wood itself.
Loose veneer needs a thin glue that spreads under pressure. Liquid hide glue or thin PVA both work. Cover with wax paper and clamp with a flat block.
Outdoor bench and porch repairs need polyurethane glue or waterproof PVA. Rain and sun break down standard indoor glue. A waterproof bond lasts years longer outside.
Mixed-material repairs, such as wood to metal brackets, need polyurethane glue or epoxy. Standard PVA bonds poorly to metal and plastic.
Cost and Price of Wood Glue for Home Use
Wood glue is one of the cheapest home repair supplies. A standard eight-ounce bottle of yellow PVA glue costs only a few dollars at stores like The Home Depot. That one bottle handles dozens of small repairs. A sixteen-ounce bottle costs a little more and suits bigger projects.
Polyurethane glue costs more per ounce. A four-ounce bottle is enough for several outdoor repairs. Epoxy kits cost the most. A small kit with resin and hardener handles a handful of tough jobs.
Do not buy the biggest bottle to save money. Wood glue has a shelf life. Opened bottles last about one to two years. Buy what you will use in a year. Old, thick, stringy glue has lost its strength. Throw it away.
Check dates when you buy. Stores sometimes stock old glue. Fresh glue flows smooth and creamy. If it smells sour or looks lumpy in the store, choose another bottle.
Applying Wood Glue the Right Way
Good technique matters as much as the glue. Start with clean joints. Old glue must come off. Scrape it with a chisel or knife. Sand lightly. Wipe away dust with a damp cloth. Glue bonds to wood, not to old glue.
Do a dry fit first. Put the parts together without glue. Make sure they fit. Check that your clamps reach and open wide enough. Once glue is on, you have only minutes.
Apply glue to both surfaces. A thin even layer beats a thick blob. Too much glue makes a weak joint and a big mess. The rule is simple. You want a little squeeze-out along the joint line. That shows full coverage.
Clamp with firm, even pressure. Too much force squeezes all the glue out. Too little leaves gaps. For chair legs, one or two clamps per joint is enough. Protect the wood with small pads under the clamp jaws.
Wipe squeeze-out right away with a damp cloth. Dried glue blocks stain and finish. Check the joint after ten minutes and wipe again. Let the repair cure for a full day before use. Full strength takes twenty-four hours even if the glue feels dry sooner.
Care and Upkeep of Glued Furniture Repairs
Treat repaired furniture with care for the first week. Avoid heavy loads. Do not drag chairs across the floor. Lift instead of pulling. The glue is still reaching full strength.
Keep repaired furniture dry. Even waterproof glue lasts longer away from standing water. Wipe spills fast. Use coasters and pads under hot dishes. Heat and steam soften many glues over time.
Check repairs once a year. Look for new cracks around the joint. Listen for creaks when you sit. A small touch of glue now stops a big break later. Store your glue bottle upright in a cool room. Heat ruins glue fast.
If a repair fails, do not just add more glue on top. Take the joint apart. Clean both faces down to bare wood. Start fresh. Layered old glue is the main reason repairs fail twice.
Safety Tips for DIY Wood Glue Repairs
Wood glue is safer than most shop chemicals. Still, take care. Work in fresh air. Some glues give off fumes. Polyurethane and epoxy fumes can irritate eyes and lungs. Open a window or work in the garage.
Wear gloves with polyurethane glue and epoxy. Polyurethane stains skin brown for days. Epoxy can cause skin reactions with repeated contact. Simple latex or nitrile gloves solve both problems.
Keep glue away from children and pets. Bottles look harmless but are not toys. Store glue on a high shelf or in a locked cabinet. If glue gets in eyes, rinse with water and call a doctor.
Read the warning label. Every glue lists first aid steps. Follow them. Safety sheets from makers like Loctite give full details on handling and cleanup.
FAQ About Wood Glue for Furniture Repairs
What is the strongest wood glue for furniture?
For most indoor furniture, yellow PVA glue gives the strongest wood-to-wood bond. The joint often becomes stronger than the wood itself. For outdoor furniture, polyurethane glue wins because it is fully waterproof. For gap filling and mixed materials, epoxy is strongest.
Can I use super glue on wood furniture?
Super glue works for tiny fixes, such as a small chip or a loose inlay. It is too brittle for load-bearing joints like chair legs. It also stains wood and is hard to sand. For real furniture repairs, use wood glue instead.
How long does wood glue take to dry?
Most PVA glue sets in about thirty minutes of clamping. It feels dry in one to two hours. Full strength takes twenty-four hours. Polyurethane glue sets in one to four hours. Epoxy sets in five minutes to several hours depending on the formula.
Does wood glue work on painted or finished wood?
No. Wood glue bonds to bare wood fibers. Paint, varnish, and oil block the bond. Sand or scrape the joint faces down to bare wood before gluing. This one step doubles the strength of your repair.
Can I glue a chair leg without clamps?
You can, but the repair will be weak. Clamps press the joint tight so the glue film stays thin. Thin glue films are strong. Without clamps, use tight wrapping with rope, tape, or rubber bands. Some pressure is always better than none.
Is wood glue stronger than screws?
A well-made glued wood joint is often stronger than screws alone. Glue spreads force across the whole joint face. Screws focus force on small points. The best repairs use both. Glue the joint, then add a screw or dowel for extra hold.
Final Word
The best wood glue for furniture DIY repairs is the one that fits your job. Yellow PVA glue covers most indoor repairs at low cost. Polyurethane glue handles outdoor and mixed-material jobs. Hide glue suits antiques. Epoxy saves the hardest cases.
Buy fresh glue. Clean your joints. Clamp well. Give the repair a full day to cure. These four habits matter more than any brand. Your furniture will thank you with years of solid service.
For more home project ideas, see our guides on the best hot glue gun for craft projects home, the best wood burning kit for diy crafts, and wood craft blanks for painting and signs. Craft stores like Michaels and project guides at Family Handyman and Bob Vila offer more help for home makers. Independent reviews at Consumer Reports and project ideas at The Spruce can guide your next repair. Woodworking supply shops such as Woodcraft and Rockler carry clamps, glues, and tools for serious DIY work.
References
Bob Vila. (n.d.). Home improvement advice. https://www.bobvila.com Consumer Reports. (n.d.). Product reviews and ratings. https://www.consumerreports.org Family Handyman. (n.d.). DIY home repair and maintenance. https://www.familyhandyman.com Gorilla Glue. (n.d.). Adhesives. https://www.gorillaglue.com Loctite. (n.d.). Adhesives and sealants. https://www.loctite.com Michaels. (n.d.). Arts and crafts supplies. https://www.michaels.com Rockler. (n.d.). Woodworking tools and supplies. https://www.rockler.com The Home Depot. (n.d.). Home improvement products. https://www.homedepot.com The Spruce. (n.d.). Home and garden advice. https://www.thespruce.com This Old House. (n.d.). Home renovation guidance. https://www.thisoldhouse.com Titebond. (n.d.). Wood glues and adhesives. https://www.titebond.com Woodcraft. (n.d.). Woodworking tools and supplies. https://www.woodcraft.com
Was this guide helpful?

About James Carter
The My Garden US editorial team writes practical, in-depth home and garden guides for American homeowners — tested advice, no fluff.