
Introduction
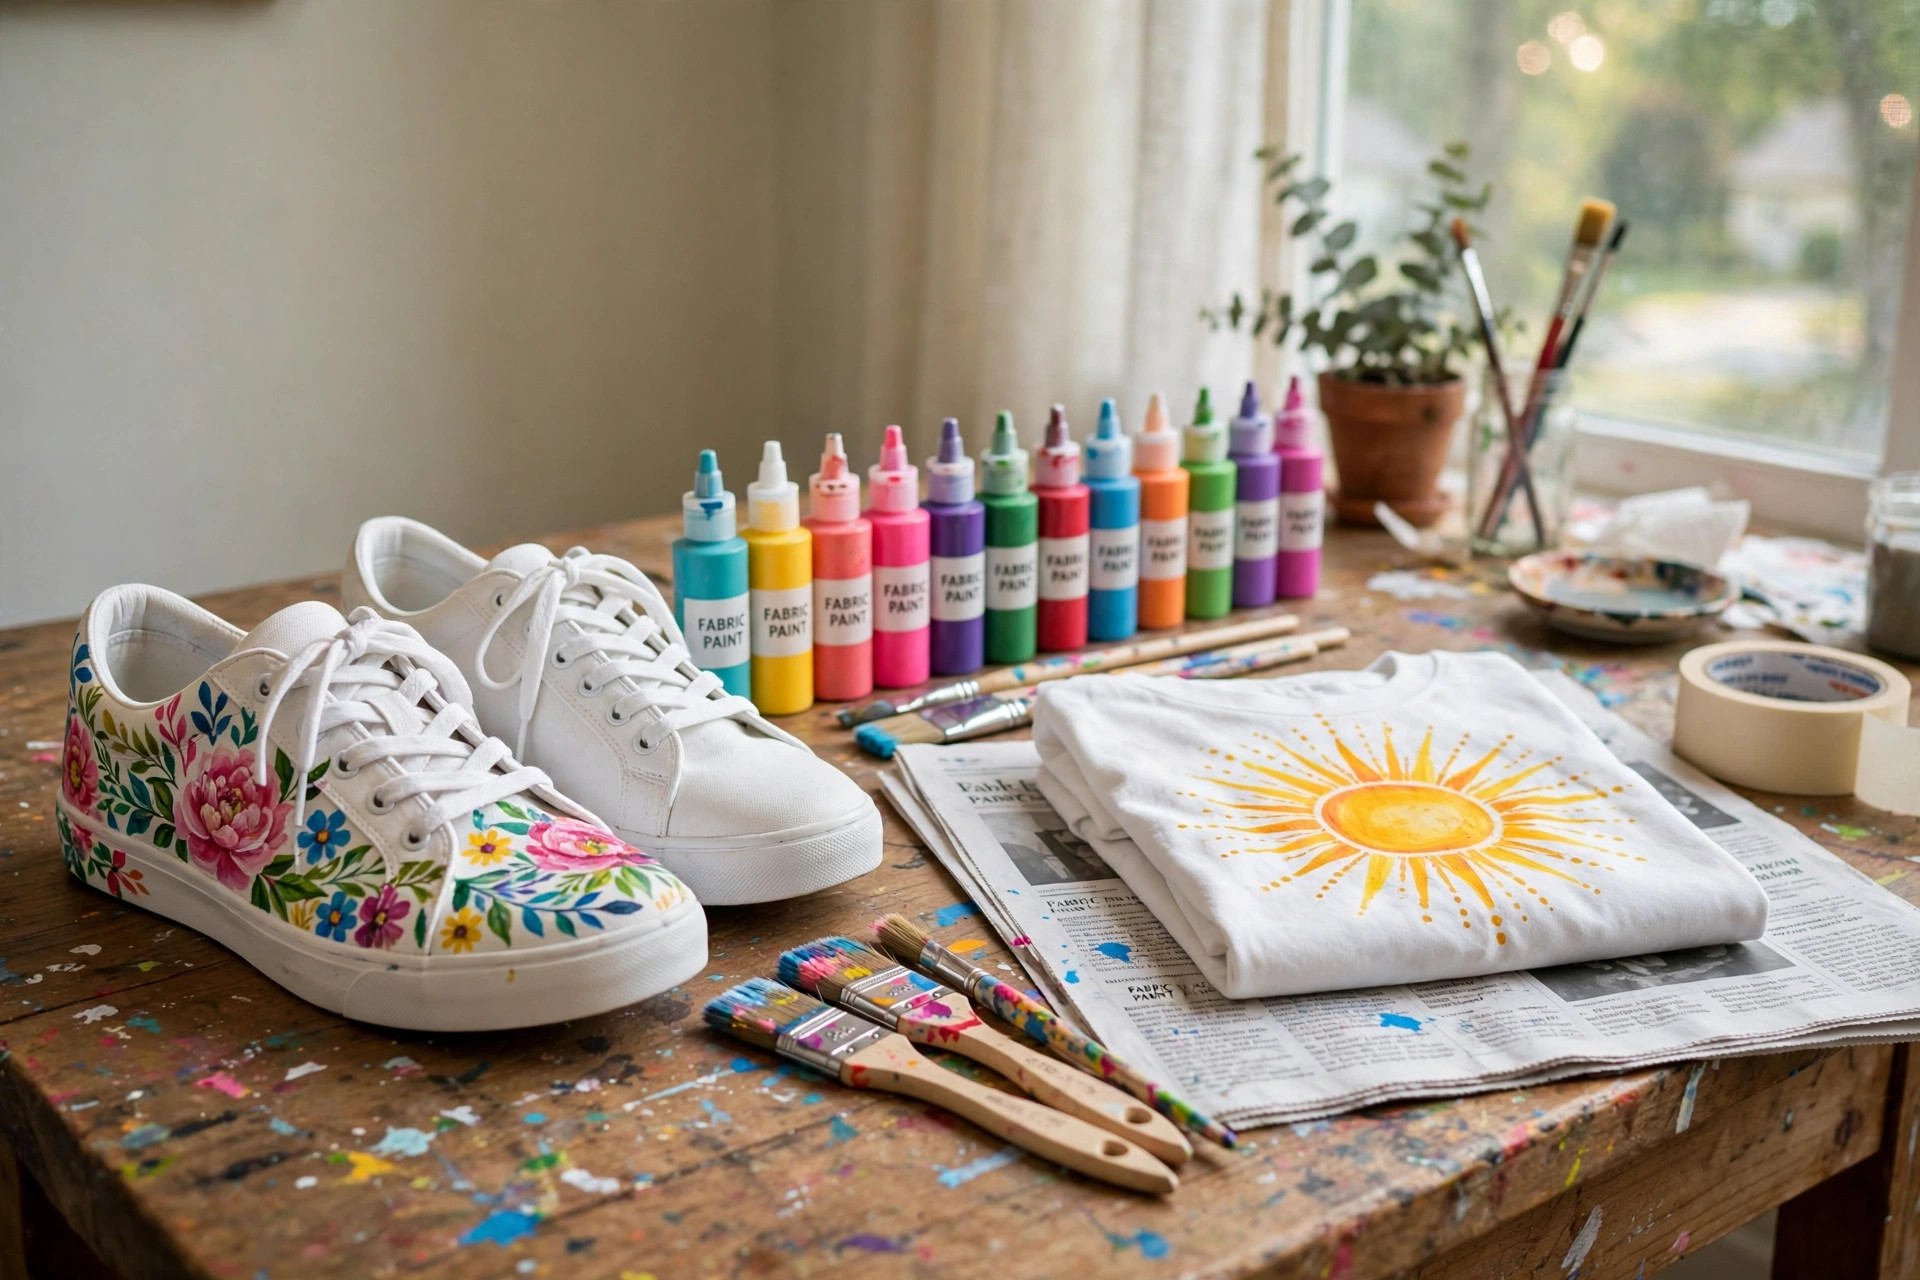
When people search for the best fabric paint for shoes and clothes diy projects, they want one thing above all else: color that stays. A painted shoe that flakes after one walk is a waste of time. A hand-painted shirt that fades in the wash is a small heartbreak. The good news is that modern fabric paints are made for this exact work. They flex with the cloth, grip the fibers, and survive wash after wash when used with care.
Painting shoes and clothes by hand has grown into one of the most popular home crafts in the United States. Sneaker culture plays a part. People want one-of-a-kind footwear that no store sells. Custom shirts play a part too, from team uniforms to gifts to simple fun. The barrier to entry is low. A set of paints, a few brushes, and a free afternoon are enough to begin.
This guide walks through the whole process in plain terms. It explains why fabric paint matters, what to look for on the label, the main types on the market, what they cost, how to make the work last, and how to stay safe while you paint. It ends with answers to the questions people ask most often.
Why the Right Fabric Paint Matters: Best Fabric Paint for Shoes and Clothes Diy
Regular craft paint and wall paint are not made for cloth. Acrylic craft paint dries stiff. On a shoe, it cracks along the crease lines the first time you bend your foot. On a shirt, it peels off in the laundry. Fabric paint is made with a different base. It bonds with the fibers and stays flexible after it dries. That single difference is what keeps a design alive.
The stakes are higher with shoes. Shoes bend, scrape, and take rain. A poor paint job on canvas sneakers will chip at the toe within days. Leather shoes bring their own trouble. The factory finish on leather repels paint, so the surface needs prep work before any color goes on. The right product, such as a flexible acrylic leather paint, holds through this abuse.
Clothes are a bit more forgiving but still need the right chemistry. A shirt moves all day. Sleeves stretch. Collars rub. Fabric paint with a soft hand — meaning it feels like cloth, not plastic, after it dries — is what keeps a design comfortable to wear. A shirt that feels like a board will sit in the drawer no matter how nice it looks.
There is also the money angle. A pair of plain white canvas shoes costs little. A set of fabric paint costs less than a restaurant meal. Together they can produce custom sneakers that look like they came from a boutique. For gifts, that ratio of low cost to high personal value is hard to beat. Many people who start with one pair of shoes go on to paint shirts, jackets, and bags for friends and family.
What to Look for When You Choose
The paint aisle at a craft store can overwhelm a beginner. Bottles crowd the shelves in every color and brand. A few simple checks cut through the noise.
Fabric-specific formula. The label should say fabric paint, fabric medium, or textile paint. These words mean the product was tested on cloth. If you already own acrylic craft paints, you can still use them on fabric by mixing in a fabric medium, but buying paint made for fabric saves a step. Good background on paint types is available through craft guides at Michaels.
Flexibility after drying. Read reviews or test on a scrap. The dried paint should bend without cracking. This matters most for shoes and for stretchy clothes like t-shirts.
Wash permanence. Look for the words washable, permanent, or machine washable. Most fabric paints need heat setting — ironing or dryer heat — to lock in. Without that step, even good paint may wash out.
Coverage and opacity. Light colors on dark fabric need strong opacity or several coats. Metallic and neon shades also tend to cover poorly. If your plan is white designs on black shirts, pick a paint known for heavy coverage.
Color range and mixing. A wide basic palette plus the ability to mix shades gives you more freedom. Most brands sell primary colors, black, white, and metallics.
Bottle or jar size. For small detail work, fine-tip bottles are best. For big background areas, larger jars save money. Beginners often do well with a starter set that includes both.
Non-toxic rating. Paint used around children or on clothes worn against skin should carry a non-toxic label. Most major craft brands do, but always check.
Types of Fabric Paint for Shoes and Clothes
Fabric paint comes in several forms. Each has strengths for this kind of work.
Acrylic-Based Fabric Paints
These are the workhorses. They are water-based, easy to clean up, and sold everywhere. They dry flexible and wash well once heat-set. Brands like Tulip make lines aimed squarely at DIY clothing projects, and you can browse their range at Tulip Color. For shoes and clothes, this is where most people should start. If you are coming from canvas painting, note that paint made for canvas behaves differently on cloth — a good primer on the difference is to compare with an acrylic paint set for beginners canvas art to see why fabric-specific formulas win on flexible surfaces.
Fabric Markers and Pens
Markers give fine control for outlines, lettering, and small details. They work well on shoes for sharp lines that a brush would smear. The downside is cost. Coloring a whole shirt with markers is slow and expensive. Many painters combine the two: brush or sponge for large areas, markers for detail. Craft retailers such as JOANN stock a deep range of both.
Puff and Dimensional Paints
These paints dry raised and rubbery. They are popular for fun, chunky designs on t-shirts. They do not suit shoes well. The raised surface scuffs off under foot traffic and bending. Use them for shirts and jackets, not footwear.
Spray Fabric Paints
Sprays cover large areas fast and give smooth, even backgrounds. They are handy for base coats on shoes or for ombre effects on shirts. The trade-off is control. Overspray is a real problem, so mask off every area you want to keep clean. Work outdoors or in a ventilated garage, and shake the can well. Guides to spray technique appear in project write-ups at Family Handyman.
Fabric Medium Added to Acrylics
A fabric medium is a clear additive that turns regular acrylic craft paint into fabric paint. It costs little and opens up the huge color range of standard acrylics. The mix ratio is usually one part medium to two parts paint, but follow the bottle. This route appeals to people who already own acrylics. Independent technique articles at The Spruce Crafts cover mixing ratios in plain detail.
Preparing Shoes and Clothes Before Painting
Preparation decides half the result. Skip it, and even the best paint will fail.
For canvas shoes, wash them first if they are worn. New shoes can be wiped with a damp cloth to remove sizing. Let them dry fully. Stuff the toes with paper or rags so the canvas holds its shape while you work. Tape off soles and eyelets with painter’s tape. Light sanding with fine sandpaper on smooth areas helps paint grip.
For leather shoes, prep is more serious. Wipe the leather with acetone or a leather deglazer on a cotton pad. This strips the factory finish. Work in a ventilated room and wear gloves. The leather will look dull when the finish is gone. That is correct. Tape off soles, laces, and any part you will not paint. Many customizers also score glossy areas lightly with fine sandpaper.
For clothes, wash and dry the garment first. Do not use fabric softener. Softener coats fibers and blocks paint from bonding. Iron out wrinkles. Slide cardboard or wax paper inside shirts and jackets so paint does not bleed through to the other side. Draw your design lightly in pencil or use a stencil.
One more tip that saves many projects: test on a scrap or a hidden spot first. A quick test swatch tells you about coverage, drying time, and how the color looks on that exact fabric.
Step by Step: Painting Your Project
1. Set up your space. Cover the table with newspaper or a plastic cloth. Keep water, paper towels, and your brushes close. Good light matters more than people think.
2. Lay down base coats. For dark fabrics, one or two coats of white or light paint make top colors pop. Let each coat dry fully. Thin coats beat thick ones. Thick paint cracks.
3. Paint the design. Work from large areas to small details. Use flat brushes for fills and small round brushes for lines. For shoes, paint panels one at a time so wet areas do not touch. Detailed stencil and vinyl approaches are covered in guides like a best vinyl cutter for t shirt business home resource if you want machine-cut precision.
4. Let it cure. Drying time varies by brand, usually a few hours. Curing is different from drying. Many paints need 24 to 72 hours before heat setting. Read the label. Rushing this step is the most common cause of paint that washes out.
5. Heat set the work. For clothes, iron on the reverse side or through a pressing cloth for three to five minutes, or run the garment through a hot dryer for 30 to 40 minutes. For shoes, a hair dryer on high heat works. Keep it moving so no spot scorches. This heat locks the paint to the fibers.
6. Finish shoes with a sealer. A clear acrylic finisher or matte sealer adds scratch and water resistance to painted shoes. Two or three light coats, drying between each, is the standard. This step is optional for clothes.
DIY home craft columns at Bob Vila often stress the same point: patience between coats is what separates a crisp result from a smeared one.
Cost and Price: What to Expect
Fabric painting is one of the cheaper crafts to start. Here is a rough picture of prices in the United States.
A basic set of fabric paints, ten to twenty colors, usually runs between eight and twenty-five dollars. Name-brand sets cost more. Single bottles of three to four ounces run two to five dollars each. Fabric markers come in packs of ten to thirty for ten to twenty-five dollars.
Brushes add little. A starter brush set costs five to ten dollars. Painter’s tape, stencils, and sponges add another five to ten dollars total. A fabric medium, if you go that route, costs around eight dollars for a bottle that will last many projects.
The canvas for your work is cheap too. Plain white canvas sneakers sell for fifteen to thirty dollars. Blank t-shirts run three to eight dollars each in multi-packs. All told, a beginner can start for under fifty dollars and finish several projects.
For comparison, custom hand-painted sneakers from online sellers often list for one hundred to three hundred dollars. Doing it yourself saves real money, and the designs are truly your own. Bulk craft supplies for bigger runs are easy to price out at big-box craft departments such as Home Depot and discount options at Walmart, while broad price comparisons across brands show up on Amazon.
Care and Upkeep After Painting
Finished pieces need gentle treatment to last.
Wash painted clothes inside out in cold water. Use a mild detergent. Skip bleach and skip fabric softener. Tumble dry on low or line dry. Hot dryers can stress paint over time, though one hot cycle for heat setting is fine and even needed.
Clean painted shoes with a damp cloth, not a washing machine. Machine washing batters the paint and the shoe together. For scuffs, touch up with the original paint and re-seal the spot.
Store painted items out of long direct sun. Ultraviolet light fades pigments over months. A closet or drawer is fine.
Expect some wear. Even the best fabric paint job is not factory printing. Small touch-ups once a year keep a favorite pair of shoes looking fresh. Keep leftover paint sealed tight and stored at room temperature, and it will last for future fixes.
Safety Notes
Fabric paints from major brands are non-toxic when used as directed, but a few habits keep the work safe.
Ventilate your room, especially with sprays, sealers, and acetone for leather prep. Work near an open window or outdoors when you can. Wear gloves when handling acetone or strong cleaners. Keep paints away from food and drink at the table. Wash hands when you finish.
Keep small paint bottles, markers, and acetone out of reach of young children. Supervise kids closely during craft time. For nursery and kids’ room projects, safety rules are stricter, and guidance from product safety sources is worth a look.
If you have sensitive skin, wear gloves while painting clothes you will wear. Some people react to pigments or mediums with dry skin or a rash. When in doubt, check the product label and the maker’s safety sheet. Restoration and repainting guides at This Old House also cover safe prep habits that carry over to shoe work.
FAQ
How long does fabric paint last on shoes? With proper prep, thin coats, curing, and a sealer, painted designs on shoes can last a year or more of regular wear. Toe creases and soles take the most abuse. Touch-ups now and then keep them sharp.
Can I use regular acrylic paint on clothes? You can, but only with a fabric medium mixed in. Straight acrylic craft paint dries stiff and cracks on fabric. The medium keeps it flexible and washable. For best results on a first project, buy paint labeled for fabric.
Do I really need to heat set? Yes, for clothes you plan to wash. Heat setting bonds the paint to the fibers. Without it, colors fade or wash out quickly. An iron through a cloth or a hot dryer cycle both work.
Will fabric paint work on dark shirts? Yes, with the right approach. Lay down a white or light base coat first, then build color on top. Choose paints known for strong opacity. Two thin coats beat one thick coat every time.
Can I paint leather sneakers? Yes. Strip the factory finish with acetone or leather deglazer, paint with flexible acrylic leather paint, and finish with a clear sealer. Leather takes paint beautifully once prepped, and many customizers prefer it to canvas.
What is the easiest beginner project? A simple design on a white t-shirt. The surface is flat, forgiving, and cheap to replace if you make a mistake. Tie-dye is another easy entry point — see a diy tie dye kit for shirts and crafts guide for a no-brush option that pairs well with painted details.
A Short Final Word
The best fabric paint for shoes and clothes diy work is the one that fits your project: flexible acrylic fabric paint for most jobs, markers for detail, sprays for smooth backgrounds, and a sealer to protect shoes. Prep the surface, paint in thin coats, give it time to cure, and heat set before the first wash. Do those things and your designs will hold their color and their shape for a long time. Then make the next pair. The second project always looks better than the first.
References
Amazon. (n.d.). Online shopping. https://www.amazon.com Blick Art Materials. (n.d.). Art and craft supplies. https://www.dickblick.com Bob Vila. (n.d.). Home improvement advice. https://www.bobvila.com Family Handyman. (n.d.). DIY home repair and maintenance. https://www.familyhandyman.com JOANN. (n.d.). Fabric and craft supplies. https://www.joann.com Michaels. (n.d.). Arts and crafts supplies. https://www.michaels.com The Home Depot. (n.d.). Home improvement products. https://www.homedepot.com The Spruce Crafts. (n.d.). Craft projects and tutorials. https://www.thesprucecrafts.com This Old House. (n.d.). Home renovation guidance. https://www.thisoldhouse.com Tulip Color. (n.d.). Fabric paint and dye products. https://www.tulipcolor.com Walmart. (n.d.). Everyday low prices. https://www.walmart.com
Was this guide helpful?

About Lisa Anderson
The My Garden US editorial team writes practical, in-depth home and garden guides for American homeowners — tested advice, no fluff.
You May Also Like

DIY Wreath Making Kit for Front Door Decor: A Complete Guide
January 25, 2026 0 views
Best Rotary Cutter for Quilting Fabric Crafts
July 16, 2026 0 views
Macrame Wall Hanging Kit Large for Living Room: A Complete Guide to Handmade Wall Art
May 18, 2026 0 views